Tuesday, September 30, 2008

New Giveaways, Reviews, & Articles

Lots of great stuff is happening on the site this week!

We started a new giveaway this week for $25 gift cards to Shutterfly! This contest is to help promote their new Share Site service where you can create a free site for your family and share your pictures through their website. Head over here to enter today to win!

Today is the last day to enter for the $100 iTunes gift card. Ciao is a new online shopping community and the perfect destination for all of your online shopping needs. Ciao.com features thousands of accurate and honest reviews from real people on everything from cell phones to laptops to MP3 players - even movies and beauty products. As a fun reward, Ciao also pays its members $1 per qualifying review. A great way to earn some extra cash on the side! To enter you have to go here for all the details!

Enter today to win a 10th Anniversary Harry Potter prize pack. We are giving away beautiful boxed sets of the Harry Potter series and the new anniversary editions of, "Harry Potter & the Sorcerer's Stone" Please do not enter here, only entries over here will qualify. Good luck, everyone!

*******************

We also have a fresh new round of reviews up for you to help with your holiday shopping this year!

Animal Paradise for Nintendo DS
Mystery Case Files: MillionHeir
Family Facts: School Years Memento Keeper
BusyBodyBook Wall Calendar

*********************

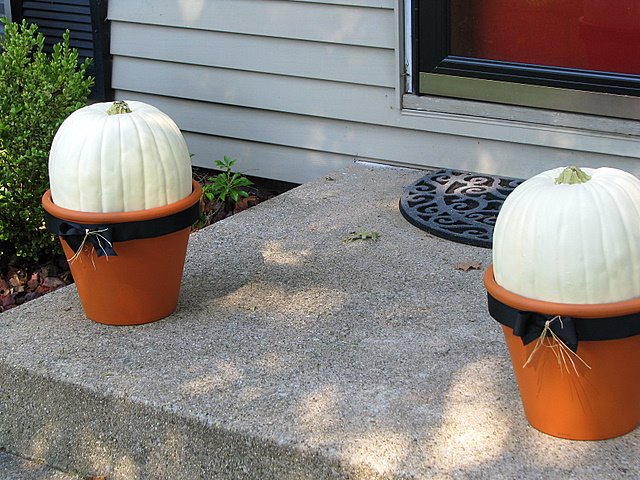
A new article has been added to our site! Just in time for fall, visit our, "Oh, Glorious Pumpkin." It should give you lots of creative pumpkin crafts and recipes to use this season!

Labels:

ENJOYED THIS POST? SHARE IT WITH OTHERS:

Click to share on StumbleUpon STUMBLE This Click to share on kirtsy Add to KiRTSY Click to share on Mixx Add to MIXX Click to share on DeliciousIt's DELICIOUS

Dressing Up the Front Step For Fall

I loved the white pumpkins featured in A Soft Place to Land and gained some inspiration from that post for my own doorstep. Of course, I took the lazy and cheap route, but I think they turned out beautifully.

I purchased faux pumpkins at Michael's Craft Store. The were on sale for 40% off this past week. I found two pots to rest my pumpkins in and a bolt of black ribbon to dress up the pots.


I used my glue gun to attach the ribbon around the outside of the pot. With the leftover ribbon from the bolt, I made a bow and then tied it off with a little raffia. The pumpkins wedge perfectly in there.

I am hoping it will be something that I can use each year. I have found most of our guests think they are real pumpkins when they come over and have spent a lot of time thumping and touching them. I am not usually one to pick things that aren't natural for decorating with, but I love being able to store these and use them year after year. If they are fooling people, then that works even more to my advantage!


Of course, if those pumpkins don't last until next year, I have these two little pumpkins that I can set out there on occasion to dress up the step!

What are some creative ways you decorate your home for fall?

Labels: , ,

ENJOYED THIS POST? SHARE IT WITH OTHERS:

Click to share on StumbleUpon STUMBLE This Click to share on kirtsy Add to KiRTSY Click to share on Mixx Add to MIXX Click to share on DeliciousIt's DELICIOUS

Monday, September 29, 2008

Redbox Code 09.29.08

Today's free code for a Redbox movie is LA45W7. This code is good for one free movie and you can use it until midnight tonight. Enjoy a free family movie together!

Side Notes:

- If you want to rent more than one movie for free, bring more than one credit/debit card. You can use the same promotional code, you just will need different cards to charge it to. The charge will be zero as long as you return your movie on time for the next day.

- When entering in your free movie code, you need to enter it FIRST before picking the movie. On the very first screen, click the, "Rent with Promo." Enter in the above code and then make your selection- the amount should then total zero.

Here is an updated list of new releases:

Sex and the City
Expensive restaurants, romantic encounters, and lots and lots of girl talk. The TV series with the most seriously self-explanatory name ever was this year's summertime hit – and Sarah Jessica Parker, Kim Cattrall, Cynthia Nixon and Kristin Davis are all back. Will Carrie wind up with Big? Oh just you wait.

Leatherheads
Long before players were changing their names to the numbers, football was a pure and simple game, played by men in absurdly unprotective leather helmets. George Clooney, Renee Zellweger and Jon Krasinski take you back to that time in this charming comedy about the pioneers of an early football league.

Deception
Ewan MacGregor is a joyless and high-strung CPA trudging through stacks of spreadsheets. Meeting the free-spirited Hugh Jackman – and soon getting caught up in a private, anonymous sex club – seems like just the jolt he needs. That is, until he gets accused in the disappearance of one of the club's members.

Run Fatboy Run
In this romantic comedy, Simon Pegg has just plain let himself go. It stems from all the guilt he feels from having left his pregnant fiance at the altar five years earlier. Suddenly, though, a revelation! He knows just how to win her back: get in shape and run a marathon! Thandie Newton and Hank Azaria co-star.

Made of Honor
It's now or never for Patrick 'McDreamy' Dempsey. He's just been asked by his closest girlfriend to stand up in her wedding. But the fact that he's in love with her, and is running out of chances to win her heart, is making things complicated (and hilarious). Michelle Monaghan plays the blushing bride to be.

Speed Racer
Emile Hirsch and Matthew Fox are dueling racers in this frenzied and visually stunning feature length version of the old cartoon. Hirsch plays Speed Racer and Fox plays Racer X, who together take on dangerous turns and aggressive drivers on futuristic tracks.

Labels:

ENJOYED THIS POST? SHARE IT WITH OTHERS:

Click to share on StumbleUpon STUMBLE This Click to share on kirtsy Add to KiRTSY Click to share on Mixx Add to MIXX Click to share on DeliciousIt's DELICIOUS

Company is Coming: A Fast Coffee Cake


One of my favorite things to make for our company is my favorite Jewish Coffee Cake recipe. This recipe was given to me by my best friend's mother. She told me that no matter how many other types of cakes she made, this was always the one that was requested and was always the favorite among her family members.

It should come as no surprise that it has become a favorite in our family too. This is the cake that made me a famous woman at my husband's work, and I have scored more than a few friends at potlucks, toting my cake around town. It has even been served for my husband's birthday dinners, making it just the right cake for any occasion.

The orange juice gives the cake a little tang and the cinnamon gives the cake a little spice to balance out the sweetness. With a dusting of confectioner's sugar, you can hide any flaws and make it look like the star of any occasion.


This cake graced my table this past week, as I gathered my friends together to have a knitting night. My mother-in-law came to give us a class on how to knit hats and my girlfriends brought their knitting supplies to learn from the Master. Yes, I am finally learning to knit in the round and hope to have some fun projects to share with you soon!

Oh, and did I mention that the cake is made out of a cake mix? Don't tell anyone! That will have to be our secret!

Fast Coffee Cake

1 package vanilla instant pudding
1 package yellow cake mix
½ cup oil
4 eggs
1 cup orange juice

Mix these ingredients together and then swirl the following through the cake batter 1/3 c. sugar, 4 t. cinnamon, 4 t. sesame seeds (optional). Bake for 50-60 minutes at 350 degrees in a well-greased and floured bundt pan. Allow cake to cool for 45-60 minutes in pan. Sprinkle with powdered sugar.

Labels:

ENJOYED THIS POST? SHARE IT WITH OTHERS:

Click to share on StumbleUpon STUMBLE This Click to share on kirtsy Add to KiRTSY Click to share on Mixx Add to MIXX Click to share on DeliciousIt's DELICIOUS

Friday, September 26, 2008

Freebie Friday: September 26, 2008

A big thank you to Heather, from Freebies 4 Mom, for supplying us a great list of freebies for your freebie fix of the week. Be sure to check out Heather's latest coupon list and give her some feedback on the new set up! Heather also has a great round-up of free resources to begin managing and treating your blog like a small business. How great is that?

Happy Freebie Friday, everyone! Enjoy your loot!


Health & Beauty

Murad Resurgence (More magazine offer)
Always Infinity (Walgreens sample)
Kotex (when you enter sweeps)
Entertainment

Family Fun digital magazine (for current subscribers only)
Natural Solutions digital magazine
PC Magazine


Mark Your Calendars

September - Starbucks Free coffee Mondays for teachers K-12 & homeschoolers
September - Walgreens Take Care Health Tour
September 27 - National Museum Day
September 27 - Borders Kids Party
September 27 - Geoffrey's Birthday Party @ ToysRUs
September 27 - Lowe's Kids - Make a fire truck
October - Free Night of Theater (Thank you, Gayle, from the Affluent Pauper for sending us a link to this!)
October 4 - Home Depot Kids (make a whistle fire truck 9 am to noon)
October 11 - Arm & Hammer Essentials demonstration @ Walmart

*******************************

We have a new giveaway running for a $100 iTunes gift card. Ciao is a new online shopping community and the perfect destination for all of your online shopping needs. Ciao.com features thousands of accurate and honest reviews from real people on everything from cell phones to laptops to MP3 players - even movies and beauty products. As a fun reward, Ciao also pays its members $1 per qualifying review. A great way to earn some extra cash on the side! To enter you have to go here for all the details!

Enter today to win a 10th Anniversary Harry Potter prize pack. We are giving away beautiful boxed sets of the Harry Potter series and the new anniversary editions of, "Harry Potter & the Sorcerer's Stone" Please do not enter here, only entries over here will qualify. Good luck, everyone!

Labels:

ENJOYED THIS POST? SHARE IT WITH OTHERS:

Click to share on StumbleUpon STUMBLE This Click to share on kirtsy Add to KiRTSY Click to share on Mixx Add to MIXX Click to share on DeliciousIt's DELICIOUS

Thursday, September 25, 2008

Don't Forget to Enter Our Giveaways!

We have a new giveaway running for a $100 iTunes gift card. Ciao is a new online shopping community and the perfect destination for all of your online shopping needs. Ciao.com features thousands of accurate and honest reviews from real people on everything from cell phones to laptops to MP3 players - even movies and beauty products. As a fun reward, Ciao also pays its members $1 per qualifying review. A great way to earn some extra cash on the side! To enter you have to go here for all the details!

Enter today to win a 10th Anniversary Harry Potter prize pack. We are giving away beautiful boxed sets of the Harry Potter series and the new anniversary editions of, "Harry Potter & the Sorcerer's Stone" Please do not enter here, only entries over here will qualify. Good luck, everyone!

Labels:

ENJOYED THIS POST? SHARE IT WITH OTHERS:

Click to share on StumbleUpon STUMBLE This Click to share on kirtsy Add to KiRTSY Click to share on Mixx Add to MIXX Click to share on DeliciousIt's DELICIOUS

Amy's Notebook 09.25.08

I am going to have to work on some silhouettes of the kids (@ The Homespun Heart)

I must knit a pumpkin hat (@ Crazy Aunt Purl)

I think it would be fun to make a shopping bag from an old pillowcase (@ Psych Mamma)

This skillet baked cookie looks delicious (@ a tad bit prudish)

I am looking forward to following this paper pile makeover (@ Small Notebook)

It is never too early to start thinking about a cool Advent calendar for this year (@ Tatertots & Jello)

These burp cloths are darling (@ Paper Dolly Girl)

I love these window shade ideas (@ DIY Maven)

My daughter would love these doll diapers (@ Skip to My Lou)

I really like these cupcake decorating tips (@ Chica & Jo)

This reuse of the crib mattress is brilliant (@ ohdeedoh)

I want to make this color book (@ Make and Takes)

I want to try making applesauce in my slow cooker so I can smell it all day long (@ A Year of Crockpotting)

These Kermit cupcakes are adorable (Flickr via Craftzine)

This tomato sauce sounds like a winner (@ Soule Mama)

This candy cane sugar scrub would make a wonderful Christmas gift (@ The Natural Beauty Workshop)

I love this on-the-go knit kit made from a water bottle (@ Suite.Living)

These painted white pumpkins would really dress up my doorstep (@ A Soft Place to Land)

I love these mittens made from an old sweater (@ zakka life)

These brown sugar cupcakes would really hit the sweet spot (@ My Sweet & Saucy)

Who could resist this Chicken Parmesan recipe? (@ Divine Domesticity)

Labels: ,

ENJOYED THIS POST? SHARE IT WITH OTHERS:

Click to share on StumbleUpon STUMBLE This Click to share on kirtsy Add to KiRTSY Click to share on Mixx Add to MIXX Click to share on DeliciousIt's DELICIOUS

Notebook Experiments: Can I Make a Deep Dish Pizza?


Experiment: Can I make a deep dish pizza that the whole family will love?

Experiment Taken From: Notebook Entry 08.21.08

Materials Needed: Please see Chocolate On My Cranium for the full instructions on ideas for completing this task. I featured this recipe last week, but this week I tried something new with it. Instead of making the breadsticks (as directed), I mixed up two batches of the dough- one batch for breadsticks and one batch to be made into a pizza for the family.

For the pizza, instead of the 4 tablespoons of butter, I used two tablespoons and just used a pastry brush to brush the entire cookie sheet so the dough would not stick. I made my easy pizza sauce and then we topped the pizza with our favorite toppings.

Results: This dough makes a delicious pizza! I decided to bake the crust for ten minutes minus any sauce or toppings, to give it a good start on the baking. I then added all of the yummy pizza fixings and put it back in the oven for another twelve minutes.

Conclusion: This was a very easy way to make a homemade pizza for our Friday family nights together. I loved that I didn't have to get out my rolling pin and that we had plenty of food for leftovers for lunch the next day. The entire family loved it, especially the family members who love a nice thick crust on their pizza! We will definitely be making this again and again in our house!
********************

I am so excited to open our Notebook Experiments up to everyone and I hope that you will be able to participate this week or in weeks to come! I will be posting this each Thursday so please mark your calendars if you plan to participate. You can post your entries at any time throughout the week and then leave your entry in the links below.

We have this handy banner that you are more than welcome to use, but it is not a requirement! It is just something you can add to add a little sparkle to your entry.

Rules for Participation:

1. Choose anything from any of our notebook entries (past or present) to do with your family. We have hundreds of bookmarked links of crafts, ways to save money, and organizing ideas.
2. Complete an experiment from the notebook and share about it on your blog or website. We would love to see pictures of what you accomplished or a detailed description of how your projects turned out. Please include a link to this entry, a link to the original posting of the entry (at the original crafster's blog), and (to help us relocate the project) the date or link of the notebook entry where you found it. You can use the same formatting as our entries or you can just include that information in your post in your own unique way!
3. Post a link below. Please include your name or blog name & a fast description of your project. Example- MomAdvice (WHO bread)

I can't wait to see what you create and what you find inspiring!

Labels: ,

ENJOYED THIS POST? SHARE IT WITH OTHERS:

Click to share on StumbleUpon STUMBLE This Click to share on kirtsy Add to KiRTSY Click to share on Mixx Add to MIXX Click to share on DeliciousIt's DELICIOUS

Wednesday, September 24, 2008

Snacks For Mom: Do You Have Them?

I shared with you that I am trying to manage my time better, but one thing that often gets pushed to to the side are my own eating habits.

I can guide my children to make good food choices, but I can go for hours on end without eating well myself. Normally, I end up snacking towards the end of the day and it all balances out, but lately this plan hasn't been working so well.

I am hypoglycemic, which is just a fancy way of saying that I have low blood sugar. I have always had problems, but after I had Emily, it has seemed to have gotten worse.

These past couple of weeks have been really horrible and I have felt really rundown. I break out in a sweat, I have the shakes, my vision gets blurry, I feel faint, and I get extremely irritable. It seems like something like low blood sugar should be such a minor thing, but it can suck up hours of my day where I feel sluggish and generally out of it. I am sure my exercise routine is contributing towards the need for more eating, but I have been letting it go.

I decided to make it a priority this week and stocked our pantry with some mommy snacks. I got myself some cheese sticks, yogurts, fiber bars, and some canned & fresh fruit. I also bought black beans and whole grain rice to make tortillas for my lunches and to replace any late night cravings for junk food. I don't know why, but I find it difficult to "blow" grocery money on myself for these quick snacks. I feel like I should be making all of these things, but sometimes time is more limited and then I find myself in these slumps with nothing stocked to eat. The planner in me knows that I could do a better job of this, but sometimes it is nice to have a couple store-bought goodies packed in your purse for when you feel a slump coming on.

As I sat munching on my fiber bar this afternoon, I suddenly felt two eyes watching me. Emily came around the corner and pointed to my bar. She threw down her apple and started kicking and screaming for me to give it to her, as only a two year-old can do. As I shook my head no, my mouth full of food, she began escalating and I felt my stomach rumbling in protest from the interrupted and stressful snack. Can't a girl eat a fiber bar without having to share it?

I will admit that I now find myself sneaking into the bathroom or an unlit corner of the house to sneak in a little nutrition for myself, lest I have to share with everyone else in the house. Images of my own poor mother hovering over the sink to shove a little treat in her mouth and all us kids circling her like a pack of wolves comes rushing back to me. We could sniff those Girl Scout Cookies out like nobody's business and I doubt my mother had many meals where she didn't have to sacrifice a few bites between the three of us.

Do you have a favorite healthy mommy snack that you could recommend? What keeps you going during the day? Secret mommy confession... do you hide your snacks or keep them separate from the rest of the family's food? Fess up! Where do you put your stash?

Labels: , ,

ENJOYED THIS POST? SHARE IT WITH OTHERS:

Click to share on StumbleUpon STUMBLE This Click to share on kirtsy Add to KiRTSY Click to share on Mixx Add to MIXX Click to share on DeliciousIt's DELICIOUS

Tuesday, September 23, 2008

Clay Cookery: A Frugal Chef's Dream Come True


A long time ago, I read a post from Meredith, at Like Merchant Ships, about her clay cooker. Since her post, I have been on the lookout for a clay baker of my own, but have not seen one on any trip to the thrift shops. I am sure that I probably passed a million, not knowing what the heck they were, but when I finally figured it out...there were none to be found.

Until last week, that is! I actually spotted two of them sitting together on a shelf. I lunged to grab one and took home the one that was in the best condition. It was marked for six dollars, a bit more than I usually spend on a single item in housewares. After months and months of waiting though, I was willing to fork over the six dollars.

The lid was tightly taped shut and, I prayed that there was nothing wrong inside of it. What I discovered was that the clay cooker had never been used and all of the information packets were neatly tucked inside waiting for the next owner.

Today we roasted a chicken for our family in it. A good old Aldi chicken was stuffed with rosemary from my garden and seasoned with a little salt and pepper. I slid the chicken into the cold oven, after soaking my baker in water, and baked it at 450 degrees for 85 minutes.

I had read the packets cover to cover, praying that I wouldn't screw it up. Would the chicken really be moist and flavorful? Would it be brown or would it be light in color like my slow cooker chickens? Was it really true that it didn't require liquids?

We held our breaths as I lifted the lid...

What was unveiled was better than I had imagined. A juicy and flavorful chicken- full of color and just as good as any chicken I have bought in a store.

After we were all done applauding... well, maybe that didn't really happen, but I will say that we were all really impressed with just how good that chicken tasted.

I can't wait to try other things in the clay cooker and, just in case your thrift store find does not come with a booklet, here are a few of the tips that were provided for using your clay baker:

  • Soak it in water- Completely immerse the top and bottom in water for ten to fifteen minutes before each use.
  • Place in a cold oven- After adding the ingredients, place your clay baker in the center of the cold oven.
  • Time cooking according to your own preferences and oven- tastes and ovens vary. Time your dishes according to the way you want them and don't hesitate to vary the recipe slightly. Recipes usually can be converted for clay pots by increasing the cooking temperature by 100 degrees and deducting a 1/2 hour of cooking time.
  • Put the clay cooker on a cloth when you remove it from the oven- Sudden changes in temperature should be avoided. When the clay baker is removed from a hot oven, place it on a towel, hot pad, or wooden board rather than a cold surface.
  • Clay bakers are ideal for the microwave- Because microwaves vary to such a great degree, it is impossible to state any rules for converting recipes for the microwave. Use the oven manufacturer's guidelines for cooking times.
  • Clean with a hot water and a brush- Use hot water and a stiff brush to clean your clay baker. A little baking soda will cut any grease. Translation: NO SOAP! Never scour with a scouring powder or metal scouring pad. It can block some of the pores of the clay, reducing the water absorption.
  • Don't use it on an open flame- It is designed only for the oven.
  • Place the lid upside down on top of base when storing- When the clay baker is not in use, keep it in a place where the air circulates. Place the lid upside down on top of the base, so the air can reach inside the bottom.
But, why is a clay baker helpful for a frugal cook? Here are a few reasons I think this can be a good addition to the kitchen:

  • Cooking food in a cooker requires no additional liquids. It pulls all the natural juices out of your dishes so no need to add cans of chicken stock or extra ingredients to make your food flavorful.
  • Clay bakers allow you to prepare quick, healthy, high quality meals that cost less and taste better. My Aldi chicken looked and tasted better than any other preparation I have tried before and it browned the chicken beautifully without any extra steps at all!
  • You can cook very nutritiously. You can cook all kinds of foods without adding any fat. Due to the low cooking temperature the aroma, vitamins and minerals are preserved within your food. As someone who is trying to eat well, this is an important feature for me!
I can't wait to try other things in this clay baker and I hope you can score one of your own for your kitchen!

Have you ever tried cooking in a clay baker before? If not, what are some items you use in your kitchen that may seem unconventional to others, but have saved you time or money?

Labels: , , , ,

ENJOYED THIS POST? SHARE IT WITH OTHERS:

Click to share on StumbleUpon STUMBLE This Click to share on kirtsy Add to KiRTSY Click to share on Mixx Add to MIXX Click to share on DeliciousIt's DELICIOUS

Monday, September 22, 2008

Redbox Code 09.22.08

Today's free code for a Redbox movie is CR654D. This code is good for one free movie and you can use it until midnight tonight. Enjoy a free family movie together!

Side Notes:

- If you want to rent more than one movie for free, bring more than one credit/debit card. You can use the same promotional code, you just will need different cards to charge it to. The charge will be zero as long as you return your movie on time for the next day.

- When entering in your free movie code, you need to enter it FIRST before picking the movie. On the very first screen, click the, "Rent with Promo." Enter in the above code and then make your selection- the amount should then total zero.

Here is an updated list of new releases:


Baby Mama
The darlings of Saturday Night Live's Weekend Update are reunited. Amy Poehler and Tina Fey star in this comedy about a straightlaced and squeaky clean career woman (Fey) who, after discovering she's infertile, hires a surrogate (Poehler) who turns out to be crass and downright crazy.

Forbidden Kingdom
It's every kung fu obsessed teen's dream come true (or it should be): get recruited by a band of martial artists in China and trusted on a deadly mission (in this case to rescue a character named The Monkey King). Action heroes Jet Li and Jackie Chan star.

Barbie & the Diamond Castle
This animated feature might, at first, seem like Barbie and her close friends singing songs and enjoying the meaning of true friendship. Soon, though, they find themselves having to save the Diamond Castle – and music itself! – from the evil muse Lydia!

Payback
Returning from last week, it's a new release exclusive to redbox! When a cop-killer escapes prison after ten years, he goes straight after the family of the man who put him away – the partner of the cop he murdered. Christopher Atkins and Costas Mandylor star in this fast paced thriller.

Then She Found Me
This movie picks up in the aftermath of some pretty tough times for the main character. Her husband has left her. Her adoptive mother dies. As if that weren't adjustment enough, her biological mother suddenly enters her life. Helen Hunt gives a great directorial debut, starring Bette Midler, Colin Firth and Matthew Broderick.

What Happens In Vegas
Forget how the saying goes — it doesn't always stay in Vegas. Ashton Kutcher and Cameron Diaz play young opposites who start a night in Sin City as total strangers and wake up as newlyweds. After Ashton hits big on the slots, a judge (Dennis Miller) orders them to honor their wedding vows for six months.

Labels:

ENJOYED THIS POST? SHARE IT WITH OTHERS:

Click to share on StumbleUpon STUMBLE This Click to share on kirtsy Add to KiRTSY Click to share on Mixx Add to MIXX Click to share on DeliciousIt's DELICIOUS

Company is Coming: Fast Peanut Butter Cookies

There are very few nights where we don't have a guest sitting at our dinner table. Although I put a lot of thought into our main dishes, I have to say, dessert sometimes gets the short end of the stick when I am entertaining.

I happened upon this recipe for peanut butter cookies that will make a regular appearance for busy weeknight invitations though! The recipe yields between two to three dozen (depending on the size of your scoops) and is made from items out of your pantry. Best of all, you can get all the ingredients at Aldi, which is a bonus in my book!

Be sure to keep the cooking time to the ten to twelve minutes and don't let the lighter color fool you. I had some burnt cookies in my first batch because I left them in the oven too long. Let them cool as instructed and then place them on a pretty plate for serving. Then you need to complete the most difficult step of all...Try to graciously accept the compliments without giving away your cooking secrets (which I never can do myself!).

I piled these on one of my trays with a carafe of decaf coffee, mugs, creamers, and and special coffee syrups. It was the perfect way to end an evening and I look forward to serving these again and again!

Elaine's Peanut Butter Cookies (Courtesy of AllRecipes.com)

1 (18.25 ounce) package yellow cake mix
1 cup creamy peanut butter
1/2 cup vegetable oil
2 eggs
2 tablespoons water

1. Preheat oven to 350 degrees F (175 degrees C).

2. Pour the cake mix into a large bowl. Make a well in the center, and add peanut butter, oil, eggs, and water. Mix until well blended. Drop by teaspoonfuls onto ungreased cookie sheets. Flatten slightly using a fork dipped in water.

3. Bake for 10 to 12 minutes in the preheated oven. Let cookies set on cookie sheet for 2 to 3 minutes before carefully removing from the cookie sheet to cool on wire racks.

I am curious, what is your go-to dessert dish when you are having company? I would love some new desserts to add to our dinner table!

Labels:

ENJOYED THIS POST? SHARE IT WITH OTHERS:

Click to share on StumbleUpon STUMBLE This Click to share on kirtsy Add to KiRTSY Click to share on Mixx Add to MIXX Click to share on DeliciousIt's DELICIOUS

Saturday, September 20, 2008

Putting My Hat Into the Martha Ring

Oh, how I love Martha Stewart! Martha is running a contest for bloggers (on her own blog) where she will be highlighting a few of her favorite blogs and bloggers can submit their blogs for consideration. The bloggers that are chosen will be reviewed on Martha's personal blog!

If you are looking for information on how to start a blog, you should visit her entry and see the tips for blogging that they have compiled there. They did a fantastic episode on blogging and invited some blog-celebrities to share about their blogging experiences.

I am making a wish that we are chosen for her list! Good luck to all the entries!

Labels:

ENJOYED THIS POST? SHARE IT WITH OTHERS:

Click to share on StumbleUpon STUMBLE This Click to share on kirtsy Add to KiRTSY Click to share on Mixx Add to MIXX Click to share on DeliciousIt's DELICIOUS

Friday, September 19, 2008

Freebie Friday: September 19, 2008

A big thanks to my friend Heather, from Freebies 4 Mom, for all of her help with our Freebie Friday this week. We are thankful that Heather is back to blogging and that her family is safe and sound after Hurricane Ike. Please head over to Freebies 4 Mom and show her some love- she totally deserves it!

Exciting news- Disneyland is giving a free pass to admit you into their park on your birthday for '09! You can register yourself (and your children)! Visit their site for the full scoop!

Health & Beauty
Entertainment

Rogue Magazine (from P&G)
Automobile Magazine
Maxim Magazine (1 free issue)


Pets


9Lives
Greenies

Mark Your Calendars

September - Starbucks Free coffee Mondays for teachers K-12
September - Walgreens Take Care Health Tour
September 20 - Carvel Customer Appreciation Day - free ice cream 12 to 5
September 20
- Doll crafts @ Michaels
September 25 - Coldstone Creamery Ice Cream Social (donations benefit Make-a-Wish)
September 27 - National Museum Day
September 27 - Geoffrey's Birthday @ ToysRUs
September 27 - Lowe's Kids - Make a fire truck
October 4 - Home Depot Kids (make a whistle fire truck 9 am to noon)

**************************
Enter today to win a 10th Anniversary Harry Potter prize pack. We are giving away beautiful boxed sets of the Harry Potter series and the new anniversary editions of, "Harry Potter & the Sorcerer's Stone" Please do not enter here, only entries over here will qualify. Good luck, everyone!


Labels:

ENJOYED THIS POST? SHARE IT WITH OTHERS:

Click to share on StumbleUpon STUMBLE This Click to share on kirtsy Add to KiRTSY Click to share on Mixx Add to MIXX Click to share on DeliciousIt's DELICIOUS

Thursday, September 18, 2008

Notebook Experiments: Can I Make Homemade Breadsticks?


Experiment: Can I whip up a batch of homemade breadsticks?

Experiment Taken From: Notebook Entry 08.21.08

Materials Needed: Please see Chocolate On My Cranium for the full instructions on ideas for completing this task. I followed her instructions and just used my stand mixer for this project. I also added my own additions of a 1/4 tsp garlic powder, a 1/4 tsp of Italian seasoning mix, and a handful of Parmesan cheese for sprinkling on top. For a fast dipping sauce, I used a jar of Aldi's spaghetti sauce.

Results: This is the first time that I have ever tried to make homemade breadsticks, but I really needed some type of bread for dinner and this recipe looked fast and easy. I was doubly inspired to try this because Heather, from Freebies 4 Mom, had attempted making these and I read through all of the suggestions on her comment thread before making them.

I added 1/4 cup of extra flour to make sure that the dough was sticky, but not too sticky. I let the stand mixer do all the work for me and plopped all of the ingredients in the mixer after the yeast, sugar, and water had proofed. Within five minutes, the dough was nicely incorporated.

I poured the butter onto a rimmed cookie sheet and then scooped the dough with a spatula onto the sheet. I flipped it, covering both sides in butter and then sprinkled my addition of Parmesan cheese.

I covered the whole cookie sheet with plastic wrap and popped it in my fridge until our dinner hour. About a half hour before our dinner, I pulled it out of the fridge and let it rest on the counter while our oven preheated.

I slid a big tray of my favorite baked ziti into the oven and then popped in the breadsticks for the last twenty minutes at 350 degrees. It needed a few extra minutes more than the required cooking time, but I think that was because they had been refrigerated.

Conclusion: These breadsticks were amazing and a great way to get a large batch of bread on the table while being creative with your pantry ingredients. Next time I will add a little bit more salt to add more flavor, but other than that, I thought they were perfect. I can see us making these over and over again in our house and I want to thank Chocolate On My Cranium for a wonderful new side dish we can add to our table!
********************

I am so excited to open our Notebook Experiments up to everyone and I hope that you will be able to participate this week or in weeks to come! I will be posting this each Thursday so please mark your calendars if you plan to participate. You can post your entries at any time throughout the week and then leave your entry in the links below.

We have this handy banner that you are more than welcome to use, but it is not a requirement! It is just something you can add to add a little sparkle to your entry.

Rules for Participation:

1. Choose anything from any of our notebook entries (past or present) to do with your family. We have hundreds of bookmarked links of crafts, ways to save money, and organizing ideas.
2. Complete an experiment from the notebook and share about it on your blog or website. We would love to see pictures of what you accomplished or a detailed description of how your projects turned out. Please include a link to this entry, a link to the original posting of the entry (at the original crafster's blog), and (to help us relocate the project) the date or link of the notebook entry where you found it. You can use the same formatting as our entries or you can just include that information in your post in your own unique way!
3. Post a link below. Please include your name or blog name & a fast description of your project. Example- MomAdvice (WHO bread)

I can't wait to see what you create and what you find inspiring!

Labels: ,

ENJOYED THIS POST? SHARE IT WITH OTHERS:

Click to share on StumbleUpon STUMBLE This Click to share on kirtsy Add to KiRTSY Click to share on Mixx Add to MIXX Click to share on DeliciousIt's DELICIOUS

Amy's Notebook 09.18.08

These baked apples look delicious (@ little momma & co.)

I love this idea for creating your own crazy yarn (@ Craftzine)

This scarf made from thrifted goodies is so beautiful (@ Wise Craft)

I want to make some of these day of the week folders (@ design sponge)

I love this little round-up of bookmark ideas (@ Skip to My Lou)

These popcorn balls look like a fun fall treat (@ elsie marley)

These child's art smocks would be very handy for messy crafts in our house (@ zakka life)

I want to make clothespin dolls with my daughter someday (@ plumpudding)

I love this memory jar idea (@ ohdeedoh)

These custom silhouette t-shirt would make a fabulous gift or fashion statement (@ Inhabitots)

This purse made from a sweater makes me want to get acquainted with my sewing machine (@ cindygert)

We aren't in Netflix anymore, but I am loving this Netflix origami (@ swiss miss)

I am loving these baby shower decorations (@ Thompson Family-Life)

This fresh apple cake with caramel glaze looks sinful (@ Wise Craft)

These felted pictures look like a fun craft for the advanced crafters (@ One Crafty Mumma)

I love these ideas for freezing potatoes (@ Organizing Connection)

Vapor rub on pantiliners hack- only inventive parents could think of this (@ Parent Hacks)

Loved looking through the Knitty Fall '08 patterns (@ Knitty)

I adore this fence with alternating board lengths (@ shelterrific)

This is a great recipe round-up of homemade pet treats (@ The Kitchn)

I love these tips for making good bread (@ Smitten Kitchen)

This creamy parmesan orzo looks delicious (@ Cheap Healthy Good)

These butterfly cupcakes are so sweet (@ My Wooden Spoon)

Labels: ,

ENJOYED THIS POST? SHARE IT WITH OTHERS:

Click to share on StumbleUpon STUMBLE This Click to share on kirtsy Add to KiRTSY Click to share on Mixx Add to MIXX Click to share on DeliciousIt's DELICIOUS

Wednesday, September 17, 2008

Play It Again, Momma: Vanilla Scented Granola

Just in time for the busy school year, here is a snack that is healthy and can be used for breakfast or for snacks. Watch out though, this stuff is highly addictive!

I am easing my family into eating granola and I found this recipe that I thought would fit the bill perfectly. The only item that they could consider "weird" are the slivered almonds. No dried fruits, no coconut, no weird foods...no reason to complain!

I will gradually be adding some other elements into this recipe, but if you have a picky family, this granola recipe might be a great place to start. I bought a large container of vanilla yogurt and made little yogurt cups for the kids with this homemade granola sprinkled on top. They gobbled it up and I found them both licking their bowls. I would say this one was a hit!

Vanilla Scented Granola Courtesy of Bon Appetit Magazine

Cooking spray
4 cups rolled oats
1 cup sliced almonds
1/2 cup brown sugar
1/4 teaspoon salt
1/8 teaspoon ground cinnamon
1/3 cup vegetable oil
1/4 cup honey
2 tablespoons sugar
4 teaspoons vanilla extract Position rack to middle of oven and preheat to 300 degrees. Lightly spray large baking sheet with nonstick spray. Mix next 5 ingredients in large bowl. Combine oil, honey and sugar in small saucepan; bring to simmer over medium heat. Remove from heat; stir in vanilla. Pour hot liquid over oat mixture; stir well. Using hands, toss mixture until thoroughly mixed. Spread granola on prepared baking sheet. Bake until golden brown, stirring occasionally, about 30 minutes (but check after 20). Transfer sheet to rack; cool granola completely. (Can be made two weeks ahead. Store in airtight container at room temperature.) Makes approximately 8 cups.

Side Note:
If you prefer granola clumps, do not stir during baking and allow the granola to cool. You can then break the granola apart into pieces.

Labels: ,

ENJOYED THIS POST? SHARE IT WITH OTHERS:

Click to share on StumbleUpon STUMBLE This Click to share on kirtsy Add to KiRTSY Click to share on Mixx Add to MIXX Click to share on DeliciousIt's DELICIOUS

Tuesday, September 16, 2008

Celebrating Financial Milestones as a Family

This morning on WSBT, I discuss some ways that you can celebrate your financial milestones as a family. This topic is near and dear to my heart because I think it is so important to teach and share your financial victories and shortcomings in ways that your children can understand.

Here are two of our links to our past celebrations:

Debt-Free Party
Cars Party

We are now working on paying off our student loan debt so we can achieve our American Dream. I hope that all of this will inspire other families to start their own celebrations with their children!

*************************************

We are offering two exciting giveaways on our blog- don't forget to put in your entry!

Last week, I provided a list of 35 Ways to Save on Your Grocery Budget that I hope will be really helpful for families. I want to add a #36 though that I know would make your day... how about free toilet paper and paper towels for an entire year from Scott's? Head over right now and put in your entry at The MotherLoot today. Please do not enter here, only entries over here will qualify. The contest is open until Tuesday night and then I will draw our winner!

And our brand new giveaway has just begun! Enter today to win a 10th Anniversary Harry Potter prize pack. We are giving away beautiful boxed sets of the Harry Potter series and the new anniversary editions of, "Harry Potter & the Sorcerer's Stone" Please do not enter here, only entries over here will qualify. The contest is open until October 13th and then I will draw our winner! The contest is open until Tuesday night and then I will draw our winners!

Good luck, everyone!

Labels: ,

ENJOYED THIS POST? SHARE IT WITH OTHERS:

Click to share on StumbleUpon STUMBLE This Click to share on kirtsy Add to KiRTSY Click to share on Mixx Add to MIXX Click to share on DeliciousIt's DELICIOUS

Mommy Time Management: Making My Plans Work

We did a really great series on self-care awhile back (you can scroll through my Mommy Time Management category for all of the discussions and related talks on implementing self-care in your life) and I just wanted to check in with each of you and see how your self-care is going. I know that I have found it is easy to care myself during the summer, but when our new school year starts, I suddenly seem to lose myself again. I am wondering if you are feeling the same way?

My self-care has really come from trial and error and discovering what type of person I am. Here is what I am discovering.

1. I am not a morning person. I have tried being a morning person and I just can't do it. My workout attempts to wake up early left me feeling horrible the rest of the day and getting a jump on the day usually means I am tapping into the time when I feel less creative. Therefore, I am not pushing being a morning person and am instead concentrating on utilizing the times when I feel best...which is the evening. I will no longer apologize for not being a morning person and will understand that maybe I will come to a stage in my life where mornings work better for me, but for now I am content on being groggy in the morning and enjoying the first bit of laziness while I can.

2. I am not a gym person. I tried the gym with my kids and it did not work. My daughter is at a stage in her life where she is shy and scared when I am away from her. I don't know how long this stage will last, but dragging one whining kid and one crying kid to the gym so I could work out left me feeling stressed and guilty. We decided to, instead, put our tax refund check towards a good treadmill that we could use while caring for our children at home. My husband is now able to run and train for his races in the winter seasons and I am able to squeeze in a workout when it is convenient for me. I am working out more often and I feel better than I did before.

3. My self-care needs to be convenient for it to work. A treadmill in the basement...not convenient. A treadmill that is near my workspace so it is ready and waiting for me. Yup, that works. Call me lazy, but self-care will only work for me if it is convenient. This means that I have to make those things available to me and group items in such a way that I will actually use them. My foot soak goodies are all together waiting for the night when I can soak my feet. My library books sit in a basket in my living room where I can grab one and read them. My craft supplies are ready for me to spend an evening working on what makes me most happy. Keeping stocked on my self-care items helps me to actually care for myself when I need it most.

4. I need to put myself on a self-care schedule. I have made a commitment to myself to do one nice thing for myself for one hour a day. It is not an hour where I am watching my favorite show while I fold the laundry, pick up the kid's toys, and sign papers. No, the only multitasking that will be occurring is if I am watching my television show while soaking my feet. As a mom, I get in the habit of making it about everyone else, even during the time that I should be caring for myself. One hour of total and carefree time devoted to myself is just what I need. The world will still spin, our house will still function, and I will be feeling better about myself in the process.

How do you care for yourself? Do you find it more difficult as the school year and activities begin? How do you make this a priority... or do you?

(Photo Source: David Joyce)

Labels: ,

ENJOYED THIS POST? SHARE IT WITH OTHERS:

Click to share on StumbleUpon STUMBLE This Click to share on kirtsy Add to KiRTSY Click to share on Mixx Add to MIXX Click to share on DeliciousIt's DELICIOUS

Monday, September 15, 2008

Redbox Code 09.15.08

Today's free code for a Redbox movie is 2THS48. This code is good for one free movie and you can use it until midnight tonight. Enjoy a free family movie together!

Side Notes:

- If you want to rent more than one movie for free, bring more than one credit/debit card. You can use the same promotional code, you just will need different cards to charge it to. The charge will be zero as long as you return your movie on time for the next day.

- When entering in your free movie code, you need to enter it FIRST before picking the movie. On the very first screen, click the, "Rent with Promo." Enter in the above code and then make your selection- the amount should then total zero.

Here is an updated list of new releases:


Baby Mama
The darlings of Saturday Night Live's Weekend Update are reunited. Amy Poehler and Tina Fey star in this comedy about a straightlaced and squeaky clean career woman (Fey) who, after discovering she's infertile, hires a surrogate (Poehler) who turns out to be crass and downright crazy.

Forbidden Kingdom
It's every kung fu obsessed teen's dream come true (or it should be): get recruited by a band of martial artists in China and trusted on a deadly mission (in this case to rescue a character named The Monkey King). Action heroes Jet Li and Jackie Chan star.

Barbie & the Diamond Castle
This animated feature might, at first, seem like Barbie and her close friends singing songs and enjoying the meaning of true friendship. Soon, though, they find themselves having to save the Diamond Castle – and music itself! – from the evil muse Lydia!

Payback
Returning from last week, it's a new release exclusive to redbox! When a cop-killer escapes prison after ten years, he goes straight after the family of the man who put him away – the partner of the cop he murdered. Christopher Atkins and Costas Mandylor star in this fast paced thriller.

Then She Found Me
This movie picks up in the aftermath of some pretty tough times for the main character. Her husband has left her. Her adoptive mother dies. As if that weren't adjustment enough, her biological mother suddenly enters her life. Helen Hunt gives a great directorial debut, starring Bette Midler, Colin Firth and Matthew Broderick.

What Happens In Vegas
Forget how the saying goes — it doesn't always stay in Vegas. Ashton Kutcher and Cameron Diaz play young opposites who start a night in Sin City as total strangers and wake up as newlyweds. After Ashton hits big on the slots, a judge (Dennis Miller) orders them to honor their wedding vows for six months.

Labels:

ENJOYED THIS POST? SHARE IT WITH OTHERS:

Click to share on StumbleUpon STUMBLE This Click to share on kirtsy Add to KiRTSY Click to share on Mixx Add to MIXX Click to share on DeliciousIt's DELICIOUS

Skillet Ziti With Chicken & Broccoli


I had several new recipes for this month's planner that I was trying and wanted to review for you guys. This first recipe comes from the America's Test Kitchen Family Cookbook, a favorite cookbook in my collection. The cookbook includes really great reviews on the best products and rates common cooking tools for chefs. There has not been a recipe yet that I have tried and not enjoyed!

I am a big fan of skillet dinners because you only have to dirty one pan and they come together quickly. Two of my favorites are the Skillet Penne & Sausage Supper (also from the America's Test Kitchen Family Cookbook) and the Cheeseburger Pasta Skillet Dish. These dishes are great for busy weeknights and make great leftovers for the next day's lunches.

Skillet Ziti With Chicken & Broccoli

1 pound boneless, skinless chicken breast, sliced into 1" pieces
Salt and pepper
3 Tablespoons unsalted butter
1 onion, minced (we omitted this due to personal tastes)
1/4 teaspoon red pepper flakes
1/4 teaspoon dried oregano
3 garlic cloves, minced
8 ounces ziti (2 1/2 cups)
2 1/2 cups low-sodium chicken broth
1/2 cup heavy cream (I substituted this with half & half)
1 bunch broccoli (1 1/2 pounds)
1 cup jarred roasted red peppers, rinsed and sliced 1/4" thick (we omitted these due to personal taste)
1 ounce Parmesan cheese, grated (1/2 cup)
2 tablespoons fresh lemon juice (optional)

Pat the chicken dry, then season with salt and pepper. Melt 1 tablespoon of the butter in a 12" skillet over medium heat. Add the chicken and cook until it is lightly browned, but not fully cooked, about four minutes. Transfer chicken to a bowl. Add 1 more tablespoon of the butter, onion, red pepper flakes, oregano, & 1/2 teaspoon salt to the skillet. Cook until the onion is softened, about five minutes. Stir in the garlic and cook until fragrant, about 15 seconds. Sprinkle the ziti evenly into the skillet. Pour the broth and cream over the ziti. Cover and bring to a boil, about five minutes. Reduce the heat to medium-low and stir in the broccoli and roasted red peppers. Cover and continue to simmer, stirring occasionally, until the pasta begins to soften and the broccoli turns bright green (approximately eight minutes). Stir in the chicken and any accumulated juice. Cover and simmer until the chicken is cooked through, about three minutes longer. Stir in the remaining 1 tablespoon butter, the Parmesan, and lemon juice (if using). Season with salt and pepper to taste.

  • This dish made about six servings for our family. I diced fresh tomatoes to sprinkle on top of the pasta, which added a really nice fresh burst of flavor and sprinkled it with a shaving of Parmesan cheese.
  • When I packaged our leftovers, I added a drizzle of chicken broth to each container to keep the pasta moist for reheating.This definitely helped it to not dry out when it was reheated and added a little additional flavor to the leftovers.
  • If you want to make this an Aldi-friendly recipe, just substitute the ziti with elbow macaroni or penne pasta and adjust the cooking time accordingly. You would have to omit the red peppers and replace heavy cream with half & half (which substituted beautifully).
  • Don't be afraid to add a little extra liquid to the dish- I added an extra 1/4 cup of chicken broth and an extra 1/4 cup of half & half to keep the pasta nice and moist. You don't want the pasta to dry out and it should have a very thin sauce that helps to coat the pasta.
  • To make this dish vegetarian, just omit the chicken and up the veggies. The sprinkle of tomatoes or a handful of sundried tomatoes and spinach could make this a veggie packed dish worth repeating!

This dish was a huge hit with everyone except with Ethan, who has firm beliefs that no food should ever touch. He liked all the foods separately, but not mixed together. The rest of us absolutely loved it and I plan to make this again and again!

Labels:

ENJOYED THIS POST? SHARE IT WITH OTHERS:

Click to share on StumbleUpon STUMBLE This Click to share on kirtsy Add to KiRTSY Click to share on Mixx Add to MIXX Click to share on DeliciousIt's DELICIOUS

Friday, September 12, 2008

Looking for Talented Writers


Update: Thank you to everyone who has emailed me. I have received sixteen responses and I think that is all I can handle right now. I will let you guys know when we need more writers for the Family section and will open it up again! Thank you for your enormous response!


I feel very blessed to be part of the new Blissfully Domestic website. If it has been awhile since you visited, you should swing by there and see the great new design, writers, and editors that are making this a hot spot for women to learn and share.

I am the Editor for the Family Channel where we cover everything from parenting, family, empty nesters, grandparents, new parents, working parents, love & marriage and everything in between. We currently have 28 gifted writers who are contributing to my channel alone and I would love to expand our team further.

If you are interested in writing, please email me at [email protected] and let me know! With our booming team, you can commit to once a month or once a week. Of course, the more often you commit, the more often you will be seen and be able to direct traffic back to your own site. Our goal is to promote bloggers and help you grow your website!

Please let me know and I look forward to hearing from those of you that are interested!

Labels:

ENJOYED THIS POST? SHARE IT WITH OTHERS:

Click to share on StumbleUpon STUMBLE This Click to share on kirtsy Add to KiRTSY Click to share on Mixx Add to MIXX Click to share on DeliciousIt's DELICIOUS

Thursday, September 11, 2008

Freebie Friday: September 12, 2008

A big thank you to Heather, from Freebies 4 Mom, for helping to contribute to our list. If you don't want to wait all week for your samples, be sure to visit her blog regularly for your weekly freebie scoop! Heather's blog is always hopping with the latest freebies, coupons, and scoops on current sweepstake offers & giveaways.

Happy Freebie Friday!


Health & Beauty

Huggies Diapers (Walmart sample)
Deseo (fragrance for him)
Carefree
Poise (Costco sample)
Kotex LightDays Pantiliners (Costco)
10 day supply Estee Lauder Foundation (scroll to the bottom for the coupon)

Entertainment

Organic Valley Kids Activity Flyer
Parents Magazine 2 Year Subscription (ValueMags)
Electronic Gaming Monthly
PC Magazine Subscription
Gooseberry Patch Fall Favorites Cookbook


Mark Your Calendars

September - Walgreens Take Care Health Tour
September 13 - Lowe's Kids - Make a pirate ship
September 13 - Thomas & Friends Playdate @ ToysRUs
September 18 - Smoothie King Coffee Smoothie before 10:30 am
September 20 - Carvel Customer Appreciation Day - free ice cream 12 to 5
September 20
- Doll crafts @ Michaels
September 25 - Coldstone Creamery Ice Cream Social (donations benefit Make-a-Wish)
September 27 - National Museum Day
September 27 - Geoffrey's Birthday @ ToysRUs
September 27 - Lowe's Kids - Make a fire truck
October 4 - Home Depot Kids (make a whistle fire truck 9 am to noon)

*****************

We are offering two exciting giveaways on our blog- don't forget to put in your entry!

This week, I provided a list of 35 Ways to Save on Your Grocery Budget that I hope will be really helpful for families. I want to add a #36 though that I know would make your day... how about free toilet paper and paper towels for an entire year from Scott's? Head over right now and put in your entry at The MotherLoot today. Please do not enter here, only entries over here will qualify. The contest is open until Tuesday night and then I will draw our winner!

And our brand new giveaway has just begun! Enter today to win a 10th Anniversary Harry Potter prize pack. We are giving away beautiful boxed sets of the Harry Potter series and the new anniversary editions of, "Harry Potter & the Sorcerer's Stone" Please do not enter here, only entries over here will qualify. The contest is open until October 13th and then I will draw our winner! The contest is open until Tuesday night and then I will draw our winners!

Good luck, everyone!

Labels:

ENJOYED THIS POST? SHARE IT WITH OTHERS:

Click to share on StumbleUpon STUMBLE This Click to share on kirtsy Add to KiRTSY Click to share on Mixx Add to MIXX Click to share on DeliciousIt's DELICIOUS

Amy's Notebook 09.11.08

Did you miss my notebook last week? Please say yes! Here she is back in her full glory again, with a fresh new set of linky loving for my sweet blogging friends!

Remember anything that you like out of the notebook can be added to our notebook experiments section each Thursday!
Happy reading!


These homemade peanut butter cups look delicious (@ Have Cake, Will Travel)

I love these necktie glasses cases (@ Craftzine)

This chocolate mint icebox cake looks like it is to die for (@ Divine Domesticity)

I am loving this newspaper bunting (@ maya made)

I had never heard of this site where you could find local yarn shops (@ Craftzine)

I love this rug made out of a tea towel (@ knick knacks & ric rac)

I want to give this pumpkin spice latte recipe a try (@ Baking & Books)

I really love this little cupcake stand (@ Once Wed)

I am loving these felted rocks (@ resurrection fern)

I am always up for trying another banana bread recipe (@ Posie Gets Cozy)

I have wanted to know how to recycle yarn from sweaters and this post helped so much (@ Craft Leftovers)

I like these tips for seasoning your cast iron skillet (@ Joy the Baker)

I am going to have to keep my eyes peeled for a funnel pitcher for our house (@ Baking Bites)

This chocolate chunk coffee cake looks amazing (@ Genesis of a Cook)

These brownies in a mug might be a fun dessert when we are entertaining (@ A Year of Crockpotting)

I want to try tie dying shirts with the kids one day (@ Motherhood for Dummies)

I loved this post on what is an appropriate food budget for a family of four (@ The Simple Dollar)

I love these little princess crowns and I know my daughter would too (@ The Homespun Heart)

I will now know what to do with the wooden boxes from the Melissa & Doug toys that the kids get for Christmas (@ Parent Hacks)

I love this dinosaur feet craft (@ Problem Solvin' Mom)

I have never tried cooking my rice this way, but I just might have to give this a shot (@ The Kitchn)

I love these fabric & button barrettes (@ belle & burger)

Labels: ,

ENJOYED THIS POST? SHARE IT WITH OTHERS:

Click to share on StumbleUpon STUMBLE This Click to share on kirtsy Add to KiRTSY Click to share on Mixx Add to MIXX Click to share on DeliciousIt's DELICIOUS

Notebook Experiments: Can We Survive a Money-Free Weekend?


Experiment: Can our family survive a money-free weekend?

Experiment Taken From: Notebook Entry 07.24.08

Materials Needed: Please see The Simple Dollar for the full instructions on ideas for completing this task. Since it is a money-free weekend, you can bet that all those materials need to be free and laying around your house.

Results: I will admit it, we have the most trouble with our spending on the weekends. All of the leisurely free time just makes me think of all the things that I could be buying. It really doesn't help that we live off the main drag for shopping either!

For this experiment though, we made a commitment to have a money-free weekend. I had withdrawn our grocery money earlier in the week though for our grocery shopping, but that is where our spending ended.

What did we do on our no spend weekend? Well, we played board games in the evenings and caught up on our favorite shows. I spent some time working on knitting some washcloths for my grandma's birthday. I cleaned out my closet and took a load of stuff over to Goodwill to make a donation. But our favorite no spend idea that we did... well, maybe our kid's clothing choices might help you guess!


No, we didn't get to see a free game, but my husband's work throws an amazing tailgate and we thought this would be the perfect way to celebrate not spending that weekend.


And you know what is free at those events. Yup, tons of free food! My kids gorged themselves on a plethora of sugary treats and salty snacks. We all ate until we were in food comas and then swung by to see the local radio station all set up and distributing stickers and football necklaces for a special little treat for the kids. We threw our name in a raffle and chatted for a bit at their table. We watched all of the craziness that ensues for Notre Dame games and just drank in all the fresh air and sunshine.

"How convenient," I exclaimed to my husband, as we walked over to our car! "We just so happened to have parked right next to the Starbuck's. Momma could go for some delicious coffee." My husband just grinned at me and kindly replied, "Oh wait! Didn't you say we were having a NO SPEND weekend? Awww, too bad!"

I think one of us took this no spend thing a little too seriously!

Conclusion: I really loved having a money-free weekend and I plan to do this more regularly in our house. Thanks to Trent, at The Simple Dollar, for encouraging families to save instead of spend!
********************

I am so excited to open our Notebook Experiments up to everyone and I hope that you will be able to participate this week or in weeks to come! I will be posting this each Thursday so please mark your calendars if you plan to participate. You can post your entries at any time throughout the week and then leave your entry in the links below.

We have this handy banner that you are more than welcome to use, but it is not a requirement! It is just something you can add to add a little sparkle to your entry.

Rules for Participation:

1. Choose anything from any of our notebook entries (past or present) to do with your family. We have hundreds of bookmarked links of crafts, ways to save money, and organizing ideas.
2. Complete an experiment from the notebook and share about it on your blog or website. We would love to see pictures of what you accomplished or a detailed description of how your projects turned out. Please include a link to this entry, a link to the original posting of the entry (at the original crafster's blog), and (to help us relocate the project) the date or link of the notebook entry where you found it. You can use the same formatting as our entries or you can just include that information in your post in your own unique way!
3. Post a link below. Please include your name or blog name & a fast description of your project. Example- MomAdvice (WHO bread)

I can't wait to see what you create and what you find inspiring!

Labels: ,

ENJOYED THIS POST? SHARE IT WITH OTHERS:

Click to share on StumbleUpon STUMBLE This Click to share on kirtsy Add to KiRTSY Click to share on Mixx Add to MIXX Click to share on DeliciousIt's DELICIOUS

Wednesday, September 10, 2008

Finding Deals on Eye & Vision Care

Piggybacking on our discussion on going without vision and dental coverage, I got the opportunity to share with WSBT some ways that families can save on their eye coverage. I researched contact lense prices, discount programs that you can take advantage of, and where you can score an inexpensive eye exam.

Our family is currently going without optical and dental insurance and my daughter managed to break my only pair of glasses. I was overdue for an eye exam and was on my last pair of contact lenses. I drove around from place to place in town and decided that Sam's Club would be the best place for me. The selection fit my needs, the eye exam was inexpensive ($35 for my son, $55 for myself for contact & glasses fittings) and they had designer frames for between $65-90.

Although there are cheaper places on the internet to buy glasses, I really wanted to be able to try my glasses on and get them properly fitted to my face. There is something to be said for feeling confident in what you are wearing and if I would have bought them online, they would have not fit me as well.

I am planning to put this information into an article for reference on our site. Thank you all for your feedback please feel free to discuss where you have found the best deals on optical care!

Labels: ,

ENJOYED THIS POST? SHARE IT WITH OTHERS:

Click to share on StumbleUpon STUMBLE This Click to share on kirtsy Add to KiRTSY Click to share on Mixx Add to MIXX Click to share on DeliciousIt's DELICIOUS

Free 2 Year Subscription to Parent's Magazine


I doubt this offer will last long. Head over to ValueMags and pick up a 2 year subscription to Parent's Magazine for free!

Your subscription should start within six to eight weeks!

Enjoy!

Labels:

ENJOYED THIS POST? SHARE IT WITH OTHERS:

Click to share on StumbleUpon STUMBLE This Click to share on kirtsy Add to KiRTSY Click to share on Mixx Add to MIXX Click to share on DeliciousIt's DELICIOUS

Me On You Tube: Save Money With a Baking Day


Emily & I decided to have a chat with you in our pajamas while preparing for our day of baking. Setting aside one day out of the week to work on baking and the prep work for mealtime can be really beneficial towards staying on track with your budget. You can read more of my tips for a successful baking day and I hope you will be able to watch the video for more ideas to help make your baking day go really smoothly.

Sound Off: What steps do you do to make your cooking go smoothly for the week?

Labels: , ,

ENJOYED THIS POST? SHARE IT WITH OTHERS:

Click to share on StumbleUpon STUMBLE This Click to share on kirtsy Add to KiRTSY Click to share on Mixx Add to MIXX Click to share on DeliciousIt's DELICIOUS

Play it Again, Momma: Pumpkin Spice Lattes

With the Pumpkin Spice Latte season upon me, I thought it would be great to bring this little entry back for your viewing pleasure! After all, I can't be the only one with a Pumpkin Spice Latte addiction!

My absolute favorite drink at Starbucks is their Pumpkin Spice Latte. Each year, I look forward to them adding this onto their menu and this year was no exception. Unfortunately, my wallet can’t handle the frequent trips to get coffee so I have had to get creative this year.

My girlfriend, Christina, had this amazing little gadget called the Cocomotion. If you haven’t seen one of these, check it out and put it on your Christmas list. I decided to go with the Back to Basics Cocoa-Latte Maker (similar, but it has a dispenser to dispense the drink) and I have yet to be disappointed with it. It is so nice because it stirs and heats everything up, just like a blender. When it is hot, it will stop stirring and you can hit the Dispense button. As it comes out, it will come out with a beautiful froth on top, just like the coffee shops. I think the best part about it is no cocoa or coffee goes to waste. I hate when you get the bottom of your glass and there is all this cocoa that fell to the bottom and didn’t get mixed properly. With this machine, you don’t have that problem.

We have had our little cocoa machine humming every single night. As soon as I flip it on, it is like I have Pavlov’s dog in our house. Everyone runs up the stairs to wait impatiently for the cocoa to be ready.

Well, my handy little gadget makes the absolute BEST Pumpkin Spice Lattes and after trying several combinations, I finally have a recipe that I am happy with. This recipe will make two large lattes and I hope you can enjoy it as much as we have.

To save on cost, store your morning’s coffee in the fridge to be used for the lattes. You can also save on the cost of these by making a batch of powdered milk for your drinks.

If you want to splurge a bit, make sure to have whipped cream on hand to top with a dusting of cinnamon.

Let me know if you get a chance to try this recipe! Adjustments can be made according to your own taste! This is the perfect post-Thanksgiving Day treat!

Amy’s Version of Starbuck’s Pumpkin Spice Latte

2 cups milk
1 cup very strong coffee
2 teaspoons vanilla
2 teaspoons sugar (or one packet of Splenda)
1 teaspoon cinnamon (plus extra for dusting)
2 heaping spoonfuls of pumpkin

Pour all of the ingredients into a pot and heat over medium-high heat until the coffee is steaming hot. Pour into mugs and top with whipped cream & cinnamon. Enjoy!

If you are interested in purchasing a Cocoa-Latte Machine, check out Ebates and order from there. They have the Cocoa-Latte Machine (just go under Search in the left hand corner) for $30 with four percent cash back through the Ebates program.

Not an Ebates member? You can sign up today. You get five bucks in your account and so do I for referring you. It is THE place to Christmas shop! Please be sure the use the link provided so that we get credit for our referral & thank you so much! (Originally Aired: November 13, 2006)

(Photo Source:Dalboz17)

Labels: , ,

ENJOYED THIS POST? SHARE IT WITH OTHERS:

Click to share on StumbleUpon STUMBLE This Click to share on kirtsy Add to KiRTSY Click to share on Mixx Add to MIXX Click to share on DeliciousIt's DELICIOUS

Tuesday, September 09, 2008

Tip #36 For Reducing Your Grocery Budget

Today I provided a list of 35 Ways to Save on Your Grocery Budget that I hope will be really helpful for families. I want to add a #36 though that I know would make your day... how about free toilet paper and paper towels for an entire year from Scott's? Head over right now and put in your entry at The MotherLoot today. Please do not enter here, only entries over here will qualify. The contest is open until Tuesday night and then I will draw our winner!

How is that for helping reduce one's grocery budget? Good luck to each of you!

Labels: ,

ENJOYED THIS POST? SHARE IT WITH OTHERS:

Click to share on StumbleUpon STUMBLE This Click to share on kirtsy Add to KiRTSY Click to share on Mixx Add to MIXX Click to share on DeliciousIt's DELICIOUS

A Rare Interview With Debbie Phelps

Johnson's contacted me to let me know that they had chosen a handful of bloggers to chat with Debbie Phelps and asked if I would like to be included. After I got over my initial squealing and jumping up and down, I calmly replied that I could definitely make myself available for the engagement. After all, who could pass up such an amazing opportunity to speak to the mother of Michael Phelps?

Myself, BooMama, MamaPop, MomLogic, & Better Than a Playdate were chosen to talk to Johnson's official Mom of the Olympic Games. To see her video tribute to Michael, please head over here.

During our interview, Mrs. Phelps openly discussed everything from her difficulties juggling everything as a single mom, her pride over Michael's accomplishments, the bullying that Michael endured growing up, and the world's fascination with her son. In the entire interview, one message rang throughout... her deep pride and love for her family.

Being a single mom was difficult for Debbie, but she attributes her strong support network as the reason she was able to juggle it all. Debbie said, "When all of the three kids were home, they were all swimmers. I couldn’t have done everything without the support of other moms and their children being in the same sport. I relied on my friends. My mother gave me a lot of willpower and determination to believe in myself and I had a strong support system that helped make sure that everything was going well."

My question for Debbie was how she avoided falling into the stage mom trap and how she would advise other parents to do the same? Debbie said, “I wasn’t a pusher. I just always let the coaches do their jobs. My job was to be Michael’s mom.” She also discussed how she encouraged Michael without pushing him in her own direction, "I couldn't get caught up in the stage mom junk. I took on the logic of Michael's coaches- it’s here and then gone tomorrow. ''

As a personal finance blogger, my other questions were on money management and how she has been encouraging her son to manage his money. I asked how she would help Michael stay grounded and manage his new-found wealth and fame? Debbie said, "I watched Michael gain four years of maturity over this Olympics. I am hoping the values that I taught him at home are going to stay with him as he goes on this journey. I feel that Michael will be reaching out to those who supported him as he goes out onto this endeavor."

When asked if she would like to share a favorite family dish, Debbie let out a chuckle. "I hate to cook. Cooking is not my forte. With the kids growing up, it was easy to just put a pasta dish together. We were carb loading all the time. I had to be economical as a single mom – a lot of cereal and a lot of carbs." As a budget-minded mommy, I think I would be right at home at Debbie's table.

A big thank you to Johnson's for giving us this opportunity and a huge congratulations to the entire Phelps family on all that they have accomplished!

Labels:

ENJOYED THIS POST? SHARE IT WITH OTHERS:

Click to share on StumbleUpon STUMBLE This Click to share on kirtsy Add to KiRTSY Click to share on Mixx Add to MIXX Click to share on DeliciousIt's DELICIOUS

35 Ways to Save on Your Grocery Budget

With grocery prices rising and package sizes shrinking, it can be difficult to stay within your grocery budget. Here are 35 steps towards improving your grocery budget and making the most of your money.

1. Buy the least expensive ground beef and rinse the meat instead to reduce the fat content.
2. Stop buying baby carrots and chop the carrots yourself.
3. Milk your milk budget by using powdered milk when the milk prices are too high.
4. Try making your own coffee syrups and coffee creamers to help save on your coffee expenses.
5. Dispose of the disposable items and switch to cloth napkins, washcloths, and and microfiber cloths to replace your paper napkins and disposable wipes.
6. Try making your own bread using a bread machine or making bread the good old-fashioned way.
7. Start keeping a price book to cash in on the best deals (you can download a free one here).
8. Take advantage of grocery delivery services or free in-store shopping services to help avoid impulse shopping.
9. Give wholesale club shopping a try for items that you use frequently, just be sure to use your price book to compare the prices.
10. Start making your own homemade cleaners.
11. Learn the art of stockpiling and create a system for storing your stockpile that works for your family.
12. Create a series of menu plans that you can rotate so you can make your grocery shopping easier and keep yourself under budget.
13. Try using coupons and utilizing free coupon services to help you score the best deals for your money.
14. Start gardening with simple foods that are easy to grow like tomatoes, herbs, cucumbers, and squash.
15. Try canning items from your garden to help cut costs in the winter months.
16. Make your own baby food or find a way to buy it cheaper.
17. Give cloth diapering a shot! They have come a long way and can save you hundreds and hundreds of dollars.
18. Sign up for free samples of food and toiletry items. You will waste less money trying new items out and these samples can help get you by when times are more lean.
19. Make your own mixes instead of buying them.
20. Try shopping at a less expensive supermarket.
21. Bring your own grocery bags for a grocery bag credit at most supermarkets.
22. Shop at stores that will double your coupons.
23. Bring cash and a calculator instead of using your debit card. This will help you to stay on budget better.
24. Utilize a slow cooker so you can buy cheaper cuts of meats and use the slow cooker to tenderize them.
25. Try making your own condiments like pancake syrup, croutons, and salad dressings.
26. Take inventory in your fridge, pantry, and freezer before shopping to avoid buying repeat and unnecessary items.
27. Try replacing one evening meal with breakfast foods instead. Most brunch dishes are less expensive and you can omit or stretch meat in these dishes a lot further.
28. Instead of buying prepackaged bagged ingredients, try packaging your own ingredients once a week instead. It will help get dinner on the table faster and it will save you money in your grocery budget.
29. Make a homemade pizza instead of buying pizzas in the frozen section.
30. Schedule a day in your kitchen every week to make cooking easier and to help save on the cost of buying convenience foods.
31. Feed your freezer and/or give once-a-month cooking a try to save on time and money.
32. Eliminate meat or make one night a meat-free night.
33. Make snacks items convenient so you don't have to buy the prepackaged goodies.
34. Buy and prepare whole chickens instead of buying chicken breasts as a meal or shred this meat for your casseroles.
35. Buy your meat in bulk.

(Photo Credit: WhamBam Pam)

Labels: ,

ENJOYED THIS POST? SHARE IT WITH OTHERS:

Click to share on StumbleUpon STUMBLE This Click to share on kirtsy Add to KiRTSY Click to share on Mixx Add to MIXX Click to share on DeliciousIt's DELICIOUS

Monday, September 08, 2008

Guess Who is Guest Blogging for Martha Today?

Well, I may have not been contacted by Martha herself, but I did get contacted by an Editor to guest blog for their Dinner Tonight blog (brought to you by Everyday Food Magazine). I was so thrilled to be asked because I don't consider myself a foodie. I do try to share recipes though that are easy and fun for families and since we had such similar goals in mind, I knew some of my dishes would fit right in with the magazine's theme. Please read my entry here for some new recipes for what to do with those rotisserie chickens!

I really think that this will will be the highlight for my week! The blog will be running guest posts from people that I really admire (here are a few for you to check out) so be sure to check it out this week!

I have to say, I felt right at home in Martha's magazine. I just have to convince them that I shouldn't be a guest and that I should be a full-time resident!

Labels: , ,

ENJOYED THIS POST? SHARE IT WITH OTHERS:

Click to share on StumbleUpon STUMBLE This Click to share on kirtsy Add to KiRTSY Click to share on Mixx Add to MIXX Click to share on DeliciousIt's DELICIOUS

Redbox Code 09.08.08

Today's free code for a Redbox movie is 99ZA7Q. This code is good for one free movie and you can use it until midnight tonight. Enjoy a free family movie together!

Side Notes:

- If you want to rent more than one movie for free, bring more than one credit/debit card. You can use the same promotional code, you just will need different cards to charge it to. The charge will be zero as long as you return your movie on time for the next day.

- When entering in your free movie code, you need to enter it FIRST before picking the movie. On the very first screen, click the, "Rent with Promo." Enter in the above code and then make your selection- the amount should then total zero.

Here are the latest new releases from Redbox:

Payback
A new release exclusive to redbox! Christopher Atkins plays Sean Walker, a cop whose partner was brutally murdered in a drug bust gone bad. Ten years after being imprisoned, the killer (Costas Mandylor) escapes jail and decides to come after Walker for putting him away. Gunfire ensues, folks. Lots of gunfire.

Then She Found Me
In her directorial debut, Helen Hunt plays a school teacher for whom things are about to get nutty. Back to back to back, her husband leaves, her adoptive mother dies, and her biological mother enters her life after years and years. This one boasts an all-star cast, including Bette Midler, Colin Firth and Matthew Broderick.

What Happens In Vegas
Redbox always figured Ashton Kutcher and Cameron Diaz would be perfect for each other — here, they're anything but. The two play total opposites who meet and Vegas one night and wake up married the next day. But after a huge slot payout, getting it annulled is a little harder (and funnier) than they thought.

The Art of War II: Betrayal
It's been eight years since Neil Shaw (Wesley Snipes) was in action as an undercover operative. Now he's back and —before long, he discovers an evil plot to assassinate several senators where he's set up to take the fall — he has to get busier (read: "deadlier") than ever.

Hannah Montana/Miley Cyrus: Best of Both Worlds Concert Tour
Missed the Hannah/Miley tour when it came to your town? Redbox has a way to put you up in the front row. Just grab a copy of this tour movie and watch the sensational young star travel the world .This tour movie also features stars like the Jonas Brothers and Miley's achy breaky dad, Billy Ray.

Prom Night
Between borrowing a car and stocking up on breath mints, high school kids had enough to worry about on prom night...BEFORE a sadistic killer crashed the party. Brittany Snow plays Donna, a senior whose night is pretty much ruined by the return of a murderous sociopath from her long lost past.

Labels:

ENJOYED THIS POST? SHARE IT WITH OTHERS:

Click to share on StumbleUpon STUMBLE This Click to share on kirtsy Add to KiRTSY Click to share on Mixx Add to MIXX Click to share on DeliciousIt's DELICIOUS

September '08 Menu Planner

Since last month's menu planner was such a hit, I wanted to be sure to share our current month's menu plan for some inspiration for the month. I am trying some new recipes from my cookbooks so I will be sure to post our reviews of those when I complete them as well as the reipes. Anything that I have shared before or that I have found online will be highlighted so you can make the dish in your house! Please be sure to visit I'm An Organizing Junkie for a whole list of participants to help inspire your menu plans each and every week!

Meal Plan:

1. Chicken Enchiladas with Homemade Enchilada Sauce (from my America's Test Kitchen Cookbook) with tortilla chips & Idiot Margaritas

2. Classic Baked Ziti with homemade bread & tossed salad

3. Salmon Patties (from my America's Test Kitchen Cookbook) with Seasoned Baked Potato Wedges

4. Poppy Seed Chicken Casserole (scroll down to view) over Egg Noodles & Baby Peas

5. Homemade Pizza Night

6. Skillet Ziti With Chicken & Broccoli (from America's Test Kitchen Cookbook- bake or prepare extra chicken for chicken tetrazzini later in the week) with Homemade Bread

7. Leftover Night

8. Best Waffles with Orange Juice

9. Herb Baked Tilapia, Rice, & Corn

10. Creamy Chicken Tetrazzini with Tossed Salad

11. Meatball Subs with Baked Potato Wedges

12. Ranch Pork Chops, Rice, & Corn

13. Appetizer Night- Honey BBQ Chicken Wings, Cheese Quesidillas, Carrot Sticks & Tortilla Chips

14. Leftover Night

15. Pumpkin Pancakes with Orange Juice

16. Homemade Pizza Night

17. Roast Turkey Sandwiches (Scroll to Meal #7) & Panera Bread Broccoli Cheese Soup

18. Funky Chicken with Sesame Noodles

19. Turkey Salad Sandwiches (from leftover turkey) With Pretzels & Carrot Sticks

20. Lemon Roasted Chicken (scroll down to Meal #16 & save leftover chicken for later), Buttered Noodles, and Corn

21. Homemade Pizza Night

22. Leftover night

23. Chicken Salad Sandwiches (made from leftover lemon chicken)

Making for the Freezer: Butter Baked Rice (to be used throughout the month)

Snacks: Apple Pie Muffins, Pumpkin Streusel Muffins, Cinnamon Muffins

Labels:

ENJOYED THIS POST? SHARE IT WITH OTHERS:

Click to share on StumbleUpon STUMBLE This Click to share on kirtsy Add to KiRTSY Click to share on Mixx Add to MIXX Click to share on DeliciousIt's DELICIOUS

MomAdvice Monthly Recap: August '08

Thank you to everyone who took the time to visit the site this past month. We had a great month and I so appreciate each of you who come regularly and share the site with your friends. Without you, this would not be possible!

Please make sure to subscribe to our blog feeds so you will be among the first to know when we update the site. You can subscribe to each of our blogs and even our article feed!


These were our top ten articles for the month:

1. Grocery Shopping Tips
2. Mystery Shopping
3. Aldi Menu Planner
4. 2008 Online Family Planner Roundup
5. Piggy Pancakes
6. Picky Eater Dinner Ideas
7. Back to School Free Menu Planner
8. Cloth Diapering 101
9. Ten Useful Tips for Twitter Users
10. And My Heart Breaks...

And a big thank you to our top ten referrers for the month:

1. Freebies 4 Mom
2. Money Saving Mom
3. Twitter (I am including these because I wanted you to see how beneficial it is to be a part of the Twitter community!)
4. Tip Nut
5. The Centsible Sawyer
6. The Homespun Heart
7. Deal Seeking Mom
8. Mommy Snacks
9. Hooray for Freebates!
10. Baby Cheapskate

Labels:

ENJOYED THIS POST? SHARE IT WITH OTHERS:

Click to share on StumbleUpon STUMBLE This Click to share on kirtsy Add to KiRTSY Click to share on Mixx Add to MIXX Click to share on DeliciousIt's DELICIOUS

Saturday, September 06, 2008

How to Live More Simply & Why It is Important

I feel so thrilled to be sharing another amazing article from another amazing blogger. The Frugal Dad has been a source of inspiration to me and I am constantly in awe at all of his great advice. I could go on and on about him, but I think you should head to his site for yourself! He is a great resource for anyone who is trying to live a more frugal & simple life. This guest post was generously shared by Jason, a.k.a. "Frugal Dad." and we both felt it would be a wonderful addition to my site! When Jason isn't busy being a husband and father of two kids, he writes about frugal family finance topics at his blog, FrugalDad.com.

These days there are a lot of arguments being waged on the benefits of paying down debt, buying used cars, paying off mortgages early, and building savings. All of these are noble financial goals, and generally receive positive reinforcement from financial planners in the media. However, there is an element that disagrees with this logic, and they are quick to point out where the mathematics don't support these life-simplifying steps. This post is aimed primarily at that audience, and for the rest of you, perhaps it will provide some comfort when dealing with these types.

Excess Material Possessions + Excess Financial Worries = Stress


Since I know how much you "financial nerds" love formulas, I've provided one for you to chew on. I once wrote a post about homeowners paying off their mortgage early, and it was generally well-received. However, I received a number of emails from "financial experts" out there who disagreed with the idea. They were all-too-eager to tell me about the various ways that same money could be earning more in the markets. Maybe so. But their fancy formulas didn't account for the one variable most important to me at this stage in my life--simplicity.

How to Live More Simply


That stress I referred to in the equation above is the result of constant worry over reconciling balances, watching payment schedules, and fretting over the never-ending accumulation of interest, which has a way of cheapening future earnings at a rate faster than inflation. Add to this financial stress the worry of excess things and their storage, protection and maintenance, and you can easily see how too much stuff and too many accounts can lead to an ulcer. So how does one prevent such complication in their lives?

  • Learn to be content. Contentment is a powerful ally of the frugal-minded individual. When we are truly content we have very little that we desire, in terms of material possessions. This contentment keeps us away from stores, catalogs and advertisements.


  • Stop trying to impress other people. Millions of dollars are wasted each year by those trying to play up to the ideals of others. Those who incorrectly believe that material possessions are a symbol of true wealth are on a never-ending quest for something bigger and better, and more expensive. They constantly upgrade their cars, homes, jewelry and clothing in an effort to impress strangers at a red light, many whom they will never meet again, and are likely trying equally hard to impress them.


  • Rid yourself of things acquired merely for status. So you've made a decision to live more simply, but what about that Jaguar in the driveway and the "his and hers" Rolex in your sock drawer that are contradicting your new way of life? Get rid of them. I don't care how you do it. Sell them, give them away as gifts, or donate them to a charity. Just get rid of them. You will be amazed how freeing the experience can be. While I've never had a Jag or Rolex to give away, I've eliminated some "extras" from my own life and feel much better for it.


  • Consolidate your lifestyle. Do you have six Roth IRA accounts with five different brokerages? Are your insurance policies scattered around three or four different carriers? While there is some benefit in diversification, by going overboard you are adding stress to your life just from the effort required to manage all the various accounts and policies. Consolidate a couple of those accounts, and move your insurance policies to the same provider (assuming you have researched the provider and are confident in their stability). As an added benefit you may find discounts waiting for having multiple policies with the same carrier.


  • Recognize the difference in stockpiling and hoarding. It is prudent to stockpile necessities, particularly when you find a good deal, or receive a discount when buying bulk quantities. However, too much of a good thing becomes problematic when you have to spend time, money and energy just to store the items. After I returned home from school to live with my grandfather we stored a bunch of our stuff for $50-$60 per month in a storage unit. After several months went by it occurred to us that we had not used anything from the storage facility. We saved $600 a year by simply getting rid of the stuff. One less bill and a lot less worry!


Excess Material Possessions - Ego = Simplicity


Much has been written about wars with our own egos--I know I've lost my share of battles. But when I stop and think about the real reason why I want something I often find that I am simply feeding my own ego. I want others to know that I am successful. I don't want others to think I am struggling. I fall into the "I work hard, so I deserve it" line of thinking that is a recipe for financial disaster. However, once you are aware of this condition you can begin to take steps to resist the urge to give into your egotistical desires. Try to find the same joy that you once found in things in other areas of your life. Learn to appreciate the beauty that surrounds us and is freely available to anyone willing to look. Go for a walk in the woods, or a barefoot walk in your own backyard. Read a great book. Spend time playing with your children. Volunteer your time to a cause you believe in. Seek out some of life's many other simple pleasures. All of these things will fill your life in ways things used to, and they can all be done for next to nothing.

A challenge: Find one thing you've been holding on to because it is a status symbol, or a luxury item that you don't really need. Give it away to a loved one, or a complete stranger, and enjoy the freedom of a simpler life.

Labels: ,

ENJOYED THIS POST? SHARE IT WITH OTHERS:

Click to share on StumbleUpon STUMBLE This Click to share on kirtsy Add to KiRTSY Click to share on Mixx Add to MIXX Click to share on DeliciousIt's DELICIOUS

Friday, September 05, 2008

Freebie Friday: September 5, 2008

A big thank you to Heather, from Freebies 4 Mom, for helping us with our Freebie Friday. Without her help, this week just wouldn't be possible! Be sure to visit her entry on how to connect with moms in your community and her latest round of coupons for moms!

Just a reminder, we are running an amazing giveaway that you can enter for a gift pack of ten books from Hachette Book Group USA. All you have to do is tell me your favorite book, but you have to go here to enter!

We were also nominated for a Love This Site! award from Divine Caroline for the Parenting category. If you agree, would you mind just clicking to put you vote in?

We will be back to our regularly scheduled programming tomorrow and thank you guys so much for letting me indulge in a week with my family! Happy Freebie, Friday!

Health & Beauty
Always Infinity
Entertainment
Harper Collins Children's Books (advanced reader copies)
Qubo (free kids videos like Babar to watch online)

Home & Garden
Tide Total Care (free sample when you enter sweeps)
uni-ball 207 pen
KraftMaid Idea Book

Mark Your Calendars
September - Walgreens Take Care Health Tour
September - Pottery Barn Kids Star Wars Event
September 6 - Stuff a Cottonelle Puppy to take home (Walmart)
September 13
- Thomas & Friends Playdate @ ToysRUs
September 18 - Smoothie King Coffee Smoothie before 10:30 am
September 20 - Doll crafts @ Michaels
September 27 - National Museum Day
September 27 - Geoffrey's Birthday @ ToysRUs

Labels:

ENJOYED THIS POST? SHARE IT WITH OTHERS:

Click to share on StumbleUpon STUMBLE This Click to share on kirtsy Add to KiRTSY Click to share on Mixx Add to MIXX Click to share on DeliciousIt's DELICIOUS

Thursday, September 04, 2008

Exciting News from MomAdvice

I know, I am supposed to be on vacation, but I had to tell you guys that the Walmart Money Saving Moms site is up. I was so excited to see that my Choosing a Coffeemaker video is up on their homepage- how cool is that? I have been chatting with all of the folks from Walmart and one of the bonuses for this project will be that I can get an early glimpse into the freebies that they will be offering on their site for our readers. I was really excited about that and being able to get the scoop for everyone! There will be some other great perks for our readers including giveaways and other wonderful opportunities so I hope to share all I can from this project with each of you.

Thank you all for your help in choosing my picture. You can find my profile is up and I went with the majority on this one and picked #10. I loved all of your comments and I am sure you will see these pictures floating around for everything now. Thanks again to Cathy Dietz for her amazing photography and to Walmart for footing the bill for my photo shoot!

In other news, we are running an amazing giveaway that you can enter for a gift pack of ten books from Hachette Book Group USA. All you have to do is tell me your favorite book, but you have to go here to enter!

We were also nominated for a Love This Site! award from Divine Caroline for the Parenting category. If you agree, would you mind just clicking once to put you vote in? I would so appreciate it!

Now I am officially back on vacation until tomorrow for our Freebie Friday!

Labels:

ENJOYED THIS POST? SHARE IT WITH OTHERS:

Click to share on StumbleUpon STUMBLE This Click to share on kirtsy Add to KiRTSY Click to share on Mixx Add to MIXX Click to share on DeliciousIt's DELICIOUS

Ask the Frugal Momma: How Do You Organize Your Pantry & Cupboards?

I know you guys were most impressed with the way we organized our closet, but what you *REALLY* wanted to know is how do we organize our pantry.

Remember when I revamped my laundry system and my yard sale system? That day I hit up the same college student for a great bookcase that she was getting rid of for only $20! I knew right away what I wanted to do with it and couldn't wait to bring it home and put it in our basement.

First, let me give you some background information on our house and previous storage solutions. My kitchen does not have very many cupboards or pantry space so I have had to be more creative with my storage. Our big dream is to expand my tiny utility closet into a walk-in pantry, but until that happens I have been storing the majority of my pantry items in our basement.

Previously, we had a dark wood bookcase that was extremely deep that we were using to store the pantry items. We had ripped this "bookcase" out of our closet that we had turned into an entertainment unit. Yes, you could say that we are pretty creative with our smaller home. We have tried to maximize the space in places that were not being used properly instead of moving into a bigger home.

Due to the depth and darkness of the unit, what had ended up happening was that I found myself doing the repeat-buying. I would look in the unit and say to myself, "No tomato paste?" And then I would rush to the store and buy tomato paste. When I would pull items out though, I would see twenty cans of tomato paste that I had already bought. This was not frugal and the bookcase was working against me.

The location of the unit was also not the smartest place for me. With a quad level home, I was already making the trek down all of our stairs to retrieve items and then walking into the farthest corner of the basement to get what we needed. It was inconvenient and not a functional storage solution.

Welcome to the new home for my canned goods! This bookcase rests just at the bottom of the stairs in a well-lit area of our basement. The light wood color makes it easier to see what is in my pantry and the labels (created with my label maker) make it easy for even my husband to find what we need out of the pantry.

Our upstairs cupboards needed revamping as well. We have the same problem with our cupboards as we did with our former basement storage solution. One cupboard was extremely deep and items would get shoved back there until we said, "Hmmm... do you think that this is still good if it expired in 2003?" Obviously, we were wasting food and valuable cupboard space.

Repeat the same scenario above with the Lazy Susan unit that we had, but just make the items revolve in mass chaos. Clearly, we had a serious problem!

I got these handy storage baskets for less than two dollars each and divided our pantry items into categories. The storage baskets made it much easier for me to pull down exactly what I needed, rather than climbing up on a chair to try and dig through the back of the pantry. It also makes throwing items out quicker, when I need to clean out the pantry, and makes tasks easier because I had grouped like items (or cooking projects) together.

Here is how I grouped the items:

Spices- All of the spice containers were gathered together and imagine my surprise that we had plenty of repeat performers in this category. I wiped down the spices and consolidated them into one container. The spice container is residing in the cupboard closest to the stove. I can pull the small basket down and take out whatever we need and slip it back into the cupboard when I am done cooking. This is much easier than rifling through fifty teeny bottles and makes shopping day easier too!

Cake/Cookie Decorating Supplies- These are items that are used less frequently, but still needed a home. I put these higher up in a basket with handles. Piping bags, piping tips, cookie cutters, food coloring, sprinkles and the birthday candles (that no one could ever find) all went into this container.

Baking Supplies: This is a pretty general category, but it was all of the items that I needed, but could never find. In this larger basket went our baking powder, baking soda, confectioners sugar, shortening, and cocoa powder.

Rice/Pasta: These ingredients went into a larger basket and all of the boxes were consolidated and smaller pastas and the rice were placed into clear Mason jars. The mason jars were labeled and have the cooking instructions labeled on them (unless I knew the directions by heart). In the Mason jars were white rice, brown rice, jasmine rice, orzo pasta, macaroni, and couscous. Larger pasta included linguine, angel hair, and thin spaghetti. Everything fit more neatly and anything extra went into the downstairs bookcase unit.

Flour/Sugar: This organizing unit went into our Lazy Susan. This included wheat flour, white flour, self-rising flour, cake flour, brown sugar, and white sugar.

Syrups/Oils/Vinegars: This organizing unit also went into our Lazy Susan and included corn oil, vegetable oil, canola oil, olive oil, balsamic vinegar, white wine vinegar, red wine vinegar, molasses, honey, and maple syrup. Using this unit eliminated the "sticky" factor, which usually occurred, making a huge mess in the bottom of our pantry. Any extra condiments also get put in there, as they are often used in recipes.

Finally, the items that I like to keep on hand upstairs all go into our pantry door. We bought one of these wire units that mounts on the door and keep items that I might need on hand. A smaller unit, that clips onto the larger unit, houses all of those little packets that we might need to assemble a meal. I try to keep what we need for the week in the upstairs pantry door and then the excess (or whatever doesn't fit) ends up going downstairs.

If you want, I am happy to share where we keep appliances and stuff like that, just leave me a comment!

I hope that this will help give you some creative storage solutions for your pantry!

Note: You can click on the pictures to expand the size.


Related Readings:

Free Up Pantry Space & Make a Snack
Making Your Spice Rack Usable
Getting the Car Organized
Gettin' Quick in the Kitchen
Living Out of Your Pantry

Sound Off: What storage solutions have you found work in your pantry?

*Originally aired July 25, 2007*

Labels: , ,

ENJOYED THIS POST? SHARE IT WITH OTHERS:

Click to share on StumbleUpon STUMBLE This Click to share on kirtsy Add to KiRTSY Click to share on Mixx Add to MIXX Click to share on DeliciousIt's DELICIOUS

Organizing Your Laundry Room

Tis the season for college students to began moving out and that means loads of great deals on organizing units and apartment style furnishings. Not only that, but many kids just offer up the stuff for free to rid themselves of having to lug the stuff home and back to school again. Keep in mind all those students who are graduating and don't think they will need their furnishings in their new & more lucrative lives. It is a bargain-hunters dream so be checking the local papers and the free online classifieds for all these goodies.

Last weekend I scored several very nice organizing units and I was able to revamp some of the organizing systems in our house. The first organizing system that I created, was a unit that I purchased for our laundry room.

I saw this organizing idea on one of those organizing shows on television and thought, "I should do that!" The show was about a mom who just couldn't keep up with her laundry and she had no good laundry system in place. She had a laundry area in her basement (just like me!) and clothes were piled everywhere. She had no idea of what was clean or what was dirty and the basement was a disaster.

The team came in and renovated her laundry area and added a shelving unit that assigned each person in the house a shelf for clean laundry. They used baskets to organize and made things look very pretty.

I loved this idea, but I wasn't willing to fork over the big bucks for a huge unit like that. Lucky for me, a graduating university student had an organizer that she didn't need anymore and I was able to score this unit for only twenty dollars.

My husband reassembled it in our basement and I set to work on creating a system for our own family. Each person has a tag now for their respective shelf. The top shelf is for our linens and then we go down the line for the family members.

Some other features that I added to my station are:

- A small dish tub, that rests below, that houses a small sewing kit and is reserved for items that need mending. Mending must be simple, but those items are now separated and have all the materials needed for a quick & easy repair.
- A larger tub for ironing. I don't iron, but someone else in the family can now find anything they want to iron themselves. Aren't I thoughtful?
- A bin for the, "Lonely Socks Club." We sort socks at the end of all our loads, but all socks who are missing a partner are now located there. It makes finding matches much quicker.

The unit is only a holding station for the family. This is not a storage facility. When the kids get a little older, everyone will be responsible for clearing their own shelf and and putting their own clothes away. Baskets are neatly assembled beside the unit and each family member has a basket for themselves.

What are some ways that you organize your laundry area? What are some important items that you keep in your laundry room? Any systems that work great for you? Please share!

*Originally aired April 17, 2007*

Labels: ,

ENJOYED THIS POST? SHARE IT WITH OTHERS:

Click to share on StumbleUpon STUMBLE This Click to share on kirtsy Add to KiRTSY Click to share on Mixx Add to MIXX Click to share on DeliciousIt's DELICIOUS

Cleaning Out The Fridge

Continuing the Play it Again, Momma series, we are going to discuss some ways to clean and organize your digs. Enjoy!


Today’s entry request was to cover the topic of cleaning out your fridge. Now ladies, I have been plagued with cleaning questions and ya’ll are making me feel pretty bad about my house. Maybe some money-saving questions might be a better fit for this tired mom? I will continue to answer cleaning questions as they come in, but do not, I repeat, DO NOT look around my house or the items in question. I do enjoy the research though and it has inspired me in ways I didn’t think possible so continue to throw your questions my way. Please email requests to [email protected]. The column will continue to run until I run out of questions. Be sure to check out next week’s entry where we talk about that nasty toaster oven sitting on our counters.

I do not enjoy cleaning out my refrigerator, but it one of those things that must be done. I wait until the day before grocery day to do it though because this is the day where there is the least amount of items that need to be moved around. It is also a great time to check my inventory before making the shopping trip to see if I really do need half the things on my list.

When I clean out the fridge, I break out two dishwashing tubs & a cookie sheet to accomplish this task. I fill one of these tubs with two tablespoons of baking soda and one quart of warm water (no need to measure this, just an idea of how much to use). The cookie sheet is used to put all of the condiments on and drawers are emptied into the other dishwashing tub to move items quickly in and out of the fridge.

Before cleaning the interior of the fridge, fill each drawer with the same amount of baking soda solution in each one and let the baking soda solution do the dirty work while you are wiping out the inside of the fridge.

I use a rag to do the interior and just get the rag wet with the baking soda solution. Gently wipe the interior of the refrigerator and wipe off all of the surfaces and interior of the refrigerator. If the washing solution begins to look nasty, be sure to chuck it and get another tub full to clean with.

For stuck on interior stains, you can sprinkle a little baking soda directly on the spot and add just a little water to it to make a paste. Allow this to set on the stain and then scrub gently and allow the paste to remove the gunk.

Go back to your drawers and empty them and wipe the interiors of these. Now place these back into the fridge and then take your dishwashing tub of solution and empty it into the sink. Refill the tub with just warm water and add a dash of lemon juice to the water. Now use your rag to do a final swipe using just this water & lemon juice solution. This will remove any grit that might be left in the fridge and the lemon juice will give it a nice fresh scent throughout too. Dry throughly with a terry towel.

Take your cookie sheet of condiments and make sure to give each of these a quick swipe with the rag before returning them. Half the battle is just not having clean items in your fridge and this is a good way to start fresh. Return all of the items in the other tub, at this time, to their proper homes.

The exterior of your fridge can often be overlooked, but it needs attention too. As a mother of two little ones, tiny little fingerprints and smudges are all over my fridge on any given day. To remove these, use my homemade all-purpose cleaner and spray this on your fridge. I then use a microfiber cloth to clean the outside as it is still gentle on the appliance but also abrasive enough to remove any marks. Any scuffs still left? Break out your Mr. Clean Eraser (a mom’s best friend!) You can find a generic equivalent of one of these at your local dollar store.

If you have a stainless steel appliance, dip your microfiber cloth into a little vinegar and give the outside of the fridge a good swiping with the vinegar. Then give the appliance another swipe with just plain water and dry thoroughly with a terry towel. If you have soft water, that won’t show any water marks, you can just use the water to clean the exterior.

Now when was the last time you saw the top of your fridge? You might want to hop up there on occasion and give that a good wiping too. If you have a handheld vacuum, use that to suck up any crumbs and debris. After that, use the all-purpose cleaner and give that a good wiping down too.

Just as a side note, after I clean out my fridge, I also empty the ice out of our icemaker and clean it with the same solution and dump all of the old ice out. This can be a breeding ground for bacteria, so it is an easy addition to my routine since I already have everything out.

Additional Tips:

When cleaning out your fridge, always use baking soda and warm water to wipe the insides of your refrigerator and freezers- soap or dishwashing liquid will leave a smell and can taint food.

Once every few months, remove all the food, switch off the refrigerator and wipe down all the surfaces. Defrost the freezer at the same time if necessary.

A box of baking soda can be added to your fridge and freezer to neutralize those smells.

Frugal Momma’s Money-Saving Tip:

Make sure that the door seals on the refrigerator, freezer compartment, or freezer are working efficiently by closing the door on a piece of paper. If the paper can be pulled out easily, the seal is worn and should be replaced.

Make sure to vacuum your refrigerator coils (located on the back of your fridge) twice a year. It is recommended that you do this more often if you have pets in the home. Just use your vacuum with the crevice attachment attached to the vacuum hose and give it a good vacuuming. The coils are located either on the bottom of your fridge or in the rear of your fridge. Doing this will save you money because if these are clean, your fridge won’t have to work as hard lowering your bills!

Suggested Reading:

Tips to Keep White Appliances from Looking Yellow (Warning: This does include bleach so be careful with your floors and clothing!)

What else would you like to see featured here? Please drop me an email or reply by leaving me a comment!

*Originally aired March 29, 2007*

Labels: , ,

ENJOYED THIS POST? SHARE IT WITH OTHERS:

Click to share on StumbleUpon STUMBLE This Click to share on kirtsy Add to KiRTSY Click to share on Mixx Add to MIXX Click to share on DeliciousIt's DELICIOUS

Wednesday, September 03, 2008

What a Difference a Day Makes

I decided to hit the thrift store this Saturday in search of a china cabinet or unit where I could rest my laptop for our kitchen. I have been hunting for awhile, but just haven't seen anything with the good bones that I was looking for. I walked around for awhile before I saw IT. You know? The one! The one that I have been hunting for ages looking for? Well, I basically threw my body upon an old eighties cabinet and requested the crew help me load it in my vehicle. The cost was only $99 and the units that I had been looking at in the stores were a minimum of $250 and upwards of $600. This piece looked like it was going to be perfect and I headed over to the hardware store and got all of the supplies to tackle this project.

I was inspired by Meredith's recent post about a project that was done on Notes from a Cottage Industry. This blogger had painted her unit black and had gotten hers for a mere fifty bucks and made it look like a million.

This was my first attempt at refinishing a piece of furniture and I was pretty nervous at first, but my tentative paint strokes turned to fast swipes as I became more confident with what I was doing.

This particular piece was a knotty oak wood and had worn brass handles on it. We prefer a more contemporary look with clean lines and a silver finish to our pieces so that is what I wanted to achieve when I refinished this piece.


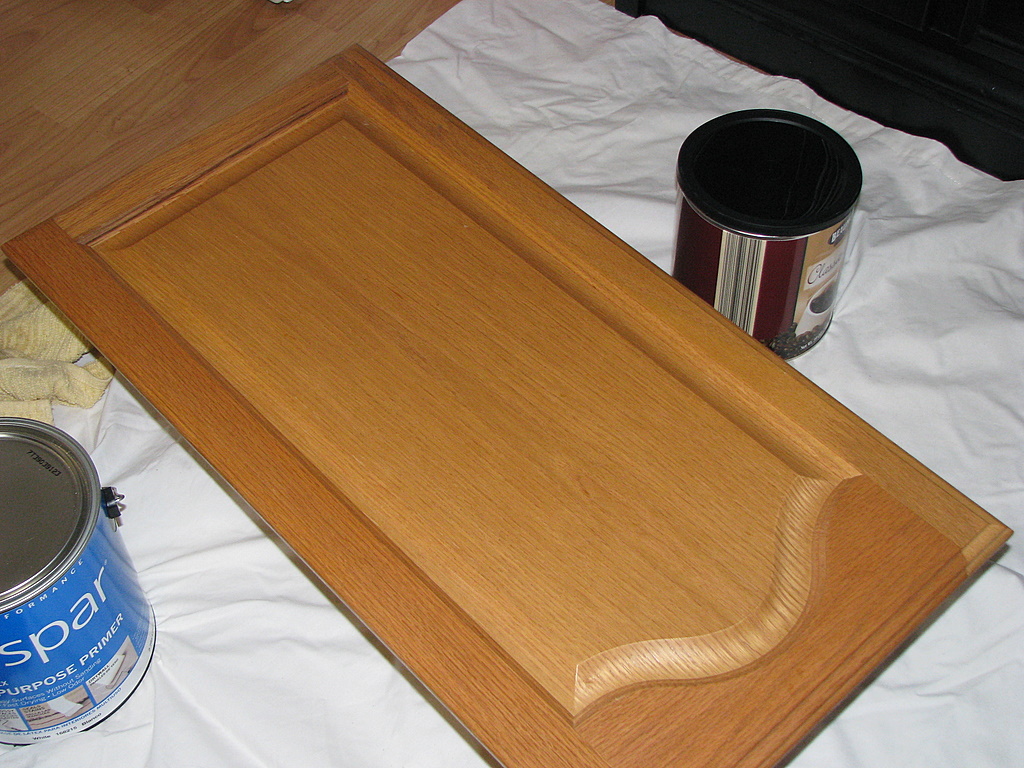
I decided to leave the piece with the knots in the wood, opting to skip the spackling step altogether, and purchased a primer tinted grey to give us a good start on the piece.

I sprayed the unit with a liquid degreaser to get all of the grime and muck of off the wood. Next I primed it with primer and allowed that to dry for a couple of hours. The next step was to put on the black paint and then another coat. Then another coat. Finally, another coat was applied before I could do the final touch-ups to the wood.

The hardware was the type that had been dropped into the a cut-out in the wood of the piece so there was no way that I could replace it. The worn dingy handles received a face-lift with a coat of stainless steel spray paint that was made especially for metal. Fifteen minutes to dry and only four dollars to redo all of the hardware. We are going to be spraying some other ugly brass fixtures around our house that need a little TLC, rather than purchasing new pieces which would cost us a lot more.

I started the project at six o'clock in the evening and painted until 2:30 in the morning. I collapsed in bed and then picked it back up at nine and had it fully assembled with my dishes and cookbooks on it by six the next evening.

It was a bear of a project, but I can't stop glowing or patting myself on the back for what I accomplished in a single day. The unit is absolutely enormous and I did all of this by myself with the only help from my husband being the help with moving and reassembling it.

The finished product reminds of something you would get at Pottery Barn or Restoration Hardware and I doubt that it would be only $99!

The history of the piece was as interesting as the furniture was itself. A quick discussion with one of the employees seemed to indicate that it was repossessed. After pulling it all apart we found a very mysterious hole that at been cut out of the bottom. A hole that would have no purpose except to hide something. Weed, perhaps? Who knows!

What has been your biggest accomplishment that you have done in or around your house? Have you ever attempted to refurbish a thrift store or yard sale piece? Any blunders refurnishing anything?

* Originally aired April 2, 2007*


Labels: , , ,

ENJOYED THIS POST? SHARE IT WITH OTHERS:

Click to share on StumbleUpon STUMBLE This Click to share on kirtsy Add to KiRTSY Click to share on Mixx Add to MIXX Click to share on DeliciousIt's DELICIOUS

Our Kitchen Makeover

When we moved into our house, one of the big things that attracted us to it was the size of our kitchen. Now that we have lived in our house for four years, I don't think my kitchen is as big as I would like, but it seemed enormous when our last house had only a galley kitchen. Isn't that funny how accustomed we can become to more space?

The thing that I was not fond of about the kitchen was the dated look of it and the lack of storage and cupboards. The walls were white, the floors a really light pine color, and the cabinets were oak with no hardware. We didn't have enough cabinet space, the appliances all needed to be updated, and the kitchen lacked the style I wanted. If this was a reflection of the "heart of our home," it was certainly missing something. The owner before us had completely renovated the kitchen, but it wasn't our style and wasn't cohesive or finished the way we would have liked.

Our kitchen makeover has been a gradual process and we are still working on the details of it, but it has come a long way from the dated eighties look. We would replace things as they went out and updates would come when we had a little extra money. I did want to show where we are at now, with the updating process, and to share how we have renovated our kitchen on a budget.

I wish I would have taken more before pictures of the kitchen, but I hope my descriptions will help.
These are the pictures of our cabinets before the makeover. Nice, but not much to write home about. We had received a $50 Lowes gift card for Christmas (thanks, mom & dad!) so we thought we would put the money to good use. I used the steps provided in this tutorial to paint our cabinets. This meant no messy sanding and so it helped to save a step and saved me a lot of cleaning too!
We took all of the doors off and gave them a really good cleaning with a liquid degreaser that I had purchased from the hardware store. Once cleaned, we applied two layers of primer to each side of the doors and to the outside of the cabinets themselves. We allowed the primer to dry one day and then we began painting them the next day. The color that we chose was a Martha Stewart "Wainscot White." It wasn't a true white, but was definitely not a cream either.

The hardware for the cabinets was purchased from Target. They have ten packs of knobs that very closely resemble the stuff at Restoration Hardware, but they only cost $14.99 for ten versus $5-10 each. The drawer pulls were $4.99 each (also purchased from Target) and they all were in oil rubbed bronze.

These are the cabinets after. What a difference a weekend can make! The cupboards are so beautiful and have brightened the kitchen up so much. Not only that, but the whole space feels so much larger because of the white cabinets. The walls were also painted a pretty gray blue to bring the more up-to-date feel to our space. We left our counters the same, but hope to one day replace them with a more high-end material (or at least make them look more high end).

We replaced our dishwasher with a new GE dishwasher that we purchased from Sears. It is the stainless steel look instead of the real stainless steel, so little hands can smudge away without mommy having to clean the surface as often. We actually won the dishwasher in an advertising contest that was sponsored by Sears. Technically, all of you AWESOME people helped us earn the dishwasher so we thank you for that. This one is so much prettier than the other one and better yet...it works! What a novel idea!
Next to my stove are hooks for my aprons. This was a great way to add some "art" to the walls without making an investment. $3.99 to display a few of my favorite things in the world.

We updated our stove with this fancy stainless steel number. It has everything I could ever want for this space and, while not free, I was able to get a killer deal on it. The stove was marked for $1K and I was able to get them to accept $500. Always pick those floor models, I say, and point out any and every flaw you can...even the stupid stuff. That is how we were able to score this stove.

The range hood was free and part of our Sears shopping spree that we won. Our refrigerator is the last of the white appliances to make an exit, but we are watching Craigslist to see if we can score a good deal on that.
Since cabinet storage was an issue, I was able to find an old ugly eighties desk with a hutch from a thrift store to remedy the problem. I did my makeover work on it and it is now my favorite piece in the house. This was cheaper than buying new cabinets and I just love how it is open for guests to grab their own dishes. The white dishes really make me happy and make me feel like a little Martha when I am entertaining! These dishes were priced at $14.99 for a service for six, including all of the serving dishes! They aren't the best quality, but I love the clean lines and design on them.

I also have my new china from my mother-in-law that looks so elegant on our tables. She recently brought this over to add to my dishes and I was so thrilled.

While it can make our seating a little more cramped, we did add a narrow table along the back wall to keep our computer. This has our dinner music on it and I can watch the television while I cook. The two plants on either side were purchased from Target, clearance to $14.99 each. The basket on the table, normally brimming over with fruit, is empty since I need to head to the grocery store. The basket was also a clearance item that I purchased from Marshalls along with some of the decor for our walls.
Like this piece that is centered along our back wall! This was a clearance item at Marshalls for $9.99. It got discounted with some of their summer pieces and I thought it would be a perfect focal point in that open spot.

I hope you enjoyed the tour of our kitchen!
We could not be more proud of the space we created...on a budget!

*Originally aired on January 2, 2008*

Labels: , , ,

ENJOYED THIS POST? SHARE IT WITH OTHERS:

Click to share on StumbleUpon STUMBLE This Click to share on kirtsy Add to KiRTSY Click to share on Mixx Add to MIXX Click to share on DeliciousIt's DELICIOUS

Weekend Project: New Workspace

Today we are continuing our week of Play it Again, Momma entries and today's focus will be on renovating your home on a budget. We have done a lot of work to our late sixties tri-level home and with each project, I feel a little more pride about our home. Our space might be limited, but each entry should showcase how we make our space work for us!

I am so excited because Ryan & I were finally able to complete another project on our to-do list... creating a workspace for two.

We have had a lot of challenges with the two of us both working from home and both working on the computer. We both needed computer time and we were constantly battling for the computer. One of my first investments was getting a laptop. Thanks to having a computer guy for a hubby, he was able to get me an excellent deal on a laptop and I was partially in business.

I say partially because we were still battling over workspace. I have back problems and would want to sit at a desk. He would need the desk for his computer so we would once again be duking it out for the workspace. One of us would be sitting at our children's tiny table trying to talk about work ideas and the other one of us would be sitting all comfy at the desk. We also had other scenarios where I would try to be productive working in my room and then fall asleep or I would attempt to work from the couch, but someone would want to watch television. In short, it wasn't working.

Finding a desk though that could fit our "team Clark" philosophy was tough and expensive! We decided to use some of the money that I earned this year to put towards getting a desk that would be perfect for us to work together.

We found what we wanted in the Pottery Barn catalog, but we aren't a Pottery Barn kind of family (budget wise, I mean). Ryan was able to find it for a fraction of the price on Target's website though and you can't even tell a difference between the two designs. He also found a deal where we got 15% off and free shipping. Timing it with that really helped save us some additional money. While it was definitely a splurge, it provided the perfect space for the two of us to work together.

Welcome to my new workspace- isn't it great? You can expand these pictures to view it in more detail. We purchased three cabinets and bought two desk tops to make our new work area. The two desk tops rest on the center cabinet and make one seamless unit. This set-up works great for us because we work together on many of our projects.

Not only is this great for working together, but it has created a lot more space in our office because it is all against one wall versus our corner desk that we had before.

This set-up was not without challenges because we had originally intended for it to go along our back wall and found that the unit was a lot larger than we had anticipated. We had to remove our closet doors and allow the unit to go basically into the closet space, which meant that this closet is now open and viewable to the world. I am not liking that too much, but it was a way to encourage us to weed through the items in the desk and in the closet to free up space and make it look more organized. I am thinking about making a curtain that would just partially hide this from view since a full set of curtains probably won't work.

I did tackle an enormous project though...those craft supplies are finally in order! That was no small undertaking and I am so happy to see everything neatly arranged. I even have space for my sewing machine so I can use my workspace to craft as well.

I organized the closet without making any investments. While I think pretty baskets would look so much better, the practical side of me won this battle and I am just using things we already have. If I add a curtain, I can close this off a bit and no one will even notice.

On the opposite wall we have my children's table and chairs. They can be in the office with us while we work and they can work on their own little projects. You can see past pictures of how we made our workspace kid-friendly.

This is an investment that I hope really pays off because we can both work together and each have our own space. Being productive, without a space to call your own, can be difficult. We love working together so this the ideal space for us!


*Originally aired February 18, 2008*

Labels: , ,

ENJOYED THIS POST? SHARE IT WITH OTHERS:

Click to share on StumbleUpon STUMBLE This Click to share on kirtsy Add to KiRTSY Click to share on Mixx Add to MIXX Click to share on DeliciousIt's DELICIOUS

Tuesday, September 02, 2008

Find An Inexpensive Hobby

In my basement are bins and bins of beautiful art supplies and oodles of crafty fun. I could spend years making things out of the items that I have already bought…and yet when I go to the craft store, I still feel that familiar tug that I really need more. I love to explore different hobbies and I love to craft. The fact that I am no good at crafting doesn’t seem to stop me and maybe you are in the same boat? Have you ever really thought about the amount of money you are spending on your hobbies? Have you ever thought about how most of the really popular hobbies cost lots of money to accomplish? Do you have oodles of craft supplies and still have an urge to buy more?

Hobbies are great for a number of reasons and I think they are important to be shared in this series. For one, if you have a hobby it can be a wonderful diversion from shopping and spending money. Hobbies can cost money, but you can choose to embrace hobbies and use your talents creating things that don't cost much. Although some people might consider shopping a hobby, it shouldn't be and finding things that fill your life in a positive way can have a positive impact on your wallet.

Not only do hobbies keep you away from shopping, your hobbies can also be turned into profits for your family. If you become good at one of your hobbies, you could potentially earn money with the talents that you have. For example, I love to create hair accessories for my daughter and my friend's love the accessories that I have made for her. I wasn't really intending to go crazy selling them, but my interest in making things for her created a small amount of revenue for me.

I can also use my hobbies to help us save our family money. Instead of buying a wreath for our front door, for example, I can make my own out of things in our home or by buying a small amount of greenery from a craft store. Learning to make things that you would buy can help your finances a lot!

Hobbies also have been proven to help people medically. People who are chronically stressed have poor health, while regular relaxation can promote good health. If I relax and really enjoy something in life, I can prevent things like high blood pressure, digestion problems, ulcers, heart disease, and insomnia. Having a relaxed attitude and enjoying the little things in life lead to better health and fewer doctor visits. Who could argue with that?

Hobbies don’t have to be expensive and many hobbies, in fact, don’t even cost a dime. I found a great book on exploring hobbies called (no less!), “Get a Hobby.” In it are tons of great ideas for hobbies that cost little to nothing and can keep you busy for months on end.

Here are some hobbies that you can pursue that shouldn’t cost you a lot of money and will help to keep you out of those craft stores:

Genealogy- Much of your research can come from things that you already have or from items in your relative’s possessions. Try to gather as much information as you can from your family members (names, birthdates, marriages, deaths, significant life events, etc…) and explore this information first. Next, look through old cookbooks, photo albums, newspaper clippings, resumes, scrapbooks, and yearbooks for more family information. You can then begin looking to websites like Genealogy.com or the Family History Library of the Church of Jesus Christ of Latter-Day Saints. Utilize this information to make a family tree.

Tina Barseghian, the author of “Get a Hobby” also suggests creating a living history interview with people in your family. Record them on camera or with a tape recorder and ask them questions about the family and about themselves. (Note: I am going to be exploring this more through another avenue of recording your life history and I can’t wait to share it with you all!)

Journaling & Blogging- To be honest, I have never really thought of my blog as a hobby, but I guess this would be one of the best hobbies I have ever taken on! Blogging and journaling are wonderful ways to preserve memories, to share your life story, or to talk about things you are passionate about.

After I went to a viewing of "The Secret" I began keeping a gratitude journal. For me, this has helped to remind me of all that I have and I also try to do this when I feel the impulse to shop. This has been very therapeutic for me and I feel like it has had a positive affect on my attitude too.

I try to keep all different types of journals that I look forward to sharing with my children. We have a journal of all the funny things that they have said, a Christmas journal, my gratitude journal, and then I do my blogging about things that we do around the house.

You can find beautiful journals at the dollar stores and for one dollar you can begin focusing on all of the wonderful things you have in life.

You can start a free blog through Blogger, My Space, or LiveJournal (just to name a few!)

These are just two examples of great hobbies that you could start today. There are tons others like gardening, cooking, sewing needlework, rubber stamping, decoupaging, or calligraphy.

If you need crafty inspiration, visit the Martha Stewart site and behold her crafting glory! I love to just hunt through the archives and see cool ideas that I can do in my house, that don't require a lot of money.

I also spend lots of time at our local library hunting through books on crafts that I would like to explore. Many times just reading about the crafts gives me a feel for whether or not I would like to try something, without making the time or money investment into the craft itself.

If you want to learn how to tackle new hobbies, check the big hardware stores (Home Depot or Lowes) for free classes that they offer. Many craft stores also offer free or very inexpensive classes, where you can try a hobby out.

Just remember when going into a hobby, that you really want a hobby that will not require a huge financial investment. If it will require an investment, tell family and friends what items you will need to accomplish the hobby or ask for a gift card to the store to buy the items. One year, I used my gift card to take a cake decorating course at our craft store. The time invested has helped me greatly and saved us lots of money on birthday cakes.

Potential Monthly Savings: $20 or more

Sound Off: What are your favorite hobbies? How do you save money when it comes to buying the supplies needed to do these?

*This entry originally aired on August 22, 2007*

Labels: ,

ENJOYED THIS POST? SHARE IT WITH OTHERS:

Click to share on StumbleUpon STUMBLE This Click to share on kirtsy Add to KiRTSY Click to share on Mixx Add to MIXX Click to share on DeliciousIt's DELICIOUS

Eat Your Heart Out Martha: Bubbly Magnets

Today I wanted to share a little holiday craft that I have been working on. I have been making some bubbly magnets to go in stockings and as small gifts for those special people in our life.

Remember, I am no Martha Stewart, so any craft that I share is something that a child can do. I am trying to share some little ideas for things that you can make to give for the holidays. Last week I shared my homemade spiced nut mixture and this week I am sharing my magnet craft. Crafting can be expensive, but this craft is affordable and highly addictive!

Supplies Needed:

Flat marbles (These can be purchased at the dollar store or in the floral section of your local craft store)

1/2" or 3/4" Round magnets (These are the most expensive purchase. I believe they are $6.99 for 50 magnets, but you can use the Michael's 40% off coupon in your paper towards this tab)

Modge Podge Adhesive Glue

A small paintbrush

Hot glue gun and glue sticks

Scissors

Pictures for your magnets (you can use photographs, wrapping paper, magazine pictures, scrapbooking paper- anything with a fun design)

Instructions:


Take your marbles and center it over your desired design, just to make sure it will fit perfectly under your marble. Dip your brush into the Mod Podge glue and brush the glue onto your design. Center your marble over the design and stick it to the pattern. Allow the glue to dry for fifteen to twenty minutes. If you are doing more than one magnet, on the same sheet, repeat the process on the paper or move on to your next sheet of paper.

Once your glue has dried, cut around the marbles, as close to the edges as possible. Now take your glue gun and dab a bit of glue on the magnet and attach your marble over the magnet piece. Allow these to dry completely.

Ta-Da! Cute new magnets for your fridge!

* This post originally aired on October 15, 2007*

Labels: , ,

ENJOYED THIS POST? SHARE IT WITH OTHERS:

Click to share on StumbleUpon STUMBLE This Click to share on kirtsy Add to KiRTSY Click to share on Mixx Add to MIXX Click to share on DeliciousIt's DELICIOUS

Eat Your Heart Out Martha (Or How to Make a Diaper Cake)

Welcome to a Play It Again, Momma week! This week we will be highlighting some of our favorite entries and today's entries will be all about crafting. What could be better than that? I hope you will enjoy these and remember, if I can craft it, your kid can craft it!

If you can believe it, I have been sitting on this blog entry for a year now. I only know this because the cakes that I have pictured were for my nephew and my best friend's son and they are both celebrating their first birthday!

Even though I haven't shared about this, my heart swells a little because I was so proud to carry such a pretty gift into the hospital. I felt even more proud when the nurses stopped me and asked me where I bought it. It was one of my proudest Martha moments because I am not very crafty, but I try oh-so-hard to have those impressive moments in my life.

Making a diaper cake is so easy and the results are extremely impressive! I had seen many companies advertising these on their websites, but they were charging fifty dollars (or more!) for these cakes. I ran a search and ran across this great picture tutorial on how to do it, and decided that it was definitely something I could do with just a couple of small purchases.

For my diaper cakes, I needed to establish a base for them so that I could transport them easily. I found a box in our garage and cut a square of cardboard out of it to rest the cake on. I then covered the cardboard with pretty wrapping paper in blues & pinks.

Next I followed the instructions for making the first diaper layer and used a stretchy headband that I had to bring the base diapers all together, making the first layer of the cake. It had suggested using a rubber band, but I didn't have any that would secure that many diapers together. I then wrapped pretty ribbon around it and tied them together with that, securing them together with white tipped pins, which made it look like part of the ribbon itself. With the next two layers, I was able to use a rubber band to put them together, and then covered the rubber band with the ribbon.

Once you have all of your layers, you can stack them and stick a dowel rod in the center, or anything that is long and will help them stay jointed together.

I went to Target and found little man blazers that would be perfect to go with the cake. I pinned these to the back and stuck a little stamped card in the pocket that said, "Congratulations!"

Next I went to the dollar store to buy some shrink wrap and two sets of wooden blocks (over by the baby supplies). I spelled out BOY on each of them and saved the rest of the blocks for our daughter to play with.

Shrink wrapping is very easy! Take the bag and pull it over your item and hold it at the top. Turn your blow dryer on and blast it until the wrapping shrinks tightly to fit your item. Use the bow that is supplied, or tie off with a bow of your own!

Diaper cakes can have small items tucked in the center of them from the mom's registry or you can go with a themed cake. Remember, the more items you add, the more you add to your cost. If you are trying to keep the cost down, keep it simple.

Here are a few theme ideas:

Bath time Cake- add a baby towel, tuck washcloths in the center and put a Rubber Ducky on top. You can also add small bath toys or bubble bath.

Elegant Cake- Make your diaper cake look like a wedding cake, and surround it with fresh or silk flowers. People will hardly believe their eyes when they see it.

Beach time Cake- This would be for a little later in the baby's life, but you can fill it up with beachy items. Some suggestions are a shovel, pail, baby sunglasses, a hat and some sunblock.

Night-Night Baby- Include a copy of, "Goodnight, Moon" with this cake. Add a little sleeper set, some calming nighttime lotion, and a compact disc of sweet baby lullabies.

The cost for each of these was:

Diapers- Free! they were given to us as a gift and Emily wore cloth so we never used them!
Diaper Cake Base- Free- made out of an old cardboard box we had!
Ribbon- $1.98
Little Man Blazer- Clearanced out for $2.98 at Target! Gotta love those clearance items!
Shrink Wrap & Baby Blocks- $2

Total Cost= $6.96

Sound Off: Would you guys like to see more, "Eat Your Heart Out, Martha!" moments on here? I have one a year, but I am happy to share the few I do have! I hope this gives you another thrifty gift alternative!

Labels: , ,

ENJOYED THIS POST? SHARE IT WITH OTHERS:

Click to share on StumbleUpon STUMBLE This Click to share on kirtsy Add to KiRTSY Click to share on Mixx Add to MIXX Click to share on DeliciousIt's DELICIOUS

Monday, September 01, 2008

Ask the Frugal Momma: Getting to Know the Bread Machine

You have been talking about bread machines and making bread. I am interested in doing this since I am home all the time and I love fresh bread.

I was at the Goodwill and saw many of them and they were kind of cheap, like 20.00 or less. I am dumb so help me out. Does the machine knead the dough and bake it and everything in the bread machine?

If I would purchase one at the Goodwill how would I know if it works or not?

I am interested. Please help me find a way in a new venture.


Signed,
Future Bread Maker

First of all, thank you for your question! The Ask Frugal Momma column can't happen without your questions, so please keep sending them my way. You can email any and all questions to [email protected]. We have had some fun topics and I am very excited to share with everyone!

Do any of you have bread machine gathering dust in your house? A lot of people buy these appliances and then end up donating them at their local thrift store because they never use them. I think of the bread machine as a modern day convenience, but in a culture where we want everything NOW, waiting for a loaf of bread can seem like an eternity. Why wait for a hot loaf of fresh bread when you can grab a loaf at your supermarket? And what exactly is the purpose of that appliance that is taking up space on your shelves?

On any given day in our house, you will find our bread machine happily humming along and whipping up fresh dough and bread for us. We use our bread machine almost daily, and spare ourselves the expense of fancy bakery breads. Not only that, but our bread machine has a regular performance in our house on Friday nights. This appliance makes our favorite pizza dough for our official “family night” together.

The purpose of a bread machine is to be able to make fresh bread when you want it. The reasons vary from person to person on why they choose to make their own bread. Many people have concerns about the additives and preservatives that are found in store-bought breads. Another reason that many people choose to make their own bread is because they just enjoy the taste of homemade bread. My reasoning for making our own bread is because I like to save our family money. Making your own bread costs so much less than purchasing a loaf of bread, and the rising grocery costs have only fueled my desire more to make it at home.

I am not a baker though and our days seem to be jam-packed with activities for our family. Taking the time to knead, rise, and bake bread…well, that hasn’t seemed to top the priority list at this point in my life. Lucky for me, there is an appliance that can do all the work for me and all I have to do is pull the finished loaf or ball of dough out.

To begin, all you have to do is put the ingredients in and select your setting. Some of the older machines have just a handful of simple settings. I find that the settings we use most on our machine are Basic and the Dough cycle, which can be found on every machine. The basic cycle is just the basic setting for making a loaf of bread. The Dough cycle just completes the kneading and rising of the dough. Once the dough cycle is complete, you can take the dough out and shape it into your loaf pan or do fancy braids or rolls out of the dough.

Inserting your ingredients into a bread machine is also very straightforward. If you are making the loaf right away, you can insert the ingredients in any way that you want. All of these ingredients will immediately be stirred together and so it will not matter what the order is. If you use a timer delay on your bread machine, delaying the start time of making your loaf, it is imperative that you put the ingredients in the right order or your loaf will not turn out right. The order of ingredients is liquid (liquids include water, oil, milk, eggs, or honey), flour, other dry ingredients (salt, sugar, baking powder, seasonings), and ending the ingredients with your yeast. The most important part of putting the yeast in is to make sure that you make a small indentation into the center of the flour so that the yeast does not react with the other ingredients.

Upon inserting your ingredients, your bread machine will take over the process from there. The machine will knead the ingredients together, give the bread its rising time, and then it will bake the bread. The bread machine will signal when the bread is ready and you can allow the bread to cool inside of the bread bucket.

There is no need to spend the money on convenience bread machine mixes; in fact, you can make your own convenient mixes handy for the week. I take plastic storage bags and make an assembly line of the dry ingredients and do my bags once a month. On the outside, just write what liquids you will need to add and you will only have a dirty kitchen once.

A quick glance at grocery store prices though and you will wonder how there could be any possible savings with making your bread at home. The key to making this the least expensive on your family is to purchase all of your ingredients at your local wholesale club. With proper storage, you can buy the ingredients in bulk and save your family loads of money. For example, our wholesale club has twenty-five pounds of bread & all-purpose flour for under $6 each. Two pounds of yeast will run you just under $4. What a difference compared to the prices in your regular supermarket!

For storage, flour can be stored for up to a year in an airtight container. With bulk storage, a large plastic bin that has been clearly labeled is ideal to keep your flour fresh. Yeast is the easiest ingredient to store and has a very long shelf life. I store my yeast in a clear jar in our refrigerator door. With both of these ingredients, writing an expiration date on the label will also remind you of when the item is going to expire.

If you do not have a bread machine and are looking for one, garage sales and thrift sales are a great place to hunt. I see these machines for $10 or less, and you will definitely get your money back from the savings of making your own bread. When you find one, ask if you can plug it in and make sure it is working. Just check that it actually powers up, that there is a bread bucket inside, and that there is a paddle in the bottom of the bread machine to stir the ingredients. Having a manual with it is handy, but usually can be found by searching online.

Good luck in your quest to find a bread machine and I hope it is a well-loved appliance in your home!

Related & Helpful Information:

Hillbilly Houswife's Bread Machine Basics

Buttery Bread Machine Rolls

My Favorite Pizza Dough (after much trial & error)

Storing Homemade Bread & Bread Ingredients

Homemade Croutons

Dinner is in the Bag


* This post originally aired on June 28, 2007*

Labels: ,

ENJOYED THIS POST? SHARE IT WITH OTHERS:

Click to share on StumbleUpon STUMBLE This Click to share on kirtsy Add to KiRTSY Click to share on Mixx Add to MIXX Click to share on DeliciousIt's DELICIOUS

Best Birthday Cupcakes In the World

My sister-in-law's boyfriend celebrated his birthday Friday night. To help out with the evening's festivities, I offered to make the cupcakes for his special day. I found a recipe in my favorite cupcake book, "Cupcakes from the Cake Doctor" and picked her "Best Birthday Cupcakes" recipe.

These cupcakes are as close to a bakery cupcake as I will probably ever make. They are light and sweet, but not too sweet. They have a great consistency and are perfectly moist and sturdy enough to hold up to a good dose of yummy frosting.

I will probably never search for the perfect birthday cupcake again after sampling these. I paired the cupcake with her Chocolate Syrup Frosting which was the perfect way to top this delicious cake.

No more searching, ladies! This is THE cupcake for every celebration. Enjoy!!


The Best Birthday Cupcakes

24 paper liners
1 package plain butter recipe golden cake mix (I subbed with white and loved it!)
1 package (8 ounces) reduced-fat cream cheese, at room temperature
1/2 cup sugar

1/2 cup water
1/2 cup vegetable oil
4 large eggs
1 tablespoon pure vanilla extract
Chocolate Syrup Frosting (recipe to follow)
Colored sprinkles or candy cake decorations for garnish

Place a rack in the center of the oven and preheat to 350 degrees. Line cupcake cups with liners. Set the pans aside. Place the cake mix, cream cheese, sugar, water, oil, eggs, and vanilla in a large mixing bowl. Blend on low speed with an electric mixer for 30 seconds, until the ingredients are well blended then stop the machine and scrape down the sides. Increase the mixer to medium speed and beat for 1 1/2 minutes to 2 minutes more, scraping down the sides again if needed. The batter should be smooth and thickened. Spoon or scoop 1/4 cup batter into each lined cupcake cup, filling it two thirds of the way full (You should get between 22-24 cupcakes). Place the pans in the oven. Bake the cupcakes until they are golden and spring back when lightly pressed with your finger, 24-27 minutes. Remove pans from oven and place them on wire racks to cool for five minutes. Run a dinner knife around the edges of the cupcake liners, lift the cupcakes up from the bottoms of the cups using the end of the knife, and pick them out of the cups carefully with your fingertips. Place them on a wire rack to cool fifteen minutes before frosting. Meanwhile prepare your frosting...


Chocolate Syrup Frosting

1 stick butter, at room temperature
1/2 cup unsweetened cocoa powder
1/2 cup chocolate syrup
3 cups confectioner's sugar, sifted
1 tablespoon milk
1 teaspoon vanilla extract

Place the butter, cocoa powder, and chocolate syrup in a large mixing bowl. Blend with an electric mixer on low speed until just combined (about 30 seconds). Stop the machine and add the sugar, milk, and vanilla. Blend with the mixer on low speed until the sugar is incorporated, 1 minute. Increase the speed to medium and beat until light and fluffy, 1 minute more. Use to frost your cupcakes.


*This post originally aired on October 8, 2007*

Labels:

ENJOYED THIS POST? SHARE IT WITH OTHERS:

Click to share on StumbleUpon STUMBLE This Click to share on kirtsy Add to KiRTSY Click to share on Mixx Add to MIXX Click to share on DeliciousIt's DELICIOUS

Snickerdoodle Cupcakes

Welcome to a Play It Again, Momma week! This week we will be highlighting some of our favorite entries and today we kick off the week with three great recipes. I hope you will join me this week as I highlight some oldies, but goodies!


We had a reason to celebrate this week because my husband started a new job. We are so grateful that he has been given this opportunity and that he will be able to start a new adventure on his career path.

We wanted to do something to celebrate his first day of work so we made him one of his favorite treats...Snickerdoodle Cupcakes!

These are so delicious and I got the recipe from one of the Cake Doctor books. It has been a favorite in our house for several years and a frequent request for family birthdays.

The cake has just the right blending of flavors and the cake mix make these easy to whip up for unexpected company. It is the cinnamon frosting that pushes it over the top though so take the time to make the icing from scratch since you are saving time on the cake by using the mix!

I hope you can try these in your house- let me know what you think!

Snickerdoodle Cupcakes (these can be made into a cake too- whichever you prefer)

1 package plain white cake mix
1 cup whole milk
1 stick of butter, melted
3 large eggs
1 teaspoon vanilla extract
2 teaspoons ground cinnamon

Frosting:
1 stick butter
3 3/4 cup confectioners sugar
3-4 Tablespoons milk
1 teaspoon vanilla extract
1 Tablespoon ground cinnamon

Preheat oven to 350 degrees and flour & grease 2 9" pans (for cakes) or line your cupcake tin. Place cake mix, milk, melted butter, eggs, vanilla, and cinnamon in a large mixing bowl. Blend for three minutes (stop to scrape once). Pour into pans and bake for 27-29 minutes (for cake) or 22-25 minutes (for cupcakes). Allow the cakes to cool completely.

Beat butter until fluffy for frosting. Add all other ingredients.

Note: I froze half of these (without frosting) to keep in our freezer for another occasion. They freeze very nicely!

Labels:

ENJOYED THIS POST? SHARE IT WITH OTHERS:

Click to share on StumbleUpon STUMBLE This Click to share on kirtsy Add to KiRTSY Click to share on Mixx Add to MIXX Click to share on DeliciousIt's DELICIOUS