Tuesday, March 03, 2009

Play It Again, Momma: Getting to Know Your Bread Machine
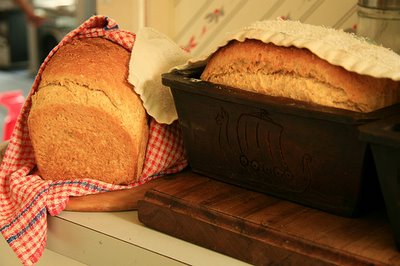

You have been talking about bread machines and making bread. I am interested in doing this since I am home all the time and I love fresh bread.

I was at the Goodwill and saw many of them and they were kind of cheap, like 20.00 or less. I am dumb so help me out. Does the machine knead the dough and bake it and everything in the bread machine?

If I would purchase one at the Goodwill how would I know if it works or not?

I am interested. Please help me find a way in a new venture.


Signed,
Future Bread Maker

First of all, thank you for your question! The Ask Frugal Momma column can't happen without your questions, so please keep sending them my way. You can email any and all questions to [email protected]. We have had some fun topics and I am very excited to share with everyone!

Do any of you have bread machine gathering dust in your house? A lot of people buy these appliances and then end up donating them at their local thrift store because they never use them. I think of the bread machine as a modern day convenience, but in a culture where we want everything NOW, waiting for a loaf of bread can seem like an eternity. Why wait for a hot loaf of fresh bread when you can grab a loaf at your supermarket? And what exactly is the purpose of that appliance that is taking up space on your shelves?

On any given day in our house, you will find our bread machine happily humming along and whipping up fresh dough and bread for us. We use our bread machine almost daily, and spare ourselves the expense of fancy bakery breads. Not only that, but our bread machine has a regular performance in our house on Friday nights. This appliance makes our favorite pizza dough for our official “family night” together.

The purpose of a bread machine is to be able to make fresh bread when you want it. The reasons vary from person to person on why they choose to make their own bread. Many people have concerns about the additives and preservatives that are found in store-bought breads. Another reason that many people choose to make their own bread is because they just enjoy the taste of homemade bread. My reasoning for making our own bread is because I like to save our family money. Making your own bread costs so much less than purchasing a loaf of bread, and the rising grocery costs have only fueled my desire more to make it at home.

I am not a baker though and our days seem to be jam-packed with activities for our family. Taking the time to knead, rise, and bake bread…well, that hasn’t seemed to top the priority list at this point in my life. Lucky for me, there is an appliance that can do all the work for me and all I have to do is pull the finished loaf or ball of dough out.

To begin, all you have to do is put the ingredients in and select your setting. Some of the older machines have just a handful of simple settings. I find that the settings we use most on our machine are Basic and the Dough cycle, which can be found on every machine. The basic cycle is just the basic setting for making a loaf of bread. The Dough cycle just completes the kneading and rising of the dough. Once the dough cycle is complete, you can take the dough out and shape it into your loaf pan or do fancy braids or rolls out of the dough.

Inserting your ingredients into a bread machine is also very straightforward. If you are making the loaf right away, you can insert the ingredients in any way that you want. All of these ingredients will immediately be stirred together and so it will not matter what the order is. If you use a timer delay on your bread machine, delaying the start time of making your loaf, it is imperative that you put the ingredients in the right order or your loaf will not turn out right. The order of ingredients is liquid (liquids include water, oil, milk, eggs, or honey), flour, other dry ingredients (salt, sugar, baking powder, seasonings), and ending the ingredients with your yeast. The most important part of putting the yeast in is to make sure that you make a small indentation into the center of the flour so that the yeast does not react with the other ingredients.

Upon inserting your ingredients, your bread machine will take over the process from there. The machine will knead the ingredients together, give the bread its rising time, and then it will bake the bread. The bread machine will signal when the bread is ready and you can allow the bread to cool inside of the bread bucket.

There is no need to spend the money on convenience bread machine mixes; in fact, you can make your own convenient mixes handy for the week. I take plastic storage bags and make an assembly line of the dry ingredients and do my bags once a month. On the outside, just write what liquids you will need to add and you will only have a dirty kitchen once.

A quick glance at grocery store prices though and you will wonder how there could be any possible savings with making your bread at home. The key to making this the least expensive on your family is to purchase all of your ingredients at your local wholesale club. With proper storage, you can buy the ingredients in bulk and save your family loads of money. For example, our wholesale club has twenty-five pounds of bread & all-purpose flour for under $6 each. Two pounds of yeast will run you just under $4. What a difference compared to the prices in your regular supermarket!

For storage, flour can be stored for up to a year in an airtight container. With bulk storage, a large plastic bin that has been clearly labeled is ideal to keep your flour fresh. Yeast is the easiest ingredient to store and has a very long shelf life. I store my yeast in a clear jar in our refrigerator door. With both of these ingredients, writing an expiration date on the label will also remind you of when the item is going to expire.

If you do not have a bread machine and are looking for one, garage sales and thrift sales are a great place to hunt. I see these machines for $10 or less, and you will definitely get your money back from the savings of making your own bread. When you find one, ask if you can plug it in and make sure it is working. Just check that it actually powers up, that there is a bread bucket inside, and that there is a paddle in the bottom of the bread machine to stir the ingredients. Having a manual with it is handy, but usually can be found by searching online.

Good luck in your quest to find a bread machine and I hope it is a well-loved appliance in your home!

(photo credit: Koropop)


Related & Helpful Information:

Hillbilly Houswife's Bread Machine Basics

Buttery Bread Machine Rolls

My Favorite Pizza Dough (after much trial & error)

Storing Homemade Bread & Bread Ingredients

Homemade Croutons

Dinner is in the Bag

Adventures in Bread Making: Artisan Bread in 5

Adventures in Bread Making: Fiddlin' With Temperatures

Let's talk about it! Do you use a bread machine or do you make your bread the old school way? Feel free to share your bread machine recipes here!

Labels: , ,

ENJOYED THIS POST? SHARE IT WITH OTHERS:

Click to share on StumbleUpon STUMBLE This Click to share on kirtsy Add to KiRTSY Click to share on Mixx Add to MIXX Click to share on DeliciousIt's DELICIOUS

Wednesday, October 22, 2008

Play it Again, Momma: Fun Family Game Nights

Our family loves to play board games and after we had children, we began to play them a lot more. We are usually home more in the evening, so we pop some popcorn and catch up on our television shows while we play.

I try to get our board games at our local thrift store because it is a great way for me to try them out without making a huge investment. Sometimes I buy games and we discover that it isn't something we would want to play over and over again. When they cost us only $1.50, it makes it much easier to donate it back and try something else out.

You might be able to do this without even making a small investment by checking with your local library. Our library actually has games and toys that you can rent for your children. We were able to try some games out for our son and found that he either didn't like them or they were way too advanced by just checking them out for a week. We were able to return them and then try them at a later date with him, when they were more age-appropriate.

Starting your own game collection does not have to be expensive. If you don't have somewhere that you can buy them secondhand, ask for these as a family Christmas gift or ask for them for your children as birthday gifts. Some of the best childhood games are Candyland, Chutes & Ladders, Memory, Hungry Hungry Hippos, Life, and Clue.

Games are a great way to bond with your family and are a inexpensive "date night" with your spouse. We try and devote (at least) one night a week towards playing a game together and enjoy playing these games on the weekend.


These are a few of our favorite games:


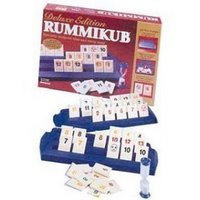
1. Rummikub: This is a game that my husband loved to play when he was growing up, and now he has me addicted to it too! The game is intended for ages eight and up and can be played with two or more players. With rules similar to gin rummy, Rummikub is a classic tile game that's guaranteed to get at least a million kid-hours of use in any family. Players take 14 numbered tiles and try to get rid of them as fast as possible by creating runs (for example, 7-8-9) and sets (7-7-7). The link provided is for their deluxe edition (which we do not have). This deluxe edition is cleverly designed so that the four plastic tile racks fit together to form a carrying case for the game.

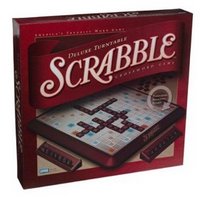
2. Scrabble- What is not to love about this game? Intended for two players or more and recommended for ages eight to ninety-nine, you can play this game for years with your children. The game has been improved with a swivel board (less stretching required!), raised holders to rest the tiles into, and a bag to store all of the tiles. This is one of my personal favorites and we play this a lot in our house. Don't forget to purchase a copy of the Scrabble Dictionary and store it with your game board. Take some time to study some words and really beat your opponents! Want to see what Scrabble obsession looks like? Rent the movie, "Word Wars." It is all about the Scrabble championships that are held and people who attempt to make a living from this sport.

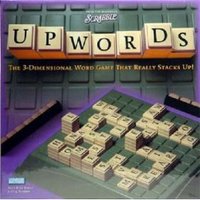
3. Upwords- Along the same vein, this is another fabulous word puzzle game, but with a twist. You build words just like Scrabble, but you can build up and up (five letters high) to change words into new words. The more you stack, the more points you earn. I think it is more challenging than Scrabble, but the scoring is much easier to do. This game is for two players or more and recommended for ages eight and up. This game can be a powerful tool when your children are beginning to read because it can help teach them how to change words using different letters. Consider it a cheap version of "Hooked on Phonics" and a game that they can enjoy for years after they have learned to read!

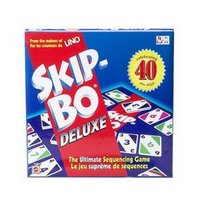
4. Skipbo- This was my favorite game growing up and my sister & I would play this for hours and hours. Created by the makers of UNO, this card game is a delight for anyone of all ages. The game is a sequencing game of skill and strategy intended for two players or more and ages seven and up. Players create sequential stacks with cards on the board, the first player to use all the cards in their stack wins. The deluxe edition has a board with placeholders for all of the stacks of cards and score sheets to keep tabs of the winners. I love this game because it is easy to still have conversations while playing, making it a great game to socialize with other couples.

5. Yahtzee- A classic game of dice that has been around since 1956 and is still played in millions of homes today. You can play alone (which I don't think would be as much fun) or with more players. The ultimate in this game is to actually get Yahtzee or five of a kind. This game is so much fun and also a great teaching tool for children. Children can learn basic addition and subtraction, as well as sequential ordering.


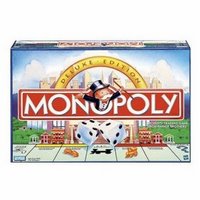
6. Monopoly- I had never played this game until high school, and I can honestly say that my husband is always the winner, which is why we don't play it as much! This game is a great teaching tool in money-management and in buying real estate. We have a couple of different versions of this game, but my favorite is the Dot Com Monopoly, which we purchased when Dot Coms were ruling the world. Few of the companies on the board exist anymore, which makes for interesting conversation and fond memories before the dot com bomb hit for computer nerds and geeks alike!


We have many more games in our collection and the last time I hit the thrift store, I picked up another stack of new ones. Our collection keeps growing and we hope to have a game collection that our kids will enjoy someday with their friends. In a day of technological bliss, game nights now seem "retro." Why play on a board when you can just grab your game system or play a computer game online? I hope that board games will last the test of time because they can be an essential part of family bonding and creating a family night to remember!

What are your favorite games? Any games that I should be adding to our collection?

Labels: , , ,

ENJOYED THIS POST? SHARE IT WITH OTHERS:

Click to share on StumbleUpon STUMBLE This Click to share on kirtsy Add to KiRTSY Click to share on Mixx Add to MIXX Click to share on DeliciousIt's DELICIOUS

Tuesday, September 23, 2008

Clay Cookery: A Frugal Chef's Dream Come True


A long time ago, I read a post from Meredith, at Like Merchant Ships, about her clay cooker. Since her post, I have been on the lookout for a clay baker of my own, but have not seen one on any trip to the thrift shops. I am sure that I probably passed a million, not knowing what the heck they were, but when I finally figured it out...there were none to be found.

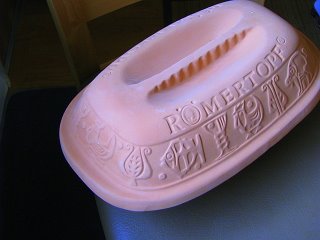
Until last week, that is! I actually spotted two of them sitting together on a shelf. I lunged to grab one and took home the one that was in the best condition. It was marked for six dollars, a bit more than I usually spend on a single item in housewares. After months and months of waiting though, I was willing to fork over the six dollars.

The lid was tightly taped shut and, I prayed that there was nothing wrong inside of it. What I discovered was that the clay cooker had never been used and all of the information packets were neatly tucked inside waiting for the next owner.

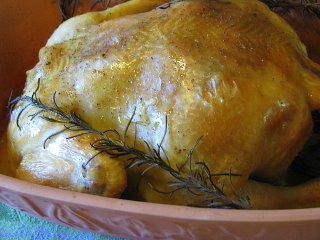
Today we roasted a chicken for our family in it. A good old Aldi chicken was stuffed with rosemary from my garden and seasoned with a little salt and pepper. I slid the chicken into the cold oven, after soaking my baker in water, and baked it at 450 degrees for 85 minutes.

I had read the packets cover to cover, praying that I wouldn't screw it up. Would the chicken really be moist and flavorful? Would it be brown or would it be light in color like my slow cooker chickens? Was it really true that it didn't require liquids?

We held our breaths as I lifted the lid...

What was unveiled was better than I had imagined. A juicy and flavorful chicken- full of color and just as good as any chicken I have bought in a store.

After we were all done applauding... well, maybe that didn't really happen, but I will say that we were all really impressed with just how good that chicken tasted.

I can't wait to try other things in the clay cooker and, just in case your thrift store find does not come with a booklet, here are a few of the tips that were provided for using your clay baker:

  • Soak it in water- Completely immerse the top and bottom in water for ten to fifteen minutes before each use.
  • Place in a cold oven- After adding the ingredients, place your clay baker in the center of the cold oven.
  • Time cooking according to your own preferences and oven- tastes and ovens vary. Time your dishes according to the way you want them and don't hesitate to vary the recipe slightly. Recipes usually can be converted for clay pots by increasing the cooking temperature by 100 degrees and deducting a 1/2 hour of cooking time.
  • Put the clay cooker on a cloth when you remove it from the oven- Sudden changes in temperature should be avoided. When the clay baker is removed from a hot oven, place it on a towel, hot pad, or wooden board rather than a cold surface.
  • Clay bakers are ideal for the microwave- Because microwaves vary to such a great degree, it is impossible to state any rules for converting recipes for the microwave. Use the oven manufacturer's guidelines for cooking times.
  • Clean with a hot water and a brush- Use hot water and a stiff brush to clean your clay baker. A little baking soda will cut any grease. Translation: NO SOAP! Never scour with a scouring powder or metal scouring pad. It can block some of the pores of the clay, reducing the water absorption.
  • Don't use it on an open flame- It is designed only for the oven.
  • Place the lid upside down on top of base when storing- When the clay baker is not in use, keep it in a place where the air circulates. Place the lid upside down on top of the base, so the air can reach inside the bottom.
But, why is a clay baker helpful for a frugal cook? Here are a few reasons I think this can be a good addition to the kitchen:

  • Cooking food in a cooker requires no additional liquids. It pulls all the natural juices out of your dishes so no need to add cans of chicken stock or extra ingredients to make your food flavorful.
  • Clay bakers allow you to prepare quick, healthy, high quality meals that cost less and taste better. My Aldi chicken looked and tasted better than any other preparation I have tried before and it browned the chicken beautifully without any extra steps at all!
  • You can cook very nutritiously. You can cook all kinds of foods without adding any fat. Due to the low cooking temperature the aroma, vitamins and minerals are preserved within your food. As someone who is trying to eat well, this is an important feature for me!
I can't wait to try other things in this clay baker and I hope you can score one of your own for your kitchen!

Have you ever tried cooking in a clay baker before? If not, what are some items you use in your kitchen that may seem unconventional to others, but have saved you time or money?

Labels: , , , ,

ENJOYED THIS POST? SHARE IT WITH OTHERS:

Click to share on StumbleUpon STUMBLE This Click to share on kirtsy Add to KiRTSY Click to share on Mixx Add to MIXX Click to share on DeliciousIt's DELICIOUS

Wednesday, September 03, 2008

What a Difference a Day Makes

I decided to hit the thrift store this Saturday in search of a china cabinet or unit where I could rest my laptop for our kitchen. I have been hunting for awhile, but just haven't seen anything with the good bones that I was looking for. I walked around for awhile before I saw IT. You know? The one! The one that I have been hunting for ages looking for? Well, I basically threw my body upon an old eighties cabinet and requested the crew help me load it in my vehicle. The cost was only $99 and the units that I had been looking at in the stores were a minimum of $250 and upwards of $600. This piece looked like it was going to be perfect and I headed over to the hardware store and got all of the supplies to tackle this project.

I was inspired by Meredith's recent post about a project that was done on Notes from a Cottage Industry. This blogger had painted her unit black and had gotten hers for a mere fifty bucks and made it look like a million.

This was my first attempt at refinishing a piece of furniture and I was pretty nervous at first, but my tentative paint strokes turned to fast swipes as I became more confident with what I was doing.

This particular piece was a knotty oak wood and had worn brass handles on it. We prefer a more contemporary look with clean lines and a silver finish to our pieces so that is what I wanted to achieve when I refinished this piece.


I decided to leave the piece with the knots in the wood, opting to skip the spackling step altogether, and purchased a primer tinted grey to give us a good start on the piece.

I sprayed the unit with a liquid degreaser to get all of the grime and muck of off the wood. Next I primed it with primer and allowed that to dry for a couple of hours. The next step was to put on the black paint and then another coat. Then another coat. Finally, another coat was applied before I could do the final touch-ups to the wood.

The hardware was the type that had been dropped into the a cut-out in the wood of the piece so there was no way that I could replace it. The worn dingy handles received a face-lift with a coat of stainless steel spray paint that was made especially for metal. Fifteen minutes to dry and only four dollars to redo all of the hardware. We are going to be spraying some other ugly brass fixtures around our house that need a little TLC, rather than purchasing new pieces which would cost us a lot more.

I started the project at six o'clock in the evening and painted until 2:30 in the morning. I collapsed in bed and then picked it back up at nine and had it fully assembled with my dishes and cookbooks on it by six the next evening.

It was a bear of a project, but I can't stop glowing or patting myself on the back for what I accomplished in a single day. The unit is absolutely enormous and I did all of this by myself with the only help from my husband being the help with moving and reassembling it.

The finished product reminds of something you would get at Pottery Barn or Restoration Hardware and I doubt that it would be only $99!

The history of the piece was as interesting as the furniture was itself. A quick discussion with one of the employees seemed to indicate that it was repossessed. After pulling it all apart we found a very mysterious hole that at been cut out of the bottom. A hole that would have no purpose except to hide something. Weed, perhaps? Who knows!

What has been your biggest accomplishment that you have done in or around your house? Have you ever attempted to refurbish a thrift store or yard sale piece? Any blunders refurnishing anything?

* Originally aired April 2, 2007*


Labels: , , ,

ENJOYED THIS POST? SHARE IT WITH OTHERS:

Click to share on StumbleUpon STUMBLE This Click to share on kirtsy Add to KiRTSY Click to share on Mixx Add to MIXX Click to share on DeliciousIt's DELICIOUS

Tuesday, April 01, 2008

Cute Jewelry Holder & Jewelry Cleaner Recipes

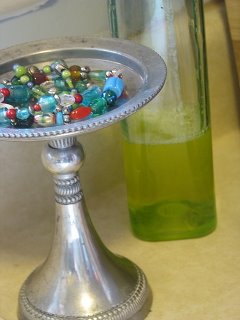
I like to keep a little dish by my sink to put my jewelry in while I am doing the dishes. I also love to thrift shop so I put my love for thrift and my little dish together and came up with this cute little idea.

I use a thrifted candle holder to put my jewels in. They look so pretty and, if the edge has a nice lip on it, it is a safe way to keep your jewels out of harms way. It also makes your jewelry a pretty display while you are scrubbing your little heart out and cursing your family for not helping you... or praying- whatever you happen to do while washing the dishes.

And, if you so choose, you could also be cleaning your jewelry while scrubbing your heart (as you curse your family or pray).

Here are two handy little recipes to keep tucked away for that special day!

Homemade Silver Jewelry Cleaner:

In a bowl, place strips of aluminum foil in and place your silver jewelry on top of them. Cover the silver with boiling water and then add three tablespoons of baking soda and soak for ten minutes. Mix remaining hot water and a drop of liquid soap into another glass bowl. Place your silver in the soapy water and wash. Rinse with clean water and polish dry your pieces with a soft cotton cloth. Please take care, some solutions that are great for some metals and stones may damage others.

(Side Note- I use this solution for cleaning all my silver jewelry and have never had any problems. This works like a dream!)

Homemade Gold Jewelry Cleaner:

Fill a small bowl with warm water and a drop of liquid dish soap. Allow this to soak for approximately ten minutes. Proceed to brush the pieces with an eyebrow brush (or a similar substation such as a toothbrush) while they are being soaked. Then you should transfer the gold jewelry to a strainer and then proceed to rinsing it off with warm water. Finish by drying with a soft cotton cloth.

Labels: , , , ,

ENJOYED THIS POST? SHARE IT WITH OTHERS:

Click to share on StumbleUpon STUMBLE This Click to share on kirtsy Add to KiRTSY Click to share on Mixx Add to MIXX Click to share on DeliciousIt's DELICIOUS

Monday, October 22, 2007

Thrifty Treasures: Autumn Container

I found this container when I hit our local Goodwill this past Friday. Saturday was their official half off day, but my husband was going to be gone all day and I was not about to brave the crowds with two little ones to take care of.

Lucky for me, they had discounted their seasonal items down to 75% off the day before their big sale day. This beautiful glass container ended up costing me less than a dollar after I got my discount.

I filled it with marshmallows and placed it on a serving tray along with hot cocoa and freshly popped popcorn. It was a fun treat for a freezing cold evening and a great way to start our weekend. I always try to do a special snack and the marshmallows looked so pretty in this!

I am going to have fun filling it with all sorts of fun goodies and it is the perfect size to be functional, but not take up too much room in our house.

Labels: , ,

ENJOYED THIS POST? SHARE IT WITH OTHERS:

Click to share on StumbleUpon STUMBLE This Click to share on kirtsy Add to KiRTSY Click to share on Mixx Add to MIXX Click to share on DeliciousIt's DELICIOUS

Thursday, October 18, 2007

Be a Wrap Superstar: Tailor Your Gift

Last week I started a series of posts on wrapping your holiday gifts. I shared my obsession for beautiful wallpaper and a cute idea for your gift tags.

This week I wanted to talk a little bit about tailoring your gifts for their recipient. This is one way that I do try to make my gifts special because I try to wrap my gifts with the person in mind who is receiving the gift.

Sometimes I tailor the gift to the person who is going to receive it and sometimes I tie the theme into what the gift actually is. It is fun to wrap your gifts this way because it makes it fun for the person who is opening it and it shows that you had them in mind when you wrapped the gift.

The gift shown in this example is for your favorite budget-savvy blogger or someone whose occupation involved the green stuff. The gift was wrapped in the stocks section of our Business paper and the gift tag was made out of a piece of money from a Life board game. Tied in green raffia, to go along with our money theme, this brings it altogether perfectly.

I try to do this often with the elements that I bring into my wrapping. When I go thrift shopping, I look for cute serving spoons or whisks that can be used to tie on the outside of newlywed gifts or for the Foodie in our family. Any small item that can be tied to the outside of the gifts can be great items to add to your wrapping details.

The comics section can be used to wrap children's gifts, Wall Street Journals make great wrapping paper, and foreign newspapers can add a little pizazz to any gifts you are giving.

Best of all, what a wonderful and earth-friendly way to recycle your newspapers!

Sound Off: What special details do you add to your wrapping jobs?

Labels: , , , ,

ENJOYED THIS POST? SHARE IT WITH OTHERS:

Click to share on StumbleUpon STUMBLE This Click to share on kirtsy Add to KiRTSY Click to share on Mixx Add to MIXX Click to share on DeliciousIt's DELICIOUS

Wednesday, October 10, 2007

Be a Wrap Superstar: Wallpaper That Gift, Yo!

I was asked to speak to my mom's group this week on how to celebrate Christmas on a budget. Since I do those Tuesday morning show segments, I figured it would be in my best interest to make some pretty props to go along with my morning discussions (and that could double for my mom's group discussion).

How about serving triple duty and sharing them on my blog here too? Why not!

I have several ideas for thinking outside of the box when it comes to wrapping your gifts. Sure, I could go to the store and get a giant roll of wrapping paper, but what is the fun in that? Some of the most fun is in the inventing of new ways to wrap those gifts under the tree.

The gifts might not all match, they may not be overly red and green, they also aren't going to be uniform, but at least each gift will have their own original style.

Today's gift wrapping idea is to check your local thrift store for wallpaper to wrap your gifts. I frequently find gigantic rolls for only $1. Try to pick a design that can be used for the holidays, but also can double for those other special occasions where a gift is needed.

This gift is not only covered in wallpaper, but the gift tag is made from a deck of cards. Is your dad a prankster? Give him the Joker! Is your brother the jack-of-all-trades? A Jack! Does your mom think she is the queen of the castle? Give that woman the Queen!


Tie it off with a little holiday cheer and embellish your gifts with a little ornament or something holiday-ish. I love those ornaments for those teeny trees to put on my gifts or I love to add big old jingle bells to make my present a little more festive.


I hope you enjoyed my quick tutorial on being a wrap superstar. I will discuss another idea next week!!

***For more great ideas today, visit Rocks In My Dryer for Works-For-Me Wednesday!***

Sound Off: Are you a wrap superstar? What are some things you use to wrap your gifts?

Labels: , , , , ,

ENJOYED THIS POST? SHARE IT WITH OTHERS:

Click to share on StumbleUpon STUMBLE This Click to share on kirtsy Add to KiRTSY Click to share on Mixx Add to MIXX Click to share on DeliciousIt's DELICIOUS

Wednesday, September 12, 2007

Thrifty Treasures: Pampered Chef Bread Tubes

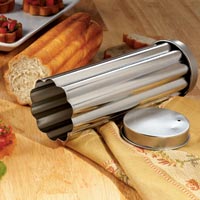
Does anyone have one of these? I just picked two of them up for $2 each at our thrift store.

I was wondering what you use yours for? Do you have any recipes to share?

I was so excited to have found them...now what do I use them for?

Labels:

ENJOYED THIS POST? SHARE IT WITH OTHERS:

Click to share on StumbleUpon STUMBLE This Click to share on kirtsy Add to KiRTSY Click to share on Mixx Add to MIXX Click to share on DeliciousIt's DELICIOUS

Tuesday, September 04, 2007

Thrifty Treasures: Betty Crocker Heaven

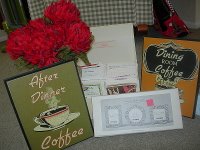
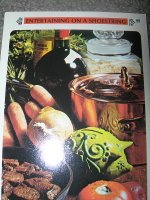
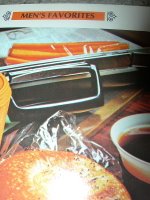
Labor Day was half off day at our Goodwill so I stopped in to see what I could find. I am trying to limit myself to only going on half off days since we don't really need anything. I did find some wonderful treasures that day, but the ultimate had to be the box of Betty Crocker recipes. The date on them is 1971 and I am totally loving the recipes and categories that they had. Some of the categories were Budget Casseroles, Mens Favorites, Gala Menus (probably among the most interesting dishes served to statesmen and celebrities- Hot Bouillon & Cottage Cheese , anyone?), Ground Beef to the Rescue, and hundreds of recipes in the Fondue category. I also got:

1. A pretty pot of fake mums (for our family room)
2. Two vintage coffee signs for our kitchen
3. Two pairs of new tights
4. A pair of sweats
5. A fleece hoodie
6. Three pretty green & white plates
7. Party Invitations for my daughter's next birthday party
8. A pretty Pier One frame set

Total spent: $14

Here is a recipe from the recipe box that I am looking forward to trying:

Apple Crisp
(Betty Crocker, 1971)

Butter crunch (recipe below)
1 can (21 ounces) apple pie filling
1 teaspoon lemon juice
1/2 teaspoon cinnamon
Vanilla ice cream

Prepare Butter Crunch. Heat oven to 450 degrees. In an ungreased 9" pie pan or baking dish, mix pie filing, lemon juice, and cinnamon. Sprinkle one cup of the butter crunch evenly over the top. Bake ten minutes or until top is light golden and bubbly. Serve warm with ice cream

Butter Crunch

1/2 cup butter or margarine
1/4 cup brown sugar (packed)
1 cup flour
1/2 cup chopped pecans, walnuts or coconut

Heat oven to 400 degrees. Mix all ingredients with hands. Spread in an ungreased pan (13x9") Bake fifteen minutes; stir with a spoon. Store in a covered container in refrigerator. Yields two cups.

Pineapple Crisp: Substitute one can (22 ounce) pineapple pie filling for the apple pie filling.

Labels: ,

ENJOYED THIS POST? SHARE IT WITH OTHERS:

Click to share on StumbleUpon STUMBLE This Click to share on kirtsy Add to KiRTSY Click to share on Mixx Add to MIXX Click to share on DeliciousIt's DELICIOUS

Friday, July 13, 2007

Thrifty Treasures: Bread Slicer

I have been looking for a good bread slicer since I started using my bread machine more regularly. I thought it would be nice to be able to make clean & crisp slices of bread, instead of my uneven pieces that I was cutting freehand. I wanted slices that were even, particularly for the sandwiches we were eating out of the loaves.

Lucky for me, someone donated their bread slicer and I was able to snatch it up for $2.50. It was priced at $5.00, but thanks to our local Goodwill Booster Club program, I was able to use my fifty percent off coupon for their member rewards weekend. This is a really great model because it folds down completely flat for easy storage. With kitchen space at a premium in our house, I look for items that can be stored easily while using a minimal amount of space.

If you happen to live in Michiana, you can sign up for their Goodwill Booster Club program for $5 for an entire year. Now through Sunday, they will give you a fifty percent off coupon that day (off of your total order) and then you will get a coupon for each month for an entire year for that $5 investment. Each year the coupons have changed so I am not sure what this round of coupons offers, but no matter what you will definitely get your five dollar investment back (and then some!) I have done the program for three years now and it has saved our family a lot of money.

Does anyone else use one of these types of bread slicers? What do you think?

Related Readings:

Getting to Know the Bread Machine

Storing Homemade Bread & Bread Ingredients

Frugal Momma's Test Kitchen: Homemade Croutons

Dinner is in the Bag

Labels:

ENJOYED THIS POST? SHARE IT WITH OTHERS:

Click to share on StumbleUpon STUMBLE This Click to share on kirtsy Add to KiRTSY Click to share on Mixx Add to MIXX Click to share on DeliciousIt's DELICIOUS

Monday, July 02, 2007

Thrifty Treasures: Vera Bradley Purse

A long awaited purse...Vera Bradley. Every single time I see one of these, I want it. The patterns are so beautiful! Unfortunately, they cost a mint. I have been watching them on Ebay, but the prices were still a little too high for my taste.

Lucky for me, someone donated their purse to Goodwill and I was able to snatch it up for $8. It is about $6 more than I usually spend for a purse, but is definitely worth it! This one is such a pretty spring color.

My mother-in-law can make bags that look just like these, but has had a hard time finding the fabric. Anyone making bags like these that have a good resource for fabrics? I know she would appreciate the input!

Labels: ,

ENJOYED THIS POST? SHARE IT WITH OTHERS:

Click to share on StumbleUpon STUMBLE This Click to share on kirtsy Add to KiRTSY Click to share on Mixx Add to MIXX Click to share on DeliciousIt's DELICIOUS

Monday, April 02, 2007

What a Difference a Day Makes

I decided to hit the thrift store this Saturday in search of a china cabinet or unit where I could rest my laptop for our kitchen. I have been hunting for awhile, but just haven't seen anything with the good bones that I was looking for. I walked around for awhile before I saw IT. You know? The one! The one that I have been hunting for ages looking for? Well, I basically threw my body upon an old eighties cabinet and requested the crew help me load it in my vehicle. The cost was only $99 and the units that I had been looking at in the stores were a minimum of $250 and upwards of $600. This piece looked like it was going to be perfect and I headed over to the hardware store and got all of the supplies to tackle this project.

I was inspired by Meredith's recent post about a project that was done on Notes from a Cottage Industry. This blogger had painted her unit black and had gotten hers for a mere fifty bucks and made it look like a million.

This was my first attempt at refinishing a piece of furniture and I was pretty nervous at first, but my tentative paint strokes turned to fast swipes as I became more confident with what I was doing.

This particular piece was a knotty oak wood and had worn brass handles on it. We prefer a more contemporary look with clean lines and a silver finish to our pieces so that is what I wanted to achieve when I refinished this piece.


I decided to leave the piece with the knots in the wood, opting to skip the spackling step altogether, and purchased a primer tinted grey to give us a good start on the piece.

I sprayed the unit with a liquid degreaser to get all of the grime and muck of off the wood. Next I primed it with primer and allowed that to dry for a couple of hours. The next step was to put on the black paint and then another coat. Then another coat. Finally, another coat was applied before I could do the final touch-ups to the wood.

The hardware was the type that had been dropped into the a cut-out in the wood of the piece so there was no way that I could replace it. The worn dingy handles received a face-lift with a coat of stainless steel spray paint that was made especially for metal. Fifteen minutes to dry and only four dollars to redo all of the hardware. We are going to be spraying some other ugly brass fixtures around our house that need a little TLC, rather than purchasing new pieces which would cost us a lot more.

I started the project at six o'clock in the evening and painted until 2:30 in the morning. I collapsed in bed and then picked it back up at nine and had it fully assembled with my dishes and cookbooks on it by six the next evening.

It was a bear of a project, but I can't stop glowing or patting myself on the back for what I accomplished in a single day. The unit is absolutely enormous and I did all of this by myself with the only help from my husband being the help with moving and reassembling it.

The finished product reminds of something you would get at Pottery Barn or Restoration Hardware and I doubt that it would be only $99!

The history of the piece was as interesting as the furniture was itself. A quick discussion with one of the employees seemed to indicate that it was repossessed. After pulling it all apart we found a very mysterious hole that at been cut out of the bottom. A hole that would have no purpose except to hide something. Weed, perhaps? Who knows!

What has been your biggest accomplishment that you have done in or around your house? Have you ever attempted to refurbish a thrift store or yard sale piece? Any blunders refurnishing anything?

Labels: , , ,

ENJOYED THIS POST? SHARE IT WITH OTHERS:

Click to share on StumbleUpon STUMBLE This Click to share on kirtsy Add to KiRTSY Click to share on Mixx Add to MIXX Click to share on DeliciousIt's DELICIOUS

Thursday, March 08, 2007

Thrift Store Finds

Earlier this week, I went to the thrift store and found a couple of great things for our house.

The first item I found was a small bench. It was covered in a shiny & very ugly polyester, which was frayed and torn. The pictures of this fabric don't do it justice. It was much more hideous in real life than what is pictured here. The piece itself was really nice though so for ten dollars, I took it home and got to recover it. I still had some fabric leftover from when we recovered our dining chairs so I used some of that. The vinyl is nice because it could easily be wiped off, which is important in a house with a four year old and a one year old.

Originally I had planned to put it near our front door, but the sizing didn't seem right. I think a bench larger than that needs to be there, but we did have a corner in our bathroom that I had been trying to decide what to do with. I had one of my dining chairs down there and when we needed it for company, I would have to walk downstairs to get it and haul it up. The bench seemed to fit perfectly and I love the worn legs on it and how well it goes with the decor in our bathroom.

I also ran across these beautiful table linens. Now that you all are aware of my table linens obsession, you can imagine how excited I was about this! I had no idea if the tablecloth was the right size, but I was willing to take a gamble on it for $2. It had six napkins at a quarter a piece, and it is very rare to find a tablecloth and napkins all together in a matching set. I also found a few vintage floral-printed napkins too, all in various colors.

I washed the linens and placed them on the table. The tablecloth is a beautiful baby blue and it is soft just like a blanket. When washed, I did notice a small spot in the center, but it could easily be disguised with a napkin centerpiece. One of the floral napkins was perfect for resting our centerpiece on it. Do you happen to recognize this centerpiece?

I am always amazed at what one can find in their local thrift store!

Labels: , , ,

ENJOYED THIS POST? SHARE IT WITH OTHERS:

Click to share on StumbleUpon STUMBLE This Click to share on kirtsy Add to KiRTSY Click to share on Mixx Add to MIXX Click to share on DeliciousIt's DELICIOUS

Wednesday, February 14, 2007

Kid's Craft Idea: Painting Mugs

Since it is another snow-filled day, we worked on a craft project to pass the time today. What better way to pass the time than to work on some fun projects?

When I have been going to the thrift store, I have been picking up plain white mugs. The cost on these is fifty cents and I have been putting them in a box downstairs to make gifts for our family.

I then went to the craft store and purchased a porcelain paint set. The paint set was around four dollars and I used my forty percent off coupon to knock some money off of the total on that. These types of paints require no heat-setting since the glaze that is included sets the paints for you.

With this particular paint set, you need to do a glaze on the surface first and allow that to dry. I actually did this the night before so we wouldn't have to wait on this step.

Today we painted the mugs, which my son had the best time doing. We did put a heart on each of them, in honor of Valentine's Day, and we will be giving these out to some special people in our life.

While waiting for the paint to dry (to apply a final glaze on them), I have been doing a little baking for a mommy that I am running a meal over to. She just had a baby and I get to bring her Valentine's Day dinner. I am making a heart-shaped pizza, a cold pasta salad, and these giant heart brownies. I found this stoneware dish at the thrift shop for two bucks and have been waiting to be able to use it. I hope she will enjoy the meal as much I as have enjoyed cooking for her. Hopefully the weather will hold out so that I can deliver that meal!

I also need to get moving on some laundry and make cookies for my son's class. It has been fun though getting to squeeze in some quality time with my son and do something fun like this.

Give this craft idea a try with your children! These mugs are great for any occasion and what teacher wouldn't love a sweet mug like this made by your child?

Please visit Shannon's Blog, Rocks in My Dryer, for more Works-For-Me Wednesday tips!

Labels: , , , ,

ENJOYED THIS POST? SHARE IT WITH OTHERS:

Click to share on StumbleUpon STUMBLE This Click to share on kirtsy Add to KiRTSY Click to share on Mixx Add to MIXX Click to share on DeliciousIt's DELICIOUS

Monday, January 29, 2007

Budget-Friendly Ideas for Kid's Rooms

First, do not be intimidated by the bright colors on our son’s walls. What appeared to be a cheery Granny Smith apple shade assaulted us with its fluorescent glow instead when applied to the walls. Although the color is a bit brighter than I had hoped, where else except our children’s rooms could we be so bold?


I had been looking for some cute artwork for his room since we had tons of empty wall space, begging to be filled with cute artwork. We did not have the budget though to go out and blow tons of money on artwork so when I happened upon this clever idea in my Real Simple Magazine, I jumped right on it and was so pleased with the results.

The magazine had suggested using book cover jackets as art for your walls. As my son has received wonderful hardcover books from his grandparents, I had been removing the jackets and putting them on a shelf in his closet (for fear that they might be damaged or torn). Two of the jacket covers were for two of his favorite books, “How do Dinosaurs Say Goodnight” & “How do Dinosaurs Eat Their Food.” The artwork on them was just perfect for framing.
I went to the Dollar Store and purchased two frames. I then used the cardboard insert to map out how I would frame the pictures to size them and then cut them out. For one of the pictures, I just used the picture that was on the front of the jacket. I used the back of the other cover because it contained some of the story within the picture.

My son was so pleased with his new pictures on his wall as were we! What a great way to really bring to life and share your children’s favorite stories.


The linens on his bed were also in need of being replaced. My son suffers from very bad bloody noses and I could not remove the stain no matter how many times I washed it. My mom had suggested contacting the lady over at MomAdvice to find out how to fix this (obviously I get a lot of jokes about that one!), but apparently she had no idea either.


When I hit a local thrift sale in the area though, I hit the jackpot. Tucked away in a corner was an entire Pottery Barn Kids comforter set. The set included sheets, pillow cases, comforter, shams, bed skirt, and curtains. The total price on the whole thing was only $25. The colors matched perfectly with the theme we already had so these worked wonderfully.

As a side note, you will notice that our son has his bed backwards. One of the truly great things about daybeds is that you don’t have to purchase bedrails to keep them secure in bed. Simply switching the bed around (with headboard on the opposite side) and scooting it next to the wall keeps him safe in his bed without making a bed around bedrails. We will be purchasing this same type of bed for our daughter because it has worked so great. If you are worried about when they have friends come to stay the night, you can invest in a trundle bed that can be tucked underneath and can be popped up when needed. It is an ideal space saver.

I hope these ideas inspire you in creating a special space for your little ones. Feel free to share some of your own ideas by leaving a comment!

Labels: , , ,

ENJOYED THIS POST? SHARE IT WITH OTHERS:

Click to share on StumbleUpon STUMBLE This Click to share on kirtsy Add to KiRTSY Click to share on Mixx Add to MIXX Click to share on DeliciousIt's DELICIOUS

Tuesday, January 02, 2007

The Thrill of the Hunt


I am passionate about getting good deals, which makes me extremely passionate about going to garage sales and visiting our local thrift stores. There is nothing that thrills me more than to get to spend an hour hunting through all of the "junk" to find that one memorable treasure to bring home with me. I have always been this way, even when we had much more money than we do now. Thrifting has always been an outlet for me and now that we are eating at home more, I am able to use our dining out allowance to score some really great thrift store finds, without busting the budget.


It is hard to explain this passion to someone who doesn't experience it...like my husband, for example. He loves me and patiently nods as I go through each deal I found, but I don't see the passion for it although he does appreciate the things that I find that are just for him.


This weekend our parents kindly offered to watch the children for New Year's Eve. They came and picked the kids up at one in the afternoon and we had an entire day to do whatever we wanted. Guess what I begged my husband to go and do with me? Yup, hit the local Goodwill and he wasn't exactly jumping for joy.

He tried to be a good sport about it, but I could see that this and the craft store were not how he planned to spend the day. I told him how much fun it would be and about the people that work there, how nice it is...basically, anything to convince the poor guy that this was worth doing.

Imagine my surprise when my husband enjoyed going to Goodwill with me. He hunted through books and browsed the housewares with me. We pointed out things that we had when we were little and laughed at some of the more vintage pieces. We honestly had the best time.

When we walked out of there with two enormous bags full of goodies for only twenty bucks, he looked at me and told me he finally understood why I love to do this type of shopping. It is a cheap thrill that allows me to escape. Sometimes I might find some great deals, some days I leave with nothing. The point is, it is the thrill of the hunt and knowing that I am not blowing our budget in the process.

On this occasion, here are some of the highlights that we managed to leave with.
Two pictures for the walls in our kitchen ($1.50 each).

A vintage set of wooden dominoes (one of my favorite purchases and only $5)

A Liz Claiborne Purse (which my husband shook his head at me and told me he didn't like it because he said I already have enough purses- $2)

A Pampered Chef apple slicer, peeler, corer with wooden stand (which I had planned on having a party just for this item because it is so pricey- $5)

12 Little Golden Books (which I am saving to give for the countdown to Christmas that I give to my son to countdown the days of December- $6)


I also left with a husband who understands my need to thrift. Now that, my friends, is PRICELESS!

Labels: , ,

ENJOYED THIS POST? SHARE IT WITH OTHERS:

Click to share on StumbleUpon STUMBLE This Click to share on kirtsy Add to KiRTSY Click to share on Mixx Add to MIXX Click to share on DeliciousIt's DELICIOUS