Wednesday, December 12, 2007

Booster Seat Cleaning Solution

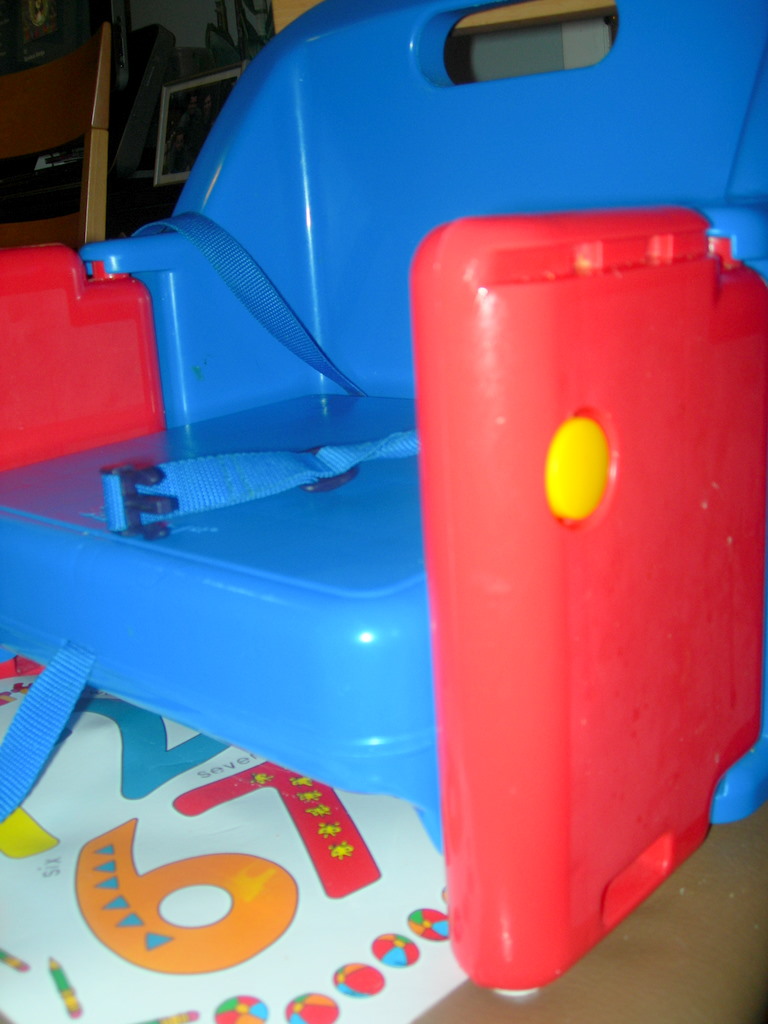
I hate cleaning underneath my daughter's booster seat, but the things that can get stuck under there can be quite unappetizing a few days after sitting there.

The other day I decided to tuck Emily's plastic placemat under her seat instead of on the table and can't believe I had not thought to do that sooner. Now after we enjoy our meal, I just pick the seat up and slide out the mat for a quick rinse instead of trying to clean under the seat, creating a sea of crumbs under our table.

It doesn't help the nasty on the top of the seat, but sure makes the nasty underneath a little bit easier.

For more fun solutions for your family, be sure to visit Works-For-Me Wednesday over at Rocks in My Dryer.

Sound Off: Do you have any clever solutions for dinner clean-up?

Labels: , ,

ENJOYED THIS POST? SHARE IT WITH OTHERS:

Click to share on StumbleUpon STUMBLE This Click to share on kirtsy Add to KiRTSY Click to share on Mixx Add to MIXX Click to share on DeliciousIt's DELICIOUS

Wednesday, October 24, 2007

Be a Wrap Superstar: Use What You Have

Sometimes it is more fun to spend money on the gifts themselves than it is to spend it on wrapping your gifts. While I love an elegantly wrapped gift, I do enjoy sharing on creative wrapping solutions too. In fact, sometimes those creative solutions are right under your nose. Wouldn't Hallmark be disappointed if we used items we already had to wrap our gifts instead of keeping them in business with their gift bags and wrapping paper?

Here in this first picture is a grocery sack. This paper bag was purchased for five cents from Aldi Supermarket. This was, of course, before I had made the switch to cloth grocery bags so I have many of these useful bags laying around my house that aren't being used.

You can leave the paper bag plain or you can decorate it. I happened to have a Christmas stamp that I stamped onto the paper. The gift tag came from a book of scrapbooking tags that I happened upon at Michael's. I used my coupon to buy them and they were $2 (less with the coupon) for 24 tags. Tie it up with a bow or a piece of raffia, and you have a beautiful gift out of items in your home.

This second gift is wrapped in a map of our hometown. You can pick these up in the different cities that you visit or in different hotels or restaurants. Save them in a folder for wrapping paper and use special areas for the special people in your life.

The gift tag was made out of my business card and then the gift was tied with green raffia. Business cards can be a fun way to tag your gifts to coworkers. Considering many companies overbuy in the business card department, this is a great way to use some of these cards up and also reminds your boss how much he should appreciate your efforts, particularly for large companies where employees and superiors can be a bit more disjointed. Just give it a hole punch and loop it through the ribbon.

Last, but certainly not least, don't forget all of those lovely coloring pages and how useful they can be for wrapping gifts.
Kids love to feel special and they love to contribute towards the making of and the purchasing of the gifts for your family. These scribbled drawings, while not as appealing to the eye as many fancy gift wrap choices, are true beauty to grandparents and other family members.

If you like to have more control over the color choices and such, give your children crayons in your color scheme that you are going for or make suggestions for drawings ("Grandma LOVES snowmen, maybe you could draw her a really special one?").

The gift tag was made from scrap cardstock that I had and then I stamped the tag with the same stamp that was pictured above in my paper bag wrapping job.

Don't forget the other solutions that I have shared on like tailoring your gifts for their recipient and using wallpaper for gift wrap!

I hope this offers some other creative solutions for your wrapping needs! I plan to put this all together into an article for our website for future reference!


***For more great solutions for your family, be sure to visit Rocks In My Dryer for more great ideas for this edition of Works-For-Me Wednesday***

Labels: , , , ,

ENJOYED THIS POST? SHARE IT WITH OTHERS:

Click to share on StumbleUpon STUMBLE This Click to share on kirtsy Add to KiRTSY Click to share on Mixx Add to MIXX Click to share on DeliciousIt's DELICIOUS

Wednesday, October 10, 2007

Be a Wrap Superstar: Wallpaper That Gift, Yo!

I was asked to speak to my mom's group this week on how to celebrate Christmas on a budget. Since I do those Tuesday morning show segments, I figured it would be in my best interest to make some pretty props to go along with my morning discussions (and that could double for my mom's group discussion).

How about serving triple duty and sharing them on my blog here too? Why not!

I have several ideas for thinking outside of the box when it comes to wrapping your gifts. Sure, I could go to the store and get a giant roll of wrapping paper, but what is the fun in that? Some of the most fun is in the inventing of new ways to wrap those gifts under the tree.

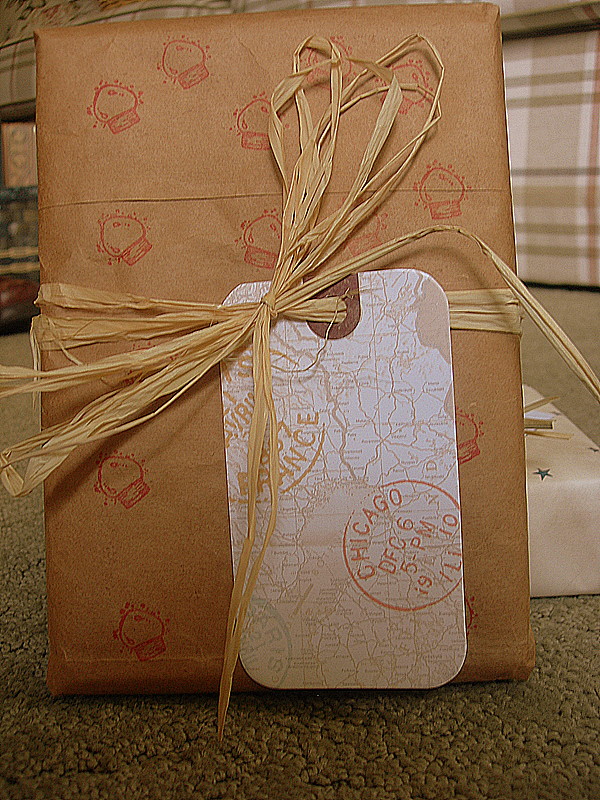
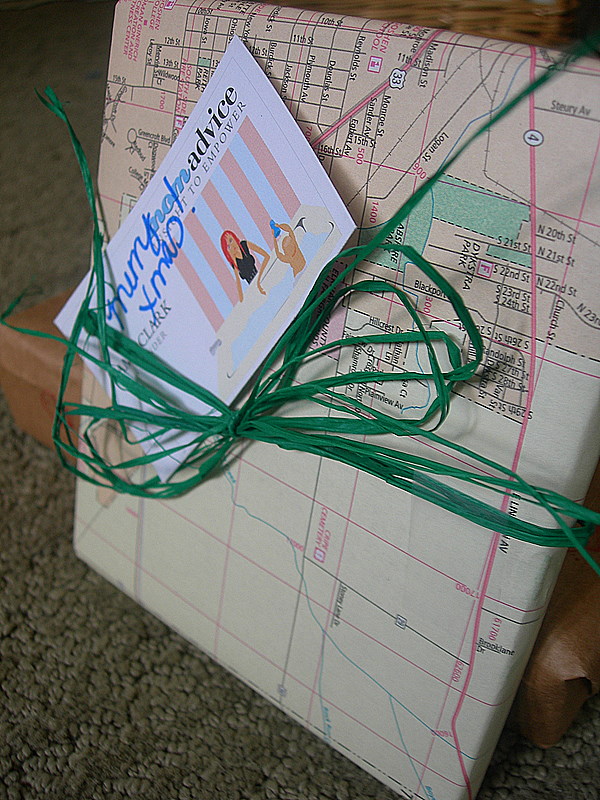
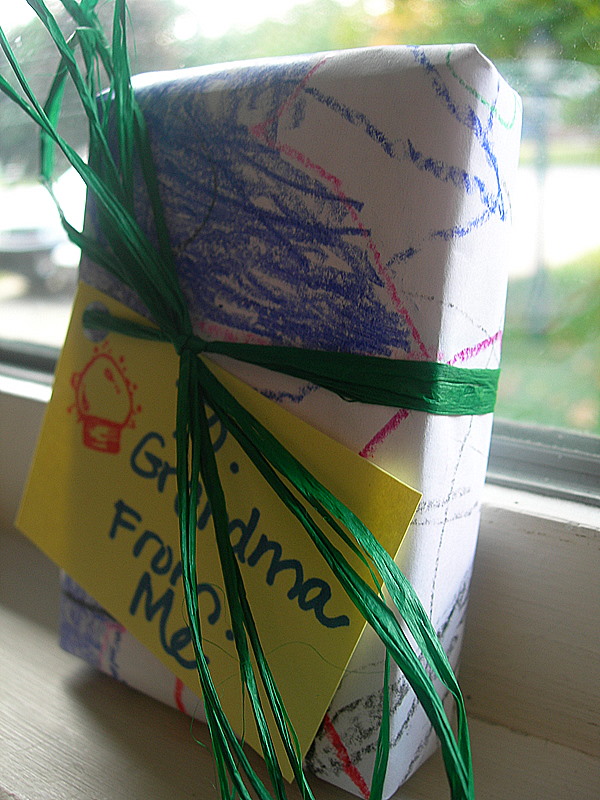
The gifts might not all match, they may not be overly red and green, they also aren't going to be uniform, but at least each gift will have their own original style.

Today's gift wrapping idea is to check your local thrift store for wallpaper to wrap your gifts. I frequently find gigantic rolls for only $1. Try to pick a design that can be used for the holidays, but also can double for those other special occasions where a gift is needed.

This gift is not only covered in wallpaper, but the gift tag is made from a deck of cards. Is your dad a prankster? Give him the Joker! Is your brother the jack-of-all-trades? A Jack! Does your mom think she is the queen of the castle? Give that woman the Queen!


Tie it off with a little holiday cheer and embellish your gifts with a little ornament or something holiday-ish. I love those ornaments for those teeny trees to put on my gifts or I love to add big old jingle bells to make my present a little more festive.


I hope you enjoyed my quick tutorial on being a wrap superstar. I will discuss another idea next week!!

***For more great ideas today, visit Rocks In My Dryer for Works-For-Me Wednesday!***

Sound Off: Are you a wrap superstar? What are some things you use to wrap your gifts?

Labels: , , , , ,

ENJOYED THIS POST? SHARE IT WITH OTHERS:

Click to share on StumbleUpon STUMBLE This Click to share on kirtsy Add to KiRTSY Click to share on Mixx Add to MIXX Click to share on DeliciousIt's DELICIOUS

Wednesday, June 20, 2007

Cheap Outdoor Music System


I love to listen to music outside, but we don't have a spare radio that we can use while we are dining outdoors. I decided to create our own outdoor music system using our baby monitor. I hooked our baby monitor up next to our computer, and then turned on our computer with our music loaded on that. The receiver got placed outside and we were able to hear all of our favorite music without making any additional purchases.

Using my baby monitor outside works for me! Please visit Shannon's entry for all of the other participants and their great Works-For-Me Wednesday ideas.

Labels: , ,

ENJOYED THIS POST? SHARE IT WITH OTHERS:

Click to share on StumbleUpon STUMBLE This Click to share on kirtsy Add to KiRTSY Click to share on Mixx Add to MIXX Click to share on DeliciousIt's DELICIOUS

Wednesday, April 18, 2007

Prepping for Garage Sales


And, no, I will not be hosting a garage sale. My prep work involves everything that I need to know in order to truly maximize my visits to other people's garage sales. I am not ambitious enough to have a garage sale myself. I prefer to donate our items and take the tax deduction. It might be the lazy person's way of decluttering, but it works well for us!

I love to garage sale during the summer. I, in fact, look forward to garage sale season all year long. In the interim, I do a lot of thrift shopping until I can take advantage of all of those great garage sale prices.

I do most of our clothes shopping for the kids by visiting the thrift store often throughout the year. We also have friends & family who pass on their clothing to us, which is a huge financial help. All of these clothes were folded in several boxes in our basement, but I had never taken inventory of what we already had.

This weekend I pulled out all of the boxes and started grouping things together. All of the dresses in a pile, all of the pajamas in a pile, and so forth. And remember when I mentioned that I got some great organizing units from a university student? Well, in her stash were large three drawer rolling carts that would be perfect for organizing the kid's clothing.

I used my label maker and labeled each drawer with the child's name and the size of the clothing. All of the clothes were neatly sorted into the drawers, instead of thrown into boxes that might have been forgotten.

I also got out a piece of paper and wrote down what I have for each child. It was time-consuming and a pain to do, but now when I hit those garage sales I will know just what my kid's need. I realize that ten summer dresses are enough for one little girl, but one pair of jeans won't cut it. I know that my son is great for the fall, but his summer wardrobe is really lacking. This information will really help me when I go to the sales this summer.

Take inventory of what you already have in your house and make a list of things to look for when you go to the garage sales. Try to stick to the list, or only buy things that you will really and truly use in your house. Even if it is only ten cents! Do not buy things that will not have a purpose in your home. A deal is not a deal, if it is just taking up space and collecting dust on a shelf.

Do you have any tips for preparing for garage sales? Do you have a way of tracking the inventory in your homes? Please share! Your comments are invaluable!

Don't forget to swing by Rocks in My Dryer for all the other wonderful participants!

Labels: , ,

ENJOYED THIS POST? SHARE IT WITH OTHERS:

Click to share on StumbleUpon STUMBLE This Click to share on kirtsy Add to KiRTSY Click to share on Mixx Add to MIXX Click to share on DeliciousIt's DELICIOUS

Wednesday, March 28, 2007

Getting the Car Organized


This week's Works-For-Me Wednesday solutions are all ideas for your car. Shannon requested any great ideas for moms on the go. It is great timing to read all of these entries with Spring Break fast approaching. Be sure to read all of the entries there!

I like to keep a tidy home, but the car is a completely other story. It seems like we are in the car a lot and somehow cleaning out the car becomes last on my task list.


A couple of weeks ago, the warm weather got me out to finally clean my
car though and I must say that the car is looking much better this month. Whether or not we can maintain that is yet to be seen, but I do like some of the solutions I came up with for organizing it (for now!)

- I had two small milk crates that I put on each side of the back seat of the car for each child. My son's crate is filled with crayons, paper, flash cards, and workbooks for him to work on. My daughter's crate is filled with lots of baby toys for her to play with. Each child's also contains a clean sippy cup. This solution has worked really well for us if we visit people's houses who don't have toys or when we go into a restaurant and want to keep the children entertained. The container is small enough that my son can carry his own and I have been toting my daughter's around when I meet friends for coffee and such. This is much better than toys haphazardly thrown around in the back and they now have their own organized space.

- In the front seat, I have a small folder and today I am working on printing out directions to all of the local parks and a few day trips in the area. This will be a great reference for us if we want to get out of the house when the weather is nice out and it will save me a step when we need to be somewhere. I also keep directions to other people's homes that I frequent. I belong to a good size mom's group and to try and remember where everyone is can be difficult. This makes for a great reference and saves me from printing the same directions out multiple times.

- In my trunk, I have a small tote bag filled with a few things that the kids can do when we go to the park. I put two Frisbees in there, bubbles, and bubble wands. I am planning to hit our dollar tree to get a few more things to add to the mix, but it is a nice thing to have to keep the kiddos entertained.

- We also keep a spare phone book in the trunk of our car. This makes it easy to call for directions or place reservations with restaurants.

- Take advantage of times when you are filling your gas tank, to clean out wrappers and such out of the car. I keep a tissue box filled with plastic bags under our seat and I pull that out to make gathering trash up a little easier.

- One thing that I try to do is keep a spare backpack in the trunk of our car. Sometimes we are on the road and aren't able to get home to pick up a backpack before I have to drop my son off for school. This spare backpack comes in handy for those occasions and helps the teacher too!

Feel free to share your own car solutions and be sure to check out all of the entries this week!

Labels: , ,

ENJOYED THIS POST? SHARE IT WITH OTHERS:

Click to share on StumbleUpon STUMBLE This Click to share on kirtsy Add to KiRTSY Click to share on Mixx Add to MIXX Click to share on DeliciousIt's DELICIOUS

Wednesday, February 28, 2007

Caring for Your Table Linens

I love having a tablecloth on our table. We have three tablecloths that I can rotate throughout the week- a red, burgundy, & white tablecloth. Of all of the colors I have, the white tablecloth is my most favorite of all. Although spills show on it more initially, I can toss it in the wash with bleach and the stains come right out. There is just something about a clean tablecloth & napkins that makes everything look fresh.

Despite loving the look of linens, I do not enjoy ironing. The rarity with which I iron is, at times, a little embarrassing.

Frankly, there are not enough hours in the day for me to be spending them standing over an ironing board.

Since the word ironing is not in my vocabulary, caring for my linens promptly is important when laundering them. I run them through a normal warm cycle (check the tags on your tablecloths to see what is best for your fabric type) and then I dry them until they are just barely dry. They are then folded into thirds inside out and hung on a hanger. I hang these down in our laundry area until it is time to use them.

If you do iron your linens, the best time to iron them is right before you use them. Spray the linens with starch or a spray bottle of water and press away on the reverse side of the tablecloth on the recommended setting.

If linens only make a rare performance on your table, there is one other storage solution that might work better for you. Take an empty wrapping paper roll and line it with acid free tissue paper. Fold the tablecloth in half and then wrap it around the roll. Line the top again with the tissue paper and then store the tablecloth horizontally.

While on the discussion of table linens, I did want to share a few links for folding cloth napkins. I am going to attempt a few of these and see if they improve the look of my table.

Cloth napkins are not only used to wipe faces, but they can also highlight something in the center of your table. This vintage napkin was the perfect place to rest an arrangement of flowers on our table.

Do you have any storage tricks for linens in your home? Do you use linens on your table?

And for those of you that are curious just what it is I am serving at my table, please visit the new “Aldi Queen” blog where I share my recipes and menu plans with everyone!

Be sure to visit Rocks in My Dryer for more tips & tricks from some of the best mommy experts on the net!

Labels: , ,

ENJOYED THIS POST? SHARE IT WITH OTHERS:

Click to share on StumbleUpon STUMBLE This Click to share on kirtsy Add to KiRTSY Click to share on Mixx Add to MIXX Click to share on DeliciousIt's DELICIOUS

Wednesday, February 21, 2007

Frugality Births Creativity

I feel very blessed to have learned to be frugal because it has stirred within me creativity that I never knew I even possessed. The blessings from my thriftiness are endless and seem abundant in our life. When we had money, we did not feel the urge to be creative with our resources. If we wanted something, we bought it. End of story. Now that we are trying to be more careful with our funds, I have found that I am more creative than I have given myself credit for.

I just want to share with you one example of creativity that has helped us financially. Obviously the website has been a great endeavor for me, but there are little things in my life that I haven’t had the opportunity to share yet.

When we found out we were having a girl, all I could feel in my heart was love and a sea of pink. I couldn’t wait to dress her up in pretty dresses, tights, patent leather Mary Janes, and get to have tea parties with her. I love my son like crazy, and was just so excited that I have one of each child so that I can do unique things with each of them.

When she was born, I never knew that a baby could have so much hair. She had this beautiful, thick dark hair and all I wanted to do was put hair bows in it. We started out with the baby headbands and I was disappointed with the selection in our area. When searching online though, I thought the prices were ridiculous and not worth that amount of money.

Fast forward to six months later, and I had completed a spokesperson position with Cascade. We received the money from that endeavor and I turned to my husband one day and said, “I want to invest that money into a little business for myself making girl’s hair bows.” I won’t say that he was jumping up or down or anything, but he said he supported me, if that is what I wanted to do with my money.

I got a book on how to do it and started hording myself in our basement with a glue gun. I researched for hours on ways that I could get these little masterpieces to stick in their hair without ever being removed. I researched the best types of ribbon, where to purchase the ribbon, how to present the bows and pricing on them.

Pictured here is an example of some of my handiwork. These batches of bows were made for my girlfriend and I was so thrilled to put together such fun ribbon selections, chosen by her. When purchasing ribbon for her bows, I also happened upon these really cute Irish ribbons and I grabbed as many as I felt I could afford. We live in Irish Country (Notre Dame University is just minutes from our house), so in other areas this would be a seasonal item. In our area, it is a year-round type of thing.

I have had great success with selling the girl’s hair bows. Although I am not brave enough to put myself out there online, as it is a tough market, I have had great success by just taking my daughter places in her bows and people asking where I bought them. She has been a great little model for me and I have made some good money doing it. This money is being socked away for something special. What that is? I don’t know yet, but I feel empowered knowing that I can help with the finances and to have a little stash stored away for a rainy day.


The lessons I have learned through my latest little business are great…

I have learned that I can be a creative, even though I never believed that I was.
I have learned that a supportive spouse is worth its weight in gold. My husband could have shook his head and told me he thought my idea was ridiculous, but he didn’t. I didn’t say he didn’t think that in his head, but he never voiced those feelings to me.

I have learned that if there is something not out there that you want, or if there is something you want but can’t afford, find within yourself to be creative and come up with it yourself.

I have learned that there are two types of people- those who think I charge too much and those who think I am selling myself short.

I have learned that asking for money upfront is the best policy. I have had people place orders that have never paid or make requests for items that I worked tirelessly on, only to tell me that they changed their mind.

I have learned that one compliment can go a long way with me. Just one person telling me that they liked what I do is enough to push me for an extra week on whatever I am doing.

I have learned that there will always be people who think that they can do whatever you are doing, but better. There will always be haters out there, but the important thing is to not allow their negativity to take the best parts about yourself out of you.

I have learned that by teaching myself new skills, that I can draw from those skills when occasions arise and save a lot of money on gifts for others.

I have learned donating my creativity to good causes makes me feel more creative and powerful than I have ever thought I could be.

I have learned that doubting myself is the biggest creativity buster of all.

I have learned that frugality fuels creativity. Creativity fuels our bank account. Our bank account fuels a peace about what we have. The peace fuels a happy home. A happy home fuels my life. My life fuels my family. My family fuels me.

What are some of your proudest creative moments? What has frugality fueled within you?

For more Rocks In My Dryer Works-For-Me Wednesday Participants, please click here.

Labels: , ,

ENJOYED THIS POST? SHARE IT WITH OTHERS:

Click to share on StumbleUpon STUMBLE This Click to share on kirtsy Add to KiRTSY Click to share on Mixx Add to MIXX Click to share on DeliciousIt's DELICIOUS

Wednesday, February 14, 2007

Kid's Craft Idea: Painting Mugs

Since it is another snow-filled day, we worked on a craft project to pass the time today. What better way to pass the time than to work on some fun projects?

When I have been going to the thrift store, I have been picking up plain white mugs. The cost on these is fifty cents and I have been putting them in a box downstairs to make gifts for our family.

I then went to the craft store and purchased a porcelain paint set. The paint set was around four dollars and I used my forty percent off coupon to knock some money off of the total on that. These types of paints require no heat-setting since the glaze that is included sets the paints for you.

With this particular paint set, you need to do a glaze on the surface first and allow that to dry. I actually did this the night before so we wouldn't have to wait on this step.

Today we painted the mugs, which my son had the best time doing. We did put a heart on each of them, in honor of Valentine's Day, and we will be giving these out to some special people in our life.

While waiting for the paint to dry (to apply a final glaze on them), I have been doing a little baking for a mommy that I am running a meal over to. She just had a baby and I get to bring her Valentine's Day dinner. I am making a heart-shaped pizza, a cold pasta salad, and these giant heart brownies. I found this stoneware dish at the thrift shop for two bucks and have been waiting to be able to use it. I hope she will enjoy the meal as much I as have enjoyed cooking for her. Hopefully the weather will hold out so that I can deliver that meal!

I also need to get moving on some laundry and make cookies for my son's class. It has been fun though getting to squeeze in some quality time with my son and do something fun like this.

Give this craft idea a try with your children! These mugs are great for any occasion and what teacher wouldn't love a sweet mug like this made by your child?

Please visit Shannon's Blog, Rocks in My Dryer, for more Works-For-Me Wednesday tips!

Labels: , , , ,

ENJOYED THIS POST? SHARE IT WITH OTHERS:

Click to share on StumbleUpon STUMBLE This Click to share on kirtsy Add to KiRTSY Click to share on Mixx Add to MIXX Click to share on DeliciousIt's DELICIOUS

Wednesday, February 07, 2007

I Heart You!


Lucky for me, today's theme for Works-For-Me Wednesday is all about Valentine's Day ideas. I happened to have posted a whole article of budget-friendly ideas for the holiday last week, so please stop over to the article to get tons of ideas that won't break the bank!

On a related note, I attempted to do Valentine's this year with my son. Now being the frugal self that I am, I realize that the store-bought cards are really not expensive at all. You can get a ton of them for a couple of dollars that have dogs on them and say, "You're Top Dog!" and such...They are very nice and we have done that in year's past.

This year I decided I wanted to make the holiday a little more meaningful and with only eleven kids in my son's class, we could definitely swing actually making the cards this year. I was proud that we did it because it required more effort than the store-bought hearts and it was a creative way for the two of us to pass another snow day at home.

Since the weather was bad, all I did was pull all of the red & pink construction paper from his craft bin. I would have loved to incorporate doilies, but after seeing them going for $4.99 last week, I decided that we could do without these. The idea was to save some money, not spend four times as much!

I did have some of those cool jagged scissors that the scrapbookers use and by cutting all my hearts out with those, it gave a pretty lacy effect on the hearts and also on the edges of the cards.

I sat everything out for my son to put his cards together including a big box of buttons and a glue stick to incorporate different dimensions into his work. He came downstairs with a piece of paper (not provided for this mission) and covered it with buttons saying he would rather make lots of planets instead of doing the task at hand.

I then came upstairs to redirect his attention to all of the paper I had cut out for him and all of the pretty hearts and what happened next was exactly what I had expected...I sat and made Valentine's for an entire hour while he made planets on other sheets of paper.

Me: "Do you want to even sign your name on these?"

Son: "Nah!"

So much for being a fun & creative mom! Maybe there are more creative ideas on Rocks in My Dryer as mine was not inspiring enough even for my own kid!

Labels: , , ,

ENJOYED THIS POST? SHARE IT WITH OTHERS:

Click to share on StumbleUpon STUMBLE This Click to share on kirtsy Add to KiRTSY Click to share on Mixx Add to MIXX Click to share on DeliciousIt's DELICIOUS

Wednesday, January 17, 2007

Are You Looking for Redbox Codes?

I love using the Redbox kiosk that is located within our grocery store. For those of you who live in the Michiana area, these kiosks are located inside Martin's Supermarkets.

We tried a movie club, but we didn't watch enough movies to really justify the cost. We also rent a lot of movies from our local library, but sometimes you want a new release that day.

Redbox has been a great alternative for us. You can rent the movie, as long as you want, for only ninety-nine cents a day. Since we typically keep our movie one night, it is only a dollar to watch a new release. You can reserve your movies online through the Redbox website, or you can just pick a movie when you get there.

Recently I discovered this great website called Inside Redbox. I have been using this site for several weeks now and I absolutely love it. The website shares all of the current coupon codes for the month. People can add codes they have used or report codes that no longer work. I have been using these codes for my movies and we have yet to be charged for a single one.

If you like movies and you like free, then please visit Inside Redbox.

As a side note, the reason I had not posted this site before was because I was afraid that it might be shut down with the traffic they would receive or that Redbox, the actual movie company, might be upset that people are sharing these codes. Luckily, the guy who runs the site recently reported a great conversation he had with the VP of Marketing at their company...Guess what? Redbox loves the site and so do we!

Please visit Rocks in My Dryer for more great ideas!

Labels: ,

ENJOYED THIS POST? SHARE IT WITH OTHERS:

Click to share on StumbleUpon STUMBLE This Click to share on kirtsy Add to KiRTSY Click to share on Mixx Add to MIXX Click to share on DeliciousIt's DELICIOUS

Wednesday, January 10, 2007

Spinach & Tomato Orzo with Chicken


This week's Works-For-Me Wednesday has a theme and the theme is sharing a low-fat recipe with everyone. I wish I would have saved my low-fat chocolate chip cookie recipe for this week, instead of last week, but hopefully you can still enjoy that recipe.

Here is one of my absolute favorite low-fat dishes that I love to eat. The chicken in this dish could be omitted if you wanted to keep the dish vegetarian.

This recipe came from one of my Rachael Ray cookbooks and it was originally prepared without the chicken, and was served as a side dish. I thought the addition of the chicken would make it a wonderful main dish.
This is one my favorite recipes to bring to potlucks because it something different than people normally prepare and it can be served warm, room temperature, or cold.

I hope you will enjoy this recipe as much as I do. The only bad thing about this dish is that it isn't as good reheated the second day. The tomatoes make it a mushy mess. The good news though is that there are rarely any leftovers! Enjoy!

Be sure to swing by Rocks in My Dryer for more great recipes!

Spinach & Tomato Orzo With Chicken

1 pound spinach, washed, dried, stems removed
1 pint grape or cherry tomatoes, halved
2 lemons, zested
1 1/2 cups orzo, cooked to al dente
1 tablespoon extra-virgin olive oil
24 basil leaves, torn or thinly sliced
1 pound cooked chicken breasts, diced
Salt and pepper

Pile spinach leaves in stacks 1 on top of the other. Thinly slice stacks of leaves to make spinach confetti. Pile shredded spinach into the bottom of a medium sized mixing bowl. Halve grape or cherry tomatoes with a paring knife and add them to the mixing bowl. Add the zest of 2 lemons to the bowl and save the lemons in the refrigerator to juice for another recipe. Next add, the cooked chicken to the bowl. Add hot cooked and drained orzo pasta to the mixing bowl. The heat of the pasta will wilt the spinach and warm the tomatoes at the bottom of the bowl and get the juices flowing from veggies. The heat of the pasta will also release the flavor and oils in the lemon zest. Drizzle 1 tablespoon extra-virgin olive oil over the pasta and toss to combine the veggies and orzo. Add basil and salt and pepper and toss to combine. Taste your orzo to adjust seasonings and serve.h

Labels: ,

ENJOYED THIS POST? SHARE IT WITH OTHERS:

Click to share on StumbleUpon STUMBLE This Click to share on kirtsy Add to KiRTSY Click to share on Mixx Add to MIXX Click to share on DeliciousIt's DELICIOUS

Wednesday, January 03, 2007

Make Your Own Scented Oil Refills

I have an obsession with making sure our house always smells really nice. House that smells really nice= six or seven of those scented oil plugins all over the house. The problem with having all of these is the cost to maintain them.

My first solution was to find the generic versions at Aldi. They had lots of scents to choose from and they are only $1.67 per plugin. That was a better deal than most places, but times that by six each month and that was quite the cut into the grocery budget.

I was reading a list of tips from Mary Hunt, that are provided by her readers, and I saw this tip. This is one of those tips where I literally smacked my head and said, "Why didn't I think of that sooner?"

The tip was to take scented oils, from cheap places like your local Dollar Store, and refill those puppies yourself.

I went to our Dollar Store last night and picked up an apple cinnamon scented oil. I brought it home and took the oil refill apart. The generic ones basically come apart by being pulled. I am sure the brand name ones probably can screw apart. I then took a small funnel and poured in the new scent. I dipped both ends of the scent-stick-thingie in the oil, just to give it a good start, put it back together & plugged it back in.

Total cost, about five cents a pop! Isn't that such a brilliant idea? I just love when I find a good idea like that!

Oh, and our house smells like a dream. I did get a few weird looks from my husband as I was performing my science experiment, but whatever!

Be sure to visit Rocks in my Dryer for more great solutions!

Labels: ,

ENJOYED THIS POST? SHARE IT WITH OTHERS:

Click to share on StumbleUpon STUMBLE This Click to share on kirtsy Add to KiRTSY Click to share on Mixx Add to MIXX Click to share on DeliciousIt's DELICIOUS

Wednesday, December 06, 2006

WFMW: Don't Throw Out Those Take-Out Menus!


It has been awhile since I have participated in Works-For-Me Wednesday, but I have been drained trying to get ready for the holidays. I actually had no original thoughts to contribute!

This week I actually had (I thought) a brilliant idea for those take-out menus that I get in the mail. Usually I get take-out menus from all sorts of restaurants in our area and we also get a booklet from a dining in service that picks up food for you so you don't have to run out and actually pick it up. Normally I throw these in the trash, but they came in handy this week as I have been preparing my menu plan.

This week I was stumped for ideas for dinner, but I pulled these take out menus out and I had a bunch of great ideas for what to fix for dinner. Say you want Italian one night? Well, whip out the Italian take-out menus and pick from those. Don't have a recipe? Well, just head to your computer and look a recipe up on AllRecipes.com. Craving some good pub food? Make your own at home. How about diner food? Why not make it at home instead?

Now since we all know that I love to save money, I had a blast preparing the food and then saying to my husband, "You know, if we went to such-and-such restaurant we would have paid a lot more for this same dish." Since I have the menus I can quote down to the quarter how much I saved us. I am sure it drives him crazy, but it makes me happy!

Menu planning became a lot easier once I saw the menus and even the uncreative can be inspired by reading these.

I hope this works for you too! Check out Shannon's blog for all of this week's participants.

Labels: ,

ENJOYED THIS POST? SHARE IT WITH OTHERS:

Click to share on StumbleUpon STUMBLE This Click to share on kirtsy Add to KiRTSY Click to share on Mixx Add to MIXX Click to share on DeliciousIt's DELICIOUS

Wednesday, November 01, 2006

Works-For-Me Wednesday: Organizing Software That Works!

Today I wanted to share about a new software program that has greatly improved my life. The software is called Cozi Central, and it is absolutely free.

This software is made with a mom in mind. It is easy to use, color-coded (for each family member), includes pictures of your sweet little ones, helps you with your grocery list, has calendars with alerts letting you know when your appointments are and you can send love notes to your hubby…all from one central location.

I have been using the software for a couple of weeks now and it has helped my life so much already. One of the features that I appreciate the most on it is the ability for my husband to login from work and see what is going on with our week. He has his own color and so do all of the other family members. He can quickly look at the day and see whether or not that particular night is a good night for him to work late. For example, when he sees that his folks are coming for dinner, he knows that is not the night to make plans to work late. He can also add his own things to the calendar and I can login and add things that the kids and I do during the day too.

I am not into text messaging, but I know that many people would benefit from the text messaging feature. I can write my hubby a note and send it directly to his phone letting him know that we have run out of milk. I can also send my grocery list to his phone or by email.

On their website, they have included these features as highlights of their free program:

Personalize your Cozi Home Page by adding a favorite photo

View upcoming appointments

Access shopping and other lists quickly to keep them up-to-date

Send a Cozi Message to all family members

Simply type in a few words to describe your upcoming appointment and Cozi Central will place it correctly on your calendar

Add and view upcoming appointments at a glance—color-coded for each family member

Easily view the current day, week or month by zooming in and out

Print any view you want to

Cozi Central helps you manage and keep track of the various items you need to purchase and tasks that need someone's attention. It's easy to view and edit shared lists for groceries, big ticket items, birthday gifts, chores, and more.

Information is only useful if you know it's there and can get to it when you need it. We all know what happens when we forget to take a look at the family calendar and other vital family information! Cozi Collage places reminders of your upcoming appointments amid photos of your family to make intelligent use of your computer's down-time.

When there's something quick you want to tell other family members about, it can be a hassle to give each and every family member a phone call or be sure they received your email. Cozi Central enables you to send a quick message. Simply type in your message and then select how to have it sent to each family member: email to Dad, text messages to the teenagers—Cozi Central takes care of the rest.

Doesn’t this sound too good to be true? I thought so too! I did email a representative of their company to find out what the catch was. Would they later be charging you? Would you need to pay to get a different type of membership to get access to other features? Just how did they intend to keep this product free? It was explained to me that Cozi will always be free and that the company receives it revenues by getting paid sponsorships, that way the users are never affected. Well, you know me and free (unless you have been missing my awesome Freebie Fridays) so this sounded like a dream come true.

I highly recommend this software, and heck…it’s free! What do you have to lose to try it?

Thank you to Cozi for contacting us about their wonderful product and we wish the company much luck in giving disorganized mothers everywhere some organization in our lives. As my husband is a former employee of Microsoft, we have a true love for guys who break out on their own from this company and create such fantastic products! Kudos to you all for making such an awesome product!

If you would like to view more solutions for your family, please visit Rocks In My Dryer today!

Labels: , ,

ENJOYED THIS POST? SHARE IT WITH OTHERS:

Click to share on StumbleUpon STUMBLE This Click to share on kirtsy Add to KiRTSY Click to share on Mixx Add to MIXX Click to share on DeliciousIt's DELICIOUS

Wednesday, October 25, 2006

Works-For-Me Wednesday: Making Restaurant Food From Home

Welcome to this edition of Works-For-Me Wednesday. After being on hiatus last week, it is up and rolling again. Please visit Shannon's blog for a listing of all the participants and their solutions.

I have decided that I no longer enjoy going out to dinner. The only time I really enjoy it is for a special treat or a really nice date night with my husband. If it is not a special occasion, chances are that you will find us eating at home.

I do enjoy certain foods from restaurants, but the hassle and the poor service usually outweighs the desire to go out to dinner.

When I am really hungry for restaurant food, I go to my recipe files and pull out these recipes (for whichever food I am craving that particular night).

Craving Olive Garden?

Italian Veggie & Pasta Soup

2 lbs ground turkey, 3 carrots, chopped very small, 4 stalks celery, 2 cans diced tomatoes (do not drain), 2 cans red kidney beans (drained, 3 cans beef broth, 1 jar spaghetti sauce, 8 ounces noodles (elbow macaroni works great), salt & pepper to taste.

Brown the ground turkey in a skillet. Drain fat from turkey and place in the slow cooker. Add to the slow cooker all of the ingredients except for the pasta. Cook soup on low for seven to eight hours or on high for four to five hours. During the last thirty minutes (if on high) or one hour (on low) add the pasta.

Rosemary & Cheese Breadsticks

1 cup grated Parmesan, Asiago, Romano cheese (made by Kraft in the dairy aisle) 1 teaspoon chopped fresh rosemary leaves, 1 (11-ounce) container refrigerated breadstick dough (recommended: Pillsbury), 1 tablespoon olive oil

Preheat the oven to 350 degrees F. Line 2 heavy large baking sheets with silicone baking sheets or parchment paper. Pour cheese and chopped fresh rosemary on a paper plate to roll the dough in. Separate the dough strips. Using a pizza cutter or a large sharp knife, cut each dough strip in half lengthwise to form thin strips. Working with dough strip at a time, coat each strip with the cheese mixture, pressing very gently. Twist each cheese covered dough strip and place onto prepared baking sheets. Sprinkle with the salt, if you wish.
Bake until the breadsticks are golden brown, about 10 to 15 minutes. Transfer the warm breadsticks to a basket or tall glass and serve.

Chicken Parmesan

4 boneless skinless chicken breast halves, ½ cup Italian breadcrumbs, 1 egg beaten, 4 teaspoons butter, 2 cups spaghetti sauce, 4 slices mozzarella cheese & 1 teaspoon of grated parmesan.

Pound chicken to flatten. Salt & pepper to taste. Dip chicken in egg; then in breadcrumbs. Fry in butter in hot skillet, turning & browning for ten minutes or until chicken is done. Remove from skillet. To skillet, add the spaghetti sauce & heat thoroughly. Add chicken back to the skillet. Place slices of mozzarella on top of chicken and sprinkle with the parmesan cheese. Cover & cook until the cheese is melted. Serve this with a side of spaghetti.

Craving Red Lobster?

Easy Garlic-Cheese Biscuits

2 Cups Original Bisquick, 2/3 cup milk,½ cup shredded Cheddar Cheese,¼ cup butter or stick margarine melted, ¼ teaspoon garlic powder

Heat oven to 450 degrees. Mix Bisquick, milk, and cheese until soft dough forms; beat vigorously 30 seconds. Drop dough by ten to twelve spoonfuls about two inches apart onto an ungreased cookie sheet. Bake eight to ten minutes or until golden brown. Mix butter and garlic powder; brush on warm biscuits before removing from cookie sheet. Serve warm.


Linguine with Clam Sauce

1 pound linguini, Salt, 1/4 cup extra-virgin olive oil, 2 tablespoons of butter, 4 cloves garlic, chopped, 1/2 to 1 teaspoon crushed red pepper flakes, 1/2 cup dry white wine, Juice from ½ a lemon, 2 (15-ounce) can whole baby clams, with their juice, Handful flat-leaf parsley, chopped.

Bring a large pot of water to a boil. Add salt and the linguini and cook as directed or until al dente. The linguini will continue to cook in sauce, later.
To a large skillet heated over medium heat, add oil, butter, garlic, and red pepper flakes. Cook together. Add wine and the juice from the clams to the pan and give the pan a shake. Finally, add the clams. Drain pasta and add it to the clam sauce. Toss and coat the pasta in sauce with clams until the pasta absorbs the flavor and juices, 2 to 3 minutes. Remove from heat and season with salt, add parsley and serve.


Salmon Baked In Foil

4 (5 ounces each) salmon fillets, 2 teaspoons olive oil plus 2 tablespoons, Salt and freshly ground black pepper, 3 tomatoes, chopped, or 1 (14-ounce) can chopped tomatoes, drained, 2 chopped shallots, 2 tablespoons fresh lemon juice 1 teaspoon dried oregano, 1 teaspoon dried thyme

Preheat the oven to 400 degrees F. Sprinkle salmon with 2 teaspoons olive oil, salt, and pepper. Stir the tomatoes, shallots, 2 tablespoons of oil, lemon juice, oregano, thyme, salt and pepper in a medium bowl to blend. Place a salmon fillet, oiled side down, atop a sheet of foil. Wrap the ends of the foil to form a spiral shape. Spoon the tomato mixture over the salmon. Fold the sides of the foil over the fish and tomato mixture, covering completely; seal the packets closed. Place the foil packet on a heavy large baking sheet. Repeat until all of the salmon have been individually wrapped in foil and placed on the baking sheet. Bake until the salmon is just cooked through, about 25 minutes. Using a large metal spatula, transfer the foil packets to plates and serve.

Craving IHOP?

Pumpkin Pancakes with Yogurt

2 cups unbleached all-purpose flour,1/2 cup sugar, 1/2 teaspoon salt, 2 teaspoons baking powder, 2 teaspoons baking soda, 1/2 teaspoon cinnamon, 1/2 teaspoon vanilla, 3 eggs, 1 cup plain yogurt, 3/4 cup milk, 1 cup pumpkin, canned.

In a large bowl, whisk together the flour, sugar, salt, baking powder, baking soda and spices. In a separate bowl, beat the eggs, adding yogurt, milk and pumpkin puree. Mix well. Pour the egg mixture into the flour mixture and stir until just blended. Spoon the batter onto a preheated, oiled griddle, using 1/4 cup batter for each pancake. Cook pancakes slowly over a low-medium heat for approximately 4-6 minutes, flipping after 3 minutes.

Fluffy Pancakes

1 egg, 1 cup flour,¾ cup milk, 2 tablespoons margarine, melted, 1 tablespoon sugar, 3 teaspoons baking powder, ½ teaspoon salt.

Beat egg until fluffy. Add milk & melted margarine. Add dry ingredients.

Banana Pancakes

1 cup flour,1 tablespoon white sugar, 2 teaspoons baking powder, ¼ teaspoon salt, 1 egg, beaten, 1 cup milk, 1 teaspoon vanilla, 1 teaspoon cinnamon, 2 tablespoons vegetable oil, 1 ripe banana

Combine flour, white sugar, baking powder cinnamon, & salt. In a separate bowl, mix together egg, milk, vegetable oil, vanilla, & bananas. Stir flour mixture into banana mixture; batter will be slightly lumpy. Heat a lightly oiled griddle or frying pan over medium high heat. Pour or scoop batter onto the griddle, using approximately ¼ cup for each pancake. Cook until pancakes are golden brown on both sides; serve hot.


Oven Fried Bacon

Use a large, rimmed baking sheet, such as a jelly-roll pan, that is shallow enough to promote browning, yet tall enough (at least 3/4-inch in height) to contain the rendered bacon fat. To save time, you can add the bacon to the oven before it reaches 400 degrees, but exact cooking time will vary from oven to oven. If cooking more than one tray of bacon, exchange their oven positions once about halfway through the cooking process.Adjust oven rack to middle position and heat oven to 400 degrees. Arrange bacon slices in a large jelly-roll pan or other shallow baking pan. Roast until fat begins to render, 5 to 6 minutes; rotate pan front-to-back. Continue roasting until is crisp and brown, 5 to 6 minutes longer for thin-sliced bacon, 8 to 10 minutes for thick-cut. Transfer with tongs to paper towel-lined plate, drain, and serve.

Craving Tacos?

Slow Cooker Taco Meat

3 tbsp taco seasoning, 1 cup chicken broth, 1 pound boneless, skinless chicken breasts

Dissolve taco seasoning into chicken broth. Place chicken breasts in slow cooker and pour broth over them. With two forks, shred the chicken meat into bite-size pieces. To freeze, place shredded meat into freezer bag with juices. Press out all the air & seal.

Taco Soup

1 pound ground turkey, 1 can chili beans, with liquid, 1 can kidney beans, with liquid, 1 can whole kernel corn, with liquid, 2 cans diced tomatoes, 1 can tomato sauce, 2 cups water, 1 package of taco seasoning mix.
In a medium skillet, cook the ground beef until browned over medium heat. Drain & set aside. Place the ground beef, chili beans, kidney beans, corn, tomato sauce, water, diced tomatoes, & taco seasoning mix in a slow cooker. Mix to blend and cook on Low setting for eight hours.


How about a burger?

Amy’s Famous Burgers

1 pound ground beef, 1 egg, 1 package dry onion soup mix, ½ cup cheddar cheese, ½ cup mozzarella cheese, 1 t. oregano, Salt and pepper to taste.
Mix all ingredients together and form into patties. Grill according to grill instructions. I usually throw these on the George Foreman grill for ten minutes to cook quickly.

Amy’s Butter Burgers

1 ¼ pound 80% lean ground beef, 2 Tablespoons Worcestershire Sauce, Salt and Pepper, 1 pat of butter per burger

In a large bowl mix together the ground beef, Worcestershire Sauce, salt, and pepper. Shape into four patties and make an indentation in the center of each burger. Fill this indentation with a pat of butter and gently shape the meat around the butter until the butter is sealed. Grill five minutes on each side or until you have achieved desired doneness.

Cheddar Cheese-Stuffed Burgers

10 ounces ground sirloin or lean ground beef, 1/3 cup finely chopped red onion, 1/4 cup chopped fresh parsley, 2 teaspoons Worcestershire sauce, 1/4 teaspoon salt, 1/4 teaspoon pepper, 1/2 cup grated sharp cheddar cheese, 2 large (4 1/2-inch-diameter) English muffins, split horizontally

Prepare barbecue (medium-high heat). Combine meat, onion, parsley, Worcestershire sauce, salt and pepper in medium bowl; blend well. Divide meat mixture into 2 equal portions. Shape each into ball. Poke deep hole in each ball and fill each with half of cheese. Mold meat around cheese to enclose. Flatten each filled burger to 3/4-inch-thick patty. Grill burgers to desired doneness, about 5 minutes per side for medium. Grill muffin halves until beginning to color, about 1 minute per side. Serve burgers in muffins.Serves 2; can be doubled.

Oven Steak Fries

5 russet potatoes, cut into thin wedges 3 tablespoons extra-virgin olive oil 1 teaspoon dried thyme. 1 teaspoon dried oregano, 1 tablespoon steak seasoning blend, such as Montreal Steak Seasoning or, salt and pepper.


Preheat oven to high. Cut potatoes and spread out on a cookie sheet. Coat potatoes with extra-virgin olive oil, dried herbs and steak seasoning or, salt and pepper. Spread potatoes to the corners of the cookie sheet. Cook potatoes in very hot oven 25 minutes. Turn potatoes once, half way in the cooking process. Serve fries hot from the oven.

Now you know some of my cooking secrets! I hope you can reach for one of these recipes if you are in the mood to dine out. It will be much friendlier on your wallet!

Labels: ,

ENJOYED THIS POST? SHARE IT WITH OTHERS:

Click to share on StumbleUpon STUMBLE This Click to share on kirtsy Add to KiRTSY Click to share on Mixx Add to MIXX Click to share on DeliciousIt's DELICIOUS

Wednesday, October 04, 2006

WFMW: CheckFree Works For Me!

Thanks for swinging by my little blog. I am participating in the Works-For-Me Wednesday this week, despite feeling very uncreative. For more creative ideas than what I am offering, please visit Shannon's blog and get extremely inspired for your week.

I wanted to recommend a service that I have used to pay my bills online. I have blogged about it in the past, but didn't really share this solution in the WFMW spot. I have been using CheckFree for years now to pay all of my bills, and just like the title says... it is free.

We had looked into paying our bills through our bank, but (much like everything in our bank) they charge to do this. I did some research and happened upon this website and I have never used anything else.

How is it free? I guess they have relationships with these companies. The companies want their money, they will pay someone to extract it from our bank account, and we have our accounts extracted for free...um, sort of.

Click the companies that you want them to work with, plug your account information into it, and then let them do the work for you. Saves on stamps because you aren't mailing anything. Saves on paper because you don't need to print every single bill out. Makes tax time a cinch because you have one place where everything is located. Finally, think of the clutter you will reduce in your home if you pay your bills online.

I did want to mention that I am hesitant to have things automatically taken out of my checking account, so instead I wait for the friendly email reminder from CheckFree to remind me that the electric bill is coming up. I then pay things as they come in, that way I can check all of my bills for any inaccuracies.

And if you were wondering, yes, those sales people just *love* me!

Past Entries:
Cleaning Up Yo' Grill
Good Ol' Plastic Bags
Easy Carrying & Storing
Find Just What You Are Looking For
Target Pharmacy
Say No to Hand Cramps
Foamy Soap
Adventures in Shipping
Frugal Exercise Solutions
Microfiber Obsessions
Sand Between Your Toes Blues
Giving the Gift of Magazines (Frugally)
Solution for Cheap Trash Bags
Programming Your Cell Phone
Free Up Pantry Space: Make a Snack
Weeding Through Your Child's Art Work Creatively
Using the Coffee Maker With Ease
Making Your Spice Rack Usable
Maximizing Space

Labels: , ,

ENJOYED THIS POST? SHARE IT WITH OTHERS:

Click to share on StumbleUpon STUMBLE This Click to share on kirtsy Add to KiRTSY Click to share on Mixx Add to MIXX Click to share on DeliciousIt's DELICIOUS

Wednesday, September 27, 2006

WFMW: Cleaning Up Yo' Grill

Welcome to Works for Me Wednesday. Each week a bunch of us share our solutions for our family with our readers. If you want to get the full experience, please visit Shannon's blog and you will find hundreds of ideas for your family & simplifying your life.

I have a quick and easy tip if you are looking for an easy solution for cleaning your grill. If you have a self-cleaning oven in your home, simply take the grill grates from your outdoor grill and pop them in with your oven. Run it through the self-cleaning cycle and go to bed. In the morning you will have a shiny clean grill and a shiny clean oven. What could be better than that?

Here is the listing of all my other grand ideas- feel free to browse around and I hope you find this tip helpful!!

Good Ol' Plastic Bags
Easy Carrying & Storing
Find Just What You Are Looking For
Target Pharmacy
Say No to Hand Cramps
Foamy Soap
Adventures in Shipping
Frugal Exercise Solutions
Microfiber Obsessions
Sand Between Your Toes Blues
Giving the Gift of Magazines (Frugally)
Solution for Cheap Trash Bags
Programming Your Cell Phone
Free Up Pantry Space: Make a Snack
Weeding Through Your Child's Art Work Creatively
Using the Coffee Maker With Ease
Making Your Spice Rack Usable
Maximizing Space

Labels: ,

ENJOYED THIS POST? SHARE IT WITH OTHERS:

Click to share on StumbleUpon STUMBLE This Click to share on kirtsy Add to KiRTSY Click to share on Mixx Add to MIXX Click to share on DeliciousIt's DELICIOUS

Wednesday, September 20, 2006

WFMW: Good Ol' Plastic Bags

Welcome to my little corner of the world over at Works-For-Me-Wednesday. For more great solutions and ideas for your family, please visit Rocks In My Dryer and click through all of the great participants.

I love plastic grocery bags and use them for just about everything- from carrying my library books to lining our trash cans.

I have a caddy with all of my cleaning supplies in it and I take that from room to room when I do the weekly house cleaning. Within it are two of my favorite free tools- newspaper and plastic trash bags. I take a giant trash bag with me from room to room and pull all of the trash from each room. In the bottom of each trash can, I put three extra trash bags and then line it with a final bag. When the trash is full, it makes it easy to toss and then place one of the empty trash bags (from the bottom) in its place. I also keep one newspaper in my caddy of tools for wiping down windows and mirrors....But I digress.

My favorite use for plastic grocery bags is to line my counters and kitchen sink. Instead of dirtying my counter when I open fresh poultry or beef, I just open the package over the empty grocery bag and dump the juices (and bacteria) directly into the trash can.

They are also really handy when peeling potatoes or carrots. Just line the interior of the kitchen sink and clean-up becomes a cinch when you gather up your bags and toss the vegetable peels in one fell swoop.

I hope this helps save some of you some clean-up time out there! Thanks so much for stopping by. For new visitors, I always include links to my past entries. Feel free to browse around!!

Past Entries:

Easy Carrying & Storing
Find Just What You Are Looking For
Target Pharmacy
Say No to Hand Cramps
Foamy Soap
Adventures in Shipping
Frugal Exercise Solutions
Microfiber Obsessions
Sand Between Your Toes Blues
Giving the Gift of Magazines (Frugally)
Solution for Cheap Trash Bags
Programming Your Cell Phone
Free Up Pantry Space: Make a Snack
Weeding Through Your Child's Art Work Creatively
Using the Coffee Maker With Ease
Making Your Spice Rack Usable
Maximizing Space

Labels: , ,

ENJOYED THIS POST? SHARE IT WITH OTHERS:

Click to share on StumbleUpon STUMBLE This Click to share on kirtsy Add to KiRTSY Click to share on Mixx Add to MIXX Click to share on DeliciousIt's DELICIOUS

Wednesday, September 13, 2006

WFMW: Easy Carrying & Storing

Good morning and welcome to this week's edition of Works For Me Wednesday where hundreds of mommies share solutions for their families. Be sure to stop by Miss Shannon's blog to read all of the entries!

I do a lot of cooking for other families because that is how I feel like I can help in crisis situations and to show my appreciation to people. Since I take meals all over, I have gotten the whole process down to a science. Because balancing and carrying items was hard, I did finally invest in a serving tray that I could carry everything on, but I had a creative solution before which worked for a long time. This solution works really well, in particular, for those flimsy aluminum pans. Just invert a lid of a 9x13" pan and rest your dish into that. I used the edges of it as a handle for carrying the dish and it made it easy to put it in the car.

This also works really well for stacking casseroles (until they become frozen or until you remember you put it in there) when you are freezing multiple dishes.

I also find, when I am running meals, usually the space in my fridge is limited. I just use my cooling racks and stack using those. I can usually get two or three stacks going, which saves on space.

Past WFMW Entries:

Find Just What You Are Looking For
Target Pharmacy
Say No to Hand Cramps
Foamy Soap
Adventures in Shipping
Frugal Exercise Solutions
Microfiber Obsessions
Sand Between Your Toes Blues
Giving the Gift of Magazines (Frugally)
Solution for Cheap Trash Bags
Programming Your Cell Phone
Free Up Pantry Space: Make a Snack
Weeding Through Your Child's Art Work Creatively
Using the Coffee Maker With Ease
Making Your Spice Rack Usable
Maximizing Space

Labels:

ENJOYED THIS POST? SHARE IT WITH OTHERS:

Click to share on StumbleUpon STUMBLE This Click to share on kirtsy Add to KiRTSY Click to share on Mixx Add to MIXX Click to share on DeliciousIt's DELICIOUS

Wednesday, August 30, 2006

WFMW: Find Just What You Are Looking For

I am stumped for ideas on what to share with you this week for the official Works For Me Wednesday segment (sponsored by my blogging friend, Shannon) so I have decided to take a different approach this week.

Here are the top twenty keyphrases, that people have searched under, and happened upon our site. Maybe one of these links will answer a question that has been pondering your mind. Or perhaps, you will think I am a lazy lady today who is stumped for ideas. Hmmm? I believe that both of these statements would be true!

1. Motherload- This would be the name of my blog. That you are looking at right now. We have had 179 hits (just this month) searching for this keyword.

2. Aldi Supermarket-I write frequently about Aldi Supermarket because it is my favorite store. In fact, if you type in that keyphrase, my site is now one of the first things to pop up on the search engines. In some cases, our site pops up before the official Aldi Supermarket homepage (which really cracks me up). This is why I get tons of emails complimenting their products, requesting refunds, and I have even had one poor lady email me that she would like to know if I could check my North Carolina store for her wallet that she happened to leave there. If you want to know more about Aldi, here are some links to some important Aldi information.

Aldi Supermarket: The Real Deal?
Aldi Fall/Winter Menu Planner
Aldi Menu Planner
Aldi Price Sheet

3. School lunch ideas- I actually had a blog entry on some frugal ideas for school lunches. I also had included a link to my free lunchbox love notes. These can be printed out for your sweet child or hubby (whoever is being nicest to you!)

4. Mom Advice- That is the name of my website, which is not to be confused with the name of my blog (The Motherload). Trust me, it confuses me too! In the beginning, I didn't really want my blog to link to my site because I was blogging about personal things in our life. I have changed it to just ideas for saving money & time. It seems to be working better for me and that is why we have joined these together.

5. Freezing zucchini- This was never written by me, but was posted on my forum. I guess a lot of people have questions on how you can freeze this vegetable. If you are looking for recipes or trying to find a way to use up zucchini, please check out this thread.

6. Gap Love Beads- Again, this one was not posted by me. This was a freebie that someone shared with us on the freebie section of our forum. If you are looking for some Gap Love Beads, check out this thread. I am known to share freebies though, each Friday of my blog, and if you are looking for free samples check out this past week's post.

7. Swiffer Coupons- We had a link to this on our forum. If you go on the Swiffer website right now, they have tons of coupons. $1 off on the Swiffer Sweeper, $3 off on the Swiffer CarpetFlick, $5 off the Swiffer WetJet, $5 off the Swiffer Sweeper+Vac, and $1 off the Swiffer dusters.

8. Eat Free On Your Birthday- This is becoming a popular link on our blog. I put together a list of all the places you could dine for free on your birthday. If your birthday is coming up, take advantage of some of those freebies and read my post.

9. Diaper Bag Essentials- I wrote an article on everything you should keep in your diaper bags. There is also a diaper bag checklist that you can print out and hang on your fridge. You must SAVE it first and then print it. For some reason, this one shows a blank page, but when saved & printed it works fine.

10. Mom Groups- I wrote an article on all of the national mothers groups out there. I would be nothing without my mom's group. If I had not had their support, I would have never been able to do this site or to have felt so good about making the decision to stay home with my children. If you are looking for a support system, please read this article.

11. Dinner Ideas- I have an article called, "Picky Eater Dinner Ideas." If you can't think of something to fix for your picky children, you should read this article. Recipes are included!

12. Pizza Dough Recipes- I love pizza. I also love talking about pizza. I wrote a blog entry on how to make your own pizza at home, hoping to save our family some money. I then revisited pizza dough and reviewed a new recipe that I really loved.

13. Aldi Supermarkets- Plural of entry #2.

14. McDonald's Birthday Party- We had our son's birthday party at McDonald's and it was the best one EVER! I shared this as a frugal party option (when you don't feel like hosting a party in your house).

15. Aldi Phone Number- There is no phone number for Aldi. They do not have a listed number that you can call. People are always looking for this, but no Aldi has a listed phone number. You need to go to the store to find out information.

16. Free On Your Birthday- Visit keyphrase #8 for all the freebies that you can receive.

17. Mother Load- Same as keyphrase #1

18. McDonald's Birthday Parties- See keyphrase #14 and take your kiddos to the dang McDonald's for their birthday!!

19. Aldi Recipes- Lots of those listed under keyphrase #2

20. Moms Advice- That's what I give- hope you like it!

Past WFMW Entries:

Target Pharmacy
Say No to Hand Cramps
Foamy Soap
Adventures in Shipping
Frugal Exercise Solutions
Microfiber Obsessions
Sand Between Your Toes Blues
Giving the Gift of Magazines (Frugally)
Solution for Cheap Trash Bags
Programming Your Cell Phone
Free Up Pantry Space: Make a Snack
Weeding Through Your Child's Art Work Creatively
Using the Coffee Maker With Ease
Making Your Spice Rack Usable
Maximizing Space

Labels: ,

ENJOYED THIS POST? SHARE IT WITH OTHERS:

Click to share on StumbleUpon STUMBLE This Click to share on kirtsy Add to KiRTSY Click to share on Mixx Add to MIXX Click to share on DeliciousIt's DELICIOUS

Wednesday, August 23, 2006

WFMW: Target Pharmacy Works For Me!


Welcome to this week's edition of Works for Me Wednesday. As always, I am honored to participate in this, each week, and encourage you to swing by Shannon's blog for more great tips from moms just like me!

This week, I just wanted to share with you all my favorite place in the world to get prescriptions- Target Pharmacy. If you are already a Target Pharmacy customer, please disregard this post because it is all about how wonderful it has been for our family.

Pictured here is their redesigned bottles. Notice that they are clear (making it easy to see how much/how little of a medication you have) and that they have a handy little ring around them. This ring is color coded and each family member gets a color for their prescriptions. This makes it easy for me to find my son's medication (he is blue) versus my daughter's medication (which is purple). For a my tired eyes in the morning, this has prevented us from a lot of medicine mix-ups.

You can also see that this bottle is flipped on its head. This helps to get all of the information on the front of the bottle and to make it easier to read. Tucked on the side, (see that little flap) is the little sheet with all of the side effects. Don't know about you, but this usually gets thrown into the trash.

The best part for me, as a mom, is giving the medicine to my children and how they have improved this little factor. Anyone who has had a screaming & tantruming child who hates to receive medicine, knows that the teaspoon just doesn't cut it. Target has also introduced bottles for liquid medicines that include a syringe dispensers that fits tightly into a specially designed cap on the bottle. To dispense liquid medication to a child, one can easily insert the syringe, turn the bottle upside down, and fill the syringe with an exact dose rather than the messy alternative of pouring into a teaspoon. This cuts down on the mess and I also am able to make sure that I get every last drop out of that bottle because it is inverted.

Other services that I have also appreciated are that they automatically refill my medication (if I request it), contact my doctor if I need a refill (which doesn't involve me calling the doctor and then calling the pharmacy), and I can request refills by telephone or online (how convenient!)

If you have the choice of where to get your prescriptions filled, I highly recommend getting them there. The new bottle is just one part that I love about it. The other part is the shopping I can do while I am waiting for my prescription.

What is not to love about Target?

As always, I am including links to my past entries. Feel free to browse around and leave your comments. I really, really love the comments!!

Past WFMW entries:

Say No to Hand Cramps
Foamy Soap
Adventures in Shipping
Frugal Exercise Solutions
Microfiber Obsessions
Sand Between Your Toes Blues
Giving the Gift of Magazines (Frugally)
Solution for Cheap Trash Bags
Programming Your Cell Phone
Free Up Pantry Space: Make a Snack
Weeding Through Your Child's Art Work Creatively
Using the Coffee Maker With Ease
Making Your Spice Rack Usable
Maximizing Space

Labels:

ENJOYED THIS POST? SHARE IT WITH OTHERS:

Click to share on StumbleUpon STUMBLE This Click to share on kirtsy Add to KiRTSY Click to share on Mixx Add to MIXX Click to share on DeliciousIt's DELICIOUS

Wednesday, August 16, 2006

WFMW: Say NO to Hand Cramps!

Good morning and welcome to this edition of Works-For-Me Wednesday. As always, may I please redirect you over to Miss Shannon’s blog, where you have the opportunity to read a hundred and one solutions for your family? Please take a minute to stop by her site!

Today I would like to share one of my other fun free obsessions- address labels. I get a lot of these in the mail and I use them for so many different things.

I keep a stash in my purse and use them when I go to get my film developed. It saves me from writing my address out over and over again on those little envelopes.

If you are traveling, it is a quick way to fill out paperwork and to make luggage tags for yourself.

I put address labels on a set of containers that I use to take meals over to people. This particularly helps out the tired new mommies, who are bombarded with fifty casseroles and can’t remember whose dish is whose.

Tack an address label onto your cell phone, address book, day planner, and coupon organizer. These are definitely items that you would want to have back if you lost them.

If you would prefer another free kind of stamp, there are also free self-inking address stamps. I have used mine until I literally have to throw all of my weight down over the envelope to get it to stamp. This is after three years of regular use and abuse in our house though. If you are looking for a self-inking address stamp, I absolutely love using VistaPrint. Many of the items on there only cost you shipping…and it is legitimate! One stamp is free, to buy two is $4.99. Slow shipping is only $5.25. For $5.25, you could save yourself from those horrible hand cramps and writing your address over and over again on your bills. Just think of how much time you will save around the holidays. No writing over and over your address on your American Express, Visa, and Mastercard bills. What a huge timesaver! Oh, and don’t forget the holiday card exchange- who wants to write that ten thousand times.

My husband actually ordered business cards for me one year, from this company, and got them for me as a Christmas gift. If you want to make your wife feel like a million bucks, make up a business card with her name and website on it. You could not have gotten me a better present. I have a whole box of them and I tuck them in my wallet so when someone finds out what I do (usually by my bragging tone or the way I keep dropping the fact that I work), I can just whip one of these little cards out so they are more likely to visit my website.

Speaking of business cards, you can make those up for free through VistaPrint too! I have been toying with the idea of getting a free set of these with our family information on it. I can’t tell you how many times I make friends when our family is out and about or we run into old friends at a store. It would be great to have our information on a card so that I can just hand that to them instead of trying to find a scrap piece of paper in my purse to write our phone number and address on.

If you are interested in VistaPrint, you can actually get ten percent cash back through Ebates. I will stop preaching about signing up for Ebates (because who doesn’t want some free cash back on their purchases?), but I will say that I have over thirty-five bucks in my account since I signed up a couple of months ago. That just goes to show that you don’t have to be a big spender to reap the rewards. If you would like to read some of my past sermons on Ebates, you can read one here and one here.

Thanks for visiting my little smorgasbord of ideas. I hope that you found them helpful! Feel free to browse around the blog and our website. Solutions for families are my cup of tea!

Past WFMW entries:
Foamy Soap
Adventures in Shipping
Frugal Exercise Solutions
Microfiber Obsessions
Sand Between Your Toes Blues
Giving the Gift of Magazines (Frugally)
Solution for Cheap Trash Bags
Programming Your Cell Phone
Free Up Pantry Space: Make a Snack
Weeding Through Your Child's Art Work Creatively
Using the Coffee Maker With Ease
Making Your Spice Rack Usable
Maximizing Space

Labels: ,

ENJOYED THIS POST? SHARE IT WITH OTHERS:

Click to share on StumbleUpon STUMBLE This Click to share on kirtsy Add to KiRTSY Click to share on Mixx Add to MIXX Click to share on DeliciousIt's DELICIOUS

Wednesday, August 09, 2006

WFMW: Foamy Soap

It is Works-For-Me Wednesday and I am happy to participate in this weekly event. For more great tips for you & your family visit the WFMW Founder, Shannon, at her website Rocks in My Dryer. There are a whole slew of great ideas for your family.

My little tip this week is regarding those foamy hand soaps that you can buy. I got three of these from a family member for Christmas one year and I love them. There is something about a foamy hand soap that makes me feel like my hands are so much cleaner. Ironically, the foaming hand soaps are only about ¼ soap and the rest is just good old-fashioned water.

When I ran out of soap, I decided to save the container and reuse it. I filled this container with our daughter’s bath wash (1/4 full) and then filled it the rest of the way with water. Gave it a good shimmy shake and ta-da! This makes your very own foamy bath soap for your little one. I just squirt a dollop of soap directly on her and rub it in with a washcloth. When you have a wet and wild little wiggle worm like I do, this soap makes things a lot easier for us during bath time.

I just peeled the label off of the front of the Bath & Body soap and labeled it (with my trusty label maker) and popped it in with her bath soaps & toys. It is amazing how much further our soap goes when we use this versus the regular old pump soap.

Want more WFMW solutions? Here ya go!

Adventures in Shipping

Frugal Exercise Solutions

Microfiber Obsessions

Sand Between Your Toes Blues

Giving the Gift of Magazines (Frugally)

Solution for Cheap Trash Bags

Programming Your Cell Phone

Free Up Pantry Space: Make a Snack

Weeding Through Your Child's Art Work Creatively

Using the Coffee Maker With Ease

Making Your Spice Rack Usable

Maximizing Space

Labels: , ,

ENJOYED THIS POST? SHARE IT WITH OTHERS:

Click to share on StumbleUpon STUMBLE This Click to share on kirtsy Add to KiRTSY Click to share on Mixx Add to MIXX Click to share on DeliciousIt's DELICIOUS

Wednesday, August 02, 2006

WFMW: Adventures in Shipping

Welcome to this installment of Works-For-Me-Wednesday. Please visit Shannon's blog for some really amazing solutions for your family. If you have a blog and want to take part in the fun, head on over! There are almost a hundred participants each week (and growing) and the tips have been so beneficial for our family.

Today I am going to focus on shipping and shipping costs. Recently, I blogged about a great cost comparison site that you can use when shipping your packages. This site basically does all of the comparing for you so that you know right away which is the cheapest shipping option.

I decided that since I have been doing a lot more shipping lately, that it would be a sound purchase to invest in a good quality postage scale. I went shopping to the big discount chains and could not find a scale anywhere. The scales available at the post office were very pricy and only went up to five pounds. More hunting and thinking later, I decided to check Ebay and their prices. I hit the jackpot. This week I received a thirty-five pound postage scale for a mere twenty-two bucks (this included shipping costs). I figured that combining this with my cost comparison site, that I could just start doing all of my shipping from home. This would save me the hassle of driving everyone over to the post office and I could do this on my own time…maybe when the children are napping or my son is in time-out? That is always a good time to get things done.

Now please bear with me, for those of you who are Ebay Queens and ship regularly, but I was not aware of some of the freebies you can get by shipping through USPS. For absolutely free you can do the following with the USPS site:

Print a shipping label
Schedule a Pickup (I mean schedule a pickup to your front door!)
Boxes (all shapes & sizes) - both flat rate and regular
Address Labels

What I want to know is, why the heck am I using all of my own boxes when I can get these for free?

Finally my last little tip, in this segment today, is regarding that handy little postage scale. Guess what else I am going to be using that little scale for? I am going to measure my food with it. It measures both pounds and ounces so I will be able to buy my chicken or beef in bulk, and divide into exact one pound packages. This will save our family more money because we will be able to be more accurate with the amount of food we are using. The chicken breasts I buy seem to have been injected with a super-duper dose of steroids. These suckers are huge. I will now be able to know that one chicken breast equals a pound, not three chicken breasts like I had originally thought.

I hope that you found this information somewhat beneficial. Give me a shout out and share your tips or, if you feel so inclined, feel free to tell me how great I am. I need a self-esteem boost today.

To my new visitors- take a peek around! My blog dishes up great money-saving solutions for your family every single day! Enjoy!

Labels: ,

ENJOYED THIS POST? SHARE IT WITH OTHERS:

Click to share on StumbleUpon STUMBLE This Click to share on kirtsy Add to KiRTSY Click to share on Mixx Add to MIXX Click to share on DeliciousIt's DELICIOUS

Wednesday, July 26, 2006

WFMW: Frugal Exercise Solutions

Welcome to this installment of Works-For-Me-Wednesday. Please visit Shannon's blog for some great solutions for your family. These ideas are much better than any parenting magazine you will ever read- and best of all, it is free!

Out of shape? Me too! The problem with a gym membership is that you pay so much money to go to the gym, and rarely use it! I can’t afford to pay forty-sixty bucks a month (to sit on my bum) so I found a cheaper solution to developing an exercise routine.

Our library has a ton of great exercise DVD’s. I check out a few at a time, and can enjoy them for (up to) six weeks. Usually by the time the six weeks is over, I am tired of the routine and ready to switch it up again. The great part about this is that it is free!
We also get a channel called Fit TV. If you get this channel, they have a show called, “All Star Workout” that you should set your TiVo for. They have all types of workouts- boot camp, belly dancing, hip hop, yoga, step, and more! It is a great workout and we get it with our regular channels on our satellite dish.

Purchasing home gym equipment can be expensive, but we found a good deal on our equipment with our wholesale club membership. They didn’t have these items in the store, but we were able to order them through their website. You don’t need fancy gym equipment in order to get in shape though. Things that are low-cost (and just as effective) are jump ropes, exercise bands, a step, and a pedometer. A lot can be said for a good old-fashioned push-up, sit up, and a good run!

If you still insist on suiting up for the gym, check to see if your gym offers classes that you can take without having a membership. One of our local gyms offers a card that you can use to pay for classes. You don’t have to have a membership, and each class is four bucks with your card. You get twelve classes on your card and you can use them anytime you want. This is a great way to sample what a gym has to offer without committing to a membership.

Thank you so much to the new visitors! I have included links, to my past submissions, so feel free to browse around. My blog focus is saving your family money. Now who couldn't use a little help in this department?

Past WFMW submissions:

Microfiber Obsessions
Sand Between Your Toes Blues
Giving the Gift of Magazines (Frugally)
Solution for Cheap Trash Bags
Programming Your Cell Phone
Free Up Pantry Space: Make a Snack
Weeding Through Your Child's Art Work Creatively
Using the Coffee Maker With Ease
Making Your Spice Rack Usable
Maximizing Space

Labels: ,

ENJOYED THIS POST? SHARE IT WITH OTHERS:

Click to share on StumbleUpon STUMBLE This Click to share on kirtsy Add to KiRTSY Click to share on Mixx Add to MIXX Click to share on DeliciousIt's DELICIOUS

Wednesday, July 19, 2006

WFMW: Microfiber Obsessions

Welcome to this installment of Works-For-Me-Wednesday. It is my favorite day of the week and I love to share my solutions and read everyone else's great solutions for their families. Please visit Shannon's blog for some amazing ideas for your family.

Today I wanted to discuss my true obsession with microfiber cloths. I have been using these for about three years now, for just about everything around our house. Microfiber is one of God's great gifts because it can be used for so many things.

I originally started using microfiber cloths just for cleaning the house. Dry, they are amazing dust cloths. Wet, they can be used to wipe down counters, mirrors, and showers.

After using those for just those reasons, I started to expand my list of uses. I then started to put a microfiber cloth on the end of my Swiffer and used that to dry dust my floors. I could also attach a dry cloth and use my Swiffer to reach up into the corners of the rooms, where all those dreaded cobwebs take over, without pulling a muscle. Wet, attached to the Swiffer, they can be used much like the expensive wet cloths you buy, but these babies can be reused.

More recently, I have used them as cloth diaper stuffers. They sell a variety of diaper doublers and stuffers that are made from microfiber. The problem with these is that they are usually sewn into a long strip, with many layers in between to capture odor. I just trifold these into a diaper and they help to keep my daughter nice and dry. When she was small, this was our only diaper stuffer. Now that she is bigger and a super soaker, we just use this to double up on her regular inserts.

When I was chatting with my best girlfriend, she had told me about her dilemma with getting her daughter's hair dry in the morning. Who has time to wait for a 3 yr old's hair to dry or have an hour to blow dry it dry? I suggested a microfiber cloth...guess what? It works like a dream! Microfiber is highly absorbent and for tiny heads, these little cloths are the perfect size. For wavy & crazy curly hair like mine, microfiber is great to keep my curls from getting the frizzy ugly look (that only curly haired women seem to get!) I just use my microfiber cloth to scrunch my hair and it keeps my curl looking....um, curly!

Caring for microcloth is easy as pie. Simply throw these in your washer with a teeny tiny amount of soap. You do not need to use a lot of product when cleaning with these or when washing them, it reduces the absorbency. I usually throw them in with a load of towels (a load that doesn't produce a ton of lint is good) and omit the fabric softener. It isn't good for your towels and it isn't good for microfiber.

I purchase these at our local wholesale club- you will find them in the automotive section. They are very inexpensive, and worth every dime! If you don't have a membership to a wholesale club, these can also be purchased at Dollar Tree, Target, or Walmart.

That is it for me- please let me know if you have other uses for your microfiber cloths! I am always inspired by you all!

Here are a few other links to some of my past ideas-Sand Between Your Toes Blues Giving the Gift of Magazines (Frugally) Solution for Cheap Trash Bags Programming Your Cell Phone Free Up Pantry Space: Make a Snack Weeding Through Your Child's Art Work Creatively Using the Coffee Maker With Ease Making Your Spice Rack Usable Maximizing Space

Labels: ,

ENJOYED THIS POST? SHARE IT WITH OTHERS:

Click to share on StumbleUpon STUMBLE This Click to share on kirtsy Add to KiRTSY Click to share on Mixx Add to MIXX Click to share on DeliciousIt's DELICIOUS

Wednesday, July 12, 2006

WFMW: Solving the Sand-Between-Your-Toes Blues

Welcome to this week's edition of Works-For-Me-Wednesday. Swing by Shannon's blog for more lovely ideas for you & your family! It is something that I know I look forward to every week because I get so many great ideas!

This week my husband is on vacation so we have been enjoying a few day trips to the beach & such. Now if there is one thing that I hate about the beach, it is all of that sand- in the car, in our toes, on our backs, in our hair. Usually there is sand everywhere and it can make for a very uncomfortable ride home.

This time I packed the miracle cure for sanditis- a container of baby powder. Just sprinkle it wherever you have sand and it will instantly just disappear off of you. Not only does it remove the sand, but it also leaves everyone smelling as sweet as a baby!

Keep some in your car or by the door and give your kids a sprinkle after they are done playing in the sand box. No more sand trailed through the house- that definitely Works For Me!

Here are a few other links to some of my past ideas-Giving the Gift of Magazines (Frugally) Solution for Cheap Trash Bags Programming Your Cell Phone Free Up Pantry Space: Make a Snack Weeding Through Your Child's Art Work Creatively Using the Coffee Maker With Ease Making Your Spice Rack Usable Maximizing Space

Labels:

ENJOYED THIS POST? SHARE IT WITH OTHERS:

Click to share on StumbleUpon STUMBLE This Click to share on kirtsy Add to KiRTSY Click to share on Mixx Add to MIXX Click to share on DeliciousIt's DELICIOUS

Wednesday, July 05, 2006

Works-For-Me-Wednesday: Giving the Gift of Magazines (Frugally)

Welcome to this week's edition of Works-For-Me-Wendesday. Swing by Shannon's blog for more great ideas (and I mean More with a capital "M") for you & your family!

This week I am going to clue you into giving another frugal gift. For each holiday & birthday, I try and get someone a gift subscription to a magazine. Do I purchase these gift subscriptions from those handy little slips in the magazine? Of course not! Those prices are ridiculous! Instead, I make most of my magazine subscription purchases off of Ebay. Ebay, you say? Why, yes! Ebay has dirt cheap subscriptions and I think magazine subscriptions are the perfect gift. They get a whole year's worth of magazines and you get these magazines for little to no money. For example, I got someone in my family a gift subscription for three years for only $3.97. This magazine retailed for $14.97 per year. This person was *super* happy and I was *super* happy because I didn't spend an arm and a leg buying them a gift.

Just a couple of little helpful hints about purchasing magazines through Ebay. First, make sure you include the gift recipient's address. Don't forget to include this (I usually include this in the notes section or however the listing descibes I should include this information) or the magazine will come to you (and that would be so silly!). Also, make sure that you read the reviews of the seller. Don't buy from someone who has lots of negative feedback or from someone that has no feedback. You want a Power Seller or someone who is known for providing services as described and who has gotten rave reviews from their buyer. Finally, make sure that there is no shipping and handling on the magazine. For example, I was buying a gift for someone and the subscription price said $1.99 for a year's worth of O! Magazine. What a great deal, right? Wrong! The seller wanted $19.97 for shipping the magazines. What a rip off!

Some of the more obscure publications are not available, but the basics are usually easy to find. Just search under the magazine name!

If you don't want to pay for magazines at all, read my blog entry on getting free magazines (or this other entry that includes some more great information). What am I getting for free right now? Spin, Interview, Family Fun, & Antiques magazine. How cool is that?

If you are new to the world of The Motherload, be sure to visit my past WFMW entries for even more great ideas!

Solution for Cheap Trash Bags
Programming Your Cell Phone
Free Up Pantry Space: Make a Snack
Weeding Through Your Child's Art Work Creatively
Using the Coffee Maker With Ease
Making Your Spice Rack Usable
Maximizing Space

Labels: ,

ENJOYED THIS POST? SHARE IT WITH OTHERS:

Click to share on StumbleUpon STUMBLE This Click to share on kirtsy Add to KiRTSY Click to share on Mixx Add to MIXX Click to share on DeliciousIt's DELICIOUS

Wednesday, June 28, 2006

Works-For-Me-Wednesday: Solution for Cheap Trash Bags

Good morning and welcome to this edition of Works-For-Me Wednesday. Please be sure to visit Shannon's blog to view all of the entries from all of the wonderful ladies who make this day so much fun!

I have had this Works-For-Me-Wednesday solution in my back pocket for a long time now. It was one of those things that I wanted to throw out there when I had absolutely no idea what to do...And that day has definitely come!

We are very tight on our grocery budget and I hate to waste money on any paper products because it takes away from our actual food budget. When I do buy paper products, I tend to buy the cheapest that you can find (with the exception of the toilet paper- ouch!).

I have found the best cheap trash bags to be the ones from Aldi. I have purchased them all over, but these seem to hold up the best under pressure. The bad thing about these bags is that they don't really have any handles and so the bag would slip, when my husband was getting the trash out to take to the curb, and we would end up with a really nasty mess.

My solution for this- old pantyhose. Simply cut the top elastic off of any old pair of torn pantyhose and wrap it around your trash bag to hug it into place. I have been using the same elastic for three years now and it is still going strong. It is the perfect solution (not to mention practically free!) and your husband will definitely thank you for this idea!

If you are new to my blog, please browse around! I am also including links to all of the past WFMW entries that I have done (in case you missed it!)

Programming Your Cell Phone
Free Up Pantry Space: Make a Snack
Weeding Through Your Child's Art Work Creatively
Using the Coffee Maker With Ease
Making Your Spice Rack Usable
Maximizing Space

Labels: ,

ENJOYED THIS POST? SHARE IT WITH OTHERS:

Click to share on StumbleUpon STUMBLE This Click to share on kirtsy Add to KiRTSY Click to share on Mixx Add to MIXX Click to share on DeliciousIt's DELICIOUS

Tuesday, June 13, 2006

Works-For-Me-Wednesday: Free Up Pantry Space & Make a Snack!

Is it my favorite day of the week yet? Well, it must be! It is Works-For-Me-Wednesday and that means I get a whole bunch of great ideas to use for my family, courtesy of all the great ladies who participate each week. Welcome to this week's installment of Works-For-Me Wednesday! Don't forget to stop by Shannon's blog to view her weekly idea & all of the other great participants. Swing by my entry last week and learn how to get rid of...or..um, regift all of those craft projects your children bring home to you.

This week, I want to discuss a great way I have found to free up pantry space for our family. It seems like we constantly have this shuffle of boxes with half a serving of food in them, particularly those cereal boxes. Now, we know how much space these take up and it is usually wasted space until we buy the same brand of cereal (no, no, you cannot mix two varieties of cereal in this house!) and can actually fill a whole bowl.

Now instead of waiting for this to happen, I make my son mommy's special trail mix. Whatever we need to unload (within reason) goes into the trail mix. Raisins, cereal, peanuts, dried fruits, chocolate chips, Easter candy (those random snack size things of M&M's), sunflower seeds, granola, etc.. I put a variety of items in a container and then give them a little shake. This power food goes into a Dollar Tree container (hard plastic so it doesn't get smashed) and I keep it in my purse for all of those snack emergencies. It is much more interesting than a baggie of crackers and he looks forward to seeing what is in the mix each day. That buys me at least five minutes while we are at the store or are out running errands.

That is what Works for Me! Looking forward to reading everyone's entries this week- I learn so much from these ladies!

Labels: ,

ENJOYED THIS POST? SHARE IT WITH OTHERS:

Click to share on StumbleUpon STUMBLE This Click to share on kirtsy Add to KiRTSY Click to share on Mixx Add to MIXX Click to share on DeliciousIt's DELICIOUS

Wednesday, June 07, 2006

Weeding Through Your Child's Art Work Creatively

Welcome to this installment of Works-For-Me Wednesday! Once again, thanks to Shannon for her great idea and please visit her blog to view all the other wonderful participants. Last week, I discussed my single cup coffeemaker and an easy way to get your coffee to your travel mug. You can view that blog entry here. I was having some difficulty with my camera so if you were missing a visual for that one, I finally uploaded a picture and you can see exactly how I do this.

Today I thought I would share my creative solution for weeding through my son's art work. My son attends preschool and they do a craft every day that he is there. He attends two days and also attends bible school on Sundays, where they make some type of craft there too. That means (at minimum) we are bringing home three crafts a week.

Now I love everything my son brings home, but there are just those *special* crafts that really stick out in my mind. There are the ones that are pictures of his family, or ones that have his beautiful handprints- stuff like that. Then there are those that are just funny that I can't wait to show him later in life. Like, when they had "Q" day and had to make a Queen and our son only put hair on one side of her face. My husband pronounced this his, "Boy George" queen and every single time one of us walks by it we sing, "Do you really want to hurt me?" Or the time where he put the duck's eyes upside down and it actually kind of looked freaky because the eyes were those googly bouncy eyes and it just looked...well, scary!

As for the other crafts, we have found a good way to share these with others. Each family occasion (birthdays, illness, or a thank you) we ask our son to pick one piece of art work that he would like to give as his gift. He picks one that is special to him and he tells us what he would like for us to write on it, as a special message just from him. This has helped him learn to share his talents with others and also becomes a special gift just from him. He loves showing his art work off and we love weeding through the countless art projects that come our way. On our gifts, we attach the craft on top of the wrapped gift and this is much more creative than a bow! As you can see, this Works-For-Me and I look forward to sharing with you guys more next week!

Labels: ,

ENJOYED THIS POST? SHARE IT WITH OTHERS:

Click to share on StumbleUpon STUMBLE This Click to share on kirtsy Add to KiRTSY Click to share on Mixx Add to MIXX Click to share on DeliciousIt's DELICIOUS

Wednesday, May 24, 2006

Works-For-Me Wednesday: Making Your Spice Rack Usable

Welcome to this edition of the Works-For-Me-Wednesday spot. Be sure to check out last week's ideas where I show you how to reinvent your closet space.

When my husband and I first got married, we purchased a very handy little spice rack. It was pre-loaded with all of the spices and all we had to do was dump them into the labeled jars and they were ready to use. Last year I realized though that all of the spices just sat there unused. I decided to dump them out and then thought to myself, "Why would I reload this spice rack with the same spices that I never used?" Instead, I decided to whip out my trusty label maker and redo the labels with things *I* would actually use. Things like that Pasta Magic Blend, Garlic Salt, Italian Seasoning Mix, Cinnamon, & Confectioners Sugar (for dusting on my French Toast), and Garlic Powder....Spices that were not available to me with my previous labels.

This option was cheaper than purchasing a new spice rack and now I have the spices handy that I actually do use!

That is this week's installment of Works-For-Me-Wednesday. Be sure to visit Shannon's Blog for a whole slew of lovely ladies who are participating each week!

Labels: , ,

ENJOYED THIS POST? SHARE IT WITH OTHERS:

Click to share on StumbleUpon STUMBLE This Click to share on kirtsy Add to KiRTSY Click to share on Mixx Add to MIXX Click to share on DeliciousIt's DELICIOUS

Wednesday, May 17, 2006

Works-For-Me Wednesday: Maximizing Space


I am new to the Works-For-Me Wednesday idea, but I absolutely love it and thought it was a great way to showcase some of those hidden organizational ideas that I have in this small head of mine. Thank you to Shannon and her wonderful blog (Rocks In My Dryer- how cute is that?) for letting us participate. Be sure to visit her blog for great homemaking & parenting ideas.

Our house is a good size home, but it is one of those lovely quad homes (don't ask me who came up with this stupid floor plan!) which means most of my space is very broken and choppy. Our lower level had an enormous closet in the living room that we originally used to store our various games and basically throw any clutter we had laying around the house into it. After some thoughtful brainstorming, I thought that it would be great to actually use the closet so that the kids had more playing room. We took down the closet doors, framed the closet with curtains, painted & floored the interior of our closet and moved the entertainment center into it. It gave us a lot more free space and took attention away from the monstrosity of an entertainment unit. Now the television is no longer the focal point and can easily disappear with a shut of the curtains.

This same idea can be applied into creating a little home office or a cute place to put your changing table and free some space up in your own home!

Labels: , ,

ENJOYED THIS POST? SHARE IT WITH OTHERS:

Click to share on StumbleUpon STUMBLE This Click to share on kirtsy Add to KiRTSY Click to share on Mixx Add to MIXX Click to share on DeliciousIt's DELICIOUS