Thursday, June 04, 2009

Play It Again, Momma: Homemade Gold & Silver Jewelry Cleaners

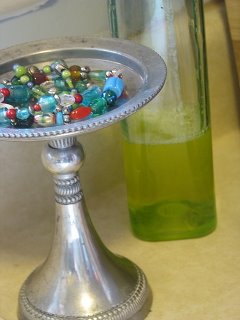
I like to keep a little dish by my sink to put my jewelry in while I am doing the dishes. I also love to thrift shop so I put my love for thrift and my little dish together and came up with this cute little idea.

I use a thrifted candle holder to put my jewels in. They look so pretty and, if the edge has a nice lip on it, it is a safe way to keep your jewels out of harms way. It also makes your jewelry a pretty display while you are scrubbing your little heart out and cursing your family for not helping you... or praying- whatever you happen to do while washing the dishes.

And, if you so choose, you could also be cleaning your jewelry while scrubbing your heart (as you curse your family or pray).

Here are two handy little recipes to keep tucked away for that special day!

Homemade Silver Jewelry Cleaner:

In a bowl, place strips of aluminum foil in and place your silver jewelry on top of them. Cover the silver with boiling water and then add three tablespoons of baking soda and soak for ten minutes. Mix remaining hot water and a drop of liquid soap into another glass bowl. Place your silver in the soapy water and wash. Rinse with clean water and polish dry your pieces with a soft cotton cloth. Please take care, some solutions that are great for some metals and stones may damage others.

(Side Note- I use this solution for cleaning all my silver jewelry and have never had any problems. This works like a dream!)

Homemade Gold Jewelry Cleaner:

Fill a small bowl with warm water and a drop of liquid dish soap. Allow this to soak for approximately ten minutes. Proceed to brush the pieces with an eyebrow brush (or a similar substation such as a toothbrush) while they are being soaked. Then you should transfer the gold jewelry to a strainer and then proceed to rinsing it off with warm water. Finish by drying with a soft cotton cloth.

Labels: ,

ENJOYED THIS POST? SHARE IT WITH OTHERS:

Click to share on StumbleUpon STUMBLE This Click to share on kirtsy Add to KiRTSY Click to share on Mixx Add to MIXX Click to share on DeliciousIt's DELICIOUS

Thursday, September 04, 2008

Ask the Frugal Momma: How Do You Organize Your Pantry & Cupboards?

I know you guys were most impressed with the way we organized our closet, but what you *REALLY* wanted to know is how do we organize our pantry.

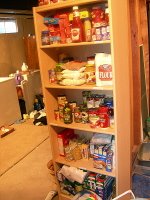
Remember when I revamped my laundry system and my yard sale system? That day I hit up the same college student for a great bookcase that she was getting rid of for only $20! I knew right away what I wanted to do with it and couldn't wait to bring it home and put it in our basement.

First, let me give you some background information on our house and previous storage solutions. My kitchen does not have very many cupboards or pantry space so I have had to be more creative with my storage. Our big dream is to expand my tiny utility closet into a walk-in pantry, but until that happens I have been storing the majority of my pantry items in our basement.

Previously, we had a dark wood bookcase that was extremely deep that we were using to store the pantry items. We had ripped this "bookcase" out of our closet that we had turned into an entertainment unit. Yes, you could say that we are pretty creative with our smaller home. We have tried to maximize the space in places that were not being used properly instead of moving into a bigger home.

Due to the depth and darkness of the unit, what had ended up happening was that I found myself doing the repeat-buying. I would look in the unit and say to myself, "No tomato paste?" And then I would rush to the store and buy tomato paste. When I would pull items out though, I would see twenty cans of tomato paste that I had already bought. This was not frugal and the bookcase was working against me.

The location of the unit was also not the smartest place for me. With a quad level home, I was already making the trek down all of our stairs to retrieve items and then walking into the farthest corner of the basement to get what we needed. It was inconvenient and not a functional storage solution.

Welcome to the new home for my canned goods! This bookcase rests just at the bottom of the stairs in a well-lit area of our basement. The light wood color makes it easier to see what is in my pantry and the labels (created with my label maker) make it easy for even my husband to find what we need out of the pantry.

Our upstairs cupboards needed revamping as well. We have the same problem with our cupboards as we did with our former basement storage solution. One cupboard was extremely deep and items would get shoved back there until we said, "Hmmm... do you think that this is still good if it expired in 2003?" Obviously, we were wasting food and valuable cupboard space.

Repeat the same scenario above with the Lazy Susan unit that we had, but just make the items revolve in mass chaos. Clearly, we had a serious problem!

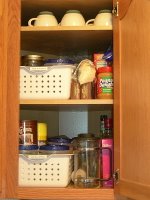
I got these handy storage baskets for less than two dollars each and divided our pantry items into categories. The storage baskets made it much easier for me to pull down exactly what I needed, rather than climbing up on a chair to try and dig through the back of the pantry. It also makes throwing items out quicker, when I need to clean out the pantry, and makes tasks easier because I had grouped like items (or cooking projects) together.

Here is how I grouped the items:

Spices- All of the spice containers were gathered together and imagine my surprise that we had plenty of repeat performers in this category. I wiped down the spices and consolidated them into one container. The spice container is residing in the cupboard closest to the stove. I can pull the small basket down and take out whatever we need and slip it back into the cupboard when I am done cooking. This is much easier than rifling through fifty teeny bottles and makes shopping day easier too!

Cake/Cookie Decorating Supplies- These are items that are used less frequently, but still needed a home. I put these higher up in a basket with handles. Piping bags, piping tips, cookie cutters, food coloring, sprinkles and the birthday candles (that no one could ever find) all went into this container.

Baking Supplies: This is a pretty general category, but it was all of the items that I needed, but could never find. In this larger basket went our baking powder, baking soda, confectioners sugar, shortening, and cocoa powder.

Rice/Pasta: These ingredients went into a larger basket and all of the boxes were consolidated and smaller pastas and the rice were placed into clear Mason jars. The mason jars were labeled and have the cooking instructions labeled on them (unless I knew the directions by heart). In the Mason jars were white rice, brown rice, jasmine rice, orzo pasta, macaroni, and couscous. Larger pasta included linguine, angel hair, and thin spaghetti. Everything fit more neatly and anything extra went into the downstairs bookcase unit.

Flour/Sugar: This organizing unit went into our Lazy Susan. This included wheat flour, white flour, self-rising flour, cake flour, brown sugar, and white sugar.

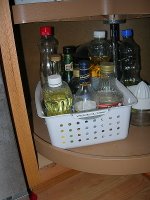
Syrups/Oils/Vinegars: This organizing unit also went into our Lazy Susan and included corn oil, vegetable oil, canola oil, olive oil, balsamic vinegar, white wine vinegar, red wine vinegar, molasses, honey, and maple syrup. Using this unit eliminated the "sticky" factor, which usually occurred, making a huge mess in the bottom of our pantry. Any extra condiments also get put in there, as they are often used in recipes.
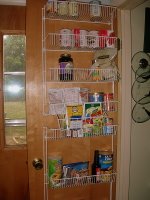
Finally, the items that I like to keep on hand upstairs all go into our pantry door. We bought one of these wire units that mounts on the door and keep items that I might need on hand. A smaller unit, that clips onto the larger unit, houses all of those little packets that we might need to assemble a meal. I try to keep what we need for the week in the upstairs pantry door and then the excess (or whatever doesn't fit) ends up going downstairs.
If you want, I am happy to share where we keep appliances and stuff like that, just leave me a comment!

I hope that this will help give you some creative storage solutions for your pantry!

Note: You can click on the pictures to expand the size.


Related Readings:

Free Up Pantry Space & Make a Snack
Making Your Spice Rack Usable
Getting the Car Organized
Gettin' Quick in the Kitchen
Living Out of Your Pantry

Sound Off: What storage solutions have you found work in your pantry?

*Originally aired July 25, 2007*

Labels: , ,

ENJOYED THIS POST? SHARE IT WITH OTHERS:

Click to share on StumbleUpon STUMBLE This Click to share on kirtsy Add to KiRTSY Click to share on Mixx Add to MIXX Click to share on DeliciousIt's DELICIOUS

Organizing Your Laundry Room

Tis the season for college students to began moving out and that means loads of great deals on organizing units and apartment style furnishings. Not only that, but many kids just offer up the stuff for free to rid themselves of having to lug the stuff home and back to school again. Keep in mind all those students who are graduating and don't think they will need their furnishings in their new & more lucrative lives. It is a bargain-hunters dream so be checking the local papers and the free online classifieds for all these goodies.

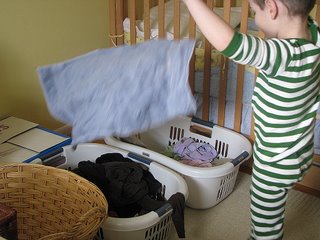
Last weekend I scored several very nice organizing units and I was able to revamp some of the organizing systems in our house. The first organizing system that I created, was a unit that I purchased for our laundry room.

I saw this organizing idea on one of those organizing shows on television and thought, "I should do that!" The show was about a mom who just couldn't keep up with her laundry and she had no good laundry system in place. She had a laundry area in her basement (just like me!) and clothes were piled everywhere. She had no idea of what was clean or what was dirty and the basement was a disaster.

The team came in and renovated her laundry area and added a shelving unit that assigned each person in the house a shelf for clean laundry. They used baskets to organize and made things look very pretty.

I loved this idea, but I wasn't willing to fork over the big bucks for a huge unit like that. Lucky for me, a graduating university student had an organizer that she didn't need anymore and I was able to score this unit for only twenty dollars.

My husband reassembled it in our basement and I set to work on creating a system for our own family. Each person has a tag now for their respective shelf. The top shelf is for our linens and then we go down the line for the family members.

Some other features that I added to my station are:

- A small dish tub, that rests below, that houses a small sewing kit and is reserved for items that need mending. Mending must be simple, but those items are now separated and have all the materials needed for a quick & easy repair.
- A larger tub for ironing. I don't iron, but someone else in the family can now find anything they want to iron themselves. Aren't I thoughtful?
- A bin for the, "Lonely Socks Club." We sort socks at the end of all our loads, but all socks who are missing a partner are now located there. It makes finding matches much quicker.

The unit is only a holding station for the family. This is not a storage facility. When the kids get a little older, everyone will be responsible for clearing their own shelf and and putting their own clothes away. Baskets are neatly assembled beside the unit and each family member has a basket for themselves.

What are some ways that you organize your laundry area? What are some important items that you keep in your laundry room? Any systems that work great for you? Please share!

*Originally aired April 17, 2007*

Labels: ,

ENJOYED THIS POST? SHARE IT WITH OTHERS:

Click to share on StumbleUpon STUMBLE This Click to share on kirtsy Add to KiRTSY Click to share on Mixx Add to MIXX Click to share on DeliciousIt's DELICIOUS

Cleaning Out The Fridge

Continuing the Play it Again, Momma series, we are going to discuss some ways to clean and organize your digs. Enjoy!


Today’s entry request was to cover the topic of cleaning out your fridge. Now ladies, I have been plagued with cleaning questions and ya’ll are making me feel pretty bad about my house. Maybe some money-saving questions might be a better fit for this tired mom? I will continue to answer cleaning questions as they come in, but do not, I repeat, DO NOT look around my house or the items in question. I do enjoy the research though and it has inspired me in ways I didn’t think possible so continue to throw your questions my way. Please email requests to [email protected]. The column will continue to run until I run out of questions. Be sure to check out next week’s entry where we talk about that nasty toaster oven sitting on our counters.

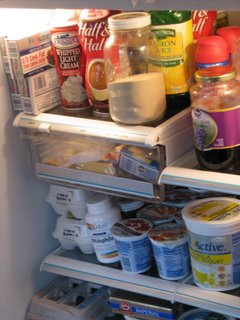
I do not enjoy cleaning out my refrigerator, but it one of those things that must be done. I wait until the day before grocery day to do it though because this is the day where there is the least amount of items that need to be moved around. It is also a great time to check my inventory before making the shopping trip to see if I really do need half the things on my list.

When I clean out the fridge, I break out two dishwashing tubs & a cookie sheet to accomplish this task. I fill one of these tubs with two tablespoons of baking soda and one quart of warm water (no need to measure this, just an idea of how much to use). The cookie sheet is used to put all of the condiments on and drawers are emptied into the other dishwashing tub to move items quickly in and out of the fridge.

Before cleaning the interior of the fridge, fill each drawer with the same amount of baking soda solution in each one and let the baking soda solution do the dirty work while you are wiping out the inside of the fridge.

I use a rag to do the interior and just get the rag wet with the baking soda solution. Gently wipe the interior of the refrigerator and wipe off all of the surfaces and interior of the refrigerator. If the washing solution begins to look nasty, be sure to chuck it and get another tub full to clean with.

For stuck on interior stains, you can sprinkle a little baking soda directly on the spot and add just a little water to it to make a paste. Allow this to set on the stain and then scrub gently and allow the paste to remove the gunk.

Go back to your drawers and empty them and wipe the interiors of these. Now place these back into the fridge and then take your dishwashing tub of solution and empty it into the sink. Refill the tub with just warm water and add a dash of lemon juice to the water. Now use your rag to do a final swipe using just this water & lemon juice solution. This will remove any grit that might be left in the fridge and the lemon juice will give it a nice fresh scent throughout too. Dry throughly with a terry towel.

Take your cookie sheet of condiments and make sure to give each of these a quick swipe with the rag before returning them. Half the battle is just not having clean items in your fridge and this is a good way to start fresh. Return all of the items in the other tub, at this time, to their proper homes.

The exterior of your fridge can often be overlooked, but it needs attention too. As a mother of two little ones, tiny little fingerprints and smudges are all over my fridge on any given day. To remove these, use my homemade all-purpose cleaner and spray this on your fridge. I then use a microfiber cloth to clean the outside as it is still gentle on the appliance but also abrasive enough to remove any marks. Any scuffs still left? Break out your Mr. Clean Eraser (a mom’s best friend!) You can find a generic equivalent of one of these at your local dollar store.

If you have a stainless steel appliance, dip your microfiber cloth into a little vinegar and give the outside of the fridge a good swiping with the vinegar. Then give the appliance another swipe with just plain water and dry thoroughly with a terry towel. If you have soft water, that won’t show any water marks, you can just use the water to clean the exterior.

Now when was the last time you saw the top of your fridge? You might want to hop up there on occasion and give that a good wiping too. If you have a handheld vacuum, use that to suck up any crumbs and debris. After that, use the all-purpose cleaner and give that a good wiping down too.

Just as a side note, after I clean out my fridge, I also empty the ice out of our icemaker and clean it with the same solution and dump all of the old ice out. This can be a breeding ground for bacteria, so it is an easy addition to my routine since I already have everything out.

Additional Tips:

When cleaning out your fridge, always use baking soda and warm water to wipe the insides of your refrigerator and freezers- soap or dishwashing liquid will leave a smell and can taint food.

Once every few months, remove all the food, switch off the refrigerator and wipe down all the surfaces. Defrost the freezer at the same time if necessary.

A box of baking soda can be added to your fridge and freezer to neutralize those smells.

Frugal Momma’s Money-Saving Tip:

Make sure that the door seals on the refrigerator, freezer compartment, or freezer are working efficiently by closing the door on a piece of paper. If the paper can be pulled out easily, the seal is worn and should be replaced.

Make sure to vacuum your refrigerator coils (located on the back of your fridge) twice a year. It is recommended that you do this more often if you have pets in the home. Just use your vacuum with the crevice attachment attached to the vacuum hose and give it a good vacuuming. The coils are located either on the bottom of your fridge or in the rear of your fridge. Doing this will save you money because if these are clean, your fridge won’t have to work as hard lowering your bills!

Suggested Reading:

Tips to Keep White Appliances from Looking Yellow (Warning: This does include bleach so be careful with your floors and clothing!)

What else would you like to see featured here? Please drop me an email or reply by leaving me a comment!

*Originally aired March 29, 2007*

Labels: , ,

ENJOYED THIS POST? SHARE IT WITH OTHERS:

Click to share on StumbleUpon STUMBLE This Click to share on kirtsy Add to KiRTSY Click to share on Mixx Add to MIXX Click to share on DeliciousIt's DELICIOUS

Tuesday, August 05, 2008

Me On You Tube: Choosing a Coffee Maker

One of our most popular articles on our site is the Frugal Mom's Guide to Coffee so I thought it would be great to do a segment on coffee as a You Tube clip. This segment breaks down the cost comparison between a drip coffee maker and a pod brew system. I tried to share some of the features that I love on my coffee maker and how to care for your coffee maker so you always have a fresh cup.

If you are in the market for a new coffee maker, I did find the best price on my Cuisinart Brew Central Coffee Maker at Sam's Club. My local price is listed as $54.86. In the departments stores I have seen this model range between $80-129, but if you know of anywhere else that carries it cheaper, please leave a comment!

I got the opportunity to plug my experience with my coffee maker for an article in Woman's World Magazine. The article is set to hit the newsstands on August 18th with a cover date of August 25th. They found me when looking for a frugal mom who was a self-confessed coffee fanatic and I guess they thought I fit that bill perfectly!

As I had discussed before, I will be working with Wal-Mart to provide content for a new You Tube channel. I wanted to include a list of the participants because they are all so great and I am excited to see what each of them comes up with! I look forward to working with each of them and please check their sites out for more money-saving tips!

GeekMommy's WebLife
The Domestic Diva
Jessica Knows
Classy Mommy
Being Frugal
Deal Seeking Mom
Frugal Upstate
Keeping the Kingdom First
Coupon Cravings
The "Cent"sible Sawyer

How many coffee drinkers are in your family and what coffee maker works well for you?


Labels: , , , ,

ENJOYED THIS POST? SHARE IT WITH OTHERS:

Click to share on StumbleUpon STUMBLE This Click to share on kirtsy Add to KiRTSY Click to share on Mixx Add to MIXX Click to share on DeliciousIt's DELICIOUS

Friday, May 09, 2008

There are Holes in My House Where My Clutter Used To Be

This corner of my garage has been housing our old dishwasher since we replaced it this fall. It was one of those things that needed to be taken care of, but I kept procrastinating on it. As long as I could get my car parked and open our doors comfortably, did it really matter that it was sitting there?

While the kids were enjoying some fresh sunshine in our front yard one day though, I started to organize our garage...a dumping ground of activity in our home. Don't know what to do with something? Just throw it in the garage or basement until you can "figure it out."

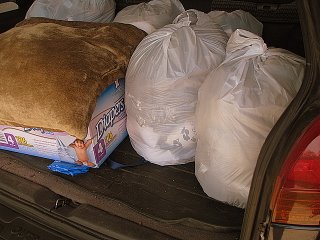
I started loading items right into our car that we were no longer using and could donate, other items were thrown into the trash. I filled our car up with the first load of stuff and made a pile for a second round later.

I flipped through our local paper and found a company that hauls your junk for free. We have one particular company that we like because they are very respectful and come when they say they are going to come. They arrived the next morning and picked up the dishwasher and some old doors that we had from our closets. The entire process took about five minutes and everything was gone. Yes, I completed this task while watching my kids play in the front yard- a half year for a five minute task, but I guess that is how I can procrastinate sometimes.

Feeling motivated, I started clearing out the basement, my closet and drawers of too old clothes, cleaned out both of the kid's drawers and closets and loaded up four more loads of stuff that we didn't need. Summer clothes were moved into the closets and an inventory was taken of what little they really did need for the warmer months ahead.

I sold $70 worth of Emily's cloth diapers, $25 worth of her clothes, $10 in Ethan's toys, and am making another $50 on our train table that the kids no longer play with. That is $155 that I made plus a nice tax deduction for next year. Although I might have done well with a garage sale, I really just wanted the items out so I could get on with life.

We miss none of the clutter and I am continuing to add to the car as I see things. I didn't just look at the big things though, there were lots of little things too. For example, every single morning, I would remove this little toaster oven baking sheet that came with my toaster oven so that I could make the kid's their bagels. I never actually used the little cookie sheet because I used my little stoneware pan if I needed to use something, but every single day, I would pull that sheet out to put my bagel in. It would rest on the counter, aggravating me until I could slip it back into its proper place. Last week I looked at that dish and asked myself, "Why do I do this every day?" I didn't use it, it was a nuisance, it got in the way of what I needed to do....so I loaded it into the car. Guess what? It isn't bothering me and I am glad to have it gone.

Is there something that is getting in the way of your life? Why not start a container in your car and fill it as you see things. When the bin is full, just drop it at a charity on your errand day. Start with a small tote and see if you could fill that. What I found though was that I started with a tote that turned into a trunk full of items that were not being used in our house.

Yes, I like the holes in my house where my junk used to be!

Labels: , ,

ENJOYED THIS POST? SHARE IT WITH OTHERS:

Click to share on StumbleUpon STUMBLE This Click to share on kirtsy Add to KiRTSY Click to share on Mixx Add to MIXX Click to share on DeliciousIt's DELICIOUS

Monday, May 05, 2008

Working Out On a Budget

(Ring, Ring)

Me: Hello?
Voice: Hi, it's 1997 calling
Me: 1997? Wow, that was such a great year for me. How is 1997?
Voice: Good, except they want their workout clothes back
Me: What? No, those are perfectly good pants and shirts. I am just working out in them, I don't understand what the big deal is.
Voice: Yeah, and those pants you wore through your pregnancy? You know, the ones with the bleach stains on the butt?
Me: No. Please. Those pants have been good to me.
Voice: Please throw them away
Me: But I don't want to spend money...I could still get another ten years out of them.
Voice: (interrupting) NO! They are finished. Throw them away- you are embarrassing yourself.
Me: But...
Voice: And about those socks from junior high...
Me: One thing at a time, dude.

Our discussion last week about exercise really struck a chord with me. My family suffers from many health problems that I hope to not replicate, but if I am sitting on the couch (or in front of the computer), I may suffer from the same ailments.

As always, the budget comes into play and if I was going to work out, I knew that I needed to do it inexpensively. I am not one of those people that is disciplined enough to motivate myself to work out on my own and I know that I am better motivated in a gym-type setting. Let's face it though, gym memberships aren't cheap.

In a moment of Divine Intervention, my girlfriend called and said that they had an opening for babysitting at her gym. For one hour a week, I could babysit the other client's children and get a free membership. This works out to be four hours a month and my membership is paid for. I did think about the value of my time versus the value of the free membership and it would work out to be about $10 per hour of my time. I think that is a good return on investment and the highlight for me is that they offer the childcare in the first place. I can workout and take classes at the gym and Emily can go with me and play with some other kids. It is a total win-win situation for us.

The next dilemma was getting some things that would be appropriate to work out in. Since I was used to working out at home, I needed to update my wardrobe a bit. I decided to purchase two pairs of yoga pants ($19.50 each) and two new sports bras ($15 each) from Old Navy. I also got a stainless steel water bottle ($6.99) from our local Meijer.

My tennis shoes were looking really worn and needed some attention. I slipped the laces off of them and threw them in our washer (a big thanks to my sister for that tip!). I washed them on a warm setting with a little laundry detergent. When I pulled them out, they looked a thousand times better from such a good scrubbing. I took newspaper and stuffed the interior of the shoe (to help hold its shape and also to absorb any lingering odors) and let them dry outside in the sunshine. When they were dry, they looked like brand new shoes, and acceptable enough to wear to the gym.

While I did make an investment in workout gear, I did save on my membership and on new running shoes. I am proud to say that I have already hit the gym three times and am dedicated to getting in back in shape. It is such a treat to workout in such a nice place and to be able to do it for only one hour of my time each week.

Sound Off: Where do you purchase your workout clothes from? How is the progress going for you with your own exercise routine?

Labels: , , ,

ENJOYED THIS POST? SHARE IT WITH OTHERS:

Click to share on StumbleUpon STUMBLE This Click to share on kirtsy Add to KiRTSY Click to share on Mixx Add to MIXX Click to share on DeliciousIt's DELICIOUS

Tuesday, April 01, 2008

Cute Jewelry Holder & Jewelry Cleaner Recipes

I like to keep a little dish by my sink to put my jewelry in while I am doing the dishes. I also love to thrift shop so I put my love for thrift and my little dish together and came up with this cute little idea.

I use a thrifted candle holder to put my jewels in. They look so pretty and, if the edge has a nice lip on it, it is a safe way to keep your jewels out of harms way. It also makes your jewelry a pretty display while you are scrubbing your little heart out and cursing your family for not helping you... or praying- whatever you happen to do while washing the dishes.

And, if you so choose, you could also be cleaning your jewelry while scrubbing your heart (as you curse your family or pray).

Here are two handy little recipes to keep tucked away for that special day!

Homemade Silver Jewelry Cleaner:

In a bowl, place strips of aluminum foil in and place your silver jewelry on top of them. Cover the silver with boiling water and then add three tablespoons of baking soda and soak for ten minutes. Mix remaining hot water and a drop of liquid soap into another glass bowl. Place your silver in the soapy water and wash. Rinse with clean water and polish dry your pieces with a soft cotton cloth. Please take care, some solutions that are great for some metals and stones may damage others.

(Side Note- I use this solution for cleaning all my silver jewelry and have never had any problems. This works like a dream!)

Homemade Gold Jewelry Cleaner:

Fill a small bowl with warm water and a drop of liquid dish soap. Allow this to soak for approximately ten minutes. Proceed to brush the pieces with an eyebrow brush (or a similar substation such as a toothbrush) while they are being soaked. Then you should transfer the gold jewelry to a strainer and then proceed to rinsing it off with warm water. Finish by drying with a soft cotton cloth.

Labels: , , , ,

ENJOYED THIS POST? SHARE IT WITH OTHERS:

Click to share on StumbleUpon STUMBLE This Click to share on kirtsy Add to KiRTSY Click to share on Mixx Add to MIXX Click to share on DeliciousIt's DELICIOUS

Wednesday, March 26, 2008

Taking A Day Off, But...

I am taking a day off from our spring cleaning series, but you can get lots of ideas for cleaning and printables for your tasks from my post yesterday.

I got an unexpected opportunity to share about going green with my mom's group so I spent yesterday afternoon preparing for that and then spent the evening hanging out with my great friends!

This morning, I got to do an interview with Elastic Waist (which will be posted tomorrow at noon!) and share some tips and ideas for spring cleaning your home. What an honor to score an interview with them! The remainder of my evening was spent preparing for that.

I will finish out this week and then will probably take some time off from the series with spring break approaching and a mini-vacation for me next week!

If you are looking for more material from me today- you can check out my post on Frugal Hacks on simplifying entertaining or find me on Blissfully Domestic sharing ideas for repurposing the sandbox.

PS- Are there any other mommy bloggers heading to NJ for the Johnson & Johnson Camp Baby event? Please let me know! That is where I will be next week!

Labels: , ,

ENJOYED THIS POST? SHARE IT WITH OTHERS:

Click to share on StumbleUpon STUMBLE This Click to share on kirtsy Add to KiRTSY Click to share on Mixx Add to MIXX Click to share on DeliciousIt's DELICIOUS

Tuesday, March 25, 2008

Spring Cleaning: Organizing The Bookshelves

Yesterday we spent time organizing our entertainment units and our media. Today we are going to focus on another area common to many family rooms- the bookshelves.

We have two bookshelves in our home and then another bookshelf built-in that resides in our office. I am really good about using our local library though so unless I find a book that I just have to have, I usually limit our book purchases and take advantage of the free service instead.

I worship our library, I would build a shrine to it if I could! I am a big library dork and even subscribe to our libraries blog so I can get the latest information on any books that are coming out or library events. I feel self-confident enough to admit that I am obsessed with my library.

If your home is overrun with books though, there are lots of great sites where you can share and swap books with others. This might be a great way to not add to your collection, but share the collection you already have without buying more.

PaperBack Swap

BookMooch (this site also allows for charitable donations of books to prisoners)

bookins

SwapTree

2Swap

BookCrossing

Frugal Reader

You could also donate these to Goodwill, schools, hospitals, and churches. Call around and see if anyone is interested! If all else fails, check out Freecycle or Craigslist for passing those books on.

Today's Printable:

Spring Cleaning Your Family Room Day Two

In Case You Missed It (Previous Printables):


Spring Cleaning Introductory Page

Spring Cleaning Recipes

Spring Cleaning Your Kitchen Day One

Spring Cleaning Your Kitchen Day Two

Spring Cleaning Your Kitchen Day Three

Spring Cleaning Your Kitchen Day Four

Spring Cleaning Your Kitchen Day Five

Spring Cleaning Your Kitchen Day Six (newly updated with cabinet instructions)

Spring Cleaning Your Bathroom Day One

Spring Cleaning Your Bathroom Day Two

Spring Cleaning Your Bathroom Day Three

Spring Cleaning Your Bathroom Day Four

Spring Cleaning Your Bathroom Day Five

Spring Cleaning Your Bathroom Day Six

Spring Cleaning Your Family Room Day One

Sound Off: Are you a book collector? Do you use any websites for sharing your books or keep a virtual bookshelf anywhere?

Labels: ,

ENJOYED THIS POST? SHARE IT WITH OTHERS:

Click to share on StumbleUpon STUMBLE This Click to share on kirtsy Add to KiRTSY Click to share on Mixx Add to MIXX Click to share on DeliciousIt's DELICIOUS

Monday, March 24, 2008

Spring Cleaning: Week Three, Day One

I had hoped to get more printables done, but Easter festivities prevented me from spending a lot of time working (which is a good thing!)

I feel like I have an Easter hangover today- anyone else feel this way? I think my kids are feeling that way too because we had a difficult morning getting around today.

This week we are spending time tidying our family room. These agendas can be applied to whichever room you would like to concentrate on- the playroom, the family room, the living room, or the den. Whatever you call it, you can use these printables for those rooms and whip them back into shape.

Each task is intended to be one hour long only. That is the beauty of doing these agendas- they are meant to help you work more efficiently with your time instead of a marathon day of cleaning or spending your cleaning time researching how to clean your items.

This is what I have planned for us this week:

1. Organize your entertainment and media center
2. Organize your bookcases
3. Clean and organize children's toys
4. Wash curtains, blinds, swipe baseboards, dust
5. Final tidy- deep clean carpets and vacuum couches & chairs

To save myself some time this week (and resume focus on some other activities on the blog) I will just share pictures at the end of our week and show you what was accomplished, instead of doing daily pictures.

Today's Printable:

Spring Cleaning Your Family Room Day One

In Case You Missed It (Previous Printables):

Spring Cleaning Introductory Page

Spring Cleaning Recipes

Spring Cleaning Your Kitchen Day One

Spring Cleaning Your Kitchen Day Two

Spring Cleaning Your Kitchen Day Three

Spring Cleaning Your Kitchen Day Four

Spring Cleaning Your Kitchen Day Five

Spring Cleaning Your Kitchen Day Six (newly updated with cabinet instructions)

Spring Cleaning Your Bathroom Day One

Spring Cleaning Your Bathroom Day Two

Spring Cleaning Your Bathroom Day Three

Spring Cleaning Your Bathroom Day Four

Spring Cleaning Your Bathroom Day Five

Spring Cleaning Your Bathroom Day Six

Labels: ,

ENJOYED THIS POST? SHARE IT WITH OTHERS:

Click to share on StumbleUpon STUMBLE This Click to share on kirtsy Add to KiRTSY Click to share on Mixx Add to MIXX Click to share on DeliciousIt's DELICIOUS

Friday, March 21, 2008

Progress Report: Day Five in the Bathroom

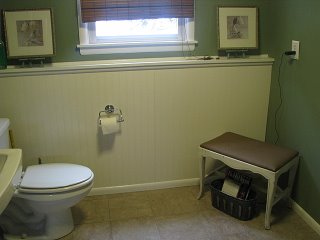
My second bathroom is all clean and tidy. I washed the floors, cleaned the baseboards, cleared items from the ledge (a catch-all for a lot of stuff), recycled the old magazines, and swiped everything down.


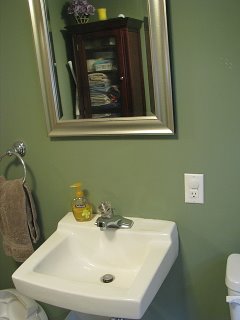
The sink is all clean and tidy and I put a fresh hand towel out for our guests. My parents are coming over for the day so I wanted to get this done before their visit.


Can anyone guess where I shoved all those extra towels from my upstairs linen closet? Not necessarily ideal, but I can't part with perfectly good towels. I figured they would be nice and safe in here until we need them. These will be a great back-up if I get behind on our laundry!

Labels:

ENJOYED THIS POST? SHARE IT WITH OTHERS:

Click to share on StumbleUpon STUMBLE This Click to share on kirtsy Add to KiRTSY Click to share on Mixx Add to MIXX Click to share on DeliciousIt's DELICIOUS

Thursday, March 20, 2008

Progress Report: Day Four in the Bathroom


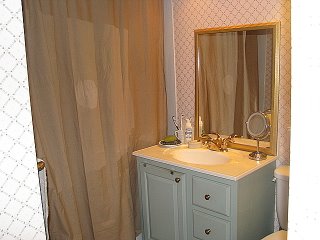
Today I worked on the finishing touches in our upstairs bathroom. I washed and ironed our shower curtain (a new one because I accidentally got hair color on our old one) and replaced our shower liner with a new one.

I wiped down the bathroom and deep cleaned my floors. The magazines have been recycled and new magazines were added to a basket next to the toilet. I threw in a couple of rolls of toilet paper while I was over in that corner. The bathroom trash was emptied and swiped down. Baseboards were wiped as well as the outside of our cabinet.

Just a few weeks ago, I had put fresh caulk on the tub and that is why I had included it in our activities. It just made my tub looks so new and so fresh- what an economical solution for making something look nice again Right now my vinegar is doing some action on my fixtures- I will pull these off in the morning.

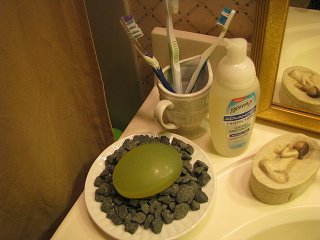
I put out a fresh bar of soap for our guests and I stuck the toothbrush holder in the dishwasher for a deep cleaning. I stuck the toothbrushes in my creamer dish and I actually think they look pretty cute in there. If I don't get the toothbrush holder as clean as I would like, I might just keep them in that!

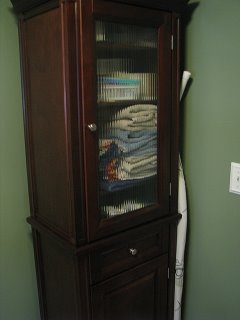
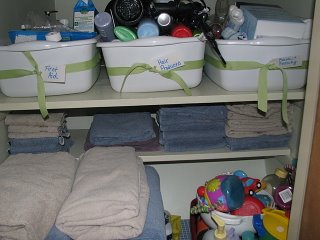
Of all the work I did in the bathroom though, the linen closet is my shining glory! I have to hold myself back from opening and standing in front of it for a good five minutes. It has brought me a lot of pleasure to see this area in my home all neat and organized.

I will share pictures from my other bathroom tomorrow! I am really pleased with my progress in our upstairs bathroom. This is my least favorite room in the house because I need to rip out the wallpaper and paint, but at least it can be clean until I can accomplish that home improvement project!

Labels:

ENJOYED THIS POST? SHARE IT WITH OTHERS:

Click to share on StumbleUpon STUMBLE This Click to share on kirtsy Add to KiRTSY Click to share on Mixx Add to MIXX Click to share on DeliciousIt's DELICIOUS

Wednesday, March 19, 2008

Spring Cleaning: Week Two, Days 4-6

Here are the next three days of activities for spring cleaning our bathrooms. I have made a lot of progress towards organizing the bathroom and these last three days focus more on the cleaning aspect for this space (which my bathroom desperately needs). This will wrap up our time in the bathroom so we can work on other projects.

I was thinking we could focus on our living room/playroom space after this! Let me know what you think!


Today's Printables:

Spring Cleaning Your Bathroom Day Four

Spring Cleaning Your Bathroom Day Five

Spring Cleaning Your Bathroom Day Six

In Case You Missed It (Previous Printables):

Spring Cleaning Introductory Page

Spring Cleaning Recipes

Spring Cleaning Your Kitchen Day One

Spring Cleaning Your Kitchen Day Two

Spring Cleaning Your Kitchen Day Three

Spring Cleaning Your Kitchen Day Four

Spring Cleaning Your Kitchen Day Five

Spring Cleaning Your Kitchen Day Six (newly updated with cabinet instructions)

Spring Cleaning Your Bathroom Day One

Spring Cleaning Your Bathroom Day Two

Spring Cleaning Your Bathroom Day Three

Labels: ,

ENJOYED THIS POST? SHARE IT WITH OTHERS:

Click to share on StumbleUpon STUMBLE This Click to share on kirtsy Add to KiRTSY Click to share on Mixx Add to MIXX Click to share on DeliciousIt's DELICIOUS

Progress Report: Day Three in the Bathroom


I have no pictures from my weeding out day because all of the items already got dropped off to Goodwill! Whoohoo! We were able to unload a lot and downsized the amount of items in our bathroom.

I am behind on putting together our printables for these next three days, but I promise to put something up by this evening. I am running a little ragged from a head cold and a day of work for Kenmore yesterday.

They brought their whole team in to their headquarters (in Chicago) and we all had tables set up with things that represented our specialties on advice. I got to share about our spring cleaning challenge and making your own cleaners for your house. People seemed to really love it and I hope we will have lots of new visitors to our site since I handed out over a hundred business cards to the folks that stopped by my table. One hour spring cleaning challenges seemed to appeal to people so I hope we will have lots of new guests to join us in our mission to organize.

Labels:

ENJOYED THIS POST? SHARE IT WITH OTHERS:

Click to share on StumbleUpon STUMBLE This Click to share on kirtsy Add to KiRTSY Click to share on Mixx Add to MIXX Click to share on DeliciousIt's DELICIOUS

Tuesday, March 18, 2008

Progress Report: Day Two in the Bathroom

Day two was much easier for me than day one in spring cleaning my bathroom. I am pretty good about keeping our medications up to date, but I did need to gather everything and get it back in one location.

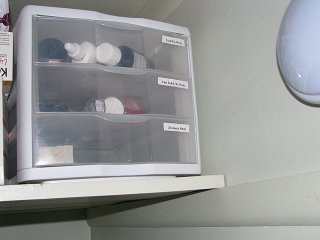
My medications are grouped by types of illness. I started doing this after I had a couple of nights where I was trying to hunt for medicines and was having trouble finding what I needed. Our drawers are labeled for stomach medications, pain relief/prescription medication, and cold/flu medications. I use a three drawer container for these to make things easier to find. This is located in a dark & cool place in my linen closet on a super high shelf!

We also have a "sniffle kit" for when someone in our family comes down with a cold. In the kit is a little container of tissues, cough drops, Vicks vapor rub, nasal spray, and nose suckers (for little ones). The kit is put together in a smaller container for those occasions. I am, in fact, using it as we speak!

Sound Off: Do you have a system for organizing your medications?

Labels:

ENJOYED THIS POST? SHARE IT WITH OTHERS:

Click to share on StumbleUpon STUMBLE This Click to share on kirtsy Add to KiRTSY Click to share on Mixx Add to MIXX Click to share on DeliciousIt's DELICIOUS

Monday, March 17, 2008

Progress Report: Day One in the Bathroom

Confession time! I hate throwing away things that I think are "perfectly good" especially when it comes to my beauty supplies. I have a feeling that I am going to be one of those kind of old ladies that saves a lot of "perfectly good" stuff that will drive my children crazy someday.

Needless to say, I had an entire trash bag of stuff to throw out, filled to the brim with old beauty supplies. I had saved stuff even from high school that I thought was worth saving. Obviously, the gravity of my drugstore addictions coupled with my need to save everything created a lot more than an hour's worth of work for me.

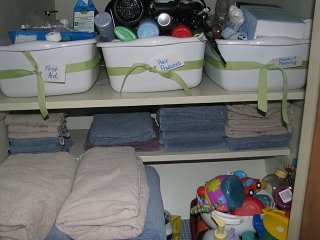
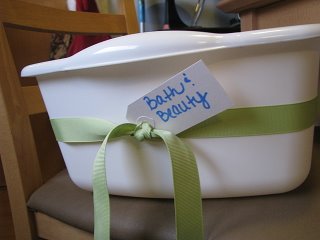
Pictured above are my dish tubs that I have used to store everything. I have four of these- Essentials, Bath & Beauty, Hair Products, & First Aid. I had them labeled with my label maker, but the labels kept falling off and they didn't look as pretty as I would have liked.

I used some ribbon and gift tags from my craft supplies and just used a hot glue gun to secure the ribbon around the outside of these. This was a practical solution for making them look cute, but didn't require me to spend any money. I love the look of wicker baskets, but I wasn't willing to spend the money on this investment right now. Besides, the dish tubs are so easy to rinse out if anything gets spilled or if they get dingy.

I made a commitment to myself that I would only keep products that were worth keeping and that would fit in my newly organized space. Three of the bins went into my linen closet, after it been throughly swiped, and the bin of my essential items (stuff I need for every day) went underneath our sink so I could grab it and get ready for the morning.

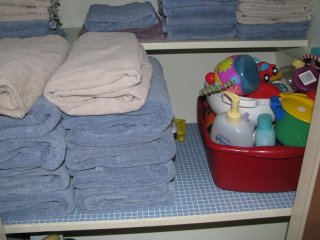
I refolded and sorted our towels while I was in there and relocated some towels that we didn't need in our closet to make it a little more spacious.

I didn't get to any of the extra credit work because the kids and I all came down with a nasty cold. I was just glad to have gotten these things done and I can't wait to hear about your progress!

Labels: , ,

ENJOYED THIS POST? SHARE IT WITH OTHERS:

Click to share on StumbleUpon STUMBLE This Click to share on kirtsy Add to KiRTSY Click to share on Mixx Add to MIXX Click to share on DeliciousIt's DELICIOUS

Sunday, March 16, 2008

Spring Cleaning: Week Two, Days 1-3

This week is a busy one for my family so I have been working all weekend on putting these printables together for our time cleaning in the bathroom. I thought I would post them three at a time (I am still working on the second half) and give you a chance to work ahead, or just give you a chance look ahead at our week.

Our next round of deep cleaning will occur in the bathroom. If you have more than one bathroom, you may need to spread these tasks out over two weeks time. Remember, you can do everything at your own pace- these are just suggestions to help make your life a little easier and to make manageable cleaning goals for your week.

We will be doing progress reports daily and I look forward to hearing how everyone is doing with their tasks. It has been so fun sharing with you my progress and has provided the motivation I need to make my home the organized space that I have always wanted.

Without further adieu, here are the first three printables for our bathroom cleaning agenda:

Today's Printables

Spring Cleaning Your Bathroom Day One

Spring Cleaning Your Bathroom Day Two

Spring Cleaning Your Bathroom Day Three

In Case You Missed It (Previous Printables):

Spring Cleaning Introductory Page

Spring Cleaning Recipes

Spring Cleaning Your Kitchen Day One

Spring Cleaning Your Kitchen Day Two

Spring Cleaning Your Kitchen Day Three

Spring Cleaning Your Kitchen Day Four

Spring Cleaning Your Kitchen Day Five

Spring Cleaning Your Kitchen Day Six (newly updated with cabinet instructions)

Labels: ,

ENJOYED THIS POST? SHARE IT WITH OTHERS:

Click to share on StumbleUpon STUMBLE This Click to share on kirtsy Add to KiRTSY Click to share on Mixx Add to MIXX Click to share on DeliciousIt's DELICIOUS

Friday, March 14, 2008

Progress Report: Day Six in the Kitchen


(Editor's Note: I wanted to get this up for the weekend so you could see how awesome everything turned out. I am working feverishly on our next set of printables- happy weekend, everyone!!)

To say that I feel like I am about to burst when I look at my kitchen would be an understatement. I can't believe how much I was able to accomplish this week and with only one hour for each day. This was as much of an experiment for me as it was for you. I don't have a lot of time to devote during the week towards cleaning, but I was determined that I could make one hour each day (in addition to regular duties around the house) work for me.

The real challenge has been doing this AND putting together the printables for each assignment, while documenting my progress. I am planning to get a jump start this weekend because I want to continue supplying you detailed instructions and I want these to be reused and available to our readers all year long. We will be finding a spot for these, don't you worry! The traffic on our site has boomed bigger than ever before so I know this is something that moms want!


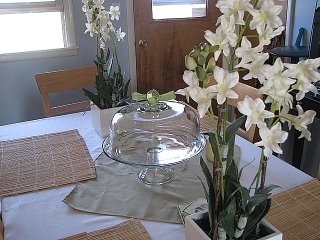
I finished the day off by putting some pretty table linens on and bringing a little spring into our house. The flowers were already in our kitchen so I just added a white tablecloth, a sage green cloth napkin to center my cake stand, and then tied a green bow on the stand. This weekend I will bake something for our centerpiece.

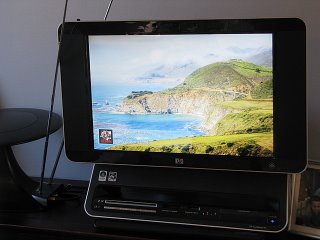
If you have a computer in your kitchen, you could even put some super spring-y pictures up from Flickr and add even more freshness into your house. My husband finds the coolest stuff to put on there!

One of my proudest organizing moments, in my kitchen, was finally making space for my cookbooks. I love knowing that they have their own home now and that I won't have to go to another room to get them. Getting rid of the clutter in my kitchen freed the space I needed to accomplish such a task. My clean fridge was also a highlight for me (as lame as it sounds) just because I don't make the time to clean on top, the front, and inside of it the way I should. It is the little things in life.

My biggest challenge had to be getting started and tackling my pantry. I have so many other things that I was thinking that I could be doing if I wasn't doing that. I am proud that I pushed myself, otherwise, I would have never appreciated my space half as much as I do now!


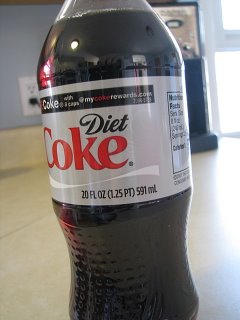
Finally, here is my reward for all of my hard work. A delicious and icy cold Diet Coke. Yum! I don't drink a lot of soda and I rarely buy the brand-name stuff so this was a true delight. I zoned out and caught up on all of the blogs that I had been missing for an hour after I cleaned.

Life is good!

Sound Off: What was your greatest reward this week? What was your biggest cleaning challenge?

Labels:

ENJOYED THIS POST? SHARE IT WITH OTHERS:

Click to share on StumbleUpon STUMBLE This Click to share on kirtsy Add to KiRTSY Click to share on Mixx Add to MIXX Click to share on DeliciousIt's DELICIOUS

Spring Cleaning: Week One, Day Six

It is the last day in our kitchen and I am so thrilled to see and hear about everyone's results. This final day will truly showcase all of your efforts and I guarantee that you are going to want to spend oodles of time in your freshly cleaned kitchen.

Next week we will be tackling another hot spot for when you have guests...the bathroom! This is another source of embarrassment for me and I am looking forward to creating a guest-worthy space. I hope you will join me on our next mission.

If you want to work ahead, here is what I had in mind for our agenda for the bathroom:

1. Organize and inventory bath/beauty products (this is a big one for the CVS addicts, like myself).
2. Organize and clean out the medicine cabinet.
3. Weeding out the unnecessary items.
4. Caulk tub (if needed), clean hard water from fixtures (if needed), and wash shower curtain.
5. Repeat steps necessary in other bathroom(s) of your home (I realize this might take more than one hour, depending on the amount of bathrooms you have)
6. Final tidy- clean the sink, toilet, tub, mirror, and do a deep clean on your floors.

Please know that I am here for any questions, should they arise, and feel free to share your progress through your own blog or email your pictures to me and I will post them to share everyone's hard work and progress.

If you haven't joined in the challenge yet, it is never too late to start. Everyone can go at their own pace, you can print out the materials and tackle a one hour task any day of the week. The important thing is to just start! You won't believe what a difference one hour can make in your home.

Today's Printable

Spring Cleaning Your Kitchen Day Six (newly updated with cabinet instructions)

In Case You Missed It (Previous Printables):

Spring Cleaning Introductory Page

Spring Cleaning Recipes

Spring Cleaning Your Kitchen Day One

Spring Cleaning Your Kitchen Day Two

Spring Cleaning Your Kitchen Day Three

Spring Cleaning Your Kitchen Day Four

Spring Cleaning Your Kitchen Day Five


Labels: ,

ENJOYED THIS POST? SHARE IT WITH OTHERS:

Click to share on StumbleUpon STUMBLE This Click to share on kirtsy Add to KiRTSY Click to share on Mixx Add to MIXX Click to share on DeliciousIt's DELICIOUS

Progress Report: Day Five in the Kitchen

I got rid of one bin of stuff and one trash bag full of items to donate. My tote was full of baby feeding supplies, a surplus of sippy cups, extra cookware, and a few duplicate items in my kitchen.

I was able to clear out enough stuff in one of my cabinets that I am now able to tuck my cookbooks in one of them. Before my cookbooks were shoved in a corner gathering dust and creating clutter in a corner in my kitchen. It is so nice to have them accessible and easy to get to.

I also was able to clear out an entire junk drawer (which produced several great finds that will save me some money this month, like batteries for my garage door opener!) and now I can open the drawer without it getting stuck on papers and junk!

Labels:

ENJOYED THIS POST? SHARE IT WITH OTHERS:

Click to share on StumbleUpon STUMBLE This Click to share on kirtsy Add to KiRTSY Click to share on Mixx Add to MIXX Click to share on DeliciousIt's DELICIOUS

Spring Cleaning: Week One, Day Five

I hope that you are feeling the same sense of accomplishment that I am and that the printables are providing the motivation you need to reclaim your home.

The last two tasks will be easy tasks, in comparison to our earlier projects. This is where all of your hard work begins paying off and you start to really see how wonderful your kitchen can look.

For day five, we are just decluttering our kitchen for an hour. Tackle the areas that are difficult for you. Can you not sit at your kitchen table and enjoy a meal because it is too cluttered? Do you have a desk or nook that is a hot spot for paperwork and junk mail? Do you have so much stuff that it is hard to see the beauty or the function in the items you have?

It feels good to declutter our kitchen and there are tons of great places where you can donate your stuff. There is Freecycle, Freepeats, Goodwill, Salvation Army, community churches, homeless shelters, and homes that care for unwed mothers.

If you are feeling particularly ambitious, start tagging the items for a future garage sale this summer. After all, why shouldn't you make a little money for all of your hard work? Tuck the money into a vacation fund or purpose the money towards an item in your home that you TRULY will use.

Throw stuff out with wild abandon! If it isn't adding to your life, if you don't have the energy to maintain it, if your kitchen is too cluttered to cook- then CHUCK IT!!

Today's Printable:

Spring Cleaning Your Kitchen Day Five

In Case You Missed It (Previous Printables):

Spring Cleaning Introductory Page

Spring Cleaning Recipes

Spring Cleaning Your Kitchen Day One

Spring Cleaning Your Kitchen Day Two

Spring Cleaning Your Kitchen Day Three

Spring Cleaning Your Kitchen Day Four

Labels: ,

ENJOYED THIS POST? SHARE IT WITH OTHERS:

Click to share on StumbleUpon STUMBLE This Click to share on kirtsy Add to KiRTSY Click to share on Mixx Add to MIXX Click to share on DeliciousIt's DELICIOUS

Thursday, March 13, 2008

Progress Report: Day Four in the Kitchen

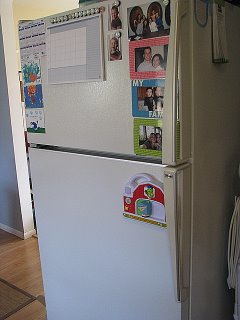
Well, I don't know about you, but my fridge was in need some outer attention too. I took everything off of my fridge and gave it a good scrubbing. I got rid of the outer clutter on the fridge and condensed our magnets. All of the little appointment cards and school fliers with reminder dates got logged into the trusty calendar. Pictures got put in a photo box (except for a few) and now I have a clean white fridge.

The top of my fridge was cluttered and I condensed that too. I still have my bread machine, griddle, and some of the children's art supplies on top. Emily likes to color while I make our dinner so I didn't want to get rid of these completely. I had a junk container up on top of the fridge that got trashed and I did some decluttering around the outside of the fridge too.

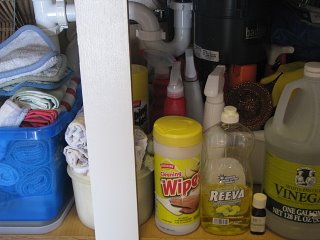
I organized underneath the sink and got rid of a lot of stuff that I didn't need. I am going to work my way through some of the cleaners that are under there. I organized my dish towels and rags and got everything back into its home.

I got a little carried away so I got a jump on tomorrow's activities, which include weeding out the rest of the junk in your kitchen. I was in a cleaning frenzy and couldn't stop!

I think part of it is that we are having a BEAUTIFUL day in Indiana and I am so THANKFUL! I am so sick of snow and yucky weather. To open my windows and let some fresh air into my kitchen is a dream come true. With the spring air blowing in, it was just the motivation I needed to get my kitchen in order.

Labels:

ENJOYED THIS POST? SHARE IT WITH OTHERS:

Click to share on StumbleUpon STUMBLE This Click to share on kirtsy Add to KiRTSY Click to share on Mixx Add to MIXX Click to share on DeliciousIt's DELICIOUS

Wednesday, March 12, 2008

Spring Cleaning: Week One, Day Four

We are closing in on the end of our time in the kitchen and will only have two more one hour tasks to go. Today we are going to tackle the exterior of our fridge and organizing underneath our sinks.

Just print out the directions for the day and tackle the task at your convenience. If you haven't joined us yet, it is NEVER too late to start. All of the tasks can easily be completed in one hour and will leave you feeling like a superstar! Good luck, everyone!


Today's Printable

Spring Cleaning Your Kitchen Day Four

In Case You Missed It (Previous Printables):

Spring Cleaning Introductory Page

Spring Cleaning Recipes

Spring Cleaning Your Kitchen Day One

Spring Cleaning Your Kitchen Day Two

Spring Cleaning Your Kitchen Day Three

Labels: ,

ENJOYED THIS POST? SHARE IT WITH OTHERS:

Click to share on StumbleUpon STUMBLE This Click to share on kirtsy Add to KiRTSY Click to share on Mixx Add to MIXX Click to share on DeliciousIt's DELICIOUS

Progress Report: Day Three in the Kitchen

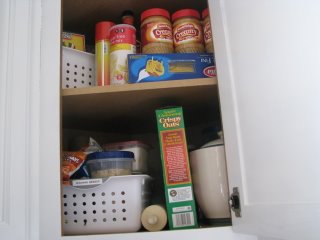
My pantry was stuffed to the brim so this is my condensed version. I got rid of all of the extra boxes, tossed some expired stuff, and even had room to make a place for my rolling pin.

I am always wondering where our peanut butter is hiding in our cupboard. No surprise that there were three jars already opened and waiting for me.

I also took inventory of the items that we have in our basement (this is where we store our canned goods and extra ingredients). Would you say that 13 jars of peanut butter sounds excessive? Perhaps! Those stockpile opportunities only happen once in a blue moon though and I would hate to miss them!

I hope everyone else did well with their pantry challenge!

Labels:

ENJOYED THIS POST? SHARE IT WITH OTHERS:

Click to share on StumbleUpon STUMBLE This Click to share on kirtsy Add to KiRTSY Click to share on Mixx Add to MIXX Click to share on DeliciousIt's DELICIOUS

Tuesday, March 11, 2008

Spring Cleaning: Week One, Day Three

Day three!! We are halfway through our week of cleaning our first room. Only three more days to go and we can experience a neat-as-a-pin kitchen. I can't wait to have my friends over in my newly organized space!

Today we are tackling the pantry and/or cupboards. Remember that the tasks are intended to be an hour so do what you have time for, but don't be surprised if you get carried away and can't stop. I think it is the getting going part that is so hard for me.

I am off to tackle my pantry right now!

Today's Printable:


Spring Cleaning Your Kitchen Day Three


In Case You Missed It (Previous Printables):

Spring Cleaning Introductory Page

Spring Cleaning Recipes

Spring Cleaning Your Kitchen Day One

Spring Cleaning Your Kitchen Day Two

Sound Off: Do you have a system for organizing your pantry or a way that has made finding what you need a little easier?

Labels: ,

ENJOYED THIS POST? SHARE IT WITH OTHERS:

Click to share on StumbleUpon STUMBLE This Click to share on kirtsy Add to KiRTSY Click to share on Mixx Add to MIXX Click to share on DeliciousIt's DELICIOUS

Progress Report: Day Two in the Kitchen

I will admit it, I am a love to clean my floors and see them all new and shiny. Cleaning the floors is not a problem... moving all of the stuff that is resting on the floors is something I don't do.

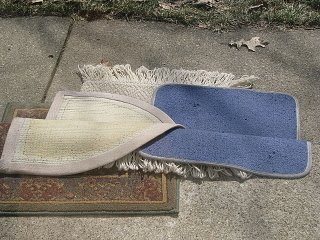
Here are my rugs sitting on the nice cold front step. They got a good shimmy shake and laid out in the sunshine while I busted tail and cleaned my floors.

Once items were moved (surprise, surprise) lots of dust bunnies and yuck emerged. I pressed on, like the soldier I am, and showed them who was boss.

How nice to have gleaming floors to greet me in the morning! Each step brings me closer to the home I am dreaming of. I hope you are having the same experience!

PS- Did I mention how nice this is to do this with friends? I noticed even message board GROUPS were doing it together. That is so wonderful and it is motivating me to keep trudging on. A big hug and thanks to all my friends for linking in to my spring cleaning challenge.

Labels:

ENJOYED THIS POST? SHARE IT WITH OTHERS:

Click to share on StumbleUpon STUMBLE This Click to share on kirtsy Add to KiRTSY Click to share on Mixx Add to MIXX Click to share on DeliciousIt's DELICIOUS

WSBT-TV: The Amazing Dishwasher

Today on our Moms First segment on WSBT, we are talking about how to save money using your dishwasher. I offer a few ideas for ways to save money including what cycles to chose, how to make your own dish detergent, what to buy instead of Jet Dry and explain the cost-effectiveness of putting your dishes in the dishwasher.

This is great timing since we are spring cleaning our kitchens this week! I will have to add an extra credit assignment to our printables to clean our dishwashers! You can also read my article, "The Amazing Dishwasher" for more ideas on how to save money!

I have gotten some emails from local folks who missed the recipe this morning for making your dish detergent so I wanted to supply that too!

Homemade Dishwashing Detergent

1 cup Borax
1 cup Baking Soda
1/4 cup Salt

Mix these ingredients together and store in an airtight container. Add one tablespoon to your detergent dispenser. If you have an older dishwasher, you may need to experiment with this to see what works best. You can also add this mixture and then a small sprinkle of the regular stuff you buy to extend further.

This formula works well for scouring sinks and tubs too!

Labels: , ,

ENJOYED THIS POST? SHARE IT WITH OTHERS:

Click to share on StumbleUpon STUMBLE This Click to share on kirtsy Add to KiRTSY Click to share on Mixx Add to MIXX Click to share on DeliciousIt's DELICIOUS

Spring Cleaning: Week One, Day Two

I was so thankful for your comments and encouragement on these printables. It had been pretty quiet yesterday and I started questioning if anyone really wanted to do this or would use these at all. Thanks for letting me know that they truly are helpful and that you do appreciate some of these tasks being presented in a smaller format.

I know that an entire day of cleaning just sounded daunting to me. In a way, I feel defeated before I begin. I am trying to chug along with you and my home needs just as much attention (sometimes a whole lot more) than everyone else!

I also recall that when I was a new homemaker, I had no idea how to do ANYTHING in my house. Even something that sounds simple to most (like cleaning out the fridge) was something I was researching how to do. My suggestions are only based on being a new mommy and a new homemaker and not having a clue what the heck I was doing with my very own house. I still sometimes feel like I am just "playing house." I think that is why this was important for me to share- so someone else isn't struggling with being a new homemaker!

Today is day two and we are going to work on deep cleaning the floors. I have put together a printable of some ideas for cleaning your floors, although this was tough since each person has a different type of flooring in their kitchen. You will also find a little bit of encouragement and a recipe for a meal- enjoy!!

Today's Printable:

Spring Cleaning Your Kitchen Day Two


In Case You Missed It (Previous Printables):

Spring Cleaning Introductory Page

Spring Cleaning Recipes

Spring Cleaning Your Kitchen Day One

Sound Off: Do you have a method to your mopping? Any product/mopping solution you rave about? Tell us the type of your floors and how you get them clean!

Labels: ,

ENJOYED THIS POST? SHARE IT WITH OTHERS:

Click to share on StumbleUpon STUMBLE This Click to share on kirtsy Add to KiRTSY Click to share on Mixx Add to MIXX Click to share on DeliciousIt's DELICIOUS

Monday, March 10, 2008

Progress Report: Day One in the Kitchen

My fridge is clean- whoohoo! Isn't it all about the little things in life? You know it is bad when you are sniffing the interior of the fridge because it smells so darn fresh. You also know it is bad if you think this is as big of a deal as I did!

My refrigerator was G-R-O-S-S! I would elaborate, but I am embarrassed to say that I found something from September lurking towards the back. Yeah, you could say that this needs to happen a tad more often in my house. Lucky for me, I have some amazing readers who won't shame me for it!

Please feel free to share a link to your own progress or just discuss how disgusting the task was...or be smug cause you are one of those people. You know who you are... fridge cleaners!

Day one is behind me and I look forward to sharing my progress on day two. Gooooo team!

Labels:

ENJOYED THIS POST? SHARE IT WITH OTHERS:

Click to share on StumbleUpon STUMBLE This Click to share on kirtsy Add to KiRTSY Click to share on Mixx Add to MIXX Click to share on DeliciousIt's DELICIOUS

Spring Cleaning: Week One, Day One

As promised, I am putting together printables for tackling your spring cleaning this year. I just want to stress that we would like for you to share these with others, but ask that you direct them to our site to print them. They have been formatted into PDF files to try and retain as much ownership on them as I can.

I have been working my tail off on these all weekend and I am hoping that you will find them useful. Today we have an introductory letter explaining how the plan will work, what tools you will need to accomplish your tasks, and then your assignment for you to complete. For fun, I have included a recipe/meal idea that you can use. The point is to have a meal in mind so your cleaning doesn't have you running out to McDonald's every night, not necessarily that you have to make whatever is on my agenda.

I am working through these tasks with you and will do my best to post my pictures of my progress. I anticipate my blogging to be a little sluggish as I am trying to put these printables together, spring clean along with you, and keep up with all of the other stuff on my plate. I will do my best though!

Please send some feedback my way- I am anxious to hear it!

Today's Printables:

Spring Cleaning Introductory Page

Spring Cleaning Recipes

Spring Cleaning Your Kitchen Day One

PS- I am trying to upload my photos for today, but am getting errors and timeouts from Google. Is anyone else having trouble with Blogger?

Labels: , , ,

ENJOYED THIS POST? SHARE IT WITH OTHERS:

Click to share on StumbleUpon STUMBLE This Click to share on kirtsy Add to KiRTSY Click to share on Mixx Add to MIXX Click to share on DeliciousIt's DELICIOUS

Friday, March 07, 2008

Spring Cleaning Agenda

It is that time of year again and I am so excited to share with you my spring cleaning goals and accomplishments for this year. To be honest, I really dread doing the spring cleaning routine, but I do love the sense of accomplishment I get and being able to restore my home to some semblance of order for the year.

I work hard as a mom and I work hard on our site so doing an entire marathon of cleaning won't be on my agenda. I keep a fairly tidy home, but I do have problem spots that desire attention. Maybe you work? Maybe you homeschool? Maybe you have a new baby? Marathon cleaning might not be for you!

I am hoping my proposed agenda might be a little more appealing. Each week we will tackle one room in our home and our tasks will be divided into one hour tasks for each day of the week, concentrating on our focused room. I am hoping to put together some printable checklists for the rooms, to help accomplish our goals for the year and to act as motivation for our spring cleaning routine.

The first room that I will be addressing in my home is my kitchen. Tidy enough to eat in? Yes! Scared when company opens a drawer or cupboard? Absolutely!

My goals for the kitchen might be different from yours though so take this weekend to think of seven one hour tasks you could do to get your kitchen/dining room in order.

Goals for My Kitchen (7 Tasks)

1. Clean out the refrigerator (interior)
2. Deep clean the floors (I steam my floors bi-weekly) and washing/shaking out rugs
3. Organize Pantry
4. Clean the refrigerator (exterior) & organize the cupboards under the sink
5. Weeding Out Day (removing unnecessary or unused items in my kitchen)
6. Continue Organizing Pantry (can do inventory at this point for grocery shopping needs)
7. Clean out the freezer


** Monica at the Homespun Heart is offering a giveaway to help motivate you to do your cleaning! Be sure to visit her site for the scoop on the contest and how to participate!!**

Labels:

ENJOYED THIS POST? SHARE IT WITH OTHERS:

Click to share on StumbleUpon STUMBLE This Click to share on kirtsy Add to KiRTSY Click to share on Mixx Add to MIXX Click to share on DeliciousIt's DELICIOUS

Wednesday, March 05, 2008

Spring Cleaning Your PC

I am very excited to share that I have a guest author that will be sharing on our site monthly to help all of our working mommas and to also help those of us that are..um, challenged technically! Nicole, from the Geek Squad team, will be tackling all of our questions each month about our computers and she wants to know what you are interested in. Have a story idea for Nicole? You can send it her way to [email protected].

To coincide with our new relationship with the company, the Geek Squad has generously offered to participate in a giveaway with us. This giveaway has a retail value of $169 and has just been listed on our product review site, The Motherloot. Hurry over there and get your entries in!

Many thanks to Nicole and her team for making this opportunity possible!

Spring Cleaning Your Computer by Nicole Conway

So it’s that glorious time of year again! Time to clear the clutter and cobwebs from their hiding places and tidy the home for the coming Spring. But what about your computer? Often overlooked, your computer also needs Spring cleaning, and some basic maintenance measures to keep it humming along. So what are some basic things that you can do?

Well first, print this page so that you can refer to it during the first part of the Spring Cleaning!!

Keeping the inside of your computer’s case clear of dust is important for the long life of your computer. It also saves electricity, because your computer does not have to work so hard to keep itself cool. The inside of your computer attracts a lot of fine dust. The build up of dust can clog the vents and fans, and eventually cause your computer to get too hot. This can cause some parts to stop working correctly. In order to clean it, you will probably want to bring it outside on a clear day. First, turn off your computer, and unplug the different wires and cables. Don’t worry! If you take a good close look at the back of your computer, you will find that everything only fits where it belongs. Putting it together again should only take a few minutes. Most computers have a side that opens easily, after a large screw is loosened on the back. Remove the side, being careful not to touch any of the parts or cards inside. You can buy a can of compressed air at nearly any major electronics store, do to the job.

Keeping an arm’s length away, spray the high pressured air from one side of the computer, pushing the dust to the other side and then out. Watch out! It may create quite a cloud of swirling dust devils and bunnies!!! Repeat the sweep a few times, until the inside of the case, and the vent holes of the sides, are relatively clear. You will notice that the can gets very cold. It is probably a good idea to keep this, like any other high pressured can, out of the reach of the little ones.

Slide the side of the case back on, and bring your clean computer back inside. This is a good time to dust out the space where the computer is normally kept, and to get those cables and wires wiped down, as well.

Now it’s time to plug everything back in. Look carefully at the plugs and wires. You will notice that they are mostly color coded, and some have different shapes. Almost everything in the back of a computer will only go where it is supposed to. The only exception is those flat USB plugs. These can be plugged into any USB ports.

Turn your computer back on, and now we will get down to some basic software maintenance.

So what makes up “software clutter?” Temp files, cookies, browsing history and the like. To start your clean up, we will start with the Control Panel. The Control Panel is the best place to start for safe computer maintenance. Click on the Start menu, and then choose Control Panel. Once this comes up, you will see a number of different options. First, we will choose Internet Options. When you click it, another window pops up, called “Internet Properties” , and you will see that there are some options there to choose from. First click on “Delete Cookies”, then on “Delete Files”, lastly on “Clear History”. This will remove some unnecessary temporary files that your computer saves. Once this is finished, you can close out of this by clicking “OK”.

Close out of the Control Panel, and let’s do some more clean up. If you click on “My Computer” it will open up, and you will see some of the things that makeup your computer. The main drive of your PC has the letter C assigned to it, and you can right click it to see a menu of options. At the very bottom is the Properties choice, which we will select here. A picture will come up, which tells you how much space is on your computer, and how much has been used already. Click on “Disk Cleanup” and let that little program do its thing. When it is finished scanning for potential free space, it will give you a tidy list of files you can clean out. To be on the safe side, make sure you only choose the Temporary types of files, and then click “OK” followed by “Yes” when it asks you if you are sure. Let this run, and then you can close out of it when it completes.

Lastly, now that we have cleaned out what isn’t needed, it is time to organize! So how do we organize the files in the computer? With a good “defrag” once a month. Defragging sounds like a complicated thing, but it is really a pretty simple thing. When your computer saves something, it breaks the file up into little pieces. Sometimes, the pieces are in different places, and all defrag does is move them all together so your computer can find them quicker!

If you right click on “My Computer” you can choose “Manage” from the menu. A new window will come up, with some pretty confusing things, but we will only need one. Click on Disk Defragmenter, and the main display window will change, to show you a picture of your computer’s storage space. When you click “Defragment” a bunch of red and blue lines will show up, and one or two blocks of green. The green will not move, but as you watch, the blue and red will move around until the red lines are almost completely gone, and the blue lines are more or less all together, in a blue block. If this is the first time that your computer is going through this, it may take a couple of hours! Don’t be alarmed. Afterwards, your computer will be able to find files quicker, and will run much better.

Although Spring Cleaning is a good time to start taking care of your computer, it is a good idea to do these basic preventative tasks once a month. This will keep your computer humming away, and give you longer life, better performance, and save you over the long term.

About Nicole Conway, Geek Squad Deputy Field Marshal
Conquering the tech terrain means knowing it's ok to run a sticky keyboard through the dishwasher (yes, just take it out before the hot drying cycle starts) or befriend your daughter on myspace so that you can monitor her activity (and every high school boy that goes near her).

When I'm not coaching on the soccer field, gardening, helping my three daughters (Emily 14, Erica 12, Erin 9) complete homework, or caring for my Beagle, 3 cats, 4 parakeets, and 2 hermit crabs (*catch breath), I'm hard at work as a Geek Squad Deputy Field Marshal. With a license to tech for three years now, I specialize in hardware repair, Networking, Virus and Spyware removal.


In other words, I'm that person you want to call when you're about to throw your computer out the window.

After 17 years of "another career" (too painful to talk about), I pursued my true passion for computers. I relish the challenge behind life's biggest annoyances -- the jammed printer, the keyboard soaked with juicy juice, the wireless router that doesn't route, the pile of wires your child devilishly jumbled up (need I say more?).

Go ahead, tell me if you have any issues (ones I can actually address). I should note I am a European History buff and cloth diaper sewer, so questions about Henry VIII and mending seams are not off limits!

Have a burning question about your computer? Send an email to [email protected] and get answers!

Labels: , , ,

ENJOYED THIS POST? SHARE IT WITH OTHERS:

Click to share on StumbleUpon STUMBLE This Click to share on kirtsy Add to KiRTSY Click to share on Mixx Add to MIXX Click to share on DeliciousIt's DELICIOUS

Tuesday, February 26, 2008

A Sad Life for the Clark Kids- Lots of Chores!

Chores are an important task in the Clark household and one of the benefits about our children getting older is that they can pitch in more. Since most chores seem to fall in the lap of mommy, I am thrilled that chores haven't lost their novelty yet and that my son loves to help mommy get things done around here.

Do I know that the novelty will wear off soon? Of course! I am going to enjoy it while it lasts.

Here are some reasons why chores are important in my house:

- I am grooming my child to someday be a self-sufficient adult. I don't want my kid going to college and not knowing how to make himself/herself a sandwich, do a load of laundry, or have to be dependent on the people around them.

- I want my kids to know that we are a family unit and in a family unit, it is important for everyone to pitch in. Occasionally, I will hear my son say that he is "bored" with chores or "too tired" to help me out. That is tough luck in this house because everyone has to put forth an effort so that we can ALL enjoy having a clean and organized home.

- Chores are a great teaching opportunity. Sorting clothing by colors teaches your child to group colors together, folding clothing helps them build fine-motor skills, working at a fast pace (setting a timer for completing certain tasks) can be a fun way to exercise.

- I want my son to be a catch someday. Yeah, I am looking waaaaayyyy down the road, but that is sometimes in the back of my mind. What girl would not want to marry someone who knew how to wash his own laundry, could whip up a lovely dinner for her, or who picked up after himself? Those are attributes that would have been on my list when choosing a mate and I want my son to have those kind of attributes too...not only for himself, but for whoever he might end up with someday.

Here are what chores we do in our house:

- My son ( 5 yr old) has to get himself dressed in the morning, put his pajamas in his hamper, and make his bed before coming downstairs.

- He helps me prepare the evening meal and helps set the table for our dinner.

- Emily (2 yr old) & Ethan both have to help pick up their toys before they go to bed in the evening. We put on fast and crazy dance music, set the timer for ten minutes, and the whole family pitches in to pick up the playroom.

- On house cleaning day, Ethan is responsible for picking up his room for me to vacuum and dust it and he has to make sure the playroom is in order. We typically clean while my daughter lays down for her nap so this is a solo operation. I have moved my cleaning day to coincide with our Friday night family night. Basically, it is total bribery and we have to get the playroom picked up so that they can have a pizza and a movie with mommy and daddy. It works out really well.

- Ethan sorts our laundry. I line the hampers up and the baskets and he sorts the laundry for me. He also helps fold the laundry when I wash it.

Here is what I had to overcome in order for this to work in our house:

- Teaching chores is a tedious process, but it is worth the time and effort spent. It took him awhile to get the hang of sorting the loads so we would start with a "question" pile which saved us all time. If he didn't know where something went, he would put that in a separate pile and we would talk about each item as we threw it in the correct basket.

- Things will not be done perfectly and I needed to get over that. When my son helps fold the laundry, it is not going to look like I folded the laundry, or like when I set the table, or have all the toys exactly where I would have put them. This is when you take your "mommy dearest" issues down a notch and enjoy being a mom and having someone to help you.

- I try to use our chore opportunities, not as a time to direct, but to talk with my kids. As we work on putting dinner together and setting the table, we talk about our day at school. It isn't always this way, but I try to reserve this special time with them.

Sound Off: What chores do your children do and what are their ages?

Labels: , ,

ENJOYED THIS POST? SHARE IT WITH OTHERS:

Click to share on StumbleUpon STUMBLE This Click to share on kirtsy Add to KiRTSY Click to share on Mixx Add to MIXX Click to share on DeliciousIt's DELICIOUS

Wednesday, December 19, 2007

Clean: The Cooktop

Every Sunday, I make it a ritual to clean a few important items in our kitchen. One of the tasks on my list is to give our stove and sink a deep cleaning. A week of cooking can really make my range look bad, but my deep cleaning gives it a nice clean top for the week. I combine this with a clean sink and I feel like my kitchen has gotten some great refreshing.

I just have a standard gas range so my routine is for this. I can post some directions I found for cleaning other surfaces, but will use my stove for this example.

1. First, I fill a sink with warm soapy water. I place all of the burner pieces gently inside of the sink and let them soak while I clean the the top of our stove. At this point, you can also take the knobs off and let them soak too. Just make sure the knobs are in the off position and pull straight out to remove (Side note: It is also possible to put these items in the dishwasher, but I prefer to hand wash them because I think it is more gentle on the pieces)

2. I then take my spray bottle filled with my homemade all-purpose spray and spray the top of my range. I let this soak in for a couple of minutes while I work on other tasks around the house.

3. Once the cleaner has done its work, I take a soft damp cloth and wipe off the cleaner.

4. If there are persistent spots that won't come up, you can try a couple of things to get them off. I pour a couple spoonfuls of baking soda on the spots and then make a paste out of this with a little water. Using the same soft cloth, gently try and get the stain up. If there is stuck on gunk, I take a different (but still gentle!) approach towards cleaning this. I use a Pampered Chef Scraper (if you don't have one of these, an old credit card is great) for getting this off. The important thing is that you are gentle with your actions, so it doesn't scratch up your appliance. Use the same gentle tactics on your glass oven door. I first try using my homemade glass cleaner. If that doesn't do the trick, you can try and get the gunk off with your handy credit card or plastic scraper. Be very careful though- you want to keep your stove looking nice!

5. Next, I use my stainless steel cleaner on my stove with one of my microfiber cloths. I just spray my cloth directly (very teeny tiny bit) and then gently remove any fingerprints that might have taken up residence on my appliance. Remember to chant, go with the grain, go with the grain, go with the grain as you are cleaning.

6. Lastly, I drain the sink and give my pieces a good rinse with cool water. At this point, you can just let them air dry or you can give them a dry with a soft towel and place them back on the stove.

Cleaning Tips for Other Types of Stoves (thanks Martha!):

Stainless-Steel Cooktop Surface: Wipe with a sponge and a little dishwashing liquid or you can use a product for stainless-steel cleaning. Be sure to dry thoroughly afterward with a clean microfiber cloth; otherwise you will have streaking. To remove stuck on gunk, soak the area with a towel dampened with hot water to loosen the material and then gently scrape with a rubber spatula.

Glass Ceramic Cooktop Surfaces: Wipe with a very lightly dampened cloth. This type of surface scratches extremely easy, in fact, even the gritty stuff that can get pushed around with a dirty sponge can cause damage. You have be really diligent to clean spills as soon as they happen. If spills do harden. You can buy special cleaners for this type of surface (available at your local hardware store). Remember to never slide pans or metal utensils across the cooktop.

Porcelain Enamel Cooktop Surfaces: Clean as directed above, but realize that the porcelain enamel can become chipped very easily. If it does get chipped though, you can camouflage damage with a little appliance touch-up paint.

Sound Off: Do you have any tips for cleaning your cooktops?

(For more great tips, visit Rocks In My Dryer)

Labels:

ENJOYED THIS POST? SHARE IT WITH OTHERS:

Click to share on StumbleUpon STUMBLE This Click to share on kirtsy Add to KiRTSY Click to share on Mixx Add to MIXX Click to share on DeliciousIt's DELICIOUS

Saturday, December 15, 2007

Operation: Sterilization

Today was spent sterilizing everything in our house, thanks to a bad case of the stomach flu. It used to be that I would get sick and my mom would change my sheets, hold my hair back when I got sick, and get all of that sick food out (Jello, Sprite, hot soup, etc...) Boy, do I miss those days! Nothing makes you miss your mommy more than when you get sick as an adult. Can I get an, "Amen"?

I stripped the beds and washed them in hot water, ran the sterilization program on our dishwasher for all of our dishes, killed the carpet germs with my super UV powers, steam cleaned the hardwood and bathroom floors, and sterilized the bathrooms with some of those homemade cleaners in my closet. If a winter storm wasn't brewing outside, I would be whipping all of these windows open to do a little airing out of the house.

Would one call this obsessive compulsive or just high-maintenance? I am not sure, but I hope that we can prevent another family member from suffering from this plague. Each meal, my husband thinks it is going to be his last. Isn't it amazing how differently you look at food when you think you might get sick from it?

On another note, I completed all of my holiday baking on the day I got sick. I am thinking I am going to be pitching my six 9x13 pans of goodies that I made. This almost makes me sick all over again, but I don't want my gift to be the gift that keeps on giving (If you know what I mean?) I don't think I have the energy or the funds to make a second batch of stuff so I might have to skip the goodies this year...which makes me really sad.

Side Note: I get tons and tons of emails about what I use to clean our hardwood floors. I bought a Bissell Steam Mop and it was BY FAR one of the best investments I have ever made for caring for our house. They had discontinued selling these, but they recently came out with another model of them and it looks to be the same, just a different color. It has replaceable terry mop heads that you can just throw in your washer. I bought extra of them because I use them so often. If you have difficulties carrying for your floors, this makes the job a lot easier. Amazon doesn't have them in stock right now, but a quick Google search should come up with some other stores that sell them.

If anyone else has hardwood floor advice, please share! Who can't use a little help when it comes to this household chore?

Labels: ,

ENJOYED THIS POST? SHARE IT WITH OTHERS:

Click to share on StumbleUpon STUMBLE This Click to share on kirtsy Add to KiRTSY Click to share on Mixx Add to MIXX Click to share on DeliciousIt's DELICIOUS

Wednesday, December 12, 2007

Booster Seat Cleaning Solution

I hate cleaning underneath my daughter's booster seat, but the things that can get stuck under there can be quite unappetizing a few days after sitting there.

The other day I decided to tuck Emily's plastic placemat under her seat instead of on the table and can't believe I had not thought to do that sooner. Now after we enjoy our meal, I just pick the seat up and slide out the mat for a quick rinse instead of trying to clean under the seat, creating a sea of crumbs under our table.

It doesn't help the nasty on the top of the seat, but sure makes the nasty underneath a little bit easier.

For more fun solutions for your family, be sure to visit Works-For-Me Wednesday over at Rocks in My Dryer.

Sound Off: Do you have any clever solutions for dinner clean-up?

Labels: , ,

ENJOYED THIS POST? SHARE IT WITH OTHERS:

Click to share on StumbleUpon STUMBLE This Click to share on kirtsy Add to KiRTSY Click to share on Mixx Add to MIXX Click to share on DeliciousIt's DELICIOUS

Tuesday, October 02, 2007

Frugal Hacks: Getting Ready for the Unexpected Guest

My cleaning caddy needed a little reorganizing and as I was working on this yesterday, I began to think about my "faux cleaning" routine that I do before we have unexpected guests.

Since I get to cover the entertainment category on Frugal Hacks, I thought it would be fun to share my quick tips for making your home look clean without really cleaning.

I am the first to raise my hand that I have been embarrassed when an unexpected person shows up and my house is a complete disaster. I try very hard to maintain things around here, but with two children under five, I often feel like all I am doing is damage control.

I am also a perfectionist and I hate for anyone to come over here without me being prepared for them. Even among friends and family, it is important to me to feel in control of a situation.

Having a website that helps moms stay organized makes me feel like I should be even more zealous in my attempts to keep up with the house.

Let's face it though, I am only human! We do the best we can throughout the week, but when that unexpected guest comes knocking, it feels good to have a game plan to fake them out with your cleaning routine.

I hope you get a chance to read the post and can share your own routines with me! As moms, I am sure we can all use a little help in this department.

Labels: ,

ENJOYED THIS POST? SHARE IT WITH OTHERS:

Click to share on StumbleUpon STUMBLE This Click to share on kirtsy Add to KiRTSY Click to share on Mixx Add to MIXX Click to share on DeliciousIt's DELICIOUS

Tuesday, September 25, 2007

Cleaning Out the Coffee Carafe

I love my coffee carafe and use it regularly. When we had a mommy's helper this summer, I would pour all of my coffee into it and then take it with me into my office and shut my door. It was a great way to keep the coffee warm and also keep me from going up and down the stairs for refills while I worked.

Cleaning a narrow thermos or carafe can be difficult, but my trusty baby bottle brush has pulled through for me on these occasions. I use this to wash these narrow items and get them squeaky clean. They also are great for washing wine glasses or other dainty glasses.

Sound Off:
What baby items do you still use in your house? What new purposes have you found for these things?

Labels: , ,

ENJOYED THIS POST? SHARE IT WITH OTHERS:

Click to share on StumbleUpon STUMBLE This Click to share on kirtsy Add to KiRTSY Click to share on Mixx Add to MIXX Click to share on DeliciousIt's DELICIOUS

Friday, September 14, 2007

Caring for Stainless Steel Appliances

We have been gradually making the switch over to stainless steel appliances. The cost on these is higher, but I have been doing bargain shopping to get the best prices on these. I am hoping that when we sell our home that it will make our kitchen look a little higher end and I love the look of the appliances for our family.

My best friend also has stainless steel appliances and when she found out that I had gotten a stainless steel stove, she told me she was going to bring a special gift over for my new stove. She showed up on my doorstep with a bottle of her favorite stainless steel cleaner that she had sworn by. She had picked up a bottle of Weiman Stainless Steel Cleaner & Polish that she had purchased for me from Wal-Mart. She said it was the best cleaner out there and instructed me to spray a very tiny bit on a soft cloth and wipe the appliance off going with the grain of the steel.

Thanks to this little bottle of cleaner (and my extremely smart friend!) I have been able to keep my appliances gleaming clean, requiring very little cleaner and effort on my part. The bottle of cleaner was $5.99, but I have had it for over two years and have barely made a dent in it.

Scotch-Brite recently contacted me though to see if we would be interested in reviewing a new product that they had come out with for stainless steel appliances. They recently came out with two new cleaners, their Stainless Steel Cleaner & Cook Top Cleaner. These cleaners have handles for gripping, making it easier to get in all of the nooks and crannies of your appliances. They are ergonomically designed and offer streak-free cleaning.

After trying these out, I was impressed with how it could into all of the grooves of my stove and I was able to deeply clean the crevices of the appliance that had not been ever cleaned. There was definitely some hidden areas that needed attention and the handle made the cleaning very easy.

Unfortunately, the Scotch-Brite pads are not reusable and would require additional refill purchases, much like the Swiffer systems and other similar products. I am not as big on products that require additional purchases and this is why I stay away from systems such as these.

The Scotch-Brite pads would be great for someone who just wants to do a quick touch-up, but with starter kits at $6.99 and refill pads an additional $3.99, this is not the most cost-effective option.

Scotch-Brite is offering a $1 coupon on their website though, if you would like to give their new products a try.

I am pretty hooked on the Weiman cleaner, but would be interested to hear how you all care for your stainless steel appliances. Do you use any special cleaners? Do you have any tips that you have found work the best for your appliances? How about cook tops? This is an area that I know nothing about!

Labels: , ,

ENJOYED THIS POST? SHARE IT WITH OTHERS:

Click to share on StumbleUpon STUMBLE This Click to share on kirtsy Add to KiRTSY Click to share on Mixx Add to MIXX Click to share on DeliciousIt's DELICIOUS

Wednesday, July 25, 2007

Ask Frugal Momma: How Do You Organize Your Pantry & Cupboards?

I know you guys were most impressed with the way we organized our closet, but what you *REALLY* wanted to know is how do we organize our pantry.

Remember when I revamped my laundry system and my yard sale system? That day I hit up the same college student for a great bookcase that she was getting rid of for only $20! I knew right away what I wanted to do with it and couldn't wait to bring it home and put it in our basement.

First, let me give you some background information on our house and previous storage solutions. My kitchen does not have very many cupboards or pantry space so I have had to be more creative with my storage. Our big dream is to expand my tiny utility closet into a walk-in pantry, but until that happens I have been storing the majority of my pantry items in our basement.

Previously, we had a dark wood bookcase that was extremely deep that we were using to store the pantry items. We had ripped this "bookcase" out of our closet that we had turned into an entertainment unit. Yes, you could say that we are pretty creative with our smaller home. We have tried to maximize the space in places that were not being used properly instead of moving into a bigger home.

Due to the depth and darkness of the unit, what had ended up happening was that I found myself doing the repeat-buying. I would look in the unit and say to myself, "No tomato paste?" And then I would rush to the store and buy tomato paste. When I would pull items out though, I would see twenty cans of tomato paste that I had already bought. This was not frugal and the bookcase was working against me.

The location of the unit was also not the smartest place for me. With a quad level home, I was already making the trek down all of our stairs to retrieve items and then walking into the farthest corner of the basement to get what we needed. It was inconvenient and not a functional storage solution.

Welcome to the new home for my canned goods! This bookcase rests just at the bottom of the stairs in a well-lit area of our basement. The light wood color makes it easier to see what is in my pantry and the labels (created with my label maker) make it easy for even my husband to find what we need out of the pantry.

Our upstairs cupboards needed revamping as well. We have the same problem with our cupboards as we did with our former basement storage solution. One cupboard was extremely deep and items would get shoved back there until we said, "Hmmm... do you think that this is still good if it expired in 2003?" Obviously, we were wasting food and valuable cupboard space.

Repeat the same scenario above with the Lazy Susan unit that we had, but just make the items revolve in mass chaos. Clearly, we had a serious problem!

I got these handy storage baskets for less than two dollars each and divided our pantry items into categories. The storage baskets made it much easier for me to pull down exactly what I needed, rather than climbing up on a chair to try and dig through the back of the pantry. It also makes throwing items out quicker, when I need to clean out the pantry, and makes tasks easier because I had grouped like items (or cooking projects) together.

Here is how I grouped the items:

Spices- All of the spice containers were gathered together and imagine my surprise that we had plenty of repeat performers in this category. I wiped down the spices and consolidated them into one container. The spice container is residing in the cupboard closest to the stove. I can pull the small basket down and take out whatever we need and slip it back into the cupboard when I am done cooking. This is much easier than rifling through fifty teeny bottles and makes shopping day easier too!

Cake/Cookie Decorating Supplies- These are items that are used less frequently, but still needed a home. I put these higher up in a basket with handles. Piping bags, piping tips, cookie cutters, food coloring, sprinkles and the birthday candles (that no one could ever find) all went into this container.

Baking Supplies: This is a pretty general category, but it was all of the items that I needed, but could never find. In this larger basket went our baking powder, baking soda, confectioners sugar, shortening, and cocoa powder.

Rice/Pasta: These ingredients went into a larger basket and all of the boxes were consolidated and smaller pastas and the rice were placed into clear Mason jars. The mason jars were labeled and have the cooking instructions labeled on them (unless I knew the directions by heart). In the Mason jars were white rice, brown rice, jasmine rice, orzo pasta, macaroni, and couscous. Larger pasta included linguine, angel hair, and thin spaghetti. Everything fit more neatly and anything extra went into the downstairs bookcase unit.

Flour/Sugar: This organizing unit went into our Lazy Susan. This included wheat flour, white flour, self-rising flour, cake flour, brown sugar, and white sugar.

Syrups/Oils/Vinegars: This organizing unit also went into our Lazy Susan and included corn oil, vegetable oil, canola oil, olive oil, balsamic vinegar, white wine vinegar, red wine vinegar, molasses, honey, and maple syrup. Using this unit eliminated the "sticky" factor, which usually occurred, making a huge mess in the bottom of our pantry. Any extra condiments also get put in there, as they are often used in recipes.

Finally, the items that I like to keep on hand upstairs all go into our pantry door. We bought one of these wire units that mounts on the door and keep items that I might need on hand. A smaller unit, that clips onto the larger unit, houses all of those little packets that we might need to assemble a meal. I try to keep what we need for the week in the upstairs pantry door and then the excess (or whatever doesn't fit) ends up going downstairs.

If you want, I am happy to share where we keep appliances and stuff like that, just leave me a comment!

I hope that this will help give you some creative storage solutions for your pantry!

Note: You can click on the pictures to expand the size.


Related Readings:

Free Up Pantry Space & Make a Snack
Making Your Spice Rack Usable
Getting the Car Organized
Gettin' Quick in the Kitchen
Living Out of Your Pantry

Sound Off: What storage solutions have you found work in your pantry?

Labels: , , ,

ENJOYED THIS POST? SHARE IT WITH OTHERS:

Click to share on StumbleUpon STUMBLE This Click to share on kirtsy Add to KiRTSY Click to share on Mixx Add to MIXX Click to share on DeliciousIt's DELICIOUS

Tuesday, July 17, 2007

Ask Frugal Momma: Washin' the Washer


Dear Frugal Momma, Would you mind doing an entry on cleaning the washing machine...both inside and out? I know that probably sounds strange, but I try to clean everything in my home on a regular basis! Thanks in advance! The Cleaning Queen

I have to admit that this is something I had never really thought about, although I am sure it is one of those items that I should add to my regular home maintenance. This entry required a little research so I hope that it will help someone else out there!

For the interior of the washer, you will want to clean your washing machine from time to time by running it empty on a hot cycle. I will offer up two choices for cleaning the washer. You can do it the environmentally-friendly way or by trying the bleach version.

The first way that you can clean the washer is by running the hot cycle with one cup (250 ml) of white vinegar. Just add it during the cycle and allow the vinegar to clean the washer for you. The vinegar will help remove any detergent deposits that have built up on your washing machine.

The second alternative for cleaning can actually be used in disinfecting a variety of non-food-contact surfaces. The recipe was supplied by, "Home Comforts" written by Cheryl Mendelson. This method is recommended for your washer, as well as the bathtubs, showers, sinks, marble, plastic, fiberglass, diaper pails and indoor garbage cans. The disinfecting solution is not recommended, however, for metal fixtures or on dark or colored grout.

Disinfecting Solution

3/4 cup bleach
1 gallon warm water
1 tablespoon of powdered laundry detergent

Using solution, wash surface or object clean. Then keep it wet with the solution for at least five minutes. Rinse and let dry.

The exterior of most washer and dryer tops are made from porcelain enamel or synthetic enamel. This type of material does not stand up well to repeated exposure of chemicals such as ammonia, chlorine bleach, or any abrasive cleaners.

The best solution for cleaning the exterior of the washer (and just about everything else) is my homemade all-purpose cleaner. The recipe for that is:

All-Purpose Cleaner

2 tablespoons dish soap (any kind works fine)
2 cups warm water


Put two ingredients into a spray bottle and give it a shake to incorporate them.


If you begin to see any mildew damage to the rubber door seal, on your washing machine, you will want to disinfect it to discourage further problems and to remove what has already occurred. Make a solution of one cup chlorine bleach to two cups warm water. Wearing rubber gloves, first wipe the lower portion of the door seal (where the water and bacteria will be most concentrated) with a soft cloth soaked in the bleach solution. Then wipe down the entire seal. Finally fill the bleach dispenser with bleach and run the washer empty through one hot cycle. You can repeat this process every two to four months to keep mildew down. This is particularly recommended if you live in a humid climate or if your laundry room is not well-ventilated.

I hope this helps answers your question! Please feel free to email your questions directly to me at [email protected] on any topic related to homemaking or saving money. I would be happy to answer your questions. You can also submit your questions through our forum.

Related Readings:

Happy Homemaking the Homemade Way
Cleaning Out Yo Fridge
Frugal Solutions for the Swiffer
Frugal Carpet Steaming
Favorite Frugal Cleaners
Organize Your Week

Labels: , , ,

ENJOYED THIS POST? SHARE IT WITH OTHERS:

Click to share on StumbleUpon STUMBLE This Click to share on kirtsy Add to KiRTSY Click to share on Mixx Add to MIXX Click to share on DeliciousIt's DELICIOUS

Monday, July 09, 2007

Washing Your Child's Lovies

"It doesn't happen all at once," said the Skin Horse. "You become. It takes a long time. That's why it doesn't happen often to people who break easily, or have sharp edges, or who have to be carefully kept. Generally, by the time you are Real, most of your hair has been loved off, and your eyes drop out and you get loose in your joints and very shabby. But these things don't matter at all, because once you are Real you can't be ugly, except to people who don't understand."

(The Velveteen Rabbit)


Do you see anything strange hanging on our line? Emily's rabbit makes an appearance there quite regularly, and it always cracks me up to see him pinned and waving in the breeze by his ears. There is just something so comical about that.

Since Emily was three weeks old, she has been in love with bunnies. Before she was born, my grandmother and I were antique shopping and ran across a cute little gift shop. Inside the gift shop was a bunny that I pointed out to her and said how perfect it would be for a little one to carry around since it was smaller than a blanket. She ended up buying one for Emily and she absolutely loved it. A girlfriend also happened to send a very similar bunny to us as a baby gift for Emily. She always had one of these little guys tucked under her arm since she was really small and now we can't go anywhere without them. Her rabbits remind me of my favorite story growing up, "The Velveteen Rabbit." I was never attached to anything in this way, but I always wished I loved something like that.

Emily's bunny collection has grown and now we have four bunnies in tote with us on any given day. She likes to chew on their ears and drag them around on dirty floors. With all the love they receive, they need frequent baths.

Here are some tips for cleaning your child's stuffed animals:

- For smaller toys, like beanie babies, you can actually throw them in your dishwasher. My girlfriend's daughter loves to tote these around and she just puts them in the dishwasher on the top rack. The chemicals that help whiten the dishes, will also help whiten the stuffed animal. Allow the stuffed animal to air dry. Other smaller toys, that your child puts in their mouth, can also be thrown in the dishwasher for a quick and easy way to keep them clean.

- For larger stuffed toys or ones that have been loved a bit too much and could fall apart in the washer, you can stick the stuffed animal in a paper bag with a little baking soda. Shut the top of the bag and shake the bag until the animal is coated in the baking soda. Let the animal sit in the bag for about a half hour and then take him out and give him a quick swipe with a towel, to get any lingering baking soda residue off. He should smell nice and fresh.

- In most cases, you can throw the stuffed animal in a pillowcase and run the delicate cycle in your washer. Before you throw the animal in, make sure that all of the stuffing is sealed in and all body parts are attached. Perform any emergency surgeries before the washing, and then run the cycle. Avoid the dryer, if at all possible, and allow the animal to air dry. In our situation, we have a back-up that we can use, but if you don't the waiting-to-dry process can seem like days. If you have a clothesline, you can hang the animal out there and let the sun dry the animal. Trust me, it is a lot quicker and time is of the essence when it comes to your child's most loved items!

- If you have animals that are collecting dust (this is most likely not the case when it comes to the lovies), you can use your vacuum hose and suck the dust off of the animal.


Sound Off: Does your child have an animal that they carry around with them? How do you care for your animals and how do you distract your child while they are being cared for?

Labels: , ,

ENJOYED THIS POST? SHARE IT WITH OTHERS:

Click to share on StumbleUpon STUMBLE This Click to share on kirtsy Add to KiRTSY Click to share on Mixx Add to MIXX Click to share on DeliciousIt's DELICIOUS

Monday, June 18, 2007

Real Simple Magazine Tips for July


This month, Real Simple would like to give our readers access to web exclusive content and a sneak preview of some of the stories in their upcoming issue. Throwing an Outdoor Cocktail Party gives readers real simple ways to create an al fresco lounge in their own backyard. Their upcoming July issue also gives readers great ideas about how to decorate your home with different types of throw pillows. I hope you enjoy these tips and much thanks to Real Simple for giving us access to these tips!


Decorating with Throw Pillows

Organize Art Supplies with a Dish Rack (This was a personal favorite of mine this month!)


Labels: ,

ENJOYED THIS POST? SHARE IT WITH OTHERS:

Click to share on StumbleUpon STUMBLE This Click to share on kirtsy Add to KiRTSY Click to share on Mixx Add to MIXX Click to share on DeliciousIt's DELICIOUS

Monday, April 23, 2007

Ask Frugal Momma: The Amazing Toaster Oven

I have a toaster oven, but it is barely functional, at best. I got it for five dollars from the thrift store and was excited to upgrade from the standard two slice toaster to the toaster oven. It was quickly evident why this appliance had been donated as I burned the toast the first time. There is no signal to let us know when it is done toasting. You have to keep an eagle eye on our toaster to make sure your toast is perfectly toasted. I am thinking of just forging ahead and getting a new one though…one that actually works. Ironically, the question of the day comes from a reader who was interested in learning about the toaster and how to care for it.

The toaster oven can be used for a variety of things, not just your toast or bagels in the morning. In fact, toaster ovens are not necessarily the best option if you are looking for an appliance to just toast bread. A toaster will actually toast your bread, while a toaster oven will provide a good toasting on one side, but takes twice the time as the traditional toaster. If you are just looking for some good toast, stick to the regular old toaster.

There are many uses for the toaster oven and it is great for when you are dining alone, want to throw together a simple appetizer, need to heat a few chicken nuggets for the kids, or don’t want to heat up the kitchen. A quick search on Google for, “toaster oven recipes” will yield a ton of ideas for things you can prepare in your toaster oven.

Consumer Reports did a testing on toaster ovens, and surprisingly some of the better performing toaster ovens were the cheapest options. Consumer Reports named the Procter-Silex Cool Touch a best buy at only $15 & the Oster Counterforms 6335 at $40 as the best deals for your money.

When it comes to electricity though, which is the cheapest option to use? Compared to your oven rage, which can use more than 3, 500 watts of electricity, a toaster oven uses only 1,350-1,500 watts. Comparatively, a typical toaster only uses 900 watts so using a toaster for toasting is the cheapest option of all when it comes to the perfect bagel. For bigger jobs though, relying on your toaster oven is a much cheaper option, particularly during the summer months when heating up your kitchen requires more wattage and makes your air conditioner have to work overtime.

Cleaning a toaster oven is very easy. First, unplug the unit and make sure it is completely cool before cleaning. If you wipe spills up as they occur, it will be a lot easier to keep this appliance clean. Wash the racks in warm soapy water. Use a damp soft cloth to clean out the interior and never ever submerge your toaster oven in water. If burned food discolors the paint on your toaster oven, you can try using a liquid degreaser to help minimize the discoloration, but nothing will remove it entirely.

To clean the standard toaster, again make sure the unit is unplugged and completely cool. Carry the toaster oven to the sink, and slide out the crumb tray (located at the very bottom of the toaster) and dump out the crumbs. Next turn the toaster upside down and let any remaining crumbs fall into the sink (if you have a disposal) or over your trashcan. Wipe the exterior with a soft cloth that has been dampened a bit with water & dishwashing soap. The chrome surfaces can be wiped down with a little all-purpose cleaner sprayed on a cloth. Don’t spray into the unit, just spray on the cloth.

How often you should clean your toaster oven depends on how often you use it. We usually wait until we can see a load of crumbs on the bottom or start to smell a burnt toast smell when we run the toaster. We probably should clean our toaster oven more often, but with all of the other things demanding my attention, this usually does not top the priority list in our house.

I do remember eating at our grandparent’s house and after every breakfast, our grandmother would clean it out, wipe it down, and then put it up in her cupboard. This was just part of her morning routine, just like taking out the trash or anything else. Her toaster always looked like new, my toaster…not so much. Follow her example if you want a sparkling toaster.

For some great toaster oven tips, visit Real Simple’s Versatile Toaster Oven article. It has some really wonderful ideas for using that toaster oven of yours!

Toaster Oven Recipes:

Toaster Oven Pizza

Mini Meat Loaves (You could probably try this recipe with my own mini meat loaves recipe)

Toaster Oven Easy Muffins

Do you have any tips to share? What do you use your toaster oven for? Please share!

Keep those questions coming! Submit them to [email protected] on any topic related to cleaning, money, or food. I love to answer these and hope that this information is useful for you & your family.

Labels: , ,

ENJOYED THIS POST? SHARE IT WITH OTHERS:

Click to share on StumbleUpon STUMBLE This Click to share on kirtsy Add to KiRTSY Click to share on Mixx Add to MIXX Click to share on DeliciousIt's DELICIOUS

Thursday, March 29, 2007

Ask Frugal Momma: Cleaning Out Yo Fridge


Today’s entry request was to cover the topic of cleaning out your fridge. Now ladies, I have been plagued with cleaning questions and ya’ll are making me feel pretty bad about my house. Maybe some money-saving questions might be a better fit for this tired mom? I will continue to answer cleaning questions as they come in, but do not, I repeat, DO NOT look around my house or the items in question. I do enjoy the research though and it has inspired me in ways I didn’t think possible so continue to throw your questions my way. Please email requests to [email protected]. The column will continue to run until I run out of questions. Be sure to check out next week’s entry where we talk about that nasty toaster oven sitting on our counters.

I do not enjoy cleaning out my refrigerator, but it one of those things that must be done. I wait until the day before grocery day to do it though because this is the day where there is the least amount of items that need to be moved around. It is also a great time to check my inventory before making the shopping trip to see if I really do need half the things on my list.

When I clean out the fridge, I break out two dishwashing tubs & a cookie sheet to accomplish this task. I fill one of these tubs with two tablespoons of baking soda and one quart of warm water (no need to measure this, just an idea of how much to use). The cookie sheet is used to put all of the condiments on and drawers are emptied into the other dishwashing tub to move items quickly in and out of the fridge.

Before cleaning the interior of the fridge, fill each drawer with the same amount of baking soda solution in each one and let the baking soda solution do the dirty work while you are wiping out the inside of the fridge.

I use a rag to do the interior and just get the rag wet with the baking soda solution. Gently wipe the interior of the refrigerator and wipe off all of the surfaces and interior of the refrigerator. If the washing solution begins to look nasty, be sure to chuck it and get another tub full to clean with.

For stuck on interior stains, you can sprinkle a little baking soda directly on the spot and add just a little water to it to make a paste. Allow this to set on the stain and then scrub gently and allow the paste to remove the gunk.

Go back to your drawers and empty them and wipe the interiors of these. Now place these back into the fridge and then take your dishwashing tub of solution and empty it into the sink. Refill the tub with just warm water and add a dash of lemon juice to the water. Now use your rag to do a final swipe using just this water & lemon juice solution. This will remove any grit that might be left in the fridge and the lemon juice will give it a nice fresh scent throughout too. Dry throughly with a terry towel.

Take your cookie sheet of condiments and make sure to give each of these a quick swipe with the rag before returning them. Half the battle is just not having clean items in your fridge and this is a good way to start fresh. Return all of the items in the other tub, at this time, to their proper homes.

The exterior of your fridge can often be overlooked, but it needs attention too. As a mother of two little ones, tiny little fingerprints and smudges are all over my fridge on any given day. To remove these, use my homemade all-purpose cleaner and spray this on your fridge. I then use a microfiber cloth to clean the outside as it is still gentle on the appliance but also abrasive enough to remove any marks. Any scuffs still left? Break out your Mr. Clean Eraser (a mom’s best friend!) You can find a generic equivalent of one of these at your local dollar store.

If you have a stainless steel appliance, dip your microfiber cloth into a little vinegar and give the outside of the fridge a good swiping with the vinegar. Then give the appliance another swipe with just plain water and dry thoroughly with a terry towel. If you have soft water, that won’t show any water marks, you can just use the water to clean the exterior.

Now when was the last time you saw the top of your fridge? You might want to hop up there on occasion and give that a good wiping too. If you have a handheld vacuum, use that to suck up any crumbs and debris. After that, use the all-purpose cleaner and give that a good wiping down too.

Just as a side note, after I clean out my fridge, I also empty the ice out of our icemaker and clean it with the same solution and dump all of the old ice out. This can be a breeding ground for bacteria, so it is an easy addition to my routine since I already have everything out.

Additional Tips:

When cleaning out your fridge, always use baking soda and warm water to wipe the insides of your refrigerator and freezers- soap or dishwashing liquid will leave a smell and can taint food.

Once every few months, remove all the food, switch off the refrigerator and wipe down all the surfaces. Defrost the freezer at the same time if necessary.

A box of baking soda can be added to your fridge and freezer to neutralize those smells.

Frugal Momma’s Money-Saving Tip:

Make sure that the door seals on the refrigerator, freezer compartment, or freezer are working efficiently by closing the door on a piece of paper. If the paper can be pulled out easily, the seal is worn and should be replaced.

Make sure to vacuum your refrigerator coils (located on the back of your fridge) twice a year. It is recommended that you do this more often if you have pets in the home. Just use your vacuum with the crevice attachment attached to the vacuum hose and give it a good vacuuming. The coils are located either on the bottom of your fridge or in the rear of your fridge. Doing this will save you money because if these are clean, your fridge won’t have to work as hard lowering your bills!

Suggested Reading:

Tips to Keep White Appliances from Looking Yellow (Warning: This does include bleach so be careful with your floors and clothing!)

What else would you like to see featured here? Please drop me an email or reply by leaving me a comment!

Labels: , , ,

ENJOYED THIS POST? SHARE IT WITH OTHERS:

Click to share on StumbleUpon STUMBLE This Click to share on kirtsy Add to KiRTSY Click to share on Mixx Add to MIXX Click to share on DeliciousIt's DELICIOUS

Wednesday, March 28, 2007

Should You Buy Brand Name Detergent?

I received a package from Tide which included some samples of their new Tide Simple Pleasures Vanilla & Lavender scented laundry detergent for review. It was a nice little package including a Tide To Go pen (a necessity for any mother’s diaper bag!) and two cute Tide retro t-shirts that had their logo on the front and a, “You’re Dirty” message on the back. You have to love a company that has a sense of humor like that!

I admit that I never buy brand name detergent and getting enough free brand name detergent to accomplish my laundry this week was a nice surprise. Since I never buy the big name detergents, I was very curious to see how this detergent would perform against my usual generic.

The first difference that I noticed, for me, was how great the scent of the detergent was. With my generic detergent, there is usually a scent when I throw it in, but rarely a scent when it comes out. In fact, the scent of my clothing remains neutral after being washed and dried. The clothes washed in Tide held their scent throughout the washing and the drying, and they just smelled cleaner. Environmentalists would say that this is a poor indication of a good detergent, and to aim for detergents that do not contain fragrances, but I secretly enjoy the scent of a good detergent.

The second difference that I noticed was the amount of lint in my dyer was considerably less with the brand name detergent. When I would use the generic detergent, I could practically make a blanket out of the lint that comes out after doing a load of laundry. When I used the Tide, however, the amount of lint was minimal and I almost didn’t need to even clean the vent at all. This indicates to me that this detergent might be easier on my clothing than the generic detergents.

I am no expert though, so I looked to Consumer Reports for the real scoop on laundry detergents. Consumer Reports performed the studies under controlled conditions and washed clothing in a variety of stains that every mother would cringe to see listed- chocolate syrup, blood, grass, coffee, purple grape juice, spaghetti, mud. If you see these items regularly, can you please raise your hand? They ran the clothes through rigorous testing and pitted the brand names versus the generics to see which would perform the best.

In the top three listed, Tide was listed the best for performance. Their top three products were Tide with Bleach, Tide Cold Water (washed in cold water), and Tide HE. To my surprise, the powders topped the charts over their liquid competitors. As someone who has always purchased the liquid detergent, this was very interesting to me.

Unfortunately, Tide is also listed as the tops for cost per load at $.33, $.31, & $.36 per load for the top three choices. Consumer Reports did name Great Value Ultra Mountain Fresh liquid (Walmart), Kirkland Signature Ultra HE (Costco), or Ultra Plus with Fabric Softener HE (Sears) detergents as achieving very good ratings and named those brands the Consumer Reports Best Buys for detergent. The cost for loads was between $.09-$.14 per load for these best buy winners.

My normal detergent, Purex, was near the bottom for their performance report and received pretty bad reviews overall. The cost was the same as the ones I listed for best buys for detergent, so buying this brand doesn’t really save me any money and it does not perform as well.

Whether you buy the name brand goods or the generic, you can always reduce the amount of detergent you use and see if it performs the same as the recommended amount. You can also wash your clothing in cold water and save yourself ten cents per load. Throwing a cup of vinegar into your fabric softener dispenser will save you on the cost of the softeners and will allow you to omit the fabric softener sheet altogether. A cup of baking soda is also a great addition to help the cheaper brand perform better. I just sprinkle this on top of my load and run the cycle.

I thank Tide for giving me the opportunity to try their new scent! This new fragrance is neither too floral nor too strong. The vanilla and lavender complimented each other well and the clothes smelled wonderful. This is great for the scent-conscious consumer and, as noted above, Tide is the best there is when it comes to the performance of detergents!

Share your thoughts on detergents. What is your favorite? Do you have any money-saving tricks when it comes to washing your clothes? How about any homemade stain fighting remedies?

Labels: , ,

ENJOYED THIS POST? SHARE IT WITH OTHERS:

Click to share on StumbleUpon STUMBLE This Click to share on kirtsy Add to KiRTSY Click to share on Mixx Add to MIXX Click to share on DeliciousIt's DELICIOUS

Thursday, March 22, 2007

Ask Frugal Momma: Happy Homemaking the Homemade Way


I am not going to launch into a preachy prose about how bad commercial cleaning products are today when it comes to cleaning your home. It is common knowledge that a healthy home is not doused in heavy-duty bleach and preserving our environment should be tops on our priority list. The truth is, if you peeked inside of my caddy of cleaners though, you would see some of these harmful products in there. The fact is that I am trying to rely less on these cleaners and rely more on homemade cleaners. I am in the process of making the transition over to using only healthy homemade cleaners, and I feel a lot of pride when I take the time to do this. I know how much better it is for our environment….and for my wallet!

Making cleaners does not mean that you need to purchase a ton of items; in fact, most cleaners can be made from things you already have in your house. The main components that I like to work with are white vinegar, baking soda, liquid dishwashing soap, and lemon juice. One purchase that you may need to make though, to begin getting started, is purchasing a few spray bottles. I pick these spray bottles up from our local dollar store. These clear spray bottles will make it easy to measure and label your new cleaners in your house.

If you do decide to use these types of cleaners regularly, I would suggest making a trip to your wholesale club to buy the ingredients. A small box of baking soda can cost around fifty cents at your local grocery store. The same baking soda, in a twelve pound bag, from Sam’s Club costs about $5.42. What a savings! All of these products can be purchased in bulk and once you begin using them regularly, you will go through them quickly.

While you are at the warehouse store, be sure to swing by the automotive section and pick up a bag of microfiber cloths. The cloths sold at the warehouse store are larger and thicker than the ones you can get in other stores, and these are great for all of the jobs around your house. You can use these wet or dry. You can also use these just using water and not even bothering with a cleaner because they are that amazing.

Be sure when you launder your microfiber cloths that you do not use any type of fabric softener and use a very little amount of soap or cleaner on them. If you overload them with cleaning products, they will become less and less effective, particularly when you are trying to attract dust towards them.

Because these cleaners are homemade and use less harsh ingredients, they will require a little more elbow grease than your commercial products. There are lots of great recipes on the internet though and typing in the search phrase, “homemade cleaners” should you give you lots of different ideas and give you an array of recipes to choose from to find which one works best for the jobs you have around your house. Everyone uses different measurements; it just depends on the difficulties of the jobs around your house.
Here are some of my tried and true recipes that we use in our house:

All-Purpose Cleaner- Mix together two tablespoons of mild dishwashing soap and two cups of water in a spray bottle and give it a shake. Use these anywhere that you would use a commercial all-purpose spray. This cleaner is particularly great for countertops, bathroom surfaces, and high chairs.

Glass Cleaner- Mix together one part white vinegar to one part water in a spray bottle. Spray this solution on your mirrors and windows and dry your windows with newspaper. The newspaper is great for lint-free drying and is a great way to repurpose some of those old papers you have laying around.

Homemade Oven Cleaner/ Deep Kitchen Cleaner- Mix a paste of three parts warm water to one part baking soda to clean away kitchen stains or to clean your oven.
Bathroom Cleaner- Mix dishwashing liquid with baking soda until you have a thick paste and use this throughout your bathroom.

Toilet Bowl Cleaner- No measuring is required with this recipe. Sprinkle a little baking soda into your toilet bowl and then pour a little vinegar in and watch it fizz it up. Give it a swish with your toilet brush and then flush.

Floor Cleaner- Add ½ cup of vinegar to a gallon of water. The scent of the vinegar will fade in approximately an hour, but you can also add a couple of drops of essential oil to help with the scent. I like the smell of Tea Tree Oil, but you can buy any essential oil that smells best to you. Essential oils can be picked up at stores offering nutritional supplements or can be purchased online.

Furniture Polish- Mix ¼ cup olive oil with four tablespoons of vinegar and two teaspoons of lemon juice. Pour into a spray bottle and shake well before using. If you do not use all of it in one cleaning session, store the remainder in the fridge, as the lemon juice can go sour. You can also substitute the lemon juice with twenty to thirty drops of lemon essential oil and then you won’t have to refrigerate it. Using the essential oils though will up the price a bit on your homemade product.

Silver Cleaner- Although I don’t polish silver very frequently, this is a great to have in your bag of tricks. This will clean all of those nooks and crannies that are hard to reach in more detailed pieces and is great if you have a big batch of silver that needs cleaning. In a large bowl (or you can use your kitchen sink) place strips of aluminum foil in and place the silver pieces on top. Cover the silver with boiling water and then add three tablespoons of baking soda and soak for ten minutes.

By making your own cleaners, you will save hundreds of dollars over the course of the year. For example, a bottle of window cleaner will usually run you around two or three dollars. A bottle of your homemade window cleaner though, will cost you about five cents. What a difference that will make to your grocery budget and helping the environment is a wonderful benefit of your fabulous frugalness.

For more tips visit the following links:


Next week, I have received a request to discuss cleaning out the fridge so I will share some tips for that next week. Please, please send me your questions about anything! Email your questions to [email protected] and I will be sure to add your requests to my list. Without your requests, this column wouldn’t be possible and I would love to keep this going. I have enjoyed sharing through this format and it helps me come up with more content for our site. The answers will be added to our website as articles for quick reference!

Labels: , , ,

ENJOYED THIS POST? SHARE IT WITH OTHERS:

Click to share on StumbleUpon STUMBLE This Click to share on kirtsy Add to KiRTSY Click to share on Mixx Add to MIXX Click to share on DeliciousIt's DELICIOUS

Thursday, March 15, 2007

Ask Frugal Momma: The Amazing Dishwasher


I have decided to start a weekly segment on getting to know items in your home. I got some emails and comments about my post yesterday, regarding some tips for your dishwasher, and I thought it would be great to start a little segment explaining frugal tips for caring for your appliances. If you have an appliance or item in your home that you would like to be featured, or you have a question about an item in your home that you would like to know more about, please email me at [email protected] and I will try and hunt for all those answers for you. Consider it a Frugal Momma question and answer column and ask away! I am not an expert in anything so take my advice with a grain of salt!

I don’t know what I would do without my dishwasher! There is an urban legend out there that says that washing dishes by hand is cheaper than washing them in the dishwasher. You actually waste less water by using your dishwasher, which makes the dishwasher a great addition to a frugal homeowner’s house.

First, there is no exact science to loading a dishwasher, but there are a few guidelines. Heavy duty stuff (pots, pans, plates, & utensils) go on bottom & delicate items and glassware go on top. Place everything in the upper rack facedown and put everything on the lower rack aimed towards the center. Silverware should have forks and spoons alternating, otherwise you will get spoons stuck together and they will need to be rewashed.

The important things to know to keep your costs low for running a dishwasher are pretty simple and straightforward. First, it is not economical to pre-rinse your dishes, especially with the newer models that they have out now for dishwashers. If you have an older dishwasher, like me, a quick pre-rinse with cold water only is the most efficient way to get your dishes clean.
Secondly, try and run the most cost-effective cycle on your dishwasher. Try the shorter cycle first and see if your dishes come out clean. If you need to still run the full cycle, don’t run the drying cycle and allow the dishes to air dry. It is more cost-effective and there is less chance of spotting on your glassware.

It is also important to read the manual for your dishwasher to see the recommended amount of dishwashing detergent you should use. The manufacturer will have the best suggestion for the amount of detergent you should use. Are your dishes looking a little gritty? Do you have a nasty residue on your glasses? The remedy to that problem is decreasing the amount of dishwashing detergent. If you don’t have the guidelines handy, you can always look them up on the manufacturer’s website or you can do your own test run to see how much you actually need to get those dishes clean.

If your glasses are looking spotty then you might need to add something to your dishwasher to make it perform better. I fill our rinse agent dispenser with white vinegar. Vinegar is great for removing spots on dishes and it leaves everything squeaky clean. Just fill the rinse aid dispenser as you would with the commercial stuff and stand back in amazement. You won’t believe how much better your dishwasher will perform with just this simple household solution.

I noticed that our dishwasher was looking pretty bad on the interior and I found the quickest way to get your dishwasher looking like new again is just running an empty cycle and filling the detergent cup with a drinking mix with citrus in it. You can use any citrus drink mix and fill it just as you would with your regular detergent. Any drink mix will do- lemonade, Tang, Crystal Lite, or any other drink mix with the citrus ingredient in it. We had a drink mix that the kids just didn’t like and that ended up going in the dishwasher instead. Doing this once a month will help keep your dishwasher looking like new.

Stubborn spots on the dishwashing door are also bothersome. If running a cycle of citrus drink powder doesn’t do the trick, you can try using other products on the door to get rid of the stains. Tomato-based stains will just have to fade with time, but you can sprinkle a little baking soda on your door and let it set for awhile. Take a soft dishtowel and add a little water to make a paste. Then rub the heck out of it and see if that removes the stain. The baking soda paste is also great for countertops or for burnt on gunk on your dishes.

There is a feature on dishwashers that I have never used, and only after writing this article would I even be aware that it even exists. The feature is the Rinse & Hold feature. This is a great feature for those dishes that you just absolutely cannot picture leaving in the sink until the dishwasher is run in the evening. Instead of washing a few dishes, you can run the Rinse and Hold cycle and have the dishwasher rinse them off for you. But how frugal is this feature? According to Consumer Reports, using this feature only takes two gallons of water compared with four gallons for a typical hand-washing. The energy needed to heat the water though, makes this a less than frugal feature so only use this feature when absolutely necessary. It is much more energy efficient to run your dishwasher with a full load.

Finally, you can make your own dishwashing detergent for a fraction of the cost. All you need to make dishwashing detergent is Borax (at our local store a box of this runs about $3.99), baking soda (cheapest at your wholesale club store) and regular old salt. Mix one cup Borax, one cup baking soda (you can also substitute this with washing soda, but most people don't have this on hand) and 1/4 cup salt. Add a tablespoon of this to your detergent dispenser and run it through a normal cycle. With vinegar added as a rinse aid, the dishes will be clean & spot free.

These blog entries will be added as articles to our Organize section of the site, for quick reference.

Up next week, Amelia's question on making your own cleaners! I can't wait to talk about this one!

Don't forget to submit those questions. I hope that this will be a fabulous addition to the blog!

Labels: , , , , ,

ENJOYED THIS POST? SHARE IT WITH OTHERS:

Click to share on StumbleUpon STUMBLE This Click to share on kirtsy Add to KiRTSY Click to share on Mixx Add to MIXX Click to share on DeliciousIt's DELICIOUS

Tuesday, March 06, 2007

Fighting The Continous Battle of the Cheerios

I have no idea how I ended up with such a messy kid, but my daughter is the messiest eater ever. She has grown accustomed to dumping a plate of pasta on her head and throwing dishes in protest. Her main protest is that she wants to be removed from her high chair. When this kid wants out of her high chair...She. Means.. Right. This. Second. Not a moment less than that!

Every day I bust out my Shark Cordless Sweeper and go to town cleaning up the mess. That sweeper has been a Godsend to a mother who doesn't have the energy (or inclination) to whip out her sweeper four times a day.

Imagine my dismay when my two year-old Shark decided to stop working. I figured it might need to recharge so we plugged it in. For two days. Nothing happened...and so I began the quest to find a replacement.

I love cordless sweepers, but the fact is, very few are made very well. If you look on Amazon, you will usually find a bunch of unhappy reviews about cordless sweepers. It just doesn't seem like anyone can get it right.

Determined to replace our old sweeper, I headed over to Target and pulled every single sweeper down. I pushed it around through the aisle (Yes, I do know this is weird) to test the weight of them and the design. I read through all of the descriptions on the boxes and aisle tags. After careful reading and buzzing through the aisle like a maniac, I made my choice. My mind settled upon the Dirt Devil Vibe Cordless Sweeper.

It needed to charge overnight and I couldn't wait until I could test run this. Lucky for me, my daughter is a willing participant and she just let me have at it today. She threw her plate and tossed crumbs, her mashed sandwich, and a hundred Cheerios all over the floor.

This sweeper has two settings- the carpet or the hardwood setting. To be perfectly honest, I find the carpet setting worked best in both location so I just used that setting rather than switching back and forth.

I zoomed over to Emily's high chair and watched in amazement as it scooped everything up. I have included before and after pictures (please ignore the fact that my hardwood is in need of a good cleaning!) of what the results were.

All in all, I am really happy with this purchase and I am hoping that this sweeper lasts me a little longer than the last one. The cost on it (currently) at Target was $49.99.

If you are thinking about purchasing a cordless sweeper, I have a couple of suggestions for you:

1. You will be much happier with whatever you are purchasing if you can test drive it. Borrow one from a friend or just take them through a spin in the aisle. It would be ideal if you could use it, but if you can't just try pushing it around to see if it glides easily.

2. Pick a store that has a good return policy. I knew that Target is pretty good about returns, so I picked that store. In the case of the Shark, I read a story of one lady who had went through three in a month so it is good that the return policy would allow her to do that.

3. Online stores are great and might have more affordable pricing on these, but the pure and simple fact is, if it is defective or you just plain hate it, you have to ship that back. Who wants to be running a sweeper over to the post office? Physical stores are better in this case.

4. Sometimes extras (which cost extra) aren't worth it. Stick to the basic functions and look for ones that offer the best sweeper for your money.

5. Just like all things, the highest price does not make it the best. Some of the higher priced models had a lot less power than the one I purchased.

Do you have a cordless sweeper? What has been your experience with these?

Labels: ,

ENJOYED THIS POST? SHARE IT WITH OTHERS:

Click to share on StumbleUpon STUMBLE This Click to share on kirtsy Add to KiRTSY Click to share on Mixx Add to MIXX Click to share on DeliciousIt's DELICIOUS

Friday, February 23, 2007

Frugal Carpet Steaming


When we got our townhouse in Massachusetts, the carpets were riddled with dirt & grime. I was pregnant with our son at the time, and the carpets were so disgusting that I refused to even take my shoes off, for fear of how filthy my socks would get from our carpet. The house had been owned previously by a rental company and, let's face it, many renters do not care about keeping a home nice that doesn't technically belong to them.

When my in-laws saw how horrible the carpets were, they offered to purchase a small steam cleaner for our new place. They took us to Target and invested in a small Bissell Steam Cleaner for our new home and some bottles of cleaner for us to deep clean the carpet.

Despite our best efforts, we ended up having to replace the carpet throughout the entire house and then two years later, we moved here.

The Bissell Steam Cleaner has been sitting in the basement the whole time we have lived here despite having some carpet in this house. Other projects have come before deep-cleaning carpets, but the other day as I was vacuuming, I realized that one of the reasons I do not like our lower level carpet is because the carpet doesn't seem clean to me.

A light bulb went off and I ran downstairs to grab the steamer and cleaners. I poured the cleaner into the steamer and started steaming our playroom. The water that I dumped out was a murky gray and I made my husband come in and look at all the yuckiness I was able to suck up. After all, isn't that what husbands are supposed to do? What is being married all about, if not for the fact that we can witness the grossness together?

After steaming those floors and feeling the pride in how clean they were, I was ready to steam all the other carpets and rugs in our home. Unfortunately, the cleaner had run out so I would have to invest in some more of the carpet cleaner... Or would I?

I ran downstairs and started searching on the internet to try and find if there were any alternatives to the pricey carpet cleaners. Sure enough, I came up with several recommendations from the commercial carpet cleaning companies.

If you do not want to buy the cleaners, simply fill the tank with the hottest tap water possible and throw in a cup (or two for a large tank) of white vinegar. Begin steaming as you did with the commercial cleaners and stand back in amazement as you notice that this inexpensive solution works just as well as the pricey cleaner.

My main concern with the vinegar was that it would make our carpets smell like vinegar. I need not worry though because vinegar has great odor neutralizing properties , so after about an hour my carpets smelled fresh and they no longer harbored the bad smells or the vinegar smell.

Now that I know how cheap it is to do this, I am more motivated than ever to keeping our carpets fresh and clean.

What are some of your favorite homemade remedies for cleaning items in your home?

Labels: , ,

ENJOYED THIS POST? SHARE IT WITH OTHERS:

Click to share on StumbleUpon STUMBLE This Click to share on kirtsy Add to KiRTSY Click to share on Mixx Add to MIXX Click to share on DeliciousIt's DELICIOUS

Thursday, January 11, 2007

Frugal Solutions for the Swiffer


I love my Swiffer WetJet and have used it for a couple of years now. Unfortunately, like all of these types of products, I need to purchase refills on the solution and the mop pads.


Once I ran out of the solution though, I began filling it with my own homemade solutions. I have done every type of solution known to man. I have filled it with a mixture of hardwood floor cleaner with water, a vinegar & water solution, and other floor cleaners in our cabinets. They all worked wonderfully and cost us a fraction of the cost. As a disclaimer though, the company suggests that you use only their cleaners, otherwise you risk clogging the unit and they will not warranty the product anymore.


I also did not want to pay for the pads, as they too cost quite a bit of money for something you just throw away. I tried using microfiber cloths, but they wouldn't hang onto the mop head well. I then tried just using the regular pads (as they cost a little less) and ended up with a soaking mess.


The solution that I found works better than anything I have ever tried and I promise you, if you buy these, you will never have to buy the disposable stuff again. These terry mop heads fit my Bissell Steam Mop (which they no longer sell) and they fit on the Swiffer WetJet PERFECTLY!. They have a little adjuster on it that can help you hug the mop head tighter and they do not come off. They are made out of terry cloth and when you are done with them, just throw them in the wash with your towels. I had bought several packages, for fear that they would discontinue selling these like they did my steamer, and I absolutely love them. This is a great reusable solution that will cost you much less in the long run. You receive two mop heads in a package and they are currently listed at $9.70.


Product endorsement over- hope you can try these! You won't be disappointed!

Labels: ,

ENJOYED THIS POST? SHARE IT WITH OTHERS:

Click to share on StumbleUpon STUMBLE This Click to share on kirtsy Add to KiRTSY Click to share on Mixx Add to MIXX Click to share on DeliciousIt's DELICIOUS

Wednesday, September 27, 2006

WFMW: Cleaning Up Yo' Grill

Welcome to Works for Me Wednesday. Each week a bunch of us share our solutions for our family with our readers. If you want to get the full experience, please visit Shannon's blog and you will find hundreds of ideas for your family & simplifying your life.

I have a quick and easy tip if you are looking for an easy solution for cleaning your grill. If you have a self-cleaning oven in your home, simply take the grill grates from your outdoor grill and pop them in with your oven. Run it through the self-cleaning cycle and go to bed. In the morning you will have a shiny clean grill and a shiny clean oven. What could be better than that?

Here is the listing of all my other grand ideas- feel free to browse around and I hope you find this tip helpful!!

Good Ol' Plastic Bags
Easy Carrying & Storing
Find Just What You Are Looking For
Target Pharmacy
Say No to Hand Cramps
Foamy Soap
Adventures in Shipping
Frugal Exercise Solutions
Microfiber Obsessions
Sand Between Your Toes Blues
Giving the Gift of Magazines (Frugally)
Solution for Cheap Trash Bags
Programming Your Cell Phone
Free Up Pantry Space: Make a Snack
Weeding Through Your Child's Art Work Creatively
Using the Coffee Maker With Ease
Making Your Spice Rack Usable
Maximizing Space

Labels: ,

ENJOYED THIS POST? SHARE IT WITH OTHERS:

Click to share on StumbleUpon STUMBLE This Click to share on kirtsy Add to KiRTSY Click to share on Mixx Add to MIXX Click to share on DeliciousIt's DELICIOUS

Wednesday, September 20, 2006

WFMW: Good Ol' Plastic Bags

Welcome to my little corner of the world over at Works-For-Me-Wednesday. For more great solutions and ideas for your family, please visit Rocks In My Dryer and click through all of the great participants.

I love plastic grocery bags and use them for just about everything- from carrying my library books to lining our trash cans.

I have a caddy with all of my cleaning supplies in it and I take that from room to room when I do the weekly house cleaning. Within it are two of my favorite free tools- newspaper and plastic trash bags. I take a giant trash bag with me from room to room and pull all of the trash from each room. In the bottom of each trash can, I put three extra trash bags and then line it with a final bag. When the trash is full, it makes it easy to toss and then place one of the empty trash bags (from the bottom) in its place. I also keep one newspaper in my caddy of tools for wiping down windows and mirrors....But I digress.

My favorite use for plastic grocery bags is to line my counters and kitchen sink. Instead of dirtying my counter when I open fresh poultry or beef, I just open the package over the empty grocery bag and dump the juices (and bacteria) directly into the trash can.

They are also really handy when peeling potatoes or carrots. Just line the interior of the kitchen sink and clean-up becomes a cinch when you gather up your bags and toss the vegetable peels in one fell swoop.

I hope this helps save some of you some clean-up time out there! Thanks so much for stopping by. For new visitors, I always include links to my past entries. Feel free to browse around!!

Past Entries:

Easy Carrying & Storing
Find Just What You Are Looking For
Target Pharmacy
Say No to Hand Cramps
Foamy Soap
Adventures in Shipping
Frugal Exercise Solutions
Microfiber Obsessions
Sand Between Your Toes Blues
Giving the Gift of Magazines (Frugally)
Solution for Cheap Trash Bags
Programming Your Cell Phone
Free Up Pantry Space: Make a Snack
Weeding Through Your Child's Art Work Creatively
Using the Coffee Maker With Ease
Making Your Spice Rack Usable
Maximizing Space

Labels: , ,

ENJOYED THIS POST? SHARE IT WITH OTHERS:

Click to share on StumbleUpon STUMBLE This Click to share on kirtsy Add to KiRTSY Click to share on Mixx Add to MIXX Click to share on DeliciousIt's DELICIOUS

Wednesday, July 19, 2006

WFMW: Microfiber Obsessions

Welcome to this installment of Works-For-Me-Wednesday. It is my favorite day of the week and I love to share my solutions and read everyone else's great solutions for their families. Please visit Shannon's blog for some amazing ideas for your family.

Today I wanted to discuss my true obsession with microfiber cloths. I have been using these for about three years now, for just about everything around our house. Microfiber is one of God's great gifts because it can be used for so many things.

I originally started using microfiber cloths just for cleaning the house. Dry, they are amazing dust cloths. Wet, they can be used to wipe down counters, mirrors, and showers.

After using those for just those reasons, I started to expand my list of uses. I then started to put a microfiber cloth on the end of my Swiffer and used that to dry dust my floors. I could also attach a dry cloth and use my Swiffer to reach up into the corners of the rooms, where all those dreaded cobwebs take over, without pulling a muscle. Wet, attached to the Swiffer, they can be used much like the expensive wet cloths you buy, but these babies can be reused.

More recently, I have used them as cloth diaper stuffers. They sell a variety of diaper doublers and stuffers that are made from microfiber. The problem with these is that they are usually sewn into a long strip, with many layers in between to capture odor. I just trifold these into a diaper and they help to keep my daughter nice and dry. When she was small, this was our only diaper stuffer. Now that she is bigger and a super soaker, we just use this to double up on her regular inserts.

When I was chatting with my best girlfriend, she had told me about her dilemma with getting her daughter's hair dry in the morning. Who has time to wait for a 3 yr old's hair to dry or have an hour to blow dry it dry? I suggested a microfiber cloth...guess what? It works like a dream! Microfiber is highly absorbent and for tiny heads, these little cloths are the perfect size. For wavy & crazy curly hair like mine, microfiber is great to keep my curls from getting the frizzy ugly look (that only curly haired women seem to get!) I just use my microfiber cloth to scrunch my hair and it keeps my curl looking....um, curly!

Caring for microcloth is easy as pie. Simply throw these in your washer with a teeny tiny amount of soap. You do not need to use a lot of product when cleaning with these or when washing them, it reduces the absorbency. I usually throw them in with a load of towels (a load that doesn't produce a ton of lint is good) and omit the fabric softener. It isn't good for your towels and it isn't good for microfiber.

I purchase these at our local wholesale club- you will find them in the automotive section. They are very inexpensive, and worth every dime! If you don't have a membership to a wholesale club, these can also be purchased at Dollar Tree, Target, or Walmart.

That is it for me- please let me know if you have other uses for your microfiber cloths! I am always inspired by you all!

Here are a few other links to some of my past ideas-Sand Between Your Toes Blues Giving the Gift of Magazines (Frugally) Solution for Cheap Trash Bags Programming Your Cell Phone Free Up Pantry Space: Make a Snack Weeding Through Your Child's Art Work Creatively Using the Coffee Maker With Ease Making Your Spice Rack Usable Maximizing Space

Labels: ,

ENJOYED THIS POST? SHARE IT WITH OTHERS:

Click to share on StumbleUpon STUMBLE This Click to share on kirtsy Add to KiRTSY Click to share on Mixx Add to MIXX Click to share on DeliciousIt's DELICIOUS