Tuesday, March 10, 2009

Ask the Frugal Momma: Throwing a Baby Shower on a Budget?

Amy,

I am turning to you for some advice about an upcoming baby shower that my husband & I are co-hosting because I know what a budget savvy and creative person you are!

A roommate of mine from college is expecting her first child in May. After asking her several times if anyone was throwing her a shower and her saying no, we offered to co-host a couple's shower with a guy that works with her husband and his wife.

So here's where I get to the dilemma...she e-mailed me the guest list this week and there are 30 couples on it...that's 60 people!

I need some advice for how to pull of the kind of shower that they deserve, but on my budget!! I feel like we have to feed all of these people and provide adult beverages, but I don't know how we could do that for less than a small fortune!!

Sincerely,

J.


Thank you so much for your question and I am so happy to offer a little advice on your baby shower! As always, if you have any questions that you would like to send me, you can email them to me at amy(at)momadvice(dot)com and I would love to share any expertise that I can offer.

Here are a few tips and tricks for throwing a fun baby shower on a budget:

Keep The Decorations Simple

You can burn through a lot of money quickly just on the decorations so one cost effective way to decorate is to decorate with item's that the mother can use or by making a few sweet handmade items.

One of my favorite decorations for a table centerpiece are diaper cakes because it is a special gift for the new mommy and it can double as an attractive centerpiece for the occasion. You can visit my easy instructions and a little cost-breakdown and my tips for how to make these inexpensively.


(photo credit: Wendy Copley)

(photo credit: Janice)

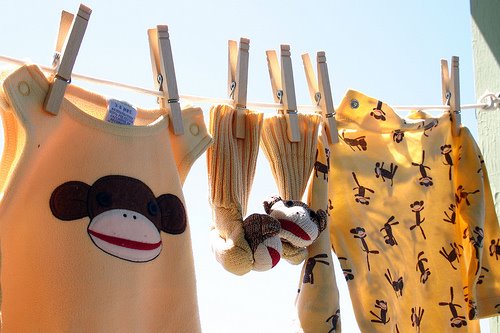
Make a baby clothesline to hang near the food table or behind where the mother will be opening her gifts. Pick cute coordinating items and then give them as a gift to the mother at the end of the shower.

(photo credit: Jaime Compton)

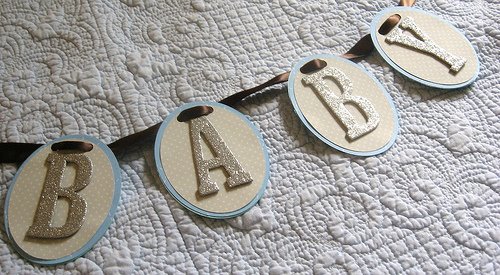
A simple, sweet banner can double as a decoration later for the child's nursery. It doesn't have to be anything elaborate at all, in fact, the simpler the better. If you know the mother's nursery colors, try and coordinate the banner to the baby's future room. For a simple banner tutorial, I love this cute square banner, a bunting made from newspaper, and for the ambitious a knitted bunting. The possibilities are endless and could be made from supplies that you already have on hand in your crafting supplies.

Inexpensive Food to Feed the Masses

If you have a large group to feed, you could stick to between meal times and just provide fun snacks or a fun dessert table. Appetizers will go a lot further than a meal will. If you would like to do a meal, a brunch can be a really cost effective way to entertain and is a classy way to throw a fabulous spread.
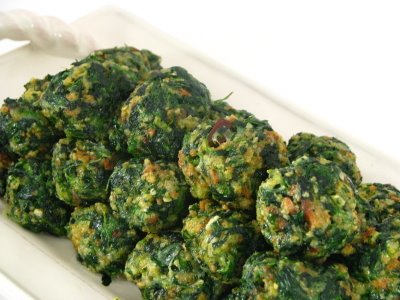
Spinach Balls

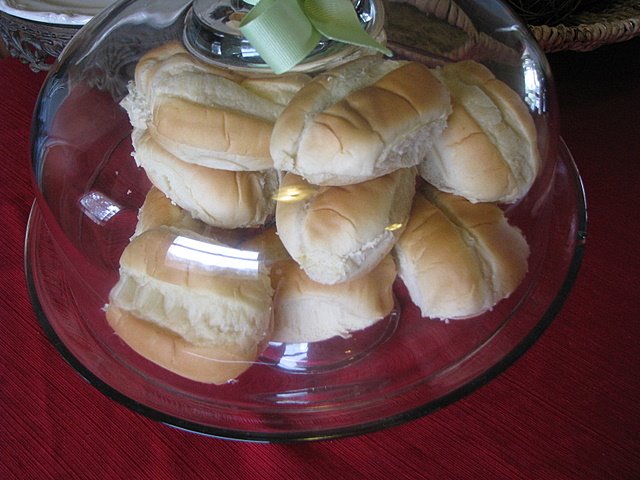
Bite Sized Sandwiches with vegetable & fruit trays

Mini Quiches with an elegant salad (photo credit: chanmelmel)

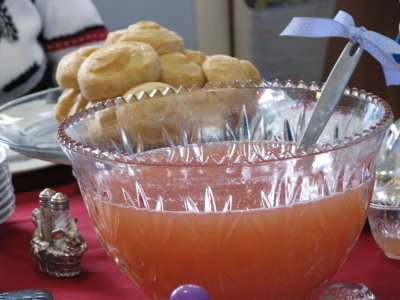
Breakfast Casseroles & a Festive Punch

Mimosas (photo credit: K Santos)
A Creative Cake


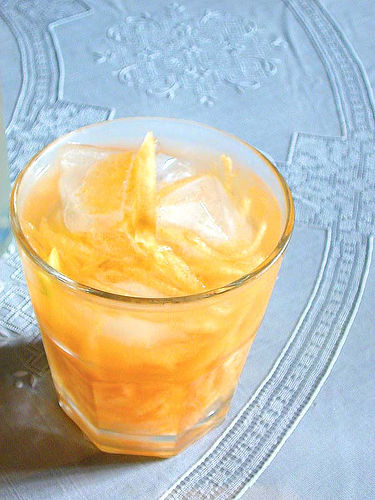
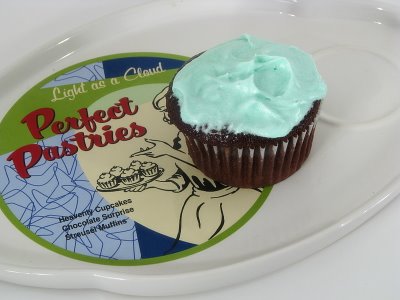
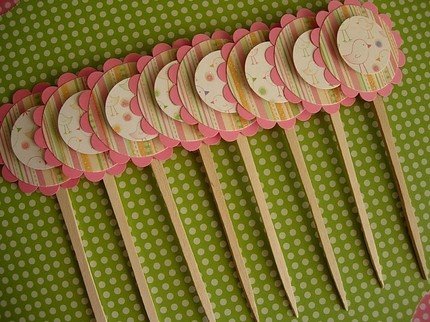
Instead of doing an elaborate cake, offer guests mini-cupcakes in sweet pastel colors with a creative cupcake topper. These cupcake toppers from papertreats are just one example of cute homemade toppers that can decorate your cupcakes very creatively and that will make them sparkle when your cake decorating skills are lacking. If you are really ambitious, you could make your own cupcake picks with the baby's initial stamped on them or even something more elaborate like this. Check a scrapbooking supplies store or a craft store to find cute paper and embellishments for your project.

Remember that you can freeze cake ahead of time, so you can crank out those cupcakes even the week before and keep them in the freezer. I like to decorate the cake while it is still frozen because it helps reduce the amount of crumbs that can collect in your icing. Ice them the day before and assemble them on pretty cake stand or make your own cake stands for a thrifty and creative alternative.

You will need to modify the length of time you cook your cupcakes for cooking mini-cupcakes. Follow the instructions exactly, but just cook your cupcakes for half the time. Keep an eye on them just because they will cook quickly!

Here are some of my favorite cupcake recipes:

Moist Chocolate Cupcakes With Vanilla Buttercream Frosting

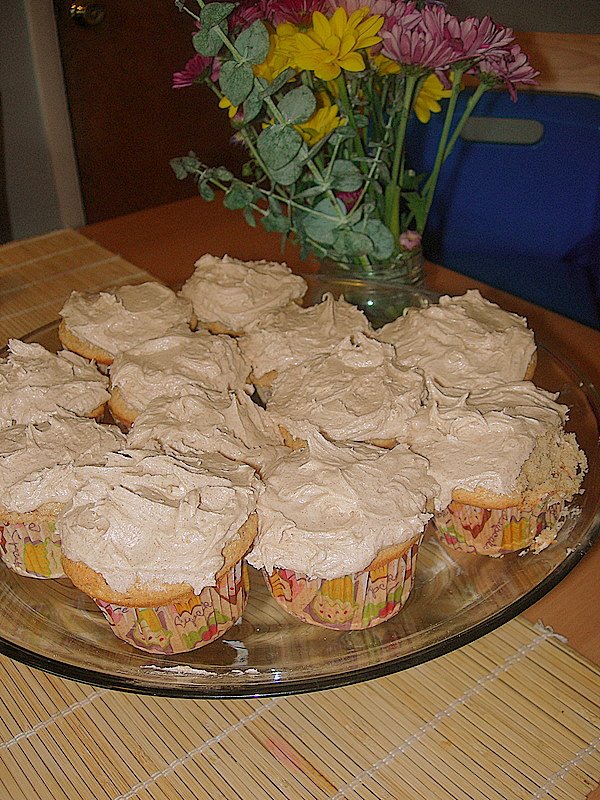
Snickerdoodle Cupcakes

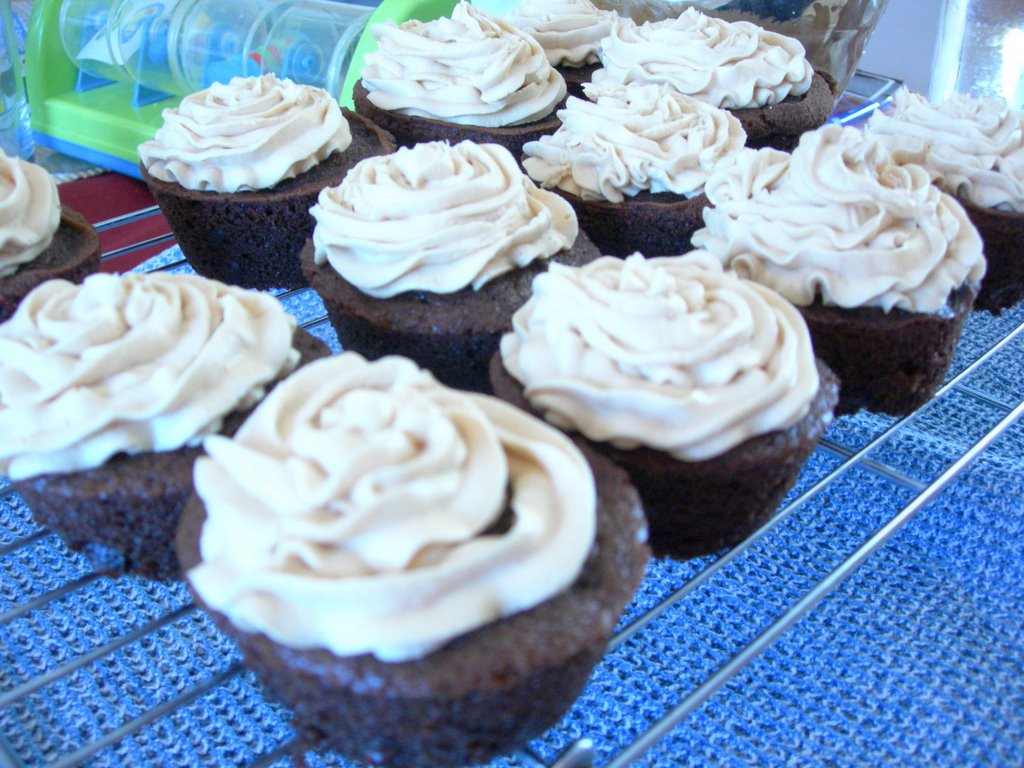
Chocolate Cupcakes With Peanut Butter Frosting

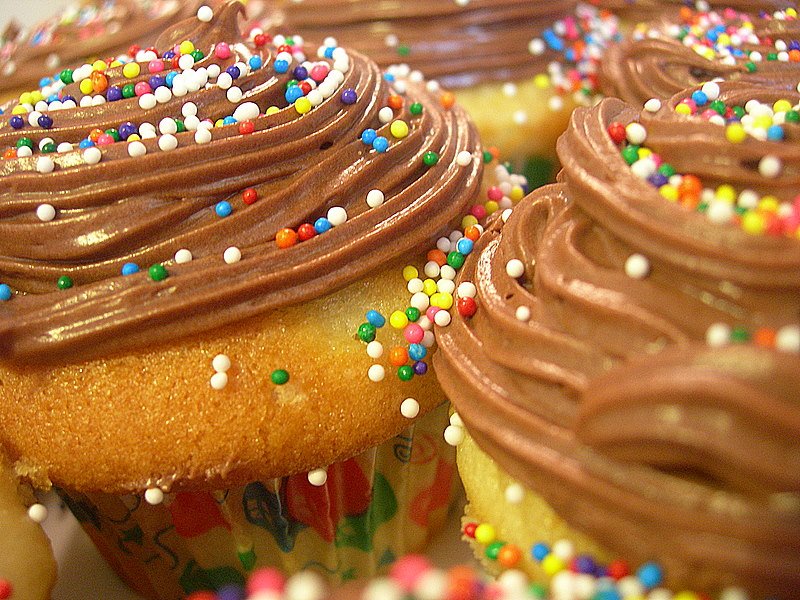
The Best Birthday Cupcakes in the World

Fun & Games

I may be the minority, but I am not a fan of baby shower games. With sixty people in attendance, you are going to have a hard time pulling off an organized activity. Spend that time socializing or do a game like these that will not require everyone being quiet and sitting in a circle.

(photo credit: Emma Black)

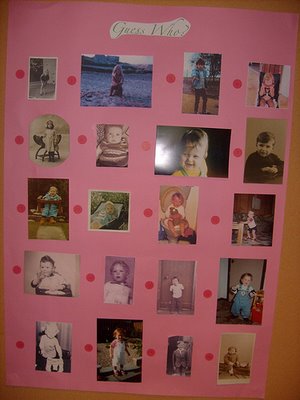
Have your guests email you a picture of them from when they were a child. Print out copies of the pictures and make it a party game to Guess Who? is in the pictures.

(photo credit: the higher nest)

How about a Baby Shower Price is Right card and choose the closest winner on how much common baby items would cost?

(photo credit: nhearon2003)

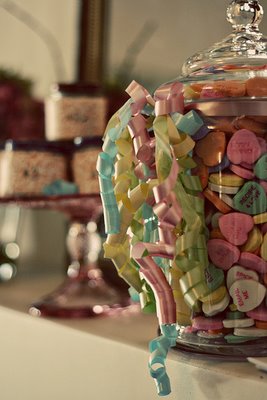
Of course the simpler the game, the easier! Why not throw candy in a clear jar and have your guests guess the total amount? With large group activities, the simpler the better! The bonus with this game is that this game can double as a centerpiece!

Parting Gifts

In a party of this size, I do not think people will be expecting to take home a party favor. Everyone is going to be happy to be included and will just be enjoying the celebrating. Concentrate your efforts on the food, cake, and entertainment and your guest will leave with the wonderful memory of the occasion rather than a gift that they probably will not use.

Consider your shower and any of the centerpieces and decorations your gift to your friend. If you want to add a special gift that she can use, give her a basket of thank you cards and stamps which she can use to thank all of her guests for their thoughtful gifts!

Good luck with your shower and I hope these ideas will give you a good starting point for a festive and frugal celebration!

(Photo Credit: Picture 1- Jerusalem)


Do you have any tips or advice for the hostess for throwing a great budget-friendly shower? I know she will really appreciate it!

Labels: , , , , , ,

ENJOYED THIS POST? SHARE IT WITH OTHERS:

Click to share on StumbleUpon STUMBLE This Click to share on kirtsy Add to KiRTSY Click to share on Mixx Add to MIXX Click to share on DeliciousIt's DELICIOUS

Monday, November 24, 2008

My Christmas Wish List This Year

Reader Q: What is on your Christmas list this year?

I love making Christmas lists for my children, but I dread making them for myself. I feel like I have so much that I don't really need anything. I know how fun it is to see other people's holiday lists though because it can help you in creating your own lists. Without further adieu, here is my wish list for this year!

The first thing on my list is that people make a donation to our Big Give this year. I have been working so hard on this and want to really give our local homeless shelter a really great Christmas this year. Our family does charitable giving in lieu of gift exchanges so I look forward to putting money in for good causes this year. I encourage you all to do the same or request that charitable gifts be made instead of getting something on your Christmas list.

One of the gifts that I received as an early Christmas gift was a Kindle. I get to do some traveling with my work and I am an avid reader. On my last trip, I was toting four library books to keep me entertained. While I was out of town, Oprah had the Kindle on her show and my husband ordered one for me at the special discount price. It was the best gift he could have ever got me, although a little extravagant for our usual "only buy for the kids" Christmas. I absolutely love it and am asking for Amazon gift cards so I can download books on it for reading. I am a gadget girl and the convenience of having all of my books on this little reader is such a special treat. You can download newspapers, books, and blogs into it and keep your reading in one little spot.

As a Christmas gift to my husband, this Mighty Bright clip-on light would be great so he could sleep at night while I am reading. I drive him crazy reading in bed so this would be a great gift for both of us. This gift would be only $13, but would add a lot of sleep value for my husband.
A makeup brush set is top priority on my list this year. This set from Ulta is only $19.99. Why might I ask for this? Well, my daughter managed to find a lemonade packet from our kitchen and decided to mix up a batch of lemonade in the toilet. With no spoons within toddler-level, mommy's make-up bag came in handy and she used my brushes as her official stirrers. Nothing like swiping a damp brush across your face to make you wonder how it got so wet? Evidence of pink residue and other fine handiwork led me to the conclusion that I should get a fresh set of brushes.

Another item on my list was the Apples to Apples game. Our family loves board games and this is one that I would really like to add to our family collection. I absolutely love this game and it is a great game to play when we have friends over.


I have a wine opener on our list because ours has kicked the can. I prefer the Rabbit style of wine opener. I am not into the wine opening sets because they require more space in my limited kitchen cupboard space. This Houdini Lever Style Wine Opener is a steal in the black color for a little over $20!

I would like to get a dry erase calendar with a set of colored markers to get our family organized for the new year. This jumbo calendar is what I have in mind for our kitchen so we can get everyone's schedule in one spot. This calendar is only $14.99 through the Container Store.
One thing that I have not bought for myself in years and years is perfume. A little known fact about my husband is that he has no sense of smell. I seem to not make the extra effort with things like this because I know it is wasted, but I love a good perfume so I would love to have some even if it is for only my own benefit. One of my favorites is Clinique Happy perfume. Just a teeny bottle would be great for those special occasions.

I would love one of these mother's necklaces with my kid's names on it. I can already see this necklace around my neck. This one is sold by Moppets Closets and is $27. I love that it says blessed on it with the names surrounding it because that is exactly how I feel as a mom.

I love bamboo placemats and we have had these on our table for years. They are easy to clean and can be rolled up and stored when we want to throw a tablecloth on our table. After eight years though,they are showing their age and are falling apart. I love these bamboo placemats in black because they wouldn't show any food stains. These are $14.90 for four.

I really would love an oilcloth tablecloth for my table and I think this color would be perfect in my kitchen:

Chalkydoodles makes custom ones with a gingham border that would be a wonderful and useful splurge in my kitchen. If I get holiday money this year, I am putting it towards this. For my table size it is a splurge at $44, but would be used for a long time. Oilcloth appeals to me with two messy kids so I would love to have one of these in my kitchen.

My French Press broke so I would love to get another one to replace it. I found my first one at a thrift store, but is rare you find one with all the working parts on it. This Bonjour Hugo accommodates three cups of coffee (or one Amy cup) and is unbreakable. You have to be careful with the glass ones and this one could stand my abuse a little more. Best of all, it is priced at $12.90.

I got the first Digital Photography book by Scott Kelby last year for Christmas and absolutely fell in love with this book. I would love to get this Digital Photography 2 book as a holiday gift. I would recommend these books to anyone who is trying to understand photography without a lot of mumbo jumbo language. These books are absolutely great for beginners.


Other things that will always make the list are-

  • Michael's or Hobby Lobby gift cards to help feed my crafting addictions. I was also thinking I would like to take the next level to cake decorating so those could also go towards my supplies.
  • Candles, but they have to be food-related scents and I love holiday-ish scented stuff.
  • Starbuck's gift cards to splurge on my favorite coffee drinks.
  • Babysitting- We love anyone who offers to help us with the kids so we can have a date night. Even the gift of time during the day so I can whip the house back into shape is always a hit!
  • A maid- If I can't get the babysitter, I could really use a maid to help me with my house.
What is on your holiday wish list this year?

Labels: ,

ENJOYED THIS POST? SHARE IT WITH OTHERS:

Click to share on StumbleUpon STUMBLE This Click to share on kirtsy Add to KiRTSY Click to share on Mixx Add to MIXX Click to share on DeliciousIt's DELICIOUS

Tuesday, October 21, 2008

How Do I Become a Product Review Blogger?

One of the questions that I get asked the most is how people can receive free products for review. I have been reviewing products for a few years now, but only more recently did we expand our review section into The MotherLoot where it could receive separate attention from the work that I do here.

Really, anyone that has a blog can move into the product review niche. I just wanted to share some things that I wish someone had shared with me when I began receiving products for review and some ins and outs of the product review niche. Of course, folks that focus solely on product reviews may have some stellar advice that I can't offer you here, but I will certainly try my best.

Start reviewing what you have. If you have not done any product reviews before, one great way to begin venturing into the world of reviews is just reviewing the items you already have in your possession. Look around at the things in your home and review the items that you would hope to receive for your blog. Want to review the latest drugstore products? Start a blog by reviewing what you use in the morning to get ready. Want to own the latest technology gadgets? Start with the laptop you are working on. Of course, you want your niche to fit well with your site so try picking products that would interest your readers. As a family blogger, our readers are interested in the latest toys and tools to make their days easier & more productive. I started by sharing tools that I used to clean my home, not intending to ever receive products from companies. Many companies saw my comments about their own particular products and my experiences with them, and I would begin receiving requests to send me products. That is truly how all of this started for me, just writing about my experience with items in my home.

Put together a set of terms for review.
When companies contact you to review one of their items, be sure to have a standard procedure for reviews. Here are some examples of procedures you could use:
  • It is a requirement by our company that we be able to keep the product that we are reviewing.
  • It is requested that we be able to offer one of your products to our readers in a giveaway.
  • We require a fee from your company in order to do a review.
  • We request that you provide a discount code for orders that can be placed online.
  • We request items that fit with our readers. We are a _____ site that caters to _____. Please make sure your product matches the efforts on our site.
Make sure that your terms are very clear and that the company understands what is required of them. These terms can be made visible on your website or you can just have a document ready to go and email the companies that you are interested in working with.

Streamline your product review process as much as you can. Now that you are receiving requests for products, what are some ways that you can streamline the process? My suggestions truly come from trial and error through my past experiences with companies.

  • Set up a seperate email address for your product reviews so you can keep track of what is coming to you. If it is set up in a different email address, set up an automated response that lets the company know that their request has been received. At this time, it is also appropriate to say, "We receive many requests for products and will try to respond to you in a timely manner. If you would like your product to be immediately seen I would like to provide our advertising rates." This will give the company an option to pay you for prompt attention and lets them know that you have received their request without them hounding you repeatedly through emails.
  • Word your mailing address so you know if you requested the product or not. I won't give away my secret, but I have a very separate wording for products that I request. There have been weeks where we receive product after product and I can't remember what I requested and what I did not request. Establishing a specific mailing address that lets you know it is an item you genuinely wanted to try will help you when multiple mailings start coming in.
  • If you are doing a giveaway with a company, request that they mail the product directly to the winner. Trust me, it is so much hassle to have the product shipped to you and then reshipping it to the winner. It is expensive, not timely at all, and one extra step that you don't want to be dealing with.
  • Keep track of that paperwork. Keeping the winner(s) information in a file along with the PR contact who handled the giveaway will be of great help to you if there should be a snafu with getting shipment to the winner. Hang on to this information for awhile because I have had errors occur months down the road. At this point, it can be time-consuming trying to hunt down that person who forgot to mail shipment to my winners.
Decide how you will handle products that you don't like. Of the twenty requests or so we receive each week, we only pick one or two items for the review site because I try to pick things that we would actually enjoy reviewing. Because of this very reason, you won't see a lot of negative reviews on our site because it is products we really know we will love. There have been the occasional bad products though and we try to review those honestly. There are times though where I have chosen to not do a review and emailed the company privately instead. One company in particular sent me a giant box of their cleaning products that caused me to go into a fit of asthma when I tried them. Rather than bash them publicly, I sent them an email and said, "I am sorry, but these products did not work for me. The scent in them was too strong and caused me to have an asthmatic reaction. I am happy to review them, but wanted your company to be aware." Instead of posting a review, they took my feedback privately and forwarded it to the team who developed the products with the recommendations that they come out with an unscented line."

Don't forget to stay true to yourself & your site. It can be easy to get caught up in all of the loot, but you need to remain true to your readers and the intentions of your site. Our website is family-focused and shopping for family needs fit with our site. Shopping did not fit with a frugal blog though so that is why we chose to move the reviews to its own separate section of the site. If you are conflicted on if it is a good move or not, try to be more heavy with the giveaways rather than the reviews themselves. Nothing makes a reader happier than that email from you letting them know that they won something on your site. It keeps people returning to your review blog if you are sharing the products with others.

Another way that you can stay true to your mission is by donating the items to charity or participating in charitable drives in your community with the items you have received. I am working on a big donation to our local shelter and am so thrilled to be able to pass on some of these wonderful products to others. The items that reflect our mission and goals will be reviewed, but the majority will be donated or given back to our readers. I feel lucky to be able to give in ways that I could not necessarily do on my own and I hope that others can benefit from our relationships with these companies as much as we have.


Do you have any tips or questions on product review blogging? Leave them here and we can start discussing!

**************************
Speaking of product reviews & giveaways, I just wanted to let you all know that we are offering a brand new giveaway to our readers! Two lucky winners will receive a copy of Build-A-Bear Workshop for the Nintendo Wii. This is a family-friendly game perfect for young children. The game is for children three and older. Put your entry in over at The Mother Loot today! The contest ends October 28th at 8PM EST!!

Labels: ,

ENJOYED THIS POST? SHARE IT WITH OTHERS:

Click to share on StumbleUpon STUMBLE This Click to share on kirtsy Add to KiRTSY Click to share on Mixx Add to MIXX Click to share on DeliciousIt's DELICIOUS

Monday, September 01, 2008

Ask the Frugal Momma: Getting to Know the Bread Machine

You have been talking about bread machines and making bread. I am interested in doing this since I am home all the time and I love fresh bread.

I was at the Goodwill and saw many of them and they were kind of cheap, like 20.00 or less. I am dumb so help me out. Does the machine knead the dough and bake it and everything in the bread machine?

If I would purchase one at the Goodwill how would I know if it works or not?

I am interested. Please help me find a way in a new venture.


Signed,
Future Bread Maker

First of all, thank you for your question! The Ask Frugal Momma column can't happen without your questions, so please keep sending them my way. You can email any and all questions to [email protected]. We have had some fun topics and I am very excited to share with everyone!

Do any of you have bread machine gathering dust in your house? A lot of people buy these appliances and then end up donating them at their local thrift store because they never use them. I think of the bread machine as a modern day convenience, but in a culture where we want everything NOW, waiting for a loaf of bread can seem like an eternity. Why wait for a hot loaf of fresh bread when you can grab a loaf at your supermarket? And what exactly is the purpose of that appliance that is taking up space on your shelves?

On any given day in our house, you will find our bread machine happily humming along and whipping up fresh dough and bread for us. We use our bread machine almost daily, and spare ourselves the expense of fancy bakery breads. Not only that, but our bread machine has a regular performance in our house on Friday nights. This appliance makes our favorite pizza dough for our official “family night” together.

The purpose of a bread machine is to be able to make fresh bread when you want it. The reasons vary from person to person on why they choose to make their own bread. Many people have concerns about the additives and preservatives that are found in store-bought breads. Another reason that many people choose to make their own bread is because they just enjoy the taste of homemade bread. My reasoning for making our own bread is because I like to save our family money. Making your own bread costs so much less than purchasing a loaf of bread, and the rising grocery costs have only fueled my desire more to make it at home.

I am not a baker though and our days seem to be jam-packed with activities for our family. Taking the time to knead, rise, and bake bread…well, that hasn’t seemed to top the priority list at this point in my life. Lucky for me, there is an appliance that can do all the work for me and all I have to do is pull the finished loaf or ball of dough out.

To begin, all you have to do is put the ingredients in and select your setting. Some of the older machines have just a handful of simple settings. I find that the settings we use most on our machine are Basic and the Dough cycle, which can be found on every machine. The basic cycle is just the basic setting for making a loaf of bread. The Dough cycle just completes the kneading and rising of the dough. Once the dough cycle is complete, you can take the dough out and shape it into your loaf pan or do fancy braids or rolls out of the dough.

Inserting your ingredients into a bread machine is also very straightforward. If you are making the loaf right away, you can insert the ingredients in any way that you want. All of these ingredients will immediately be stirred together and so it will not matter what the order is. If you use a timer delay on your bread machine, delaying the start time of making your loaf, it is imperative that you put the ingredients in the right order or your loaf will not turn out right. The order of ingredients is liquid (liquids include water, oil, milk, eggs, or honey), flour, other dry ingredients (salt, sugar, baking powder, seasonings), and ending the ingredients with your yeast. The most important part of putting the yeast in is to make sure that you make a small indentation into the center of the flour so that the yeast does not react with the other ingredients.

Upon inserting your ingredients, your bread machine will take over the process from there. The machine will knead the ingredients together, give the bread its rising time, and then it will bake the bread. The bread machine will signal when the bread is ready and you can allow the bread to cool inside of the bread bucket.

There is no need to spend the money on convenience bread machine mixes; in fact, you can make your own convenient mixes handy for the week. I take plastic storage bags and make an assembly line of the dry ingredients and do my bags once a month. On the outside, just write what liquids you will need to add and you will only have a dirty kitchen once.

A quick glance at grocery store prices though and you will wonder how there could be any possible savings with making your bread at home. The key to making this the least expensive on your family is to purchase all of your ingredients at your local wholesale club. With proper storage, you can buy the ingredients in bulk and save your family loads of money. For example, our wholesale club has twenty-five pounds of bread & all-purpose flour for under $6 each. Two pounds of yeast will run you just under $4. What a difference compared to the prices in your regular supermarket!

For storage, flour can be stored for up to a year in an airtight container. With bulk storage, a large plastic bin that has been clearly labeled is ideal to keep your flour fresh. Yeast is the easiest ingredient to store and has a very long shelf life. I store my yeast in a clear jar in our refrigerator door. With both of these ingredients, writing an expiration date on the label will also remind you of when the item is going to expire.

If you do not have a bread machine and are looking for one, garage sales and thrift sales are a great place to hunt. I see these machines for $10 or less, and you will definitely get your money back from the savings of making your own bread. When you find one, ask if you can plug it in and make sure it is working. Just check that it actually powers up, that there is a bread bucket inside, and that there is a paddle in the bottom of the bread machine to stir the ingredients. Having a manual with it is handy, but usually can be found by searching online.

Good luck in your quest to find a bread machine and I hope it is a well-loved appliance in your home!

Related & Helpful Information:

Hillbilly Houswife's Bread Machine Basics

Buttery Bread Machine Rolls

My Favorite Pizza Dough (after much trial & error)

Storing Homemade Bread & Bread Ingredients

Homemade Croutons

Dinner is in the Bag


* This post originally aired on June 28, 2007*

Labels: ,

ENJOYED THIS POST? SHARE IT WITH OTHERS:

Click to share on StumbleUpon STUMBLE This Click to share on kirtsy Add to KiRTSY Click to share on Mixx Add to MIXX Click to share on DeliciousIt's DELICIOUS

Saturday, August 23, 2008

Frugal Family Vacations

I know that you all are really going to enjoy this guest post from another one of my favorite bloggers! Stephanie, at Keeper of the Home, has agreed to share her traveling expertise with our readers and I think this post will really help those of you who are planning your family vacations! Be sure to visit her blog for wonderful tips for naturally inspired living for the Christian homemaker.

If you are interested in submitting a post on frugal living, creative/crafty parenting, or organizing, you can email your entries to me at [email protected]. Please include a bio with a link to your site and (if you would like) a picture of yourself to include.

If you're a frugally minded mama like myself, and you and your family have thought of vacationing beyond the local campground, you may be wondering how to go about planning an affordable yet still fantastic family vacation.

Here are a few things that I have learned in my experience of planning both domestic and international trips:

General Tips

Research, research, research!

This cannot be stressed enough! Do not settle on any tickets or reservations until you've researched at least 4 or 5 options.

Initial research should give you an idea of general flight, hotel, and car prices, as well as the attractions that you are interested in and a skeleton itinerary. Start by using online travel services such as Travelocity, Expedia, Hotwire and Priceline to begin to gauge prices. Use travel sites such as Lonely Planet or Fodor's to start to get some ideas about the place you will be traveling to, as well as simply googling things like "travel arizona children" or "attractions grand canyon".

From here, put together an estimate of what the cost of your trip will be. If it's coming up too high, consider what areas you can skimp in. For us, we don't care about fancy accommodations. We would prefer to have more money to allow us the freedom to eat without stress, and do all of the activities that interest us. You may feel differently. What are the priorities for your family?

Once you've worked through these steps, you can get down to business and really dig in to find the absolute best deal on each part of your trip.

2) Booking together isn't always cheaper


Through the travel companies would love to be your one-stop shop by having you book your flight, hotel and car all in a neat and tidy package, you will most likely be missing out on some deals by going that route. If you do some careful comparisons of these "deals" (compared to finding each component of the trip individually), you will see that they really aren't the deals they're cracked up to be.

3) Bidding for a deal

It's now become one of the more popular ways to try to find rock bottom deals for traveling. Sites like Priceline and Sky Auction encourage you to either bid against other would-be travelers or to "name your own price". These sites have the potential to be very valuable to you if:


  • You've already done the research and know exactly what a good deal would look like

  • You've determined your bottom line. For example, when using Priceline you don't get to choose your flight time, specific hotel, etc. You set your price, win it, and then find out what you've already bought. It's important to consider these unknown factors, compared to the available deals that you already know are out there, and then you will have the ability to pick and choose whether bidding is worthwhile. If an extra $10 a night is worth it to you in order to know exactly which hotel you will be staying in, set your Priceline limit at $10 below what you'd like to be paying, and resolve to walk away if that bid isn't accepted.
  • You are very aware of the fees and taxes that will be added on. Always, always check and know exactly what your total costs will be before making any decisions.

Tips for flights


  • Children under 2 fly free, on a parent's lap, so plan your dates accordingly if you have little ones nearing their birthday

  • If you can, keep your dates flexible. Often it is cheaper to fly on a Saturday, while the Friday may cost $15 more a ticket. It doesn't sound like much, but it can add up fast if you're buying children's flights as well. Some travel sites have search options designed to let you search using flexible dates. A great option to use is Expedia (be sure to check the box that says "my dates are flexible"). I just did a sample search on flights from Atlanta to Fort Lauderdale in August, and came up with a price range of $191 to $309, within an 11 day span- that's a big difference!


  • Look at smaller, independent airlines as well (which are usually not included on the major travel site searches). A few examples are:

  • When you find a great deal, snag it! Good deals don't last for long, and if you wait, you may just miss out (I know this from experience!)


Tips for Accommodations


  • First, consider the many varied options out there: Hotels, motels, camping, yurts, hostels, house swaps, B&Bs, etc. There is so much beyond the traditional hotel, and many of the other options are much cheaper, and can even be more enjoyable! Personally, we will be staying in a private room at a hostel in Flagstaff for our upcoming Grand Canyon trip, where we will have kitchen privileges, hot breakfast included, laundry machines and more, for a mere $45 a night!

  • Do consider bidding for hotels on sites like Priceline. I just scored two nights at the Crowne Plaza in Phoenix for $50 a night! Just remember- do your research first!

  • Change it up! When we went to Europe 2 years ago, I found that different types of accommodations were cheaper in different cities. In Rome, we stayed in a very small but lovely private hotel. In Florence, we opted for a camping hostel, where the tents are permanently set up on raised concrete, and include cots and basic bedding. In Edinburgh, we stayed in a quaint Bed & Breakfast, where we had a gorgeous, clean and very large room, delicious hot breakfast (could have done without the blood pudding, though!), for the same price as a private hostel room, and half the price of the cheapest hotels. While living in Japan, we went even cheaper than a hostel and chose to take the train out to the country each night to camp (we carried our tent on the bus we took up to Kyoto).

Tips for Rental Cars

  • Go with the smallest car that suits your needs. You'll save on rental costs, as well as gas most likely!

  • Avoid most of the bigger name companies. They tend to be significantly more expensive, unless you come across an amazing deal.

  • Again, try your hand at bidding to "name your own price"

  • Compare many sites. In my recent search for the cheapest rental car, my favorite comparison sites were Hotwire, Travelocity, Expedia, Priceline and CarRentals. I looked at the individual rental company sites, and generally they weren't cheaper than the travel sites, with the exception of a few smaller companies that were not always included in the searches. Try Fox, Advantage and Dollar.
  • If you have AAA or BCAA, or even an Entertainment book, check the types of deals and discounts that are offered for members. You may find a free upgrade on a weekly rental, or perhaps a 20% discount, etc. Just make sure you compare it to the other deals out there, as these discounts are usually for the bigger, more expensive companies.

  • Consider whether you need a car at all! Some cities have
    excellent public transit, and if you choose the location of your
    accommodations carefully, you may find that the need for a car just
    disappears.


Tips for Attractions


  • Get an Entertainment book or online membership! You will find many 2 for 1 entrances to attractions, as well as 2 for 1 entrees at the local restaurants.

  • Look for a city pass. These passes are your entrance ticket to the most popular attractions in a city or area, for a discounted rate. By buying the one pass, you can go to any attraction included over the course of one week (for example- it varies from pass to pass). Some examples are the Seattle CityPass, ShowUp Now for the Phoenix area, and the Go Los Angeles Card. Visit CityPass for several other major North American cities available.

Tips for Eating Cheaply


  • As mentioned above, the Entertainment book can help you make the best of having to eating out (or depending on your perspective, getting to eat out!) by offering 2 for 1 entrees.

  • Try finding an accommodation that includes a breakfast, or even one that allows kitchen privileges (such as a hostel, or some B&Bs) or a motel with a kitchenette.

  • If your hotel has a mini fridge, find a local grocery store (which just adds to the experience of visiting a new place), and stock up on breakfast foods (unless included), and lunch and snack foods so that you can brown bag it as much as possible.

  • Bring a stash of easy to carry snacks that your family enjoys. To Arizona, we will be bringing fruit leather or bars, rice cakes, granola bars that are wheat free (as we are all sensitive to wheat), and a box of mineral drinks mixes to add to our water bottles.

  • Bring a water bottle for each family member, and fill them up each time you're able to. Buy large bottles of purified water from a local grocery store to keep in your hotel room, or the trunk of your vehicle, to do refills.

Lastly, once you are there and you have done everything you can do to make your trip as affordable as possible, just relax! Enjoy your vacation, knowing that some extra expenses will pop up unexpectedly (as they always do), and choose to cherish every minute of the trip that you have worked so hard to plan and save for!

Despite how it may appear, Stephanie does not spend most of her time planning vacations! She is blessed to be a wife, mother to two young children, homemaker, and home schooler. In her "spare time" she maintains the blog Keeper of the Home, gardens organically, studies nutrition and natural living, and enjoys cooking up nourishing foods for her family.

Labels: , , ,

ENJOYED THIS POST? SHARE IT WITH OTHERS:

Click to share on StumbleUpon STUMBLE This Click to share on kirtsy Add to KiRTSY Click to share on Mixx Add to MIXX Click to share on DeliciousIt's DELICIOUS

Tuesday, July 15, 2008

What In The World is Twitter?

I will be honest and admit that I am completely behind the times on networking through the internet. I find a lot of these social networks to be more maintenance and more bothersome than they are worth.

When my husband suggested that I join Twitter (eons ago), I went into a speech about how I was out living my life while people sat around and twittered about it. I rolled my eyes at people who were glued to their computer screens reading one simple answer to one simple question, "What are you doing?" What am I doing? What am I doing? Um, let's see... yeah doing stuff.

Finally, I decided to really devote some time into discovering what Twitter was and if it would truly be beneficial to me. Reading people's updates about drinking coffee, heading to the movies, drinking wine, blah, blah, blah- that did not sound like fun reading material. What I wanted to see was one thing and one thing alone. Will this improve my site?

Now that you know the attitude that I went into it with, you might be shocked to find out that I am absolutely loving Twitter. No, not for the ho-hum everyday details of people's lives, but I am loving it from a networking standpoint and what it is doing for my business.

First, if you do not understand how Twitter works, I would HIGHLY recommend this video that I am posting here. It breaks down exactly how it works in a way that is very easy and basic to understand. Simply sign up for an account, find your friends (or find a really good friend who is well-networked and then look at all of his/her friends) and then click, "Follow." Now you can post updates to the people who begin to follow you and you can post a quick update (140 characters or less) on what you are doing throughout the day.

Here are some of the positive things that have happened for me since joining Twitter:

Networked With Other Bloggers- Twitter is an amazing networking tool. Do big-time bloggers not know about you? Do you want to connect more with bloggers in your own category? This is the place to do it. Following people requires one click and then you can begin building relationships with others. You might think, how could that possibly help me? Well, within the first week I was able to see how great it really was.

Is a blogger going away on vacation and in need of some bloggers to do guest posts? That blogger will post this on Twitter and you can scoop up a guest post on other blogs in your genre. Is a blogger looking for an article on a particular subject that you just so happened to have written on? That blogger will post that article request on Twitter and you can send them a message to let them know that you have the perfect article ready to go for them.

Not only does it help you network with other bloggers from those superficial standpoints, but it also helps you connect on a deeper level and build friendships with people in your blogging community. You know if a blogger is having a really bad day and can send them a quick message to cheer them up. You also know if someone is having a great day and can be their cheerleader. These deeper connections with other bloggers are what you need to grow your blog.

Pointed People to My Posts- Want people to read what you have written? Point them to your posts! Because of the limited character space, you will want to make a smaller url to point them to, but you can link right up to your blog when you have an update. Let people know about your contests, drive traffic to posts, and get people to read what you are talking about. Many of the people that I follow were not bloggers that I was familiar with, but when I saw that they had posted about something I was interested in reading, I headed over and left them a comment. Guess what? They headed over to my site and then left me a comment in return. You have to love that!

I could see from my web statistics that traffic did increase from direct hits through my Twitter links, but it was not a substantial amount. What did increase though was the awareness of other bloggers who found me and then added me as a link on their page or included me in a post. In an indirect way, my traffic then increased more through that and then the added benefit from the direct links in. Roughly, we had an increase this past month of about 100 hits, which I think is pretty good for just telling people what I am up to. Those 100 hits might lead to many more, when accessed by the right blogger or media outlet.

Got Questions Answered Quickly- The fact that Twitter is in "real time" really helps to get answers quick when you are struggling as a blogger. You will often see questions like, "Can you see this page in IE?" or "Can someone please tell me if my comments are working?" When you have a question, it is hard to wait for a delayed response especially if you are trying to check if things are loading properly and if people can access the information they need. Hopping on Twitter gives you hundreds of people who are not only willing to help... they also can give you valuable feedback right away on what is or is not working for your blog. It is probably one of the best things about Twitter.

I Can Network with PR Folks- If you are reviewing products for your blog, Twitter helps PR people track what you are up to and also find bloggers who are doing reviews. You can add another dimension to your relationships with PR people. By joining the Twitter community, I have gotten some really great products to review for our site and have been able to offer giveaways that would have not come to me otherwise. Twitter updates also immediately notifies the PR folks that a review has been posted and they can pass that info on to their client. I still email them directly, but I also post the link through Twitter as an added bonus. If you don't do product reviews, this might not appeal to you, but this is great for bloggers who do the reviews.

I Don't Need to Twitter All Day & It Still Works For Me- Part of my issue was the fact that I didn't want to have to maintain one more thing on the web. I am already overwhelmed and spending more time than I would like on the computer so why would I join another program that I had to keep up with? The beauty of Twitter though is that you can check in as frequently or as infrequently as you need to. Some days are too busy to log on, other days are slow and I feel like chatting and bouncing ideas around with people. It is that kind of freedom that really appeals to me and that there are no expectations. Low expectations make it easier for me to check in when I need to, and stay off it when I don't. Yes, it can be addictive to read, but I try to keep it low-key.

Best Part, You Already Have Your First (Or Millionth Friend)- Need to follow your first person? I can be her! Just sign up for an account and follow me!

I hope that this helps explain Twitter a little better and please watch the video for a fun visual explanation for how it works.

Need some more blogging help? Here are a few more posts to help you on your way!

The Player Scores & Silence
Five Commandments for Blogging
How Do I Track My Traffic?
Gaining a Readership (The Frugal Way)
How Do I Work From Home?

Sound Off: What social networks have helped you to network and build your traffic? Do you use Twitter and what has been your experience with it?

Labels: ,

ENJOYED THIS POST? SHARE IT WITH OTHERS:

Click to share on StumbleUpon STUMBLE This Click to share on kirtsy Add to KiRTSY Click to share on Mixx Add to MIXX Click to share on DeliciousIt's DELICIOUS

Sunday, January 27, 2008

Ask the Frugal Momma: How Do I Track My Traffic?

Continuing with our series on blogging, for fun or for profit, today I wanted to talk a little bit about tracking your readers. If you haven't had the opportunity to read the past posts, in my first entry, I discussed some basic starting points for working from home and then shared in another post ways to begin building your readership.

Today we are going to talk about tracking your readership and how statistical information can actually help you build a better blog. Be forewarned, stat tracking can become highly addictive! There is nothing more fun than seeing where your readers are coming from, the growth of your site/blog, and how people happened upon your website.

First, if you have a website, it is likely that your web host offers some type of statistical information. Since you are already paying for the hosting, you might as well take advantage of any of the stat services they offer. Your host might offer a more in-depth analysis of your stats so start here if that is what is available to you.

If you just have a blog through a service like Blogger, Typepad, or Wordpress- you will need to find your statistical information through an alternative means. There are tons of places that you can use for traffic-monitoring, but a few of the more popular are Google Analytics, SiteMeter.com, or StatCounter.com.

Each of these programs offer very simple guidelines for adding a tracking code into your page. It literally will be a matter of signing up for an account, highlighting the code that is provided, and copying the code into your site. Once you have added the code, you can sign into your account and begin viewing your site traffic.

Once you have access to your statistics, you will have a snapshot into the volume of readers you are tracking, what the readers were looking for, and how they were able to discover you.

The first thing you will see when you look at your statistics is your "Unique Visitors." This is the most important statistic and something that you will need to share if you are planning to make revenue from your site. Most advertising networks will need this information to determine whether or not you qualify to be part of an advertising network. A unique visitor is the total number of people who have come to your website and it can be viewed by week, month, or year.

The next statistic you can look at is your "Number of Visits." This is the total amount of visits that you have had over the week, month or year. This number will be higher than your unique visitors because, chances are if you have excellent content, your readers will be coming back multiple times to your website.

The final statistic I like to view, and that will often come up if you are joining an ad network, is "Page Views." This statistic tells you how many times pages have been viewed on your site or blog and can tell you the average of pages a reader views per week, month, or year on your site.

Now that you know how to get your web traffic details and can understand your reports, you can begin discovering how people have found you and what it is they are looking for. One of the most fun things to look at is your keywords or keyword phrases. Lets take a peek at some of my top keyword searches for the month.

1. Mom Advice
2. McDonald's Birthday Parties
3. Aldi
4. Redbox Codes
5. Cheapest Shipping
6. Birthday Freebies
7. Recipes for Picky Eaters
8. Dinner Ideas
9. Monthly Budget Sheets
10. Powdered Milk

Using this list, I can get an idea of what people were looking for when they came to my site. I can see immediately what is popular and what I can expand upon. With a notebook in hand, I can begin drafting up some ideas for future articles that can help even more people find me. In my case, for example, maybe I could put together an article on getting cheap shipping on your packages or I could put together more dinner ideas for picky eaters. Use your statistics to your advantage so you can build a site that will attract more visitors and give your audience exactly what they are looking for.

Last, but certainly not least, is the opportunity to see what sites like to yours (also known as the referrers). Let's take a look at my some of my top referrers for this month:

1. Money Saving Mom
2. Freebies 4 Mom
3. Frugal Hacks
4. Baby Cheapskate
5. The Dollar Stretcher
6. 9 Rules
7. Festival of Frugality (hosted at Cash Money Life)
8. Simply Thrifty
9. Frugal Upstate
10. The Homespun Heart

So let's take a look at our referrers and how this information can help me. Well, first of all, if they just were talking about something I did over here or are sharing me on their blogroll, I want to head over there and give them a big thank-you or leave them some comments on the great stuff they are doing. This give-and-take is what is all about in the blogging community, so be sure to send them lots of thanks (hopefully highlighting them above will be a great way to thank them!) or head over to their neck of the woods and let the comments flow.

Looking at some of the other things on the list, I can see what has been really successful for me and what has been a dud when it comes to time and energy. Writing for Frugal Hacks, for example, has been very lucrative for me and brought lots of great (like-minded) people my way. I guest write weekly for them and I can see that being part of that community of writers has boosted my traffic and is worth my efforts.

Likewise, guest writing for other sites and sharing my articles with them is worth my time too. The Dollar Stretcher, for example, ran one of my articles and I saw a big boost in traffic. It would be worth the time to continue sending articles their way.

Partnering with Freebies 4 Mom to offer my weekly freebies has been worth my effort too. I can see that she is sending lots of traffic our way and I am returning the traffic back to her. Seeing that my traffic has grown from collaborating our talents shows me that this is a good relationship to continue.

Participating in the Festival of Frugality is worth my time and the effort that goes into being a part of this event. It only takes me five minutes to submit my entry, and it keeps traffic coming my way throughout the month. This is something I should continue.

Being part of the 9 Rules community has helped boost our traffic, but I am able to get technical advice and support through their network. It is an honor to be part of it, but the traffic has been secondary to the relationships and guidance we are able to get through our community.

Sometimes I do things just to give myself an opportunity for me to grow and become more familiar with other forms of media. Doing the news segment, for example, is a great way to learn to be comfortable in front of the cameras and learn to communicate with my readers in a different way. Writing monthly for a local magazine helps me share in my own community and build a community-driven readership. I can position myself within our community as a local expert that knows a little bit about household management which may lead to other mediums of conveying my messages. These gigs might not show up in a statistical sense, but I know that they are adding to my portfolio of work. I can use these when companies call to see if I can handle certain jobs. "Are you comfortable in front of a camera?" they might ask. "Actually I appear weekly on our local news and I can point you to some news clips so that you can see how I am on camera." Another question might be, "Do you feel comfortable writing for other publications?" My answer would be, "Here, let me show you some of my work in this magazine that I write for. This will give you an example of what my writing looks like."

In short, look at your statistics as a way to show where you should concentrate your efforts, but don't use it as a means to the end of what you should do. Remember to look at each opportunity as an opportunity to not only grow your site, but to grow yourself.

Reading Corner:

To go along with our series, I would like to highlight great reading material for building your web business. I encourage you to check this books out from your local library to help build your mad web skillz. Today's book is "The IT Girl's Guide to Blogging With Moxie," by Joelle Reeder & Katherine Scoleri.

This book is excellent for someone who is interested in just beginning to blog. They share how to start a blog, how to build your readers, and they share more technical information on blogging in a fun and easy to understand way. This is the type of book that I wish I had read when I first began blogging and I hope that it will be a wealth of information to you too.

If you are looking for even more great information, I would highly recommend visiting Blogging Basics 101. These ladies are a wealth of information and their site is a great starting point for learning all about blogging!

Please continue to keep the questions coming our way and I will continue to answer them. Send your questions to [email protected] and I will add it to my weekly frugal momma chat on here.

Sound Off: How do you track your website/blog traffic and statistics? What have you learned from this statistical information? Anything funny popping up in your keyword searches?

Labels: ,

ENJOYED THIS POST? SHARE IT WITH OTHERS:

Click to share on StumbleUpon STUMBLE This Click to share on kirtsy Add to KiRTSY Click to share on Mixx Add to MIXX Click to share on DeliciousIt's DELICIOUS

Monday, January 21, 2008

Ask Frugal Momma: Brunch Birthday Ideas?

Dear Frugal Momma,

I need your birthday party help. I read your post about Emily's last birthday and loved the at home ideas you listed. We usually have our parties at home just like that, and they are perfect. This year though we are having my son's first birthday at the local park's carousel. We have to bring all the food etc. The kicker: the party is at 9am b/c that is the only time we could reserve it. What types of easy, portable, breakfast foods would you recommend?? Of course, on top of the sugary, yummy non-breakfast birthday cake we will be eating!! :)
Thanks!
L.

First of all, can I just say that I am green with jealousy at anyone who is able to plan a birthday party outdoors right now? This just makes me want to move to the South right now and leave this cold Indiana weather behind....but, I digress!

I think birthday parties at brunch hours are ideal for entertaining because brunch food is so inexpensive and children are so much happier during the earlier part of the day. You beat all of the grumpiness that happens closer to the nap hour and you also get the rest of the day to kick your feet up and just relax after all of that planning. If I had my choice, I would always do birthday brunches because of those very reasons.

The best part about breakfast foods is that most of them are perfect for eating at room temperature and can easily be made into portable servings. Here are some of my suggestions for the perfect birthday brunch.

Mini Frittatas

Nonstick vegetable oil cooking spray
8 large eggs
1/2 cup whole milk
1/2 teaspoon freshly ground black pepper
1/4 teaspoon salt
4 ounces thinly sliced ham, chopped
1/3 cup freshly grated Parmesan
2 tablespoons chopped fresh Italian parsley leaves

Preheat the oven to 375 degrees F.

Spray 2 mini muffin tins (each with 24 cups) with nonstick spray. Whisk the eggs, milk, pepper, and salt in a large bowl to blend well. Stir in the ham, cheese, and parsley. Fill prepared muffin cups almost to the top with the egg mixture. Bake until the egg mixture puffs and is just set in the center, about 8 to 10 minutes. Using a rubber spatula, loosen the frittatas from the muffin cups and slide the frittatas onto a platter.

Fruit Dip

1 (8 ounce package) reduced-fat cream cheese, softened
1 jar Marshmallow Creme

Using an electric mixer, whip the two ingredients together. Store in the refrigerator until it is time to go.

(Amy's Note: Cut up fresh fruit to go along with the dip and put the cubed fruit on skewers for fruit kabobs. Place all of the skewers in a covered container to take with you to the picnic.)

Spinach & Tomato Orzo Pasta Salad

1 pound spinach, washed, dried, stems removed
1 pint grape or cherry tomatoes, halved
2 lemons, zested
1 1/2 cups orzo, cooked to al dente
1 tablespoon extra-virgin olive oil, 1 turn of the bowl
24 basil leaves, torn or thinly sliced
Salt and pepper

Pile spinach leaves in stacks 1 on top of the other. Thinly slice stacks of leaves to make spinach confetti. Pile shredded spinach into the bottom of a medium sized mixing bowl. Halve grape or cherry tomatoes with a paring knife and add them to the mixing bowl. Add the zest of 2 lemons to the bowl and save the lemons in the refrigerator to juice for another recipe. Add hot cooked and drained orzo pasta to the mixing bowl. The heat of the pasta will wilt the spinach and warm the tomatoes at the bottom of the bowl and get the juices flowing from veggies. The heat of the pasta will also release the flavor and oils in the lemon zest. Drizzle 1 tablespoon extra-virgin olive oil over the pasta and toss to combine the veggies and orzo. Add basil and salt and pepper and toss to combine. Taste your orzo to adjust seasonings and serve.

(Amy's Note: This might not be as big of a hit with the kids, but it will be something that parents can enjoy! To make it a heartier main dish for the parents, throw some cooked, diced chicken in. This can be served at room temperature, cold, or hot).

You could also do a simple cheese & cracker platter and a veggie tray to help round out your table a little more. You could do juice boxes for the kids and transport coffee in a coffee carafe or just do soda/water for the adults.

As for the cake, it sounds like you have this covered, but we did a wonderful brunch for Ethan one year that I just had to share. I used a coupon for buy-one-dozen-get-one-free on Krispy Kreme donuts. I bought plain and chocolate glazed donuts and then piped decorations onto the donuts (blue stars for boys, pink hearts for girls). If you stacked these on a beautiful cake platter, you can stack them just like a cake and everyone would get their own donut to take home! While not as cheap as making a cake out of the box, this is a simple portable solution and takes the pressure off of you to make the perfect cake.

Wishing your son and family a wonderful celebration day together!

Sound Off: Do you have any recipes that you could share with our reader for making her son's birthday extra special? Please leave a comment!

Labels: , ,

ENJOYED THIS POST? SHARE IT WITH OTHERS:

Click to share on StumbleUpon STUMBLE This Click to share on kirtsy Add to KiRTSY Click to share on Mixx Add to MIXX Click to share on DeliciousIt's DELICIOUS

Tuesday, January 15, 2008

Ask the Frugal Momma: How Do You Do Your Menu Plans?

Q: What is your experience and advice on planning a standing weekly dinner menu rather than planning out a month of meals? To save time, you pick either a meal or theme for each night of the week, and repeat it for the most part each week. This way you always know what you need to buy (in general) at the grocery store without spending much time planning each week. I would like to set one up for my family and right now we have Sunday - Something New, Monday - Mexican Fiesta Night, Tuesday - Leftovers, Wednesday - Italian Feast, Thursday - Leftovers, Friday - Breakfast for Dinner, Saturday - Homemade Pizza Night. I'm just playing with this idea and have only partially implemented it. I'd love to hear your thoughts on this topic.

A: Menu planning, although it is a huge chore, is something that I really enjoy doing in our house. I really find a lot of pleasure in trying and implementing new dishes in our house. Sometimes the dishes are a roaring success, other times we find that a cold bowl of cereal would taste a lot better than my experiment.

Over the years, my menu plans have changed a lot depending on the needs of our family. Here are some ways that we have made our menu plans work for us and have saved our family a lot of money in the process.

1. Menu plan according to your family style- This might sound like a strange phrase, but I will try to explain. Generally, you probably have a style to your homemaking or the kind the of parenting that you do in your house. For example, some people live by a fly-by-the-seat of their pants mentality and may parent even in a similar way. For a family like this, expecting them to keep a rigid schedule would be awfully difficult because it just doesn't fit with their general personality. Likewise, a person who cleans the floors on Monday, recycles on Tuesday, changes sheets on Wednesday, etc... will find going without a menu plan would be extremely difficult.

I am one of those weird people that falls somewhere in between. I would love to be more rigid with the things we do in our house and set up more days of scheduled activities, but I am laid back and constantly trying to fight the clutter over here. I like to menu plan and enjoy knowing what I am going to eat throughout the week, but I hate to feel like I have to do exactly what is planned because I often give into my cravings. That is where my menu planning style comes into play. I just plan out a month's worth of meals and then pick from my twenty or so choices so that I always feel like I have lots of options. This gives me a game plan, but not a detailed game plan that I must stick to or else.

Think about your personality and what works best for you, but having a plan in mind will truly save your family a lot of cash. It is time-consuming, but it is only as time-consuming as you want to make it. If your family has simple tastes, don't feel like you have to be a gourmet chef.

2. Get creative with your planning- I love to be creative with my menu plans and have found lots of great recipes to add to my collection by spending lots of time researching new recipes and constantly being open to trying new things. I utilize websites like Recipezaar, All Recipes, and Food Network.

I also love to check out cookbooks and magazines from our local library to help inspire me in the kitchen. Many times I don't necessarily want to make exactly what is in the book, but I can flip through the cookbooks and get general ideas for recipes I can search for on the internet.

One other place I love to hunt for ideas is by saving take-out menus from our favorite restaurants and using these to do my planning off of that. Since eating out was such a temptation for me, I could take those menu plans and use those to build a menu off of them. Let's say that my favorite take-out food in the world is Chicken Lo Mein (which it truly is!) then I can take that menu description or dish idea and try and replicate it through a site like Recipezaar or Food Network.

When I began doing this something very strange started happening. I began to replace my cravings for food out with my own version. In a way it is really great because there are very few places that I really love to go out to eat at anymore, but in some twisted way it is a little disappointing because I don't enjoy dining out anymore. I just have to keep in mind all of the money that we are saving and then it all seems worth it!

3. Theme it up- Themes are definitely a great way to being menu planning and I loved the theme ideas in this question. Themes make planning a lot easier for families because it takes some of the work out of the planning.

One way to make themes easier to implement in your house is by arranging your recipes by your theme night. My recipes are in a giant Word file and are set up by my themed days. My theme was a Brunch Sunday, Slow Cooker Monday, Chicken Tuesday, Italian Night Wednesday, Casserole/Comfort Food Thursday, Kid Food Night Friday (usually pizza, but they have other options too), & Seafood Saturday. Sunday night is also Seek-And-Ye-Shall-Find Night. This is just a fancy way of saying, "Momma ain't cookin'."

You can pick from any variety of themes and you can go to town with your theme or just keep it a general night. You can make it special or keep it super simple. What I hope my children walk away with isn't just that their mom is the best darn cook in the world, but that they have fond memories of our family sitting around the dinner table being together.

4. Involve your children- Things just seem to go better if the family has some input into the week's meals. My son is five now and he is at the stage where he loves to express his opinion and feel like he is contributing towards the family.

That is why each Friday is his day to pick what he wants and I try to come up with a few ideas for things we can eat. Pancakes, waffles, calzones, pizza- those are just a few of the options that I offer. We usually watch a movie with them and have a special snack like popcorn or hot cocoa to make the night completely about them. He looks forward to this evening a lot and we look forward to indulging in some of our favorite foods too.

He doesn't get to pick the rest of the week, but I have made it a rule to only introduce one new thing at a time so that we can avoid the fights over the dinner table. I will always offer one thing that he is familiar with and likes, but I might introduce one new food in with the meal. My son is big on the routine and to hand him a plate of food that he doesn't recognize can make for a really stressful dinner hour. I try to always plan the meals with them in mind, but also like to indulge in trying new dishes. This is a happy compromise that we can all live with.

5. Remember it doesn't have to be all about the menu plan- There are so many elements to making the dinner hour enjoyable in your home. Is the kitchen table not cleared? Are you eating off of paper plates parked in front of the television? Is the baby is crying through the entire meal? I can picture all of these scenarios happening in our house at one point or another. Heck, it might even happen tonight.

Try and make the dinner hour at home fun because it curbs the temptation to want to go out to dinner. If you have an enjoyable dinner hour at home, there is just no need to go out and brave the crowds.

Now it doesn't have to be all fine dining and elegant candlelight, but keeping the dinner table clear for eating can be a great start. My ideal dinner hour has nice dishes and soft music and no children crying or whining at the table. It doesn't happen all of the time, but I try to make an effort so that we all want to be at our table instead of Steak & Shake's table.

6. Visualize your choices- I feel very accomplished when I have our menu plans hanging on our refrigerator and it makes me feel good to see all of our choices neatly typed up and ready to go. If I prepare a dish from the list, I take a highlighter and swipe a line through it. Seeing all of the things we ate all neatly highlighted also proves to me that I did not go out to eat. It makes you feel good and it also gives you ideas for food you can look forward to in the coming weeks.

7. Grocery shop according to your family style- Just as I mentioned in the first part, you need to grocery shop according to your family style or finances. I love, love, love to menu plan, but I hate, hate, hate to grocery shop. This is why menu planning once for the entire month works best for me. It keeps me out of the place I hate and I only have to sit down once a month to do my plans and grocery list.

If you only want to eat fresh produce all week long, then you will need to go weekly or bi-weekly to make that happen. Whereas my style is to rely heavily on canned applesauce, frozen veggies, and potatoes towards the end of the month. I sacrifice the fresh stuff in favor of shopping once a month.

Family finances can also have an impact on when you do your shopping. When my husband was paid bi-weekly I was able to visit the grocery store twice a month. Now that we are working with a monthly check, I find that shopping once a month makes it easier for me to manage our family finances and also keeps me out of the grocery store so often.

8. Save your plans & rotate them- One of the best ways that I have found to save us time is to just keep copies of my past menu plans so that I can rotate them. If you come up with two month's worth of meals, you can reuse those and rotate those dishes to make new planners for the future weeks. I do all of my plans on the computer and then save them so that I can look back on past ideas for inspiration.

I hope this gives you some more ideas on how we do the planning in our family! If you have a question you would like to ask me, just shoot me an email ([email protected]) and put in the subject line, "Ask Frugal Momma." I love to get your questions and it makes me feel like I am providing some truly useful content!

Some Related Readings:

Iron Chef Mom Challenge

Don't Throw Out Those Take-Out Menus!
Saving on Groceries
Pretty Menu Plans
Ding-Dong: Did Someone Order Groceries?
Become a Coupon Queen or Not
Milking the Milk Budget
Aldi Fall/Winter Planner
One Month of Slow Cooking
Aldi Menu Planner
Grocery Shopping on a Budget
More Aldi Menu Planners & Grocery Lists (Click on titles to expand)
Latest Menu Plans

Sound Off: How do you do your menu plans and keep that family grocery budget on track?

Labels: , , ,

ENJOYED THIS POST? SHARE IT WITH OTHERS:

Click to share on StumbleUpon STUMBLE This Click to share on kirtsy Add to KiRTSY Click to share on Mixx Add to MIXX Click to share on DeliciousIt's DELICIOUS

Monday, January 07, 2008

Ask the Frugal Momma: Gaining a Readership (The Frugal Way)

Q: How do you establish a reader base?

A: I may have opened a can of worms by answering the work-at-home questions, but I am hopeful that I can help offer some advice to those of you out there who are trying to start a blog or website for profit. As always, I promise to be as honest as I possibly can and share any details about my work-at-home experience to help others.

Let's say that you start a website/blog and then you are left wondering, "How in the world am I going to get people to come to my corner of the internet?" You could obviously pay to advertise on websites that target the same audience profile, but usually when you are beginning your funds are often tight and it can be difficult to fork over money. After all, you are trying to make money for your family and you want to be as smart as you can with your dollars.

I will be very honest and say that I have never paid to advertise anywhere. In the beginning, we tossed around advertising on other sites to build our audience, but we just did not have the money to pursue the sites that we felt would fit our audience best. We are just now beginning to shell out real money to get our site known in the web-design community and to boost our traffic so I think it is very possible to have a profitable website without spending a huge amount of your profits to gain a readership.

But let's be frank, without a great and interactive audience your site just won't have that sparkle that keeps people coming back. You need an audience that can provide feedback for you not only as motivation to keep doing what you are doing, but also to also create a community of people who want to keep going back to your site over and over again.

Here are a few of the ways we have gained our readership:

1. Join like-minded communities- When we first started the site, I joined every Yahoo group that had something to do with personal finance or frugality. You will have to look into the guidelines for these groups, but usually you can have a signature line at the end of your posts. This is a great way to get your name out there, participate in a group of like-minded folks who will respect your ideas/opinions, and gives you an opportunity to peek into what other people are interested in on your topics.

With a signature line, I think it is important to keep it short, sweet, and to the point. None of us have time to read a paragraph of a signature line, but a link to your site/blog and maybe a quick quip underneath can get people interested in wanting to learn more about you and what you are doing.

My signature line could be:

Amy
MomAdvice.com
"Helpful financial advice for every mother!"

This is short, sweet, and to the point. You don't want to be booted out of communities for spamming them so make sure that when you are sharing on these sites that you don't continually drop in things that could qualify as advertising or make others feel uncomfortable. Understand the rules and play by them. People will respect you more for it and it is great fun to find a post that someone else has written about what a great resource your site/blog is without you spamming everyone to death.

If you are unclear about the rules, email the moderator and make sure. It is better to be safe than sorry!

2. Name Drop- And name drop often! This is something that I learned as I got further along in my career. I was so scared that I would lose my readers that I would never share about other websites or blogs. I thought I was keeping my readers secure in my grasp if I never gave them something to take them away from my spot. But then I realized that what I was doing was actually keeping my readership low and I was losing out on a lot of readers that might come my way.

I started doing the "Amy's Notebook" entry on Thursdays to highlight other blogs. I would share great things that I ran across on other sites and include them in a weekly round-up for my site. What ended up happening was that those blogs found out about me and would add me to their favorite links, would share my site with others, or would become a reader on my blog. All of a sudden, your name gets dropped in ten new locations and those ten locations have a whole slew of readers who never knew about you.

Better yet, when you name drop in a blog post, sometimes you don't even have to come up with content for the day. This can be great when you are suffering from a case of writer's block or you are too busy to write.

3. Share Your Content- One of the greatest ways that you can get readers is by sharing your content with other sites or print publications. If you are a blogger, many blog entries are the perfect length for ezines and newsletters.

Share content with sites that are going to bring in your perfect target audience. One easy way to figure this out is to look up a site that you really like (or your own site if you are already established) on Alexa and see what other sites they recommend. You will see "Related Links" on the left-hand side and you can click on that to see what other sites other people visit that are similar to your own. For example, here is the listing for our site. That can give me a good starting point for great sites that I could contact and see if they would use my content for their own site.

Sharing your content with competing and more established sites will give you the readership boost when and where you need it most. Not only can that be good for gaining readers, but it can also help establish relationships with other website owners that can be great for networking purposes.

You can also share your content through sites that keep a directory of articles for ezine and newsletter purposes. I would list mine on Ezine Articles and also send my articles to the website owners directly to make sure my content was making its rounds. Do be aware though that when you release your content out into the world that you relinquish the rights to choose where the content might be shared and you have much less control over how it appears and might have more difficulty tracking if your site is linked to that article. Some people don't mind doing this, but others are more protective of their work and like to have more control over where it is seen.

4. Update often- I love to read blogs that I know are updated often and always have something new for me to read. Updating can be difficult and working through a writer's block can be challenging, but this is one way to be sure that people know that you are always offering something fresh. This doesn't mean that you have to add a new entry daily, but even two-three times a week is good and keeps people coming back for more.

I am a big believer in quality over quantity though so don't update just to update. Likewise, don't crank out more of whatever you are selling, but decrease the quality of your workmanship. In a world that seems to consider quantity over quality, a quality looking site with quality content/goods is a rare gem.

5. Take theming to new levels-
When I first started out, one of the best ways for me to get readers was by participating in those group theme events. There are so many theme days that it is hard to know where to start, but chances are that you can find a theme that will relate to what you are up to on the internet. Sometimes it is even fun to participate in these events even if it doesn't exactly fit with your theme. A creative mind can always work a theme into what they are doing. Here are a few events to get you started:

Menu Planning Mondays
Tackle it Tuesday
Works-For-Me Wednesday
Wordless Wednesday
Thursday Thirteen
Frugal Fridays

Maybe you are someone who sells handmade aprons. You could participate in an event like Tackle It Tuesday and share tips for caring for an apron. Maybe you sell soy candles and you could come up with ideas for extending the life of your candles, making you a perfect candidate to participate in Frugal Fridays. Maybe you are an eBay Queen and are trying to make money by selling items online. You could share your tips for posting an auction on Works-For-Me Wednesday.

6. Comment & Share- One of the best ways to get people to come to your blog/site is by visiting other people's sites. I have made some of my best buddies and created some of our best networking opportunities by commenting on other people's blogs.

Make sure that you have created an account or made yourself reachable when you do leave an account. Leaving anonymous comments won't bring in an audience to visit you so make sure you set up an account. Our blog is through Blogger so you would need to create a free Blogger account and make an account that you can sign into and that will direct people to your masterpiece.

7. Start Locally- Local folks are going to be even more interested in you than the other people because you are part of their community! Don't be afraid to contact your local media and see if they might be interested in doing a story on what you are doing. Small-town communities are more receptive to this because there might be less to cover in your area. Check your local media's websites and see if they have a free local directory for businesses or if they have a community forum where you can chat with other local business owners.

Join a small business group in town, look on Meetup to see if you can find other people who are working from home, and join community organizations that will help serve as a networking opportunity. My mom's group, for example, has been an excellent way for me to get the word out about what I do. Not only do these women clue me in on things that will help my website be better, but they also let me guest speak on occasion and share my site with their friends and family. They have become my best fans and have helped me be better at what I am doing!

8. Participate in the Festivals & Carnivals- Participating in online festivals and carnivals can really help boost your traffic. These days they have an event for just about everything in the book and these can be a great way to draw more readers to your site/blog. Create an account on Blog Carnival and start browsing through the categories that fit with what you offer. Submit your articles through their entry form and schedule these events weekly on your calendar. I just submit all of my entries each Friday since most of my events have a deadline for Saturday or Sunday. Making this a priority can help you a lot especially when you are looking for new readers. Better yet, read the other entries for fresh ideas for content to your site or do a round-up of your favorite entries so readers don't have to read the entire festival/carnival to find the really great stuff.

These are just a few of my ideas for getting started with a reader base. As always, keep the questions and comments coming. I will keep answering them as long as I have questions coming to me!

Sound Off: If you have an established site/blog, what were some of the best ways that you were able to get readers to come to your site, particularly in those beginning days?

Labels: ,

ENJOYED THIS POST? SHARE IT WITH OTHERS:

Click to share on StumbleUpon STUMBLE This Click to share on kirtsy Add to KiRTSY Click to share on Mixx Add to MIXX Click to share on DeliciousIt's DELICIOUS

Thursday, January 03, 2008

Ask the Frugal Momma: How Do I Work From Home?

Well, thankfully our phone & internet has been restored. I discovered I have quite a dependency on it and spending an entire evening over at a supermarket in the yucky weather was not ideal.

Since the CBS Early Show aired our segment, I have been really bogged down with emails and, ironically, many of them are scammers trying to scam me out of some more of my money. Right now we are not interested in any work-at-home opportunities for ourselves personally, but thank you so much for thinking of us.

For those who are legitimately trying to find work at home opportunities, please know that my sympathies are with each of you. It is really hard to find work-at-home employment and it is particularly difficult to carve your own niche into the work-at-home world.

Direct sales jobs abound and can be very fruitful for people who are really dedicated and who work hard. Sitting on a couch watching the money roll in will probably not be happening in your near future, but hard work can help you achieve your work-at-home goals.

Things that can be helpful when starting out-

1. Look at the cost investment- Always make sure that you understand how much it is going to cost to get started. Some companies, like Avon, only have a very small amount that you need to pay to start your business upfront. Other companies can require you to spend $500 or more to get started. Be sure you understand how hard you are going to have to work to recoup your investment and be very careful! If you want to dabble in working at home or are unsure if you are disciplined enough to do something like this, please don't throw in a huge investment to make that discovery. It breaks my heart when people tell me they are having a difficult time financially and then they decide to work at home with a $2K start-up fee and then weeks later say they made the wrong choice.

2. Know your strengths- If you are very shy and have a hard time talking to people, direct sales jobs can be difficult to do. I tried direct sales and discovered that I just wasn't good at it. I don't want to "bother" people so it was hard for me to do a job where I had to call and ask if people wanted to place orders, emailing them about parties, asking them if they wanted to buy stuff, handing out catalogs, etc... It wasn't for me! BUT, you might have a way with words and have just the right personality for this kind of job.

If you aren't sure what your strengths are, ask your friends and family. "You know me best. Do you think I would be good at a _____." They should be able to help you in making your decision too!

3. Go to the library- The library is a wealth of FREE information for someone who is looking into working from home. It is an easy way to explore different career paths without making an investment. Check out books on how to start a simple website, how to sell items on Ebay, or find information on great work-at-home careers.

4. Network- Network with anyone and everyone that you can. Join community groups or take advantage of the great communities that you are already part of to begin the networking process. Bater your services with other work-at-home moms, share resources for great deals, and just vent to one another about your work-at-home difficulties.

5. Get a Cheap Website- I asked my husband about this one and he said, "You are trying to put me out of business!" As a freelance web designer, he is going out on a limb to share this information so leave us some comment love!

He suggested Microsoft Office which is FREE! They also have package deals with more features for $19.95 and up. If you are just experimenting and trying to get started, this would be a nice option to explore.

6. Make Money- The bottom line is that there are legitimate opportunities out there, but they are usually names of companies that you know and recognize. The only other option is to go out on your own and start your own little adventure. If you don't have the resources or knowledge to do something new like this, check into community courses on starting a small business or starting a website. Even some libraries offer basic courses in computer skills to get you started.

I personally started this website and made below the poverty level for almost two years. Some months we were extremely excited when we brought in even $80 after I worked for 20-25 hours a week on the website. I do not have a company of people to help me and it has made the money growth a lot slower for me...BUT....I am staying home with my children and I am my own boss. It isn't a ton of money, but it is a modest income that helps when you are just trying to make ends meet. I guess what I am trying to convey is that it is important to be realistic. Growth takes time and devotion. If you aren't devoted to your business/craft/adventure then you probably will end up giving up on it before you can see the numbers begin to turn in your favor.

7. Get Advertisers- I also wanted to address the question about advertisements. There are tons of places you can go through for making money through advertisements. You can do sites like:

Google AdWords
Pay Per Post
BlogHer Ads

I am sure there are many other programs, but these are some of the basic ones that are easy for new sites/blogs to use. You can also become affiliated with companies and make money from referral programs. For example, you can sign up with a company like Commission Junction and make money if you refer people to sites/services.

As you develop more of an audience, you will find that new avenues of revenue opportunities are available. Sites that develop a strong audience can begin going out on their own and creating their own advertising. I did this in the beginning and I was able to pocket all of the money from the advertising, but I had a hard time keeping up with the accounts. I used PayPal for making payments to me, but I had to send out the reminder letters, pull the accounts when they were expired, send invoices, and we might have had to even design the advertisements. It was a lot of work! You have to be more disciplined to keep up with something like this on your own, but you also can keep all of the money you earn!

Other avenues that could open up are advertising networks that are only available to the bigger sites. One network we joined required a monthly minimum of 250K page views each month. That was the minimum. You can imagine how long it took us to get to that point, but we got a bigger piece of the pie.

When you start looking into this territory you need to start exploring how your money is generated and what income you can expect. Do you get money just if people view the advertisements or is your money made only through people clicking on the advertisements? How big are the advertisements? How many will you have to place on the site? Do you get to help pick what appears on your site? Will the advertisements fit with your audience? Will ADULT CONTENT be shown? (This is particularly important if you are trying to run a family-friendly site)

I hope that my answers do not scare anyone off, but I did want to share as much as I could on this topic since I got some really heartbreaking emails. I am so sorry to the families who have lost money because they have been scammed. There is nothing worse than being scammed especially when you are in a vulnerable financial state.

Please let me know if you have more questions by leaving me a comment! The comments keep me motivated and also help me understand what more I can share with you all.

Labels: ,

ENJOYED THIS POST? SHARE IT WITH OTHERS:

Click to share on StumbleUpon STUMBLE This Click to share on kirtsy Add to KiRTSY Click to share on Mixx Add to MIXX Click to share on DeliciousIt's DELICIOUS

Saturday, September 01, 2007

Day 24: Become a Coupon Queen (or Not)

Should a frugal gal use coupons or should she not? Do coupons really save money or do you just end up spending money that you would have not spent?

I go back and forth on this topic and it really depends on where I am doing my shopping. When I shop exclusively at Aldi, I can't use my coupons. When I shop at other stores, it is usually a toss up on whether the generic is the better deal versus the brand-name with a coupon.

You will talk to some people and they are nuts for coupons and their receipts really prove it. Others of us, don't believe all of the hype and say it is a waste of time and effort.

Since I started doing more of the drugstore rewards, in conjunction with my Aldi trip, I have found that it is possible to get items for free or really inexpensively. You could say that I am becoming a believer again in all of the coupon hype.

Here are some of the tips that I have used to help me follow the path towards coupon savings:

- Organize your coupons in a way that works for you. I have heard everything from shoe boxes to baseball card collection holders can be great ways to organize your coupons. Each person has a different system of organizing, just do what works for you. For me, I like to categorize them and then arrange by dates. I have also been known to lump everything together and then arrange by dates, to insure that I use the coupons before they expire. Right now I am finding categories works a little better for me so that is what I am doing at this point. My arrangements do change, depending on my mood.

- Make sure you put your coupons in a place that you will always have them when you need them. There is nothing worse than having all of your coupons cut and organized, only to discover that they are not with you when you need to do your shopping. Try storing them in your purse or in your car so that you will have them when you decide to make a quick stop at the store.

- There are only savings to be had if you are buying something because you normally use it and would have put it on your grocery list anyway. If you are using a coupon to just get a quarter off and this still leaves you footing a $4 tab, then using the coupon is actually doing a disservice to your budget instead of benefiting it.

- When I first started learning about coupons, I actually was pretty confused. What is the difference between the manufacturer coupons versus the store coupons? Well, the manufacturer coupons are the kind that you find in your newspaper, that come from the companies themselves. The store coupons, however, are the ones that you find in your store specific flier. The great thing about store and manufacturer coupons is that they can be used in conjunction with one another. If Dole, for example, has a coupon for $.50 off of a can of pineapple and Walgreens has a coupon for $.25 off of a can of Dole pineapple, you can use the two coupons together. Your total savings would be $.75 off of the can, and that equals a really great deal for your family. You might hear coupon queens refer to this as the "double whammy." You can also achieve a "triple whammy" if you use the store coupon, manufacturer coupon, and you pick an item that is on sale.

- If you love certain products, call the 1-800 number and rave about the product. Share your experience with them and ask if they have any coupons or if they can add you to a mailing list. Customer service representatives get a lot of disgruntled customer calls, so not only will you brighten their day, you might also be able to pocket some savings on your next trip to the store.

- Look for coupons in unexpected places. Always check your receipt, at the end of your shopping trip, to see if any printable coupons were printed. Other unusual places for coupons are inside of your magazines, hidden inside of your piles of junk mail, and inside/outside of the packaging on what you are using. I am often surprised how many coupons I can find in these unusual places.

- Visit the websites for companies and sign up for their mailing lists. They will usually have printable coupons you can use on your groceries, or will add you to future mailings on special sales they are running.

- Shop at stores that double or triple your coupons. You will maximize your savings much more if you can go to one of these stores.

- Try using the Coupon Mom website, to figure out how to maximize your savings with your coupons. This website is free and can tell you exactly what you need to buy and when. There are also services that you can pay for, such as The Grocery Game. I have never paid for the service so I have no personal experience with it, but there are many people who swear by it.

- If your friends or family do not cut coupons, ask if they will save the coupon fliers for you.

Potential Monthly Savings: $10 or more

Sound Off: Do you have any coupon tips to share? Are you a believer in the coupon hype?

Labels: , , ,

ENJOYED THIS POST? SHARE IT WITH OTHERS:

Click to share on StumbleUpon STUMBLE This Click to share on kirtsy Add to KiRTSY Click to share on Mixx Add to MIXX Click to share on DeliciousIt's DELICIOUS

Wednesday, July 25, 2007

Ask Frugal Momma: How Do You Organize Your Pantry & Cupboards?

I know you guys were most impressed with the way we organized our closet, but what you *REALLY* wanted to know is how do we organize our pantry.

Remember when I revamped my laundry system and my yard sale system? That day I hit up the same college student for a great bookcase that she was getting rid of for only $20! I knew right away what I wanted to do with it and couldn't wait to bring it home and put it in our basement.

First, let me give you some background information on our house and previous storage solutions. My kitchen does not have very many cupboards or pantry space so I have had to be more creative with my storage. Our big dream is to expand my tiny utility closet into a walk-in pantry, but until that happens I have been storing the majority of my pantry items in our basement.

Previously, we had a dark wood bookcase that was extremely deep that we were using to store the pantry items. We had ripped this "bookcase" out of our closet that we had turned into an entertainment unit. Yes, you could say that we are pretty creative with our smaller home. We have tried to maximize the space in places that were not being used properly instead of moving into a bigger home.

Due to the depth and darkness of the unit, what had ended up happening was that I found myself doing the repeat-buying. I would look in the unit and say to myself, "No tomato paste?" And then I would rush to the store and buy tomato paste. When I would pull items out though, I would see twenty cans of tomato paste that I had already bought. This was not frugal and the bookcase was working against me.

The location of the unit was also not the smartest place for me. With a quad level home, I was already making the trek down all of our stairs to retrieve items and then walking into the farthest corner of the basement to get what we needed. It was inconvenient and not a functional storage solution.

Welcome to the new home for my canned goods! This bookcase rests just at the bottom of the stairs in a well-lit area of our basement. The light wood color makes it easier to see what is in my pantry and the labels (created with my label maker) make it easy for even my husband to find what we need out of the pantry.

Our upstairs cupboards needed revamping as well. We have the same problem with our cupboards as we did with our former basement storage solution. One cupboard was extremely deep and items would get shoved back there until we said, "Hmmm... do you think that this is still good if it expired in 2003?" Obviously, we were wasting food and valuable cupboard space.

Repeat the same scenario above with the Lazy Susan unit that we had, but just make the items revolve in mass chaos. Clearly, we had a serious problem!

I got these handy storage baskets for less than two dollars each and divided our pantry items into categories. The storage baskets made it much easier for me to pull down exactly what I needed, rather than climbing up on a chair to try and dig through the back of the pantry. It also makes throwing items out quicker, when I need to clean out the pantry, and makes tasks easier because I had grouped like items (or cooking projects) together.

Here is how I grouped the items:

Spices- All of the spice containers were gathered together and imagine my surprise that we had plenty of repeat performers in this category. I wiped down the spices and consolidated them into one container. The spice container is residing in the cupboard closest to the stove. I can pull the small basket down and take out whatever we need and slip it back into the cupboard when I am done cooking. This is much easier than rifling through fifty teeny bottles and makes shopping day easier too!

Cake/Cookie Decorating Supplies- These are items that are used less frequently, but still needed a home. I put these higher up in a basket with handles. Piping bags, piping tips, cookie cutters, food coloring, sprinkles and the birthday candles (that no one could ever find) all went into this container.

Baking Supplies: This is a pretty general category, but it was all of the items that I needed, but could never find. In this larger basket went our baking powder, baking soda, confectioners sugar, shortening, and cocoa powder.

Rice/Pasta: These ingredients went into a larger basket and all of the boxes were consolidated and smaller pastas and the rice were placed into clear Mason jars. The mason jars were labeled and have the cooking instructions labeled on them (unless I knew the directions by heart). In the Mason jars were white rice, brown rice, jasmine rice, orzo pasta, macaroni, and couscous. Larger pasta included linguine, angel hair, and thin spaghetti. Everything fit more neatly and anything extra went into the downstairs bookcase unit.

Flour/Sugar: This organizing unit went into our Lazy Susan. This included wheat flour, white flour, self-rising flour, cake flour, brown sugar, and white sugar.

Syrups/Oils/Vinegars: This organizing unit also went into our Lazy Susan and included corn oil, vegetable oil, canola oil, olive oil, balsamic vinegar, white wine vinegar, red wine vinegar, molasses, honey, and maple syrup. Using this unit eliminated the "sticky" factor, which usually occurred, making a huge mess in the bottom of our pantry. Any extra condiments also get put in there, as they are often used in recipes.

Finally, the items that I like to keep on hand upstairs all go into our pantry door. We bought one of these wire units that mounts on the door and keep items that I might need on hand. A smaller unit, that clips onto the larger unit, houses all of those little packets that we might need to assemble a meal. I try to keep what we need for the week in the upstairs pantry door and then the excess (or whatever doesn't fit) ends up going downstairs.

If you want, I am happy to share where we keep appliances and stuff like that, just leave me a comment!

I hope that this will help give you some creative storage solutions for your pantry!

Note: You can click on the pictures to expand the size.


Related Readings:

Free Up Pantry Space & Make a Snack
Making Your Spice Rack Usable
Getting the Car Organized
Gettin' Quick in the Kitchen
Living Out of Your Pantry

Sound Off: What storage solutions have you found work in your pantry?

Labels: , , ,

ENJOYED THIS POST? SHARE IT WITH OTHERS:

Click to share on StumbleUpon STUMBLE This Click to share on kirtsy Add to KiRTSY Click to share on Mixx Add to MIXX Click to share on DeliciousIt's DELICIOUS

Tuesday, July 17, 2007

Ask Frugal Momma: Washin' the Washer


Dear Frugal Momma, Would you mind doing an entry on cleaning the washing machine...both inside and out? I know that probably sounds strange, but I try to clean everything in my home on a regular basis! Thanks in advance! The Cleaning Queen

I have to admit that this is something I had never really thought about, although I am sure it is one of those items that I should add to my regular home maintenance. This entry required a little research so I hope that it will help someone else out there!

For the interior of the washer, you will want to clean your washing machine from time to time by running it empty on a hot cycle. I will offer up two choices for cleaning the washer. You can do it the environmentally-friendly way or by trying the bleach version.

The first way that you can clean the washer is by running the hot cycle with one cup (250 ml) of white vinegar. Just add it during the cycle and allow the vinegar to clean the washer for you. The vinegar will help remove any detergent deposits that have built up on your washing machine.

The second alternative for cleaning can actually be used in disinfecting a variety of non-food-contact surfaces. The recipe was supplied by, "Home Comforts" written by Cheryl Mendelson. This method is recommended for your washer, as well as the bathtubs, showers, sinks, marble, plastic, fiberglass, diaper pails and indoor garbage cans. The disinfecting solution is not recommended, however, for metal fixtures or on dark or colored grout.

Disinfecting Solution

3/4 cup bleach
1 gallon warm water
1 tablespoon of powdered laundry detergent

Using solution, wash surface or object clean. Then keep it wet with the solution for at least five minutes. Rinse and let dry.

The exterior of most washer and dryer tops are made from porcelain enamel or synthetic enamel. This type of material does not stand up well to repeated exposure of chemicals such as ammonia, chlorine bleach, or any abrasive cleaners.

The best solution for cleaning the exterior of the washer (and just about everything else) is my homemade all-purpose cleaner. The recipe for that is:

All-Purpose Cleaner

2 tablespoons dish soap (any kind works fine)
2 cups warm water


Put two ingredients into a spray bottle and give it a shake to incorporate them.


If you begin to see any mildew damage to the rubber door seal, on your washing machine, you will want to disinfect it to discourage further problems and to remove what has already occurred. Make a solution of one cup chlorine bleach to two cups warm water. Wearing rubber gloves, first wipe the lower portion of the door seal (where the water and bacteria will be most concentrated) with a soft cloth soaked in the bleach solution. Then wipe down the entire seal. Finally fill the bleach dispenser with bleach and run the washer empty through one hot cycle. You can repeat this process every two to four months to keep mildew down. This is particularly recommended if you live in a humid climate or if your laundry room is not well-ventilated.

I hope this helps answers your question! Please feel free to email your questions directly to me at [email protected] on any topic related to homemaking or saving money. I would be happy to answer your questions. You can also submit your questions through our forum.

Related Readings:

Happy Homemaking the Homemade Way
Cleaning Out Yo Fridge
Frugal Solutions for the Swiffer
Frugal Carpet Steaming
Favorite Frugal Cleaners
Organize Your Week

Labels: , , ,

ENJOYED THIS POST? SHARE IT WITH OTHERS:

Click to share on StumbleUpon STUMBLE This Click to share on kirtsy Add to KiRTSY Click to share on Mixx Add to MIXX Click to share on DeliciousIt's DELICIOUS

Thursday, June 28, 2007

Ask Frugal Momma: Getting to Know the Bread Machine

You have been talking about bread machines and making bread. I am interested in doing this since I am home all the time and I love fresh bread.

I was at the Goodwill and saw many of them and they were kind of cheap, like 20.00 or less. I am dumb so help me out. Does the machine knead the dough and bake it and everything in the bread machine?

If I would purchase one at the Goodwill how would I know if it works or not?

I am interested. Please help me find a way in a new venture.


Signed,
Future Bread Maker

First of all, thank you for your question! The Ask Frugal Momma column can't happen without your questions, so please keep sending them my way. You can email any and all questions to [email protected]. We have had some fun topics and I am very excited to share with everyone!

Do any of you have bread machine gathering dust in your house? A lot of people buy these appliances and then end up donating them at their local thrift store because they never use them. I think of the bread machine as a modern day convenience, but in a culture where we want everything NOW, waiting for a loaf of bread can seem like an eternity. Why wait for a hot loaf of fresh bread when you can grab a loaf at your supermarket? And what exactly is the purpose of that appliance that is taking up space on your shelves?

On any given day in our house, you will find our bread machine happily humming along and whipping up fresh dough and bread for us. We use our bread machine almost daily, and spare ourselves the expense of fancy bakery breads. Not only that, but our bread machine has a regular performance in our house on Friday nights. This appliance makes our favorite pizza dough for our official “family night” together.

The purpose of a bread machine is to be able to make fresh bread when you want it. The reasons vary from person to person on why they choose to make their own bread. Many people have concerns about the additives and preservatives that are found in store-bought breads. Another reason that many people choose to make their own bread is because they just enjoy the taste of homemade bread. My reasoning for making our own bread is because I like to save our family money. Making your own bread costs so much less than purchasing a loaf of bread, and the rising grocery costs have only fueled my desire more to make it at home.

I am not a baker though and our days seem to be jam-packed with activities for our family. Taking the time to knead, rise, and bake bread…well, that hasn’t seemed to top the priority list at this point in my life. Lucky for me, there is an appliance that can do all the work for me and all I have to do is pull the finished loaf or ball of dough out.

To begin, all you have to do is put the ingredients in and select your setting. Some of the older machines have just a handful of simple settings. I find that the settings we use most on our machine are Basic and the Dough cycle, which can be found on every machine. The basic cycle is just the basic setting for making a loaf of bread. The Dough cycle just completes the kneading and rising of the dough. Once the dough cycle is complete, you can take the dough out and shape it into your loaf pan or do fancy braids or rolls out of the dough.

Inserting your ingredients into a bread machine is also very straightforward. If you are making the loaf right away, you can insert the ingredients in any way that you want. All of these ingredients will immediately be stirred together and so it will not matter what the order is. If you use a timer delay on your bread machine, delaying the start time of making your loaf, it is imperative that you put the ingredients in the right order or your loaf will not turn out right. The order of ingredients is liquid (liquids include water, oil, milk, eggs, or honey), flour, other dry ingredients (salt, sugar, baking powder, seasonings), and ending the ingredients with your yeast. The most important part of putting the yeast in is to make sure that you make a small indentation into the center of the flour so that the yeast does not react with the other ingredients.

Upon inserting your ingredients, your bread machine will take over the process from there. The machine will knead the ingredients together, give the bread its rising time, and then it will bake the bread. The bread machine will signal when the bread is ready and you can allow the bread to cool inside of the bread bucket.

There is no need to spend the money on convenience bread machine mixes; in fact, you can make your own convenient mixes handy for the week. I take plastic storage bags and make an assembly line of the dry ingredients and do my bags once a month. On the outside, just write what liquids you will need to add and you will only have a dirty kitchen once.

A quick glance at grocery store prices though and you will wonder how there could be any possible savings with making your bread at home. The key to making this the least expensive on your family is to purchase all of your ingredients at your local wholesale club. With proper storage, you can buy the ingredients in bulk and save your family loads of money. For example, our wholesale club has twenty-five pounds of bread & all-purpose flour for under $6 each. Two pounds of yeast will run you just under $4. What a difference compared to the prices in your regular supermarket!

For storage, flour can be stored for up to a year in an airtight container. With bulk storage, a large plastic bin that has been clearly labeled is ideal to keep your flour fresh. Yeast is the easiest ingredient to store and has a very long shelf life. I store my yeast in a clear jar in our refrigerator door. With both of these ingredients, writing an expiration date on the label will also remind you of when the item is going to expire.

If you do not have a bread machine and are looking for one, garage sales and thrift sales are a great place to hunt. I see these machines for $10 or less, and you will definitely get your money back from the savings of making your own bread. When you find one, ask if you can plug it in and make sure it is working. Just check that it actually powers up, that there is a bread bucket inside, and that there is a paddle in the bottom of the bread machine to stir the ingredients. Having a manual with it is handy, but usually can be found by searching online.

Good luck in your quest to find a bread machine and I hope it is a well-loved appliance in your home!

Related & Helpful Information:

Hillbilly Houswife's Bread Machine Basics

Buttery Bread Machine Rolls

My Favorite Pizza Dough (after much trial & error)

Storing Homemade Bread & Bread Ingredients

Homemade Croutons

Dinner is in the Bag

Labels: , ,

ENJOYED THIS POST? SHARE IT WITH OTHERS:

Click to share on StumbleUpon STUMBLE This Click to share on kirtsy Add to KiRTSY Click to share on Mixx Add to MIXX Click to share on DeliciousIt's DELICIOUS

Monday, April 23, 2007

Ask Frugal Momma: The Amazing Toaster Oven

I have a toaster oven, but it is barely functional, at best. I got it for five dollars from the thrift store and was excited to upgrade from the standard two slice toaster to the toaster oven. It was quickly evident why this appliance had been donated as I burned the toast the first time. There is no signal to let us know when it is done toasting. You have to keep an eagle eye on our toaster to make sure your toast is perfectly toasted. I am thinking of just forging ahead and getting a new one though…one that actually works. Ironically, the question of the day comes from a reader who was interested in learning about the toaster and how to care for it.

The toaster oven can be used for a variety of things, not just your toast or bagels in the morning. In fact, toaster ovens are not necessarily the best option if you are looking for an appliance to just toast bread. A toaster will actually toast your bread, while a toaster oven will provide a good toasting on one side, but takes twice the time as the traditional toaster. If you are just looking for some good toast, stick to the regular old toaster.

There are many uses for the toaster oven and it is great for when you are dining alone, want to throw together a simple appetizer, need to heat a few chicken nuggets for the kids, or don’t want to heat up the kitchen. A quick search on Google for, “toaster oven recipes” will yield a ton of ideas for things you can prepare in your toaster oven.

Consumer Reports did a testing on toaster ovens, and surprisingly some of the better performing toaster ovens were the cheapest options. Consumer Reports named the Procter-Silex Cool Touch a best buy at only $15 & the Oster Counterforms 6335 at $40 as the best deals for your money.

When it comes to electricity though, which is the cheapest option to use? Compared to your oven rage, which can use more than 3, 500 watts of electricity, a toaster oven uses only 1,350-1,500 watts. Comparatively, a typical toaster only uses 900 watts so using a toaster for toasting is the cheapest option of all when it comes to the perfect bagel. For bigger jobs though, relying on your toaster oven is a much cheaper option, particularly during the summer months when heating up your kitchen requires more wattage and makes your air conditioner have to work overtime.

Cleaning a toaster oven is very easy. First, unplug the unit and make sure it is completely cool before cleaning. If you wipe spills up as they occur, it will be a lot easier to keep this appliance clean. Wash the racks in warm soapy water. Use a damp soft cloth to clean out the interior and never ever submerge your toaster oven in water. If burned food discolors the paint on your toaster oven, you can try using a liquid degreaser to help minimize the discoloration, but nothing will remove it entirely.

To clean the standard toaster, again make sure the unit is unplugged and completely cool. Carry the toaster oven to the sink, and slide out the crumb tray (located at the very bottom of the toaster) and dump out the crumbs. Next turn the toaster upside down and let any remaining crumbs fall into the sink (if you have a disposal) or over your trashcan. Wipe the exterior with a soft cloth that has been dampened a bit with water & dishwashing soap. The chrome surfaces can be wiped down with a little all-purpose cleaner sprayed on a cloth. Don’t spray into the unit, just spray on the cloth.

How often you should clean your toaster oven depends on how often you use it. We usually wait until we can see a load of crumbs on the bottom or start to smell a burnt toast smell when we run the toaster. We probably should clean our toaster oven more often, but with all of the other things demanding my attention, this usually does not top the priority list in our house.

I do remember eating at our grandparent’s house and after every breakfast, our grandmother would clean it out, wipe it down, and then put it up in her cupboard. This was just part of her morning routine, just like taking out the trash or anything else. Her toaster always looked like new, my toaster…not so much. Follow her example if you want a sparkling toaster.

For some great toaster oven tips, visit Real Simple’s Versatile Toaster Oven article. It has some really wonderful ideas for using that toaster oven of yours!

Toaster Oven Recipes:

Toaster Oven Pizza

Mini Meat Loaves (You could probably try this recipe with my own mini meat loaves recipe)

Toaster Oven Easy Muffins

Do you have any tips to share? What do you use your toaster oven for? Please share!

Keep those questions coming! Submit them to [email protected] on any topic related to cleaning, money, or food. I love to answer these and hope that this information is useful for you & your family.

Labels: , ,

ENJOYED THIS POST? SHARE IT WITH OTHERS:

Click to share on StumbleUpon STUMBLE This Click to share on kirtsy Add to KiRTSY Click to share on Mixx Add to MIXX Click to share on DeliciousIt's DELICIOUS

Thursday, March 29, 2007

Ask Frugal Momma: Cleaning Out Yo Fridge


Today’s entry request was to cover the topic of cleaning out your fridge. Now ladies, I have been plagued with cleaning questions and ya’ll are making me feel pretty bad about my house. Maybe some money-saving questions might be a better fit for this tired mom? I will continue to answer cleaning questions as they come in, but do not, I repeat, DO NOT look around my house or the items in question. I do enjoy the research though and it has inspired me in ways I didn’t think possible so continue to throw your questions my way. Please email requests to [email protected]. The column will continue to run until I run out of questions. Be sure to check out next week’s entry where we talk about that nasty toaster oven sitting on our counters.

I do not enjoy cleaning out my refrigerator, but it one of those things that must be done. I wait until the day before grocery day to do it though because this is the day where there is the least amount of items that need to be moved around. It is also a great time to check my inventory before making the shopping trip to see if I really do need half the things on my list.

When I clean out the fridge, I break out two dishwashing tubs & a cookie sheet to accomplish this task. I fill one of these tubs with two tablespoons of baking soda and one quart of warm water (no need to measure this, just an idea of how much to use). The cookie sheet is used to put all of the condiments on and drawers are emptied into the other dishwashing tub to move items quickly in and out of the fridge.

Before cleaning the interior of the fridge, fill each drawer with the same amount of baking soda solution in each one and let the baking soda solution do the dirty work while you are wiping out the inside of the fridge.

I use a rag to do the interior and just get the rag wet with the baking soda solution. Gently wipe the interior of the refrigerator and wipe off all of the surfaces and interior of the refrigerator. If the washing solution begins to look nasty, be sure to chuck it and get another tub full to clean with.

For stuck on interior stains, you can sprinkle a little baking soda directly on the spot and add just a little water to it to make a paste. Allow this to set on the stain and then scrub gently and allow the paste to remove the gunk.

Go back to your drawers and empty them and wipe the interiors of these. Now place these back into the fridge and then take your dishwashing tub of solution and empty it into the sink. Refill the tub with just warm water and add a dash of lemon juice to the water. Now use your rag to do a final swipe using just this water & lemon juice solution. This will remove any grit that might be left in the fridge and the lemon juice will give it a nice fresh scent throughout too. Dry throughly with a terry towel.

Take your cookie sheet of condiments and make sure to give each of these a quick swipe with the rag before returning them. Half the battle is just not having clean items in your fridge and this is a good way to start fresh. Return all of the items in the other tub, at this time, to their proper homes.

The exterior of your fridge can often be overlooked, but it needs attention too. As a mother of two little ones, tiny little fingerprints and smudges are all over my fridge on any given day. To remove these, use my homemade all-purpose cleaner and spray this on your fridge. I then use a microfiber cloth to clean the outside as it is still gentle on the appliance but also abrasive enough to remove any marks. Any scuffs still left? Break out your Mr. Clean Eraser (a mom’s best friend!) You can find a generic equivalent of one of these at your local dollar store.

If you have a stainless steel appliance, dip your microfiber cloth into a little vinegar and give the outside of the fridge a good swiping with the vinegar. Then give the appliance another swipe with just plain water and dry thoroughly with a terry towel. If you have soft water, that won’t show any water marks, you can just use the water to clean the exterior.

Now when was the last time you saw the top of your fridge? You might want to hop up there on occasion and give that a good wiping too. If you have a handheld vacuum, use that to suck up any crumbs and debris. After that, use the all-purpose cleaner and give that a good wiping down too.

Just as a side note, after I clean out my fridge, I also empty the ice out of our icemaker and clean it with the same solution and dump all of the old ice out. This can be a breeding ground for bacteria, so it is an easy addition to my routine since I already have everything out.

Additional Tips:

When cleaning out your fridge, always use baking soda and warm water to wipe the insides of your refrigerator and freezers- soap or dishwashing liquid will leave a smell and can taint food.

Once every few months, remove all the food, switch off the refrigerator and wipe down all the surfaces. Defrost the freezer at the same time if necessary.

A box of baking soda can be added to your fridge and freezer to neutralize those smells.

Frugal Momma’s Money-Saving Tip:

Make sure that the door seals on the refrigerator, freezer compartment, or freezer are working efficiently by closing the door on a piece of paper. If the paper can be pulled out easily, the seal is worn and should be replaced.

Make sure to vacuum your refrigerator coils (located on the back of your fridge) twice a year. It is recommended that you do this more often if you have pets in the home. Just use your vacuum with the crevice attachment attached to the vacuum hose and give it a good vacuuming. The coils are located either on the bottom of your fridge or in the rear of your fridge. Doing this will save you money because if these are clean, your fridge won’t have to work as hard lowering your bills!

Suggested Reading:

Tips to Keep White Appliances from Looking Yellow (Warning: This does include bleach so be careful with your floors and clothing!)

What else would you like to see featured here? Please drop me an email or reply by leaving me a comment!

Labels: , , ,

ENJOYED THIS POST? SHARE IT WITH OTHERS:

Click to share on StumbleUpon STUMBLE This Click to share on kirtsy Add to KiRTSY Click to share on Mixx Add to MIXX Click to share on DeliciousIt's DELICIOUS

Thursday, March 22, 2007

Ask Frugal Momma: Happy Homemaking the Homemade Way


I am not going to launch into a preachy prose about how bad commercial cleaning products are today when it comes to cleaning your home. It is common knowledge that a healthy home is not doused in heavy-duty bleach and preserving our environment should be tops on our priority list. The truth is, if you peeked inside of my caddy of cleaners though, you would see some of these harmful products in there. The fact is that I am trying to rely less on these cleaners and rely more on homemade cleaners. I am in the process of making the transition over to using only healthy homemade cleaners, and I feel a lot of pride when I take the time to do this. I know how much better it is for our environment….and for my wallet!

Making cleaners does not mean that you need to purchase a ton of items; in fact, most cleaners can be made from things you already have in your house. The main components that I like to work with are white vinegar, baking soda, liquid dishwashing soap, and lemon juice. One purchase that you may need to make though, to begin getting started, is purchasing a few spray bottles. I pick these spray bottles up from our local dollar store. These clear spray bottles will make it easy to measure and label your new cleaners in your house.

If you do decide to use these types of cleaners regularly, I would suggest making a trip to your wholesale club to buy the ingredients. A small box of baking soda can cost around fifty cents at your local grocery store. The same baking soda, in a twelve pound bag, from Sam’s Club costs about $5.42. What a savings! All of these products can be purchased in bulk and once you begin using them regularly, you will go through them quickly.

While you are at the warehouse store, be sure to swing by the automotive section and pick up a bag of microfiber cloths. The cloths sold at the warehouse store are larger and thicker than the ones you can get in other stores, and these are great for all of the jobs around your house. You can use these wet or dry. You can also use these just using water and not even bothering with a cleaner because they are that amazing.

Be sure when you launder your microfiber cloths that you do not use any type of fabric softener and use a very little amount of soap or cleaner on them. If you overload them with cleaning products, they will become less and less effective, particularly when you are trying to attract dust towards them.

Because these cleaners are homemade and use less harsh ingredients, they will require a little more elbow grease than your commercial products. There are lots of great recipes on the internet though and typing in the search phrase, “homemade cleaners” should you give you lots of different ideas and give you an array of recipes to choose from to find which one works best for the jobs you have around your house. Everyone uses different measurements; it just depends on the difficulties of the jobs around your house.
Here are some of my tried and true recipes that we use in our house:

All-Purpose Cleaner- Mix together two tablespoons of mild dishwashing soap and two cups of water in a spray bottle and give it a shake. Use these anywhere that you would use a commercial all-purpose spray. This cleaner is particularly great for countertops, bathroom surfaces, and high chairs.

Glass Cleaner- Mix together one part white vinegar to one part water in a spray bottle. Spray this solution on your mirrors and windows and dry your windows with newspaper. The newspaper is great for lint-free drying and is a great way to repurpose some of those old papers you have laying around.

Homemade Oven Cleaner/ Deep Kitchen Cleaner- Mix a paste of three parts warm water to one part baking soda to clean away kitchen stains or to clean your oven.
Bathroom Cleaner- Mix dishwashing liquid with baking soda until you have a thick paste and use this throughout your bathroom.

Toilet Bowl Cleaner- No measuring is required with this recipe. Sprinkle a little baking soda into your toilet bowl and then pour a little vinegar in and watch it fizz it up. Give it a swish with your toilet brush and then flush.

Floor Cleaner- Add ½ cup of vinegar to a gallon of water. The scent of the vinegar will fade in approximately an hour, but you can also add a couple of drops of essential oil to help with the scent. I like the smell of Tea Tree Oil, but you can buy any essential oil that smells best to you. Essential oils can be picked up at stores offering nutritional supplements or can be purchased online.

Furniture Polish- Mix ¼ cup olive oil with four tablespoons of vinegar and two teaspoons of lemon juice. Pour into a spray bottle and shake well before using. If you do not use all of it in one cleaning session, store the remainder in the fridge, as the lemon juice can go sour. You can also substitute the lemon juice with twenty to thirty drops of lemon essential oil and then you won’t have to refrigerate it. Using the essential oils though will up the price a bit on your homemade product.

Silver Cleaner- Although I don’t polish silver very frequently, this is a great to have in your bag of tricks. This will clean all of those nooks and crannies that are hard to reach in more detailed pieces and is great if you have a big batch of silver that needs cleaning. In a large bowl (or you can use your kitchen sink) place strips of aluminum foil in and place the silver pieces on top. Cover the silver with boiling water and then add three tablespoons of baking soda and soak for ten minutes.

By making your own cleaners, you will save hundreds of dollars over the course of the year. For example, a bottle of window cleaner will usually run you around two or three dollars. A bottle of your homemade window cleaner though, will cost you about five cents. What a difference that will make to your grocery budget and helping the environment is a wonderful benefit of your fabulous frugalness.

For more tips visit the following links:


Next week, I have received a request to discuss cleaning out the fridge so I will share some tips for that next week. Please, please send me your questions about anything! Email your questions to [email protected] and I will be sure to add your requests to my list. Without your requests, this column wouldn’t be possible and I would love to keep this going. I have enjoyed sharing through this format and it helps me come up with more content for our site. The answers will be added to our website as articles for quick reference!

Labels: , , ,

ENJOYED THIS POST? SHARE IT WITH OTHERS:

Click to share on StumbleUpon STUMBLE This Click to share on kirtsy Add to KiRTSY Click to share on Mixx Add to MIXX Click to share on DeliciousIt's DELICIOUS

Thursday, March 15, 2007

Ask Frugal Momma: The Amazing Dishwasher


I have decided to start a weekly segment on getting to know items in your home. I got some emails and comments about my post yesterday, regarding some tips for your dishwasher, and I thought it would be great to start a little segment explaining frugal tips for caring for your appliances. If you have an appliance or item in your home that you would like to be featured, or you have a question about an item in your home that you would like to know more about, please email me at [email protected] and I will try and hunt for all those answers for you. Consider it a Frugal Momma question and answer column and ask away! I am not an expert in anything so take my advice with a grain of salt!

I don’t know what I would do without my dishwasher! There is an urban legend out there that says that washing dishes by hand is cheaper than washing them in the dishwasher. You actually waste less water by using your dishwasher, which makes the dishwasher a great addition to a frugal homeowner’s house.

First, there is no exact science to loading a dishwasher, but there are a few guidelines. Heavy duty stuff (pots, pans, plates, & utensils) go on bottom & delicate items and glassware go on top. Place everything in the upper rack facedown and put everything on the lower rack aimed towards the center. Silverware should have forks and spoons alternating, otherwise you will get spoons stuck together and they will need to be rewashed.

The important things to know to keep your costs low for running a dishwasher are pretty simple and straightforward. First, it is not economical to pre-rinse your dishes, especially with the newer models that they have out now for dishwashers. If you have an older dishwasher, like me, a quick pre-rinse with cold water only is the most efficient way to get your dishes clean.
Secondly, try and run the most cost-effective cycle on your dishwasher. Try the shorter cycle first and see if your dishes come out clean. If you need to still run the full cycle, don’t run the drying cycle and allow the dishes to air dry. It is more cost-effective and there is less chance of spotting on your glassware.

It is also important to read the manual for your dishwasher to see the recommended amount of dishwashing detergent you should use. The manufacturer will have the best suggestion for the amount of detergent you should use. Are your dishes looking a little gritty? Do you have a nasty residue on your glasses? The remedy to that problem is decreasing the amount of dishwashing detergent. If you don’t have the guidelines handy, you can always look them up on the manufacturer’s website or you can do your own test run to see how much you actually need to get those dishes clean.

If your glasses are looking spotty then you might need to add something to your dishwasher to make it perform better. I fill our rinse agent dispenser with white vinegar. Vinegar is great for removing spots on dishes and it leaves everything squeaky clean. Just fill the rinse aid dispenser as you would with the commercial stuff and stand back in amazement. You won’t believe how much better your dishwasher will perform with just this simple household solution.

I noticed that our dishwasher was looking pretty bad on the interior and I found the quickest way to get your dishwasher looking like new again is just running an empty cycle and filling the detergent cup with a drinking mix with citrus in it. You can use any citrus drink mix and fill it just as you would with your regular detergent. Any drink mix will do- lemonade, Tang, Crystal Lite, or any other drink mix with the citrus ingredient in it. We had a drink mix that the kids just didn’t like and that ended up going in the dishwasher instead. Doing this once a month will help keep your dishwasher looking like new.

Stubborn spots on the dishwashing door are also bothersome. If running a cycle of citrus drink powder doesn’t do the trick, you can try using other products on the door to get rid of the stains. Tomato-based stains will just have to fade with time, but you can sprinkle a little baking soda on your door and let it set for awhile. Take a soft dishtowel and add a little water to make a paste. Then rub the heck out of it and see if that removes the stain. The baking soda paste is also great for countertops or for burnt on gunk on your dishes.

There is a feature on dishwashers that I have never used, and only after writing this article would I even be aware that it even exists. The feature is the Rinse & Hold feature. This is a great feature for those dishes that you just absolutely cannot picture leaving in the sink until the dishwasher is run in the evening. Instead of washing a few dishes, you can run the Rinse and Hold cycle and have the dishwasher rinse them off for you. But how frugal is this feature? According to Consumer Reports, using this feature only takes two gallons of water compared with four gallons for a typical hand-washing. The energy needed to heat the water though, makes this a less than frugal feature so only use this feature when absolutely necessary. It is much more energy efficient to run your dishwasher with a full load.

Finally, you can make your own dishwashing detergent for a fraction of the cost. All you need to make dishwashing detergent is Borax (at our local store a box of this runs about $3.99), baking soda (cheapest at your wholesale club store) and regular old salt. Mix one cup Borax, one cup baking soda (you can also substitute this with washing soda, but most people don't have this on hand) and 1/4 cup salt. Add a tablespoon of this to your detergent dispenser and run it through a normal cycle. With vinegar added as a rinse aid, the dishes will be clean & spot free.

These blog entries will be added as articles to our Organize section of the site, for quick reference.

Up next week, Amelia's question on making your own cleaners! I can't wait to talk about this one!

Don't forget to submit those questions. I hope that this will be a fabulous addition to the blog!

Labels: , , , , ,

ENJOYED THIS POST? SHARE IT WITH OTHERS:

Click to share on StumbleUpon STUMBLE This Click to share on kirtsy Add to KiRTSY Click to share on Mixx Add to MIXX Click to share on DeliciousIt's DELICIOUS