Thursday, January 29, 2009

Notebook Experiments: Will A Loft Bed Save Us Space?

Experiment: Will a loft bed save us space?

Experiment Taken From: Notebook Entry 01.22.09

Materials Needed: Please see Ohdeedoh for the full instructions.

Results: I can admit that I am totally cheating this week, but when I saw the post on Ohdeedoh, I thought it would tie in perfectly with showing you our son's new big boy bed. Now that his bed had moved over to his sister's room, we had to find a bed for Ethan.

My new rule for furniture buying is I will NEVER again buy something online without seeing it in person first. His first bed was the biggest fiasco ever. We got it home, it was the wrong thing, it was damaged, it was 300 pounds, it had to be loaded piece by piece back into our car, it had to then be unloaded and returned to the store. The whole thing ended with me trying to get the trundle bed out, as a substitution bed for our son, and the trundle releasing under the other bed, pinning my hands between the two beds. We had to make a call to 9-1-1, I was nursing jammed fingers for three days, and cursing my bright idea to order a bed online. NEVER again!

The next day, I decided to head down the road to our local Oak Express and found a bed within minutes. I paid for the bed and sprung for the people to come and put it together for me. It was an easy decision, as I clutched my swollen hand and swore to myself that whatever the price it it would be worth EVERY penny. And it was. It was so worth it. Lesson learned.

Without further adieu, our fabulous new set-up:

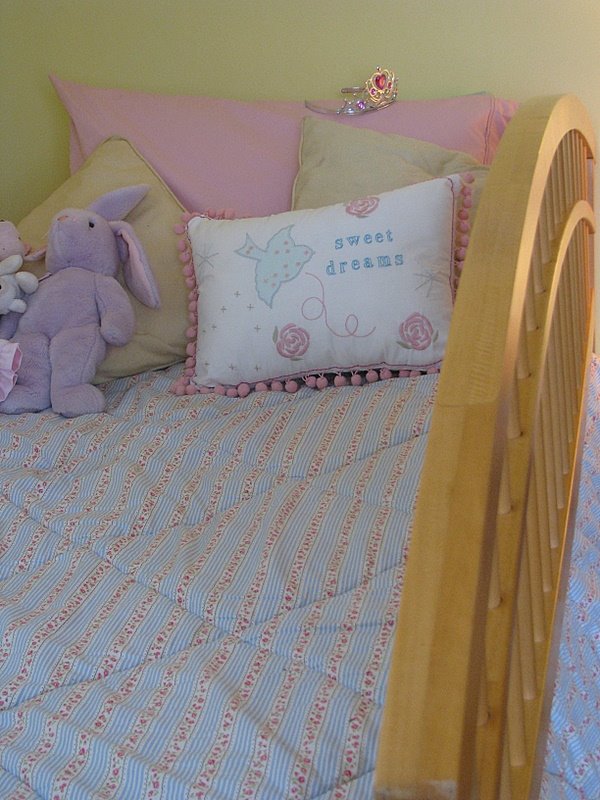
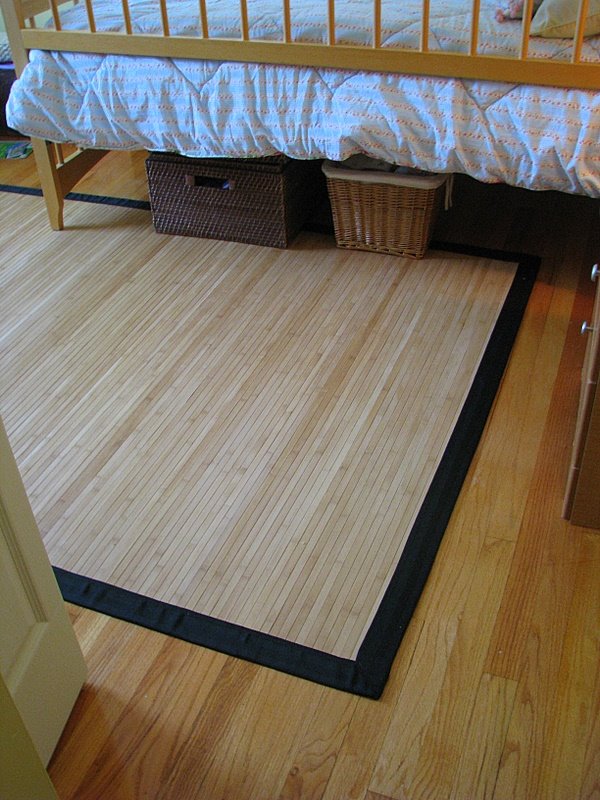
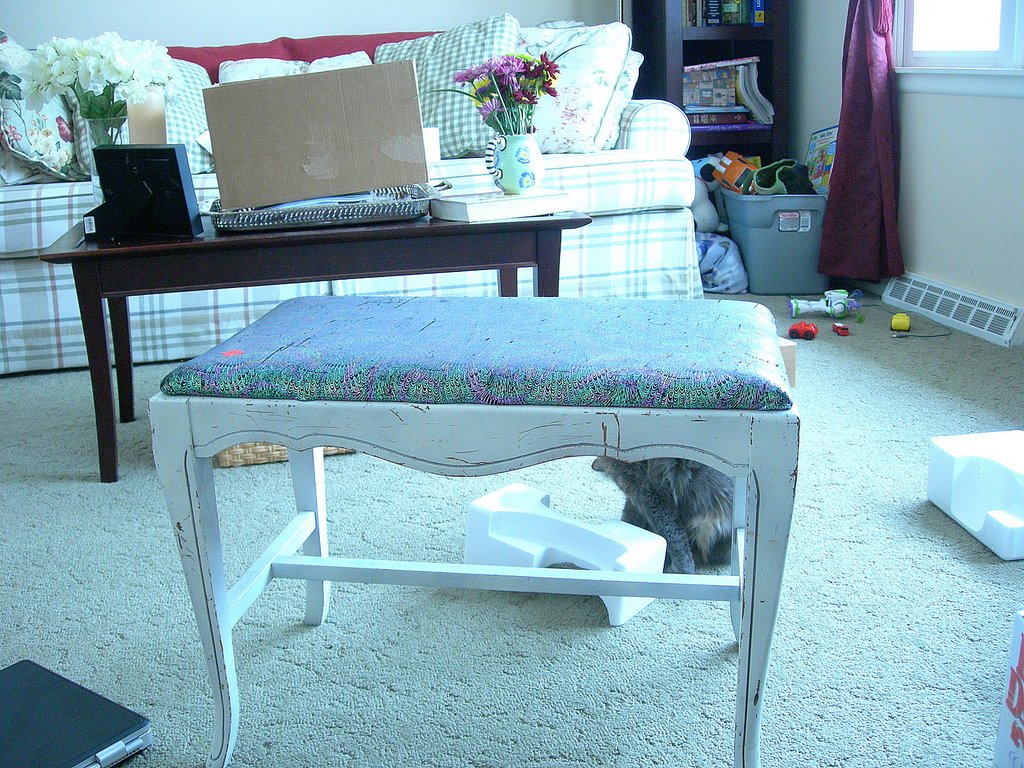
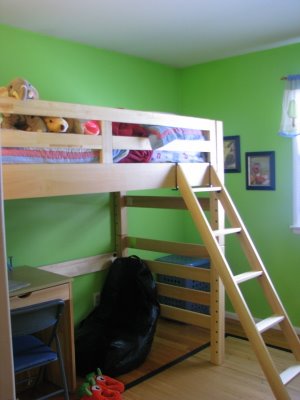
We have a tri-level home with very small bedrooms. These small spaces require much thought to make the most of every square inch. A loft bed seemed like the perfect solution for his room. With his new bed, we were able to create space underneath for his own desk to study at. What you can't see from this angle is that there is also a shelf for his books and water at the very end of the bed which he really loves.

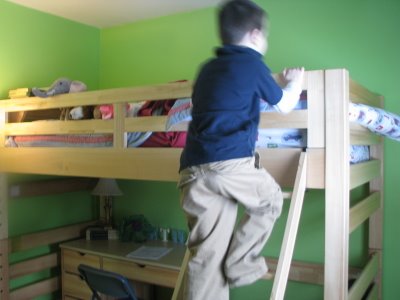
Here is Ethan's demonstration for how he climbs into his bed. When he gets older, the ladder can be removed and he can just climb up the side of it. Basically, it will look more grown up for when he is too cool for ladders.

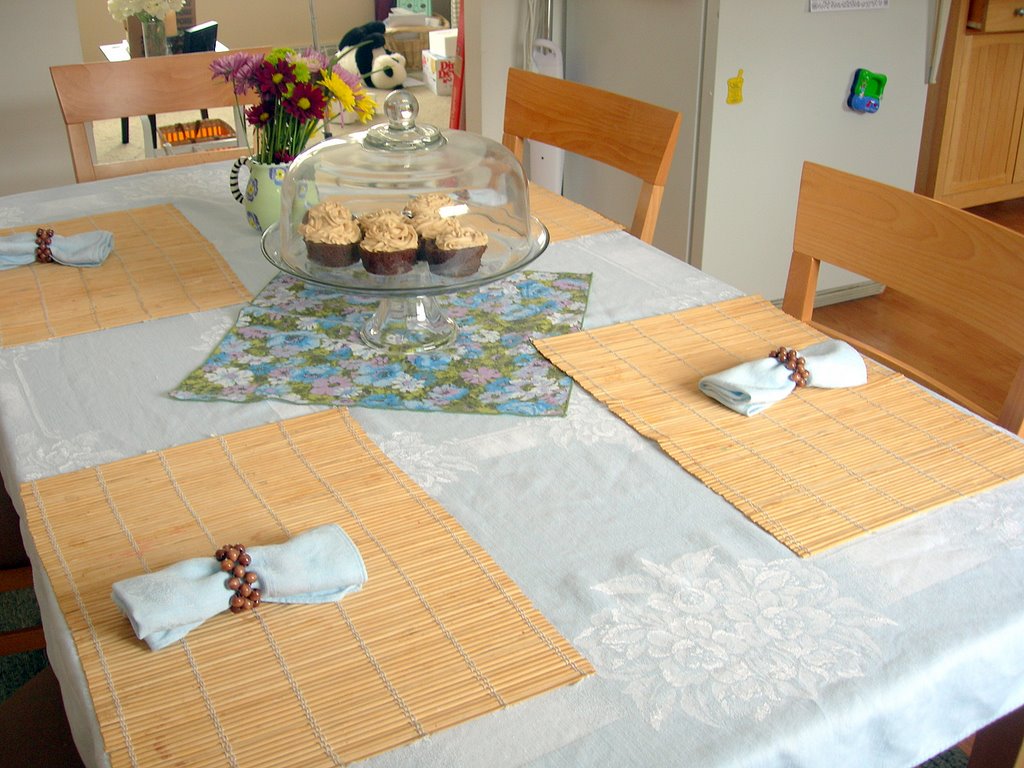
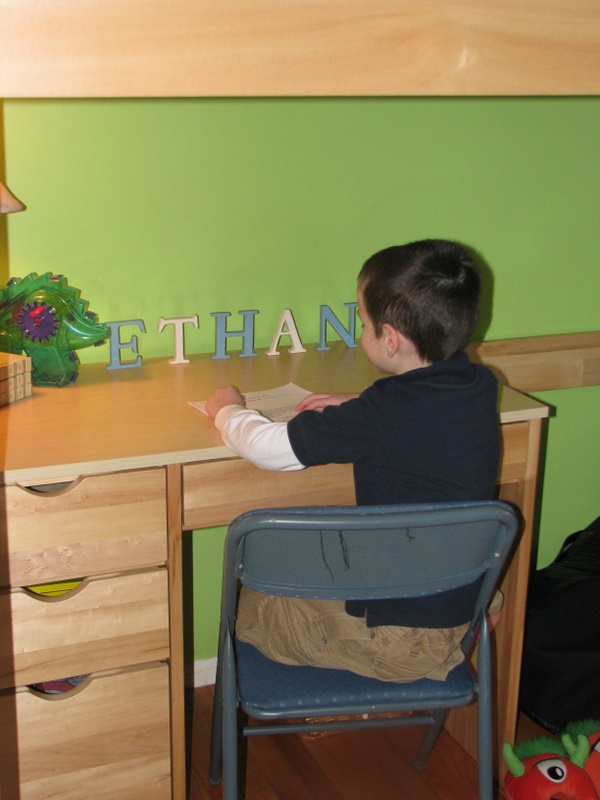
They had two desk choices for this model of bed and we went with the smaller one so he still has room to play underneath. I still need to buy a good chair for him, but he is so thrilled to have his own little space to study his schoolwork.

Conclusion: A loft bed is a great solution for small spaces. Despite having to pay more for the bed than I intended, it is still cheaper than moving into a new house to have bigger rooms. We are thrilled with our purchase and Ethan has been sleeping like a dream in his fancy new bed.

Have you ever had an online purchase go bad? Have you ever regretted buying something online rather than in person?

********************

I am so excited to open our Notebook Experiments up to everyone and I hope that you will be able to participate this week or in weeks to come! I will be posting this each Thursday so please mark your calendars if you plan to participate. You can post your entries at any time throughout the week and then leave your entry in the links below.

We have this handy banner that you are more than welcome to use, but it is not a requirement! It is just something you can add to add a little sparkle to your entry.

Rules for Participation:

1. Choose anything from any of our notebook entries (past or present) to do with your family. We have hundreds of bookmarked links of crafts, ways to save money, and organizing ideas.
2. Complete an experiment from the notebook and share about it on your blog or website. We would love to see pictures of what you accomplished or a detailed description of how your projects turned out. Please include a link to this entry, a link to the original posting of the entry (at the original crafster's blog), and (to help us relocate the project) the date or link of the notebook entry where you found it. You can use the same formatting as our entries or you can just include that information in your post in your own unique way!
3. Post a link below. Please include your name or blog name & a fast description of your project. Example- MomAdvice (WHO bread)

I can't wait to see what you create and what you find inspiring!

Labels: , ,

ENJOYED THIS POST? SHARE IT WITH OTHERS:

Click to share on StumbleUpon STUMBLE This Click to share on kirtsy Add to KiRTSY Click to share on Mixx Add to MIXX Click to share on DeliciousIt's DELICIOUS

Tuesday, January 20, 2009

Big Girl Room on a Budget


We are still getting Emily settled into her big girl room, but I thought I would share some of the ideas we have had so far for her new space.

First, Ethan's bed was moved into Emily's room and Ethan is getting a loft-style bed for his room with a desk underneath to make use of his smaller space. We had a bed fiasco, better left for another post, and he is now sleeping on the trundle part of this bed until his bed comes in.

We swung the daybed around so that the back of it becomes the side to keep her more secure. It is great because it still has the security of the crib, but has more space for her to sleep in. She has been in it for a couple of weeks now and hasn't attempted trying to get out of bed by herself yet.

The room was already painted a cheery yellow and I already had the curtains which were a set of eyelet lace curtains from the Shabby Chic line at Target. The comforter has been in a chest in our basement since we first got married. This bed was originally our guest bed and I used this comforter for it. It was a tad too girly for Ethan so we put it away, in hopes we would be adding a little girl to our family someday. It was a steal for $19.99 from TJ Maxx and is a Tommy Hilfiger comforter. It is reversible with another pretty flowered design on the alternate side. The addition of this "Sweet Dreams" pillow was bought with some of her Christmas money from the grandparents from Target (also from Shabby Chic).


The art in her room is courtesy of her big brother. These were two pictures that Ethan made at school and donated for his sister's room. I found these frames at the dollar store so these were the perfect budget-friendly decor for her new room.

We made a banner with her name on it for one of the walls. The color didn't turn out very good in this picture, but it is a pale pink with dark pink polka dots. The scrapbook paper and ribbon came from my craft supplies and I had my husband pick a pretty font for it. I used my circle punch to punch out these circles, but you could also trace a drinking glass to make them all uniform in size.

We bought new rugs for each of the kid's rooms. These are bamboo rugs that we purchased from Walmart and I absolutely love them. I have a fondness for bamboo rugs because they wipe off easily and are easy to vacuum or broom sweep. Underneath the bed is a basket of toys and a basket of diapers. We are hoping one of these baskets will be no longer needed...can you guess which one?

This set of table and chairs relocated from our playroom downstairs. Ethan was getting too big to sit in these so we put it in her room along with a basket of books for her to read.

This step stool holds an extra set of pink sheets for her bed. This stool used to be her brothers and it is one of my favorite little storage solutions for keeping a spare set of sheets.

This little lamp was also bought at Target and I used her Christmas money from her grandparents to buy it. I really wanted to bring the pink into the room and this was a cute little addition to her big girl space. You could implement the same idea with a basic white shade and a little grosgrain ribbon and some glue.


The perfect room for our sweet little princess!

What budget-friendly ideas are you proud of in your kid's rooms?

Labels: ,

ENJOYED THIS POST? SHARE IT WITH OTHERS:

Click to share on StumbleUpon STUMBLE This Click to share on kirtsy Add to KiRTSY Click to share on Mixx Add to MIXX Click to share on DeliciousIt's DELICIOUS

Tuesday, December 23, 2008

A Miscellaneous Post of Thrifty Holiday Ideas

The gifts are wrapped and tucked beneath the tree. I opted for reusable grocery bags in lieu of the traditional gift bag this year. I am such a fan of the Target bags and the clever designs that they implement into their bags. These fold up into the size of a small cosmetic case and had a pocket in the front too, perfect for tucking a gift card or a note of appreciation to someone. These were only $1.50, but everyone was so excited to get these this year. There are just a couple of pieces of tissue paper at the top, but the bottom was stuffed with newspaper that would have gone in our recycle bin. The newspaper helped these stand a little more upright since they were not flat-bottomed. I felt proud about my eco-friendly alternative and am hoping to convert some of my plastic-bag-lovin' family members over to the joys of reusable bags.

We did not buy any new decorations this year, but I opted to decorate with what we already had instead. This wall of pictures behind our Christmas tree needed some sprucing up so I covered the photos with some leftover holiday wrap and bows. I thought it tied in the Christmas spirit beautifully and look forward to doing this each year!

I did my annual gift exchange with my best friend. Do you recognize the pom pom? It is made from Target bags and was featured in our notebook. She was so proud to give it to me and I was so excited to see how her "notebook experiment" turned out. Tucked inside was Better Homes & Gardens Ultimate Cookie Book, 2-at-a-Time Socks, a gorgeous teal velvet blazer (found at the thrift store), and a set of note cards with shoes on them. Now THAT is a friend that knows you well! We put a $20 dollar limit on our gifts and always try to outdo each other with our thrift store finds and killer deals.

We worked on mailing and addressing all of our holiday cards for the year. Ethan helped me put on the stamps and we created an assembly line of stamping; he stamped with his stamps and I stamped a snowflake rubber stamp on each and dropped them in the mail. I mailed off my friend's baby blanket and noticed that shipping costs have been reduced for people who do online mailing versus bringing your items into the post office. I was able to save some change on the mailing and was once again very thankful for my handy little postal scale.

Ethan had his holiday show where he sang a beautiful song about snowpants and a song about special, special,special me. He invited Ryan & I to come to his show where he would "dress up fancy and sing special songs." He was so proud of his song and to give our cozy holiday gift (tucked in a reusable bag) to his teacher. We celebrated his special, special, special performance with a budget-friendly Junior Frosty from Wendy's.

Instead of our holiday photo books this year, I decided to make a DVD of our year for each set of the grandparents. I set it all to holiday music and sent it off to our out-of-town relatives with a message for each of them about how special they were. Shipping costs were greatly reduced and it is something that they can view over and over again or share with their friends.

What is your proudest thrifty holiday idea this year? Did you do anything out of the ordinary to save a buck? Please share!

Labels: , , , ,

ENJOYED THIS POST? SHARE IT WITH OTHERS:

Click to share on StumbleUpon STUMBLE This Click to share on kirtsy Add to KiRTSY Click to share on Mixx Add to MIXX Click to share on DeliciousIt's DELICIOUS

Tuesday, September 30, 2008

Dressing Up the Front Step For Fall

I loved the white pumpkins featured in A Soft Place to Land and gained some inspiration from that post for my own doorstep. Of course, I took the lazy and cheap route, but I think they turned out beautifully.

I purchased faux pumpkins at Michael's Craft Store. The were on sale for 40% off this past week. I found two pots to rest my pumpkins in and a bolt of black ribbon to dress up the pots.


I used my glue gun to attach the ribbon around the outside of the pot. With the leftover ribbon from the bolt, I made a bow and then tied it off with a little raffia. The pumpkins wedge perfectly in there.

I am hoping it will be something that I can use each year. I have found most of our guests think they are real pumpkins when they come over and have spent a lot of time thumping and touching them. I am not usually one to pick things that aren't natural for decorating with, but I love being able to store these and use them year after year. If they are fooling people, then that works even more to my advantage!


Of course, if those pumpkins don't last until next year, I have these two little pumpkins that I can set out there on occasion to dress up the step!

What are some creative ways you decorate your home for fall?

Labels: , ,

ENJOYED THIS POST? SHARE IT WITH OTHERS:

Click to share on StumbleUpon STUMBLE This Click to share on kirtsy Add to KiRTSY Click to share on Mixx Add to MIXX Click to share on DeliciousIt's DELICIOUS

Wednesday, September 03, 2008

What a Difference a Day Makes

I decided to hit the thrift store this Saturday in search of a china cabinet or unit where I could rest my laptop for our kitchen. I have been hunting for awhile, but just haven't seen anything with the good bones that I was looking for. I walked around for awhile before I saw IT. You know? The one! The one that I have been hunting for ages looking for? Well, I basically threw my body upon an old eighties cabinet and requested the crew help me load it in my vehicle. The cost was only $99 and the units that I had been looking at in the stores were a minimum of $250 and upwards of $600. This piece looked like it was going to be perfect and I headed over to the hardware store and got all of the supplies to tackle this project.

I was inspired by Meredith's recent post about a project that was done on Notes from a Cottage Industry. This blogger had painted her unit black and had gotten hers for a mere fifty bucks and made it look like a million.

This was my first attempt at refinishing a piece of furniture and I was pretty nervous at first, but my tentative paint strokes turned to fast swipes as I became more confident with what I was doing.

This particular piece was a knotty oak wood and had worn brass handles on it. We prefer a more contemporary look with clean lines and a silver finish to our pieces so that is what I wanted to achieve when I refinished this piece.


I decided to leave the piece with the knots in the wood, opting to skip the spackling step altogether, and purchased a primer tinted grey to give us a good start on the piece.

I sprayed the unit with a liquid degreaser to get all of the grime and muck of off the wood. Next I primed it with primer and allowed that to dry for a couple of hours. The next step was to put on the black paint and then another coat. Then another coat. Finally, another coat was applied before I could do the final touch-ups to the wood.

The hardware was the type that had been dropped into the a cut-out in the wood of the piece so there was no way that I could replace it. The worn dingy handles received a face-lift with a coat of stainless steel spray paint that was made especially for metal. Fifteen minutes to dry and only four dollars to redo all of the hardware. We are going to be spraying some other ugly brass fixtures around our house that need a little TLC, rather than purchasing new pieces which would cost us a lot more.

I started the project at six o'clock in the evening and painted until 2:30 in the morning. I collapsed in bed and then picked it back up at nine and had it fully assembled with my dishes and cookbooks on it by six the next evening.

It was a bear of a project, but I can't stop glowing or patting myself on the back for what I accomplished in a single day. The unit is absolutely enormous and I did all of this by myself with the only help from my husband being the help with moving and reassembling it.

The finished product reminds of something you would get at Pottery Barn or Restoration Hardware and I doubt that it would be only $99!

The history of the piece was as interesting as the furniture was itself. A quick discussion with one of the employees seemed to indicate that it was repossessed. After pulling it all apart we found a very mysterious hole that at been cut out of the bottom. A hole that would have no purpose except to hide something. Weed, perhaps? Who knows!

What has been your biggest accomplishment that you have done in or around your house? Have you ever attempted to refurbish a thrift store or yard sale piece? Any blunders refurnishing anything?

* Originally aired April 2, 2007*


Labels: , , ,

ENJOYED THIS POST? SHARE IT WITH OTHERS:

Click to share on StumbleUpon STUMBLE This Click to share on kirtsy Add to KiRTSY Click to share on Mixx Add to MIXX Click to share on DeliciousIt's DELICIOUS

Our Kitchen Makeover

When we moved into our house, one of the big things that attracted us to it was the size of our kitchen. Now that we have lived in our house for four years, I don't think my kitchen is as big as I would like, but it seemed enormous when our last house had only a galley kitchen. Isn't that funny how accustomed we can become to more space?

The thing that I was not fond of about the kitchen was the dated look of it and the lack of storage and cupboards. The walls were white, the floors a really light pine color, and the cabinets were oak with no hardware. We didn't have enough cabinet space, the appliances all needed to be updated, and the kitchen lacked the style I wanted. If this was a reflection of the "heart of our home," it was certainly missing something. The owner before us had completely renovated the kitchen, but it wasn't our style and wasn't cohesive or finished the way we would have liked.

Our kitchen makeover has been a gradual process and we are still working on the details of it, but it has come a long way from the dated eighties look. We would replace things as they went out and updates would come when we had a little extra money. I did want to show where we are at now, with the updating process, and to share how we have renovated our kitchen on a budget.

I wish I would have taken more before pictures of the kitchen, but I hope my descriptions will help.
These are the pictures of our cabinets before the makeover. Nice, but not much to write home about. We had received a $50 Lowes gift card for Christmas (thanks, mom & dad!) so we thought we would put the money to good use. I used the steps provided in this tutorial to paint our cabinets. This meant no messy sanding and so it helped to save a step and saved me a lot of cleaning too!
We took all of the doors off and gave them a really good cleaning with a liquid degreaser that I had purchased from the hardware store. Once cleaned, we applied two layers of primer to each side of the doors and to the outside of the cabinets themselves. We allowed the primer to dry one day and then we began painting them the next day. The color that we chose was a Martha Stewart "Wainscot White." It wasn't a true white, but was definitely not a cream either.

The hardware for the cabinets was purchased from Target. They have ten packs of knobs that very closely resemble the stuff at Restoration Hardware, but they only cost $14.99 for ten versus $5-10 each. The drawer pulls were $4.99 each (also purchased from Target) and they all were in oil rubbed bronze.

These are the cabinets after. What a difference a weekend can make! The cupboards are so beautiful and have brightened the kitchen up so much. Not only that, but the whole space feels so much larger because of the white cabinets. The walls were also painted a pretty gray blue to bring the more up-to-date feel to our space. We left our counters the same, but hope to one day replace them with a more high-end material (or at least make them look more high end).

We replaced our dishwasher with a new GE dishwasher that we purchased from Sears. It is the stainless steel look instead of the real stainless steel, so little hands can smudge away without mommy having to clean the surface as often. We actually won the dishwasher in an advertising contest that was sponsored by Sears. Technically, all of you AWESOME people helped us earn the dishwasher so we thank you for that. This one is so much prettier than the other one and better yet...it works! What a novel idea!
Next to my stove are hooks for my aprons. This was a great way to add some "art" to the walls without making an investment. $3.99 to display a few of my favorite things in the world.

We updated our stove with this fancy stainless steel number. It has everything I could ever want for this space and, while not free, I was able to get a killer deal on it. The stove was marked for $1K and I was able to get them to accept $500. Always pick those floor models, I say, and point out any and every flaw you can...even the stupid stuff. That is how we were able to score this stove.

The range hood was free and part of our Sears shopping spree that we won. Our refrigerator is the last of the white appliances to make an exit, but we are watching Craigslist to see if we can score a good deal on that.
Since cabinet storage was an issue, I was able to find an old ugly eighties desk with a hutch from a thrift store to remedy the problem. I did my makeover work on it and it is now my favorite piece in the house. This was cheaper than buying new cabinets and I just love how it is open for guests to grab their own dishes. The white dishes really make me happy and make me feel like a little Martha when I am entertaining! These dishes were priced at $14.99 for a service for six, including all of the serving dishes! They aren't the best quality, but I love the clean lines and design on them.

I also have my new china from my mother-in-law that looks so elegant on our tables. She recently brought this over to add to my dishes and I was so thrilled.

While it can make our seating a little more cramped, we did add a narrow table along the back wall to keep our computer. This has our dinner music on it and I can watch the television while I cook. The two plants on either side were purchased from Target, clearance to $14.99 each. The basket on the table, normally brimming over with fruit, is empty since I need to head to the grocery store. The basket was also a clearance item that I purchased from Marshalls along with some of the decor for our walls.
Like this piece that is centered along our back wall! This was a clearance item at Marshalls for $9.99. It got discounted with some of their summer pieces and I thought it would be a perfect focal point in that open spot.

I hope you enjoyed the tour of our kitchen!
We could not be more proud of the space we created...on a budget!

*Originally aired on January 2, 2008*

Labels: , , ,

ENJOYED THIS POST? SHARE IT WITH OTHERS:

Click to share on StumbleUpon STUMBLE This Click to share on kirtsy Add to KiRTSY Click to share on Mixx Add to MIXX Click to share on DeliciousIt's DELICIOUS

Weekend Project: New Workspace

Today we are continuing our week of Play it Again, Momma entries and today's focus will be on renovating your home on a budget. We have done a lot of work to our late sixties tri-level home and with each project, I feel a little more pride about our home. Our space might be limited, but each entry should showcase how we make our space work for us!

I am so excited because Ryan & I were finally able to complete another project on our to-do list... creating a workspace for two.

We have had a lot of challenges with the two of us both working from home and both working on the computer. We both needed computer time and we were constantly battling for the computer. One of my first investments was getting a laptop. Thanks to having a computer guy for a hubby, he was able to get me an excellent deal on a laptop and I was partially in business.

I say partially because we were still battling over workspace. I have back problems and would want to sit at a desk. He would need the desk for his computer so we would once again be duking it out for the workspace. One of us would be sitting at our children's tiny table trying to talk about work ideas and the other one of us would be sitting all comfy at the desk. We also had other scenarios where I would try to be productive working in my room and then fall asleep or I would attempt to work from the couch, but someone would want to watch television. In short, it wasn't working.

Finding a desk though that could fit our "team Clark" philosophy was tough and expensive! We decided to use some of the money that I earned this year to put towards getting a desk that would be perfect for us to work together.

We found what we wanted in the Pottery Barn catalog, but we aren't a Pottery Barn kind of family (budget wise, I mean). Ryan was able to find it for a fraction of the price on Target's website though and you can't even tell a difference between the two designs. He also found a deal where we got 15% off and free shipping. Timing it with that really helped save us some additional money. While it was definitely a splurge, it provided the perfect space for the two of us to work together.

Welcome to my new workspace- isn't it great? You can expand these pictures to view it in more detail. We purchased three cabinets and bought two desk tops to make our new work area. The two desk tops rest on the center cabinet and make one seamless unit. This set-up works great for us because we work together on many of our projects.

Not only is this great for working together, but it has created a lot more space in our office because it is all against one wall versus our corner desk that we had before.

This set-up was not without challenges because we had originally intended for it to go along our back wall and found that the unit was a lot larger than we had anticipated. We had to remove our closet doors and allow the unit to go basically into the closet space, which meant that this closet is now open and viewable to the world. I am not liking that too much, but it was a way to encourage us to weed through the items in the desk and in the closet to free up space and make it look more organized. I am thinking about making a curtain that would just partially hide this from view since a full set of curtains probably won't work.

I did tackle an enormous project though...those craft supplies are finally in order! That was no small undertaking and I am so happy to see everything neatly arranged. I even have space for my sewing machine so I can use my workspace to craft as well.

I organized the closet without making any investments. While I think pretty baskets would look so much better, the practical side of me won this battle and I am just using things we already have. If I add a curtain, I can close this off a bit and no one will even notice.

On the opposite wall we have my children's table and chairs. They can be in the office with us while we work and they can work on their own little projects. You can see past pictures of how we made our workspace kid-friendly.

This is an investment that I hope really pays off because we can both work together and each have our own space. Being productive, without a space to call your own, can be difficult. We love working together so this the ideal space for us!


*Originally aired February 18, 2008*

Labels: , ,

ENJOYED THIS POST? SHARE IT WITH OTHERS:

Click to share on StumbleUpon STUMBLE This Click to share on kirtsy Add to KiRTSY Click to share on Mixx Add to MIXX Click to share on DeliciousIt's DELICIOUS

Monday, February 18, 2008

Weekend Project: New Workspace

I am so excited because Ryan & I were finally able to complete another project on our to-do list... creating a workspace for two.

We have had a lot of challenges with the two of us both working from home and both working on the computer. We both needed computer time and we were constantly battling for the computer. One of my first investments was getting a laptop. Thanks to having a computer guy for a hubby, he was able to get me an excellent deal on a laptop and I was partially in business.

I say partially because we were still battling over workspace. I have back problems and would want to sit at a desk. He would need the desk for his computer so we would once again be duking it out for the workspace. One of us would be sitting at our children's tiny table trying to talk about work ideas and the other one of us would be sitting all comfy at the desk. We also had other scenarios where I would try to be productive working in my room and then fall asleep or I would attempt to work from the couch, but someone would want to watch television. In short, it wasn't working.

Finding a desk though that could fit our "team Clark" philosophy was tough and expensive! We decided to use some of the money that I earned this year to put towards getting a desk that would be perfect for us to work together.

We found what we wanted in the Pottery Barn catalog, but we aren't a Pottery Barn kind of family (budget wise, I mean). Ryan was able to find it for a fraction of the price on Target's website though and you can't even tell a difference between the two designs. He also found a deal where we got 15% off and free shipping. Timing it with that really helped save us some additional money. While it was definitely a splurge, it provided the perfect space for the two of us to work together.

Welcome to my new workspace- isn't it great? You can expand these pictures to view it in more detail. We purchased three cabinets and bought two desk tops to make our new work area. The two desk tops rest on the center cabinet and make one seamless unit. This set-up works great for us because we work together on many of our projects.

Not only is this great for working together, but it has created a lot more space in our office because it is all against one wall versus our corner desk that we had before.

This set-up was not without challenges because we had originally intended for it to go along our back wall and found that the unit was a lot larger than we had anticipated. We had to remove our closet doors and allow the unit to go basically into the closet space, which meant that this closet is now open and viewable to the world. I am not liking that too much, but it was a way to encourage us to weed through the items in the desk and in the closet to free up space and make it look more organized. I am thinking about making a curtain that would just partially hide this from view since a full set of curtains probably won't work.

I did tackle an enormous project though...those craft supplies are finally in order! That was no small undertaking and I am so happy to see everything neatly arranged. I even have space for my sewing machine so I can use my workspace to craft as well.

I organized the closet without making any investments. While I think pretty baskets would look so much better, the practical side of me won this battle and I am just using things we already have. If I add a curtain, I can close this off a bit and no one will even notice.

On the opposite wall we have my children's table and chairs. They can be in the office with us while we work and they can work on their own little projects. You can see past pictures of how we made our workspace kid-friendly.

This is an investment that I hope really pays off because we can both work together and each have our own space. Being productive, without a space to call your own, can be difficult. We love working together so this the ideal space for us!

Labels: , , ,

ENJOYED THIS POST? SHARE IT WITH OTHERS:

Click to share on StumbleUpon STUMBLE This Click to share on kirtsy Add to KiRTSY Click to share on Mixx Add to MIXX Click to share on DeliciousIt's DELICIOUS

Wednesday, January 02, 2008

Our Kitchen Makeover

When we moved into our house, one of the big things that attracted us to it was the size of our kitchen. Now that we have lived in our house for four years, I don't think my kitchen is as big as I would like, but it seemed enormous when our last house had only a galley kitchen. Isn't that funny how accustomed we can become to more space?

The thing that I was not fond of about the kitchen was the dated look of it and the lack of storage and cupboards. The walls were white, the floors a really light pine color, and the cabinets were oak with no hardware. We didn't have enough cabinet space, the appliances all needed to be updated, and the kitchen lacked the style I wanted. If this was a reflection of the "heart of our home," it was certainly missing something. The owner before us had completely renovated the kitchen, but it wasn't our style and wasn't cohesive or finished the way we would have liked.

Our kitchen makeover has been a gradual process and we are still working on the details of it, but it has come a long way from the dated eighties look. We would replace things as they went out and updates would come when we had a little extra money. I did want to show where we are at now, with the updating process, and to share how we have renovated our kitchen on a budget.

I wish I would have taken more before pictures of the kitchen, but I hope my descriptions will help.
These are the pictures of our cabinets before the makeover. Nice, but not much to write home about. We had received a $50 Lowes gift card for Christmas (thanks, mom & dad!) so we thought we would put the money to good use. I used the steps provided in this tutorial to paint our cabinets. This meant no messy sanding and so it helped to save a step and saved me a lot of cleaning too!
We took all of the doors off and gave them a really good cleaning with a liquid degreaser that I had purchased from the hardware store. Once cleaned, we applied two layers of primer to each side of the doors and to the outside of the cabinets themselves. We allowed the primer to dry one day and then we began painting them the next day. The color that we chose was a Martha Stewart "Wainscot White." It wasn't a true white, but was definitely not a cream either.

The hardware for the cabinets was purchased from Target. They have ten packs of knobs that very closely resemble the stuff at Restoration Hardware, but they only cost $14.99 for ten versus $5-10 each. The drawer pulls were $4.99 each (also purchased from Target) and they all were in oil rubbed bronze.

These are the cabinets after. What a difference a weekend can make! The cupboards are so beautiful and have brightened the kitchen up so much. Not only that, but the whole space feels so much larger because of the white cabinets. The walls were also painted a pretty gray blue to bring the more up-to-date feel to our space. We left our counters the same, but hope to one day replace them with a more high-end material (or at least make them look more high end).

We replaced our dishwasher with a new GE dishwasher that we purchased from Sears. It is the stainless steel look instead of the real stainless steel, so little hands can smudge away without mommy having to clean the surface as often. We actually won the dishwasher in an advertising contest that was sponsored by Sears. Technically, all of you AWESOME people helped us earn the dishwasher so we thank you for that. This one is so much prettier than the other one and better yet...it works! What a novel idea!
Next to my stove are hooks for my aprons. This was a great way to add some "art" to the walls without making an investment. $3.99 to display a few of my favorite things in the world.

We updated our stove with this fancy stainless steel number. It has everything I could ever want for this space and, while not free, I was able to get a killer deal on it. The stove was marked for $1K and I was able to get them to accept $500. Always pick those floor models, I say, and point out any and every flaw you can...even the stupid stuff. That is how we were able to score this stove.

The range hood was free and part of our Sears shopping spree that we won. Our refrigerator is the last of the white appliances to make an exit, but we are watching Craigslist to see if we can score a good deal on that.
Since cabinet storage was an issue, I was able to find an old ugly eighties desk with a hutch from a thrift store to remedy the problem. I did my makeover work on it and it is now my favorite piece in the house. This was cheaper than buying new cabinets and I just love how it is open for guests to grab their own dishes. The white dishes really make me happy and make me feel like a little Martha when I am entertaining! These dishes were priced at $14.99 for a service for six, including all of the serving dishes! They aren't the best quality, but I love the clean lines and design on them.

I also have my new china from my mother-in-law that looks so elegant on our tables. She recently brought this over to add to my dishes and I was so thrilled.

While it can make our seating a little more cramped, we did add a narrow table along the back wall to keep our computer. This has our dinner music on it and I can watch the television while I cook. The two plants on either side were purchased from Target, clearance to $14.99 each. The basket on the table, normally brimming over with fruit, is empty since I need to head to the grocery store. The basket was also a clearance item that I purchased from Marshalls along with some of the decor for our walls.
Like this piece that is centered along our back wall! This was a clearance item at Marshalls for $9.99. It got discounted with some of their summer pieces and I thought it would be a perfect focal point in that open spot.

I hope you enjoyed the tour of our kitchen!
We could not be more proud of the space we created...on a budget!

Labels: , ,

ENJOYED THIS POST? SHARE IT WITH OTHERS:

Click to share on StumbleUpon STUMBLE This Click to share on kirtsy Add to KiRTSY Click to share on Mixx Add to MIXX Click to share on DeliciousIt's DELICIOUS

Tuesday, December 04, 2007

Grab a Cup of Tea...

And sit down to read this most excellent interview with Michael Mead of Country Home Magazine, courtesy of Restyled Home. I just love the questions about the holiday season and his creative answers. Be sure to swing by and visit his site to see all of his wonderful ideas for holiday decorating!

Enjoy your mommy break!

Labels: ,

ENJOYED THIS POST? SHARE IT WITH OTHERS:

Click to share on StumbleUpon STUMBLE This Click to share on kirtsy Add to KiRTSY Click to share on Mixx Add to MIXX Click to share on DeliciousIt's DELICIOUS

Thursday, April 05, 2007

Creating a Kid-Friendly Office


I feel very fortunate and blessed to be able to work from home. The only unfortunate part about working from home though is that it is hard to separate work life from family life. I have two children who I get to be home with and I want them to feel like they are part of my work here too. Heck, without them, I wouldn't have this site or have any parenting knowledge to draw from.

I got the opportunity to revamp our office yesterday, since my in-laws so graciously offered to keep the kids for the day, and I am amazed at how much better this house looks in one day. I tackled all of my spring cleaning and set our office up in a way that I now feel that my kids can be more a part of my day and will be able to play in here while I work.

Since I was able to refurbish that hutch last weekend, the cabinet that had resided there before needed a new home. I pulled the cabinet over to the area where our child's table set was located. I removed any junk that was still left in it and filled it with our son's arts & crafts supplies and all of the family board games for us to play together. The top shelf holds the older games and the bottom shelf is storing all of our child games.

Next to the cabinet is a basket of toys for my daughter to play with. I put various board books and small toys in there for her to enjoy while mommy is working. I also brought in one of her activity cubes to play with in this room. The new location to these items makes them "new" to her and she has been enjoying having her own little space in the office.
I also have a chair for my son to sit in to read or chat with me. He can curl up in this chair, placed next to the desk, and hang out with me while I work.

I had a lot of cleaning to do in and around our desk, but now I feel like all of us have our own space in the office.

I am interested to see how others make a home office work for them. How do you separate your work from your family life when it all is in one place? Do you have any tips for keeping the children entertained while you work? Do you have a special place for them in your workspace? Please share with me!

Labels: , ,

ENJOYED THIS POST? SHARE IT WITH OTHERS:

Click to share on StumbleUpon STUMBLE This Click to share on kirtsy Add to KiRTSY Click to share on Mixx Add to MIXX Click to share on DeliciousIt's DELICIOUS

Monday, April 02, 2007

What a Difference a Day Makes

I decided to hit the thrift store this Saturday in search of a china cabinet or unit where I could rest my laptop for our kitchen. I have been hunting for awhile, but just haven't seen anything with the good bones that I was looking for. I walked around for awhile before I saw IT. You know? The one! The one that I have been hunting for ages looking for? Well, I basically threw my body upon an old eighties cabinet and requested the crew help me load it in my vehicle. The cost was only $99 and the units that I had been looking at in the stores were a minimum of $250 and upwards of $600. This piece looked like it was going to be perfect and I headed over to the hardware store and got all of the supplies to tackle this project.

I was inspired by Meredith's recent post about a project that was done on Notes from a Cottage Industry. This blogger had painted her unit black and had gotten hers for a mere fifty bucks and made it look like a million.

This was my first attempt at refinishing a piece of furniture and I was pretty nervous at first, but my tentative paint strokes turned to fast swipes as I became more confident with what I was doing.

This particular piece was a knotty oak wood and had worn brass handles on it. We prefer a more contemporary look with clean lines and a silver finish to our pieces so that is what I wanted to achieve when I refinished this piece.


I decided to leave the piece with the knots in the wood, opting to skip the spackling step altogether, and purchased a primer tinted grey to give us a good start on the piece.

I sprayed the unit with a liquid degreaser to get all of the grime and muck of off the wood. Next I primed it with primer and allowed that to dry for a couple of hours. The next step was to put on the black paint and then another coat. Then another coat. Finally, another coat was applied before I could do the final touch-ups to the wood.

The hardware was the type that had been dropped into the a cut-out in the wood of the piece so there was no way that I could replace it. The worn dingy handles received a face-lift with a coat of stainless steel spray paint that was made especially for metal. Fifteen minutes to dry and only four dollars to redo all of the hardware. We are going to be spraying some other ugly brass fixtures around our house that need a little TLC, rather than purchasing new pieces which would cost us a lot more.

I started the project at six o'clock in the evening and painted until 2:30 in the morning. I collapsed in bed and then picked it back up at nine and had it fully assembled with my dishes and cookbooks on it by six the next evening.

It was a bear of a project, but I can't stop glowing or patting myself on the back for what I accomplished in a single day. The unit is absolutely enormous and I did all of this by myself with the only help from my husband being the help with moving and reassembling it.

The finished product reminds of something you would get at Pottery Barn or Restoration Hardware and I doubt that it would be only $99!

The history of the piece was as interesting as the furniture was itself. A quick discussion with one of the employees seemed to indicate that it was repossessed. After pulling it all apart we found a very mysterious hole that at been cut out of the bottom. A hole that would have no purpose except to hide something. Weed, perhaps? Who knows!

What has been your biggest accomplishment that you have done in or around your house? Have you ever attempted to refurbish a thrift store or yard sale piece? Any blunders refurnishing anything?

Labels: , , ,

ENJOYED THIS POST? SHARE IT WITH OTHERS:

Click to share on StumbleUpon STUMBLE This Click to share on kirtsy Add to KiRTSY Click to share on Mixx Add to MIXX Click to share on DeliciousIt's DELICIOUS

Thursday, March 08, 2007

Thrift Store Finds

Earlier this week, I went to the thrift store and found a couple of great things for our house.

The first item I found was a small bench. It was covered in a shiny & very ugly polyester, which was frayed and torn. The pictures of this fabric don't do it justice. It was much more hideous in real life than what is pictured here. The piece itself was really nice though so for ten dollars, I took it home and got to recover it. I still had some fabric leftover from when we recovered our dining chairs so I used some of that. The vinyl is nice because it could easily be wiped off, which is important in a house with a four year old and a one year old.

Originally I had planned to put it near our front door, but the sizing didn't seem right. I think a bench larger than that needs to be there, but we did have a corner in our bathroom that I had been trying to decide what to do with. I had one of my dining chairs down there and when we needed it for company, I would have to walk downstairs to get it and haul it up. The bench seemed to fit perfectly and I love the worn legs on it and how well it goes with the decor in our bathroom.

I also ran across these beautiful table linens. Now that you all are aware of my table linens obsession, you can imagine how excited I was about this! I had no idea if the tablecloth was the right size, but I was willing to take a gamble on it for $2. It had six napkins at a quarter a piece, and it is very rare to find a tablecloth and napkins all together in a matching set. I also found a few vintage floral-printed napkins too, all in various colors.

I washed the linens and placed them on the table. The tablecloth is a beautiful baby blue and it is soft just like a blanket. When washed, I did notice a small spot in the center, but it could easily be disguised with a napkin centerpiece. One of the floral napkins was perfect for resting our centerpiece on it. Do you happen to recognize this centerpiece?

I am always amazed at what one can find in their local thrift store!

Labels: , , ,

ENJOYED THIS POST? SHARE IT WITH OTHERS:

Click to share on StumbleUpon STUMBLE This Click to share on kirtsy Add to KiRTSY Click to share on Mixx Add to MIXX Click to share on DeliciousIt's DELICIOUS

Tuesday, March 06, 2007

A Tutorial On Painting Kitchen Cabinets

We are going to be refinishing our cabinets and I happened upon this great tutorial on how to update them. Has anyone had any experience in this? Have any tips to share?

Labels: , ,

ENJOYED THIS POST? SHARE IT WITH OTHERS:

Click to share on StumbleUpon STUMBLE This Click to share on kirtsy Add to KiRTSY Click to share on Mixx Add to MIXX Click to share on DeliciousIt's DELICIOUS

Tuesday, February 27, 2007

Before & After: Dining Room Chairs

Awe-inspiring Meredith, from Like Merchant Ships, is a source of great inspiration when it comes to home decorating. In my opinion, you either can decorate or you can't. It has nothing to do with money, but has everything to do with being creative with what you have. She is one of those bloggers where I shake my head constantly and say, "Now that is a great idea! Why didn't I think of that?"

One of Meredith's claims to fame, in my opinion, is what a whiz she is at making furniture look new again. She has shown the tops and bottoms of pieces she does and with a piece of fabric and a few tucks here and there, she is able to recreate pieces in her home without spending a bunch of money.

In our house, our dining room set had seen far better days. When we bought it, we had no children and never gave a thought to whether plush cushions with ivory fabric would be a good selection for our furniture. After all, we knew how to eat without making a mess.

Countless playdates, hundreds of dinners on those chairs, a Kool-Aid spill here and there... then suddenly these cushions were beginning to show their age. With another child soon to be sitting in those chairs too, I knew that the situation was only going to get worse.

I ran over to the fabric store and did end up spending a mint on a little fabric to recover our chairs. Yes, I could have bought cheaper materials, but as this was my dining set, I really wanted to do this right.

The fabric is vinyl, but it is a nice faux brushed leather. The chocolate color and the wipeable fabric was just what I had envisioned with these chairs.

Spills on my chair? No problem! Greasy fingers? Easy Peasy! The difference in my attitude is night and day. Now food on our carpet is another story....but I am feeling much better about the chairs.

I hope I did you proud, Meredith!

Old Nasty Chair:


Freshly Covered Chair:


Labels: , , ,

ENJOYED THIS POST? SHARE IT WITH OTHERS:

Click to share on StumbleUpon STUMBLE This Click to share on kirtsy Add to KiRTSY Click to share on Mixx Add to MIXX Click to share on DeliciousIt's DELICIOUS

Monday, January 29, 2007

Budget-Friendly Ideas for Kid's Rooms

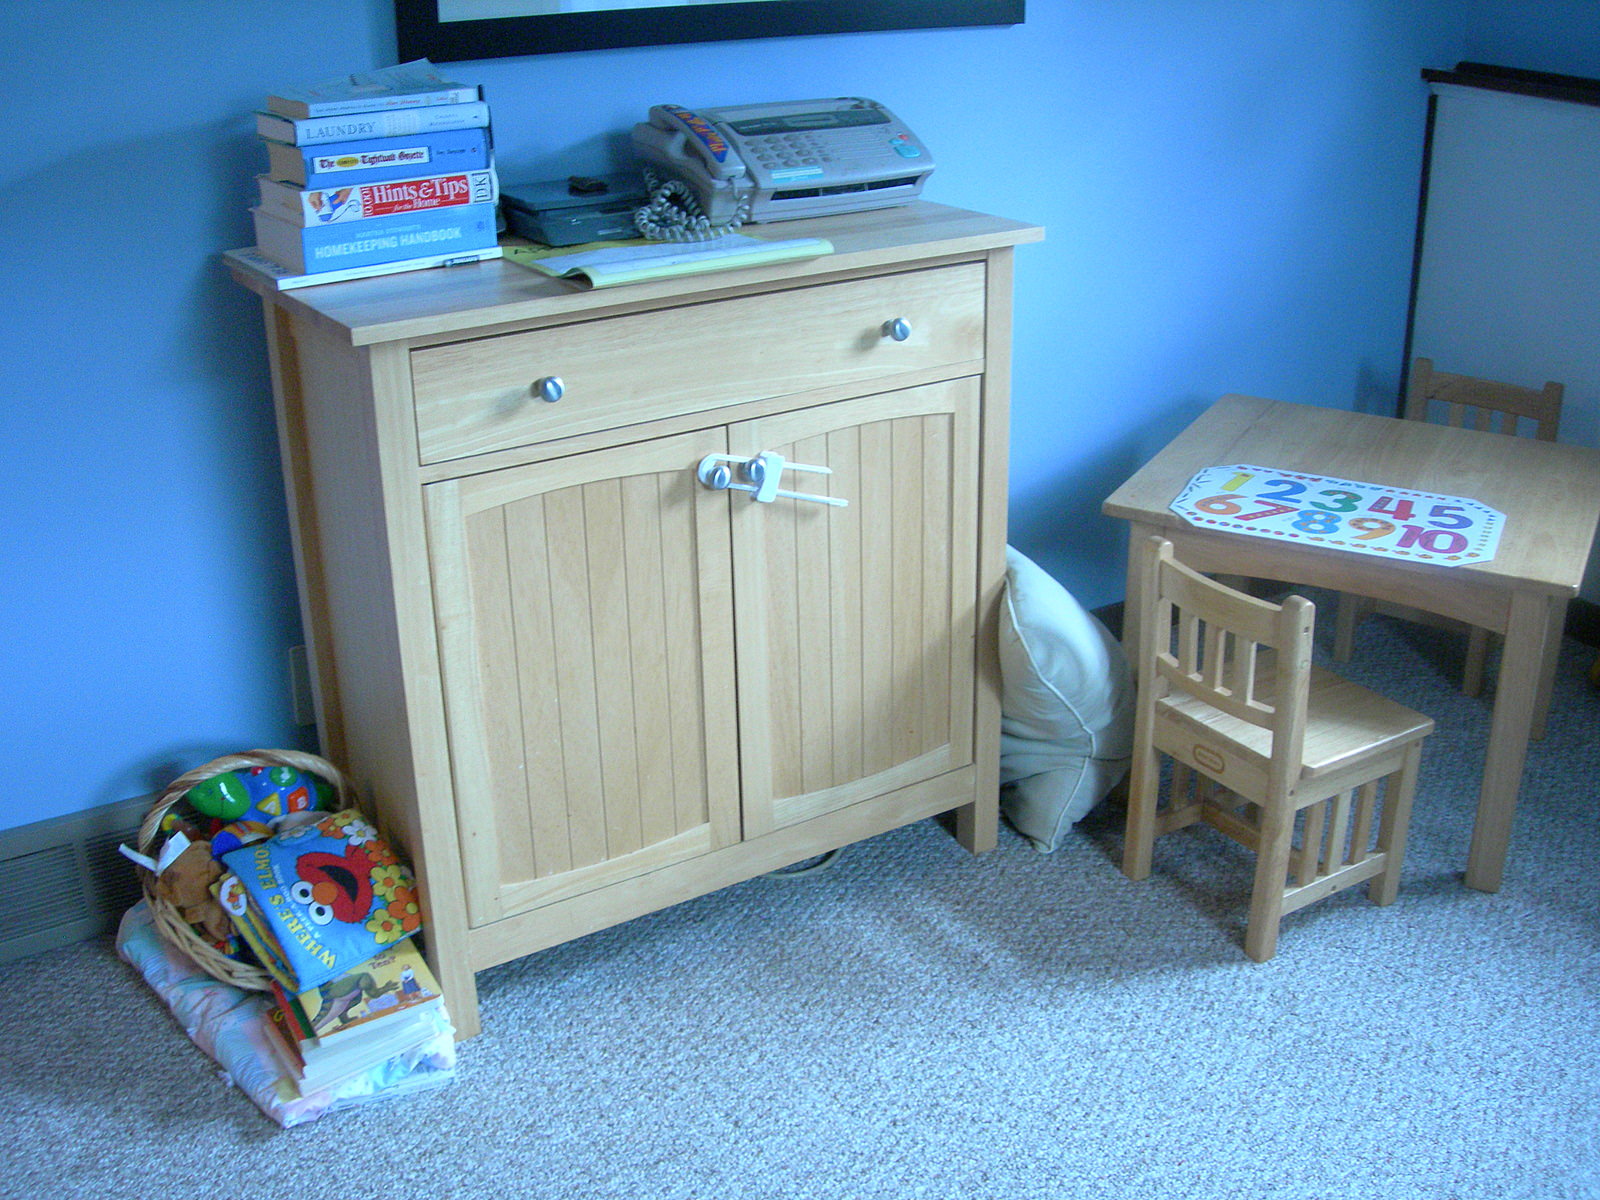
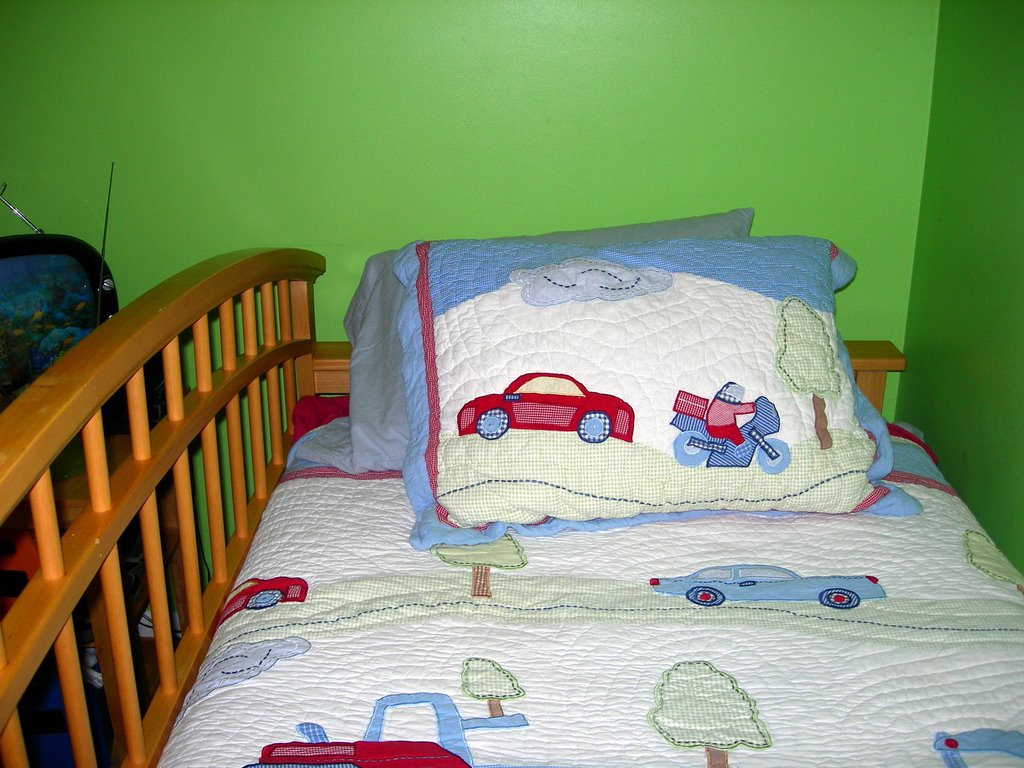
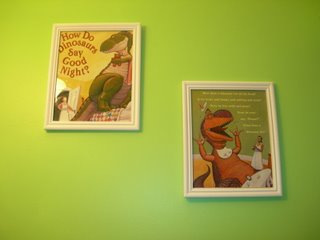
First, do not be intimidated by the bright colors on our son’s walls. What appeared to be a cheery Granny Smith apple shade assaulted us with its fluorescent glow instead when applied to the walls. Although the color is a bit brighter than I had hoped, where else except our children’s rooms could we be so bold?


I had been looking for some cute artwork for his room since we had tons of empty wall space, begging to be filled with cute artwork. We did not have the budget though to go out and blow tons of money on artwork so when I happened upon this clever idea in my Real Simple Magazine, I jumped right on it and was so pleased with the results.

The magazine had suggested using book cover jackets as art for your walls. As my son has received wonderful hardcover books from his grandparents, I had been removing the jackets and putting them on a shelf in his closet (for fear that they might be damaged or torn). Two of the jacket covers were for two of his favorite books, “How do Dinosaurs Say Goodnight” & “How do Dinosaurs Eat Their Food.” The artwork on them was just perfect for framing.
I went to the Dollar Store and purchased two frames. I then used the cardboard insert to map out how I would frame the pictures to size them and then cut them out. For one of the pictures, I just used the picture that was on the front of the jacket. I used the back of the other cover because it contained some of the story within the picture.

My son was so pleased with his new pictures on his wall as were we! What a great way to really bring to life and share your children’s favorite stories.


The linens on his bed were also in need of being replaced. My son suffers from very bad bloody noses and I could not remove the stain no matter how many times I washed it. My mom had suggested contacting the lady over at MomAdvice to find out how to fix this (obviously I get a lot of jokes about that one!), but apparently she had no idea either.


When I hit a local thrift sale in the area though, I hit the jackpot. Tucked away in a corner was an entire Pottery Barn Kids comforter set. The set included sheets, pillow cases, comforter, shams, bed skirt, and curtains. The total price on the whole thing was only $25. The colors matched perfectly with the theme we already had so these worked wonderfully.

As a side note, you will notice that our son has his bed backwards. One of the truly great things about daybeds is that you don’t have to purchase bedrails to keep them secure in bed. Simply switching the bed around (with headboard on the opposite side) and scooting it next to the wall keeps him safe in his bed without making a bed around bedrails. We will be purchasing this same type of bed for our daughter because it has worked so great. If you are worried about when they have friends come to stay the night, you can invest in a trundle bed that can be tucked underneath and can be popped up when needed. It is an ideal space saver.

I hope these ideas inspire you in creating a special space for your little ones. Feel free to share some of your own ideas by leaving a comment!

Labels: , , ,

ENJOYED THIS POST? SHARE IT WITH OTHERS:

Click to share on StumbleUpon STUMBLE This Click to share on kirtsy Add to KiRTSY Click to share on Mixx Add to MIXX Click to share on DeliciousIt's DELICIOUS