The holidays seem like so long ago already. The Christmas lights are down, the ornaments packed away, and we’re charging ahead into the new year. If you’re like us, the only remnants are a handful of candy canes leftover from the too many boxes we bought in a fit of holiday spirit.

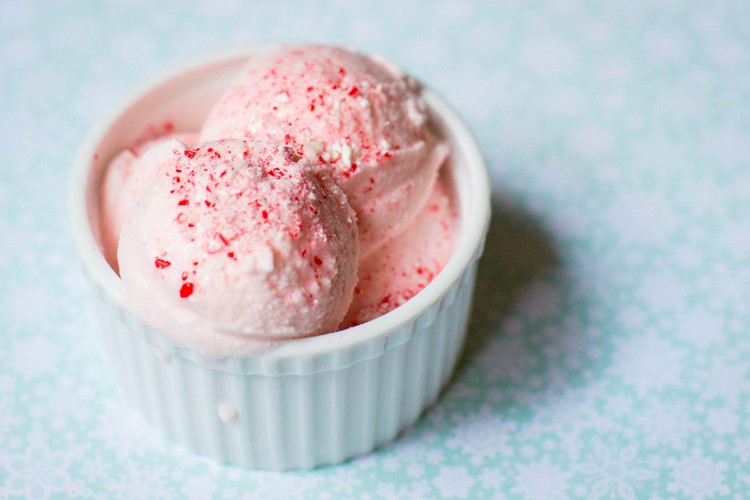
In hindsight, the candy cane excess was the best decision ever made because it led to what may be the tastiest homemade treat I’ve made all winter: Peppermint Candy Cane Ice Cream.
Super minty and winter fresh, this ice cream is the stuff Frosty the Snowman’s dreams are made of. It is downright delicious. You may even find yourself clearing out the boxes of candy canes left at the store just to make more batches of this ice cream. Good move! They’re probably on sale! You win at life.
This recipe starts with Jeni’s Splendid Ice Cream Base – a tried and true method that may seem slightly unconventional, but results in creamy dreaminess. Jeni’s method for making her famous scoop shop ice cream at home uses a bit of cream cheese and cornstarch rather than egg yolks to achieve a wonderfully dense and creamy texture. Best of all, it doesn’t require the fuss of making a custard base with all that tempering, and careful heating, and straining. Less time fussing, more time ice cream eating. Words to live by.
To our sweet cream blank canvas, all that’s left to do is add a few teaspoons of peppermint extract and crushed candy canes, and wait for that ice cream maker to do its thing.
Prepare to be quite pleased with yourself. This Peppermint Ice Cream will become a perennial favorite. Here’s what I’m dying to do…are you ready? I can’t wait to try topping a mug of hot chocolate with a scoop of this stuff!
Full of sweet cream and minty winter freshness, this peppermint ice cream is the perfect way to polish off those candy canes. It is so good, I guarantee it will become a perennial favorite, holiday season or not.

| Peppermint Candy Cane Ice Cream |
#ratingval# from #reviews# reviews
|
Print
|
Recipe Type: Dessert
Author: Adapted from Jeni’s Splendid Ice Creams at Home by Jeni Britton Bauer
Prep time: 5 mins
Cook time: 25 mins
Total time: 30 mins
Serves: 1 quart
Don’t throw out those leftover candy canes after the holidays! Reinvent those candy canes into a fun frozen treat that the whole family will love!
- 2 cups whole milk
- 1 tablespoon plus 1 teaspoon cornstarch
- 1 1/2 ounces cream cheese, softened/room temperature
- 1/8 teaspoon fine sea salt
- 1 1/4 cup heavy cream
- 2/3 cups sugar
- 2 tablespoons light corn syrup
- 2 teaspoons peppermint extract
- 4 crushed candy canes (pulse in a food processor)
- IMPORTANT NOTE: 24 hours (or more) BEFORE you want to make the ice cream, make sure to wash the canister, dry it well, and place it in the coldest part of the freezer. Do not remove it until you are ready to pour the chilled ice cream mixture into it.
- In a small bowl, mix about 2 tablespoons of the milk with the cornstarch to make a smooth slurry.
- In a large bowl, add the salt and room-temperature cream cheese and whip until smooth.
- Make an ice bath (heavy on the ice) and set aside.
- Pour the cream, sugar, corn syrup, and remaining milk into a 4-quart saucepan. Bring to a rolling boil over medium-high heat, set a timer for precisely 4 minutes and boil for exactly 4 minutes—the timing is critical. Remove from the heat and gradually whisk in the cornstarch slurry. Return the mixture to a boil over medium-high heat and cook, stirring until the mixture is slightly thickened, about 1 minute. Remove from the heat.
- Gradually whisk the hot milk mixture into the cream cheese until smooth. Do this a little bit at a time so that you can whip out any lumps of cream cheese. Mix in the peppermint extract.
- Pour the mixture into a 1-gallon Ziploc freezer bag, seal, and submerge the bag in the ice bath. Let stand, adding more ice as necessary, until very cold, about 30 minutes.
- Set up your ice cream maker and pour the chilled base into the frozen canister. About 10 to 15 minutes into the churning process, sprinkle in half of the crushed candy canes. They will mostly dissolve, turning your ice cream a pretty pink color. The ice cream is finished when the machine isn’t freezing the ice cream anymore; the ice cream will begin to pull away cleanly from the sides (about 25 minutes).
- Eat right away, sprinkling the remaining candy cane bits on top of your scoop – there are few things better than freshly churned ice cream – or if you’re storing for later, press a piece of parchment paper directly against the surface and seal in an airtight, freezer-safe container. When you remove the ice cream from the freezer, let it sit and relax until it is scoopable. Once you’ve scooped it, be sure to return any remaining ice cream to the freezer. If the ice cream has melted too much at room temperature, refreezing it will result in an ice cream that is too icy.
2.2.1
Adapted from Jeni’s Splendid Ice Creams at Home, by Jeni Britton Bauer

I would like to say thank you to my fabulous guest blogger, Stephanie Hua, today for sharing this fantastic guest blog entry with our readers! You really must head right over to see Stephanie’s blog. I am SO darn proud of my friend because she is out there pursuing her dream to start culinary school and kicking butt at it already. Read about her first day at culinary school and visit Lick My Spoon for fresh takes on delicious & healthy dishes. She even has t-shirts!! I wear mine proudly and my husband can attest that this is one of my favorite shirts to wear!
Now hurry over to her blog!

Stephanie Hua is the creator of Lick My Spoon, a place for all things delicious. So far she has learned that she very much enjoys salted caramel anything, a good soup dumpling is worth a scalded tongue, and a barrel of cheese balls never ends well. Follow her on Facebook and @lickmyspoon.
Pin It