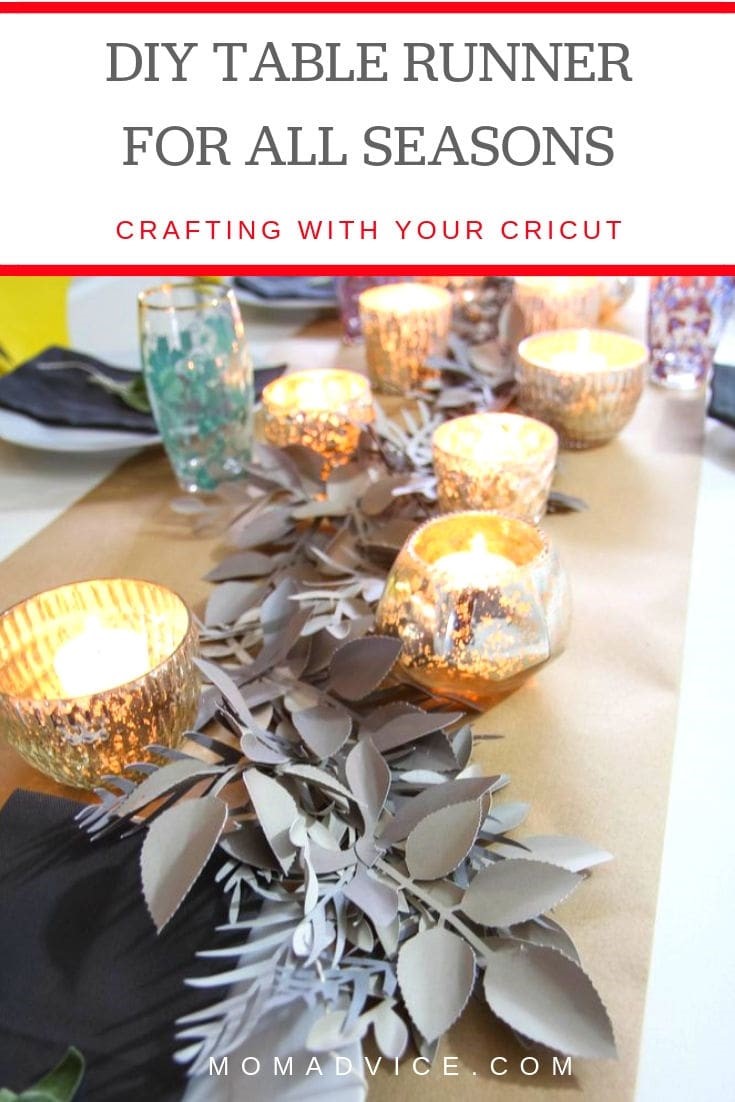
Transform your table with this easy DIY table runner that you can use for any occasion. Who knew cardstock could look so beautiful?
Today’s tutorial is for a diy table runner made from humble cardstock, glue, and twine. As a minimalist, I’m a big fan of any decorations that can be used for multiple seasons and I fully admit that I am REALLY proud when I craft something that is so very uniquely me.
As you guys know, I have really been on the struggle bus with my hand pain and I started thinking how I might need to start broadening my horizons with my crafting. It has been a dream of mine to own a Cricut so, after doing a ridiculous amount of research and price investigation, I settled on a Cricut Explore Air as the best option for what I needed.
Please note, they do offer a brand new Cricut Explore Air 2, but the price difference is $70 and the only real difference is that it can cut faster.
I can wait a few extra minutes if I can save $70!
Today’s craft is a great way to break in your Cricut since paper crafting is so darn affordable.
Before we begin, I decided to get a Cricut Access membership (I’m on the $7.99 monthly plan) so I could have unlimited access to patterns and get the discounts for the holidays. You can also pay individually for patterns, but so far the cost has been worth it for gift-making.
Do what makes sense for you and your budget though!
How to DIY a Paper Leaf Table Runner
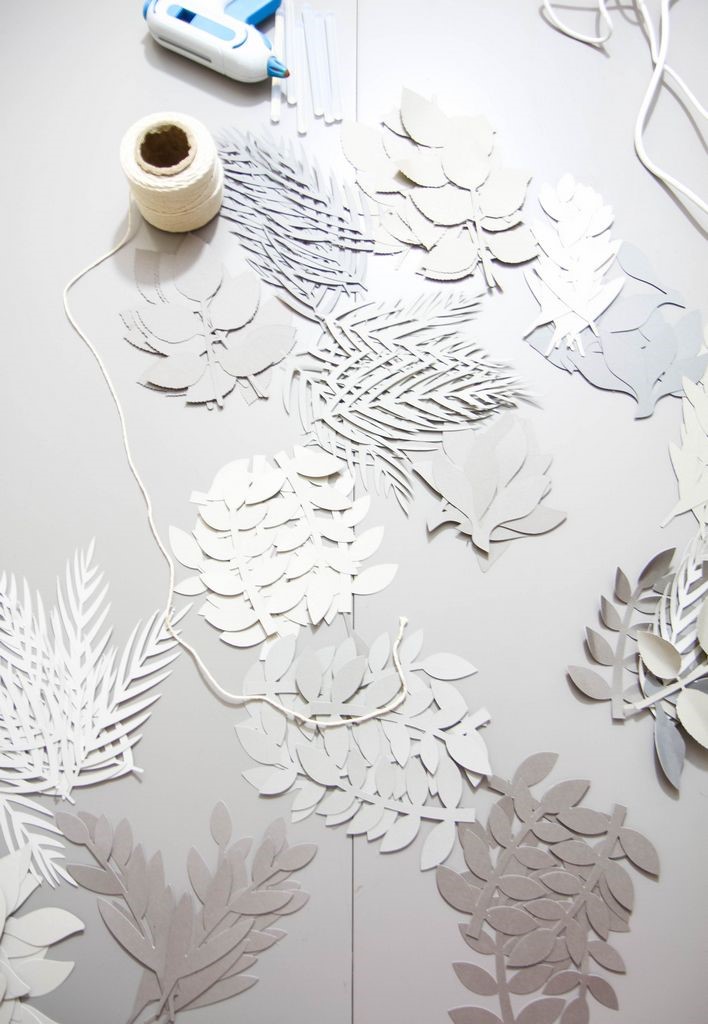
Supplies
12-15 sheets Gray Cardstock (I used 4 different shades of gray)
Hopeless Romantic Garland Pattern– you will need to create a Cricut profile to access this
Hot Glue Gun (this is the one I use and love)
Glue Sticks
Cotton Twine
A pencil, pen, or end of a small paint brush for shaping your petals
Cricut
Cricut 12×12 Standard Grip Adhesive Cutting Mats
Kraft Paper (I bought this roll and use it for wrapping our gifts too)- this is optional, but helps the garland stand out!
Tutorial
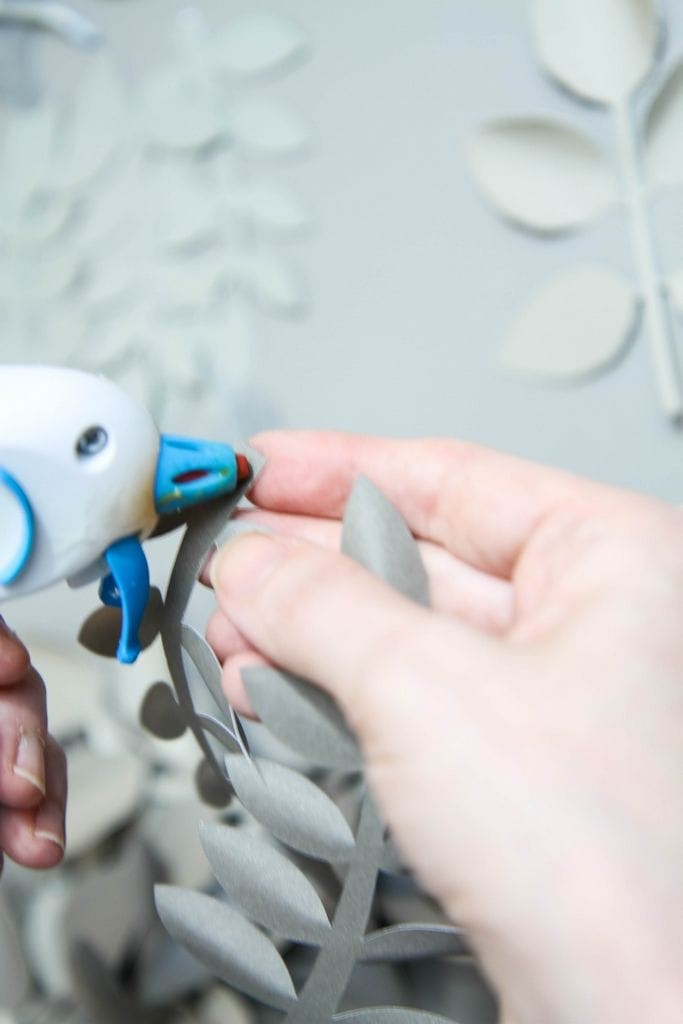
Following the pattern listed above, begin by cutting all of the leaves for this project using a different shade of gray each time you load it.
Make sure that the dial on your Cricut is set to CARDSTOCK and make sure that the blade you have loaded is the FINE-POINT BLADE.
If you have not cut cardstock before, here is a tutorial and here is also a tutorial to switching your blade (if you haven’t done that before).

Begin by creating a gathering of four to five leaves that will look good layered together.
To make this look more natural, try to avoid making each of these gatherings identical and make sure to weave in those different subtle hues that you have cut.
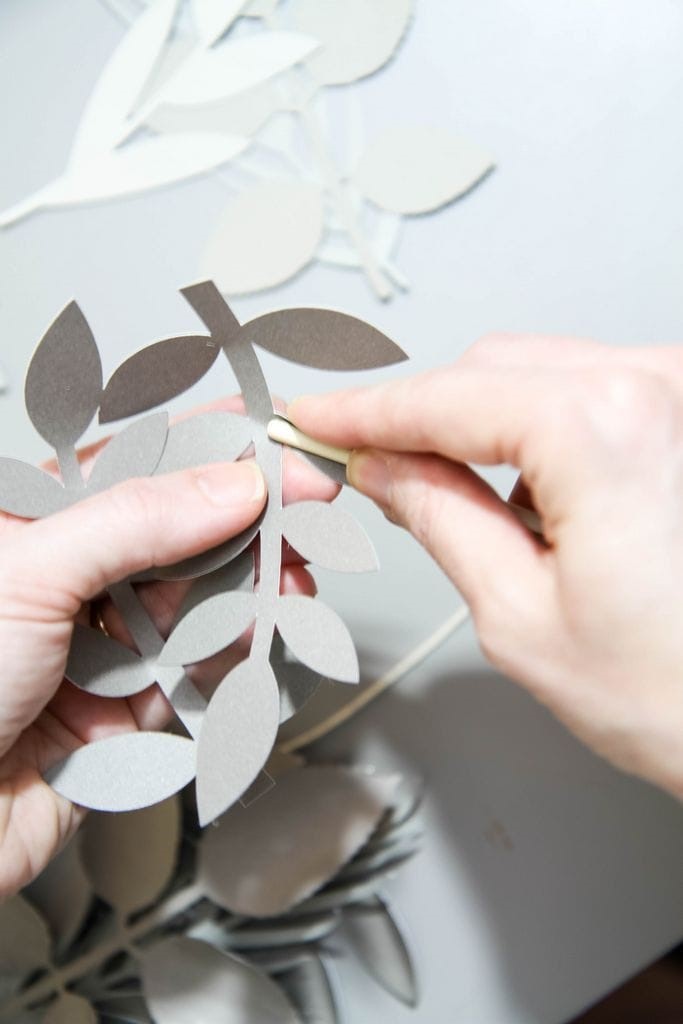
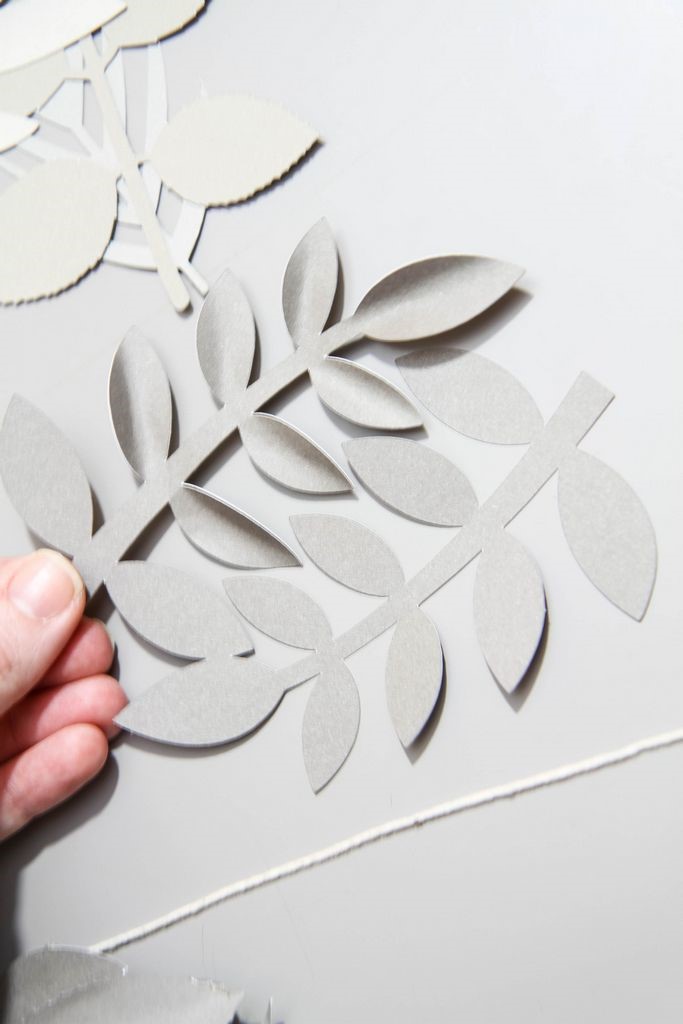
Using the end of a pencil, end of a paintbrush, or scissors, gently begin curling these petals to add depth and shape.
If you have not curled paper before, I found this advice very helpful (and her patterns are just gorgeous too!).
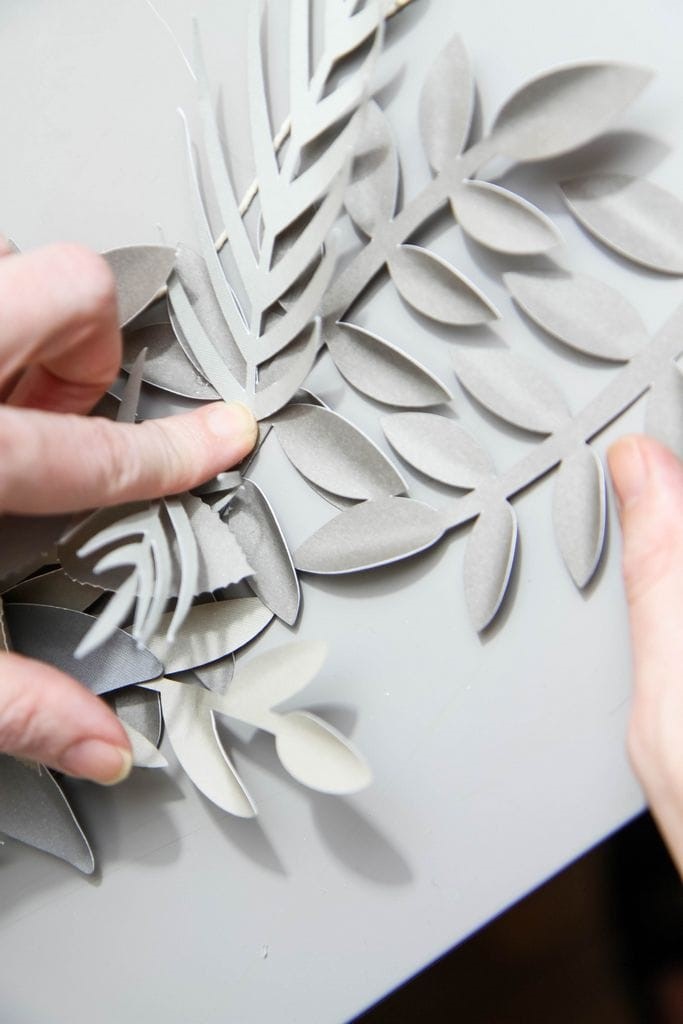
Now we can begin gluing our stack together. Keep in mind how you had them originally stacked and replicate that.
You will also want to figure out how you want these to trail and be linked together. Once again, avoid your perfectionistic nature and don’t be afraid to have these going in different directions. If it looks too matchy-matchy, it won’t have a natural feel.
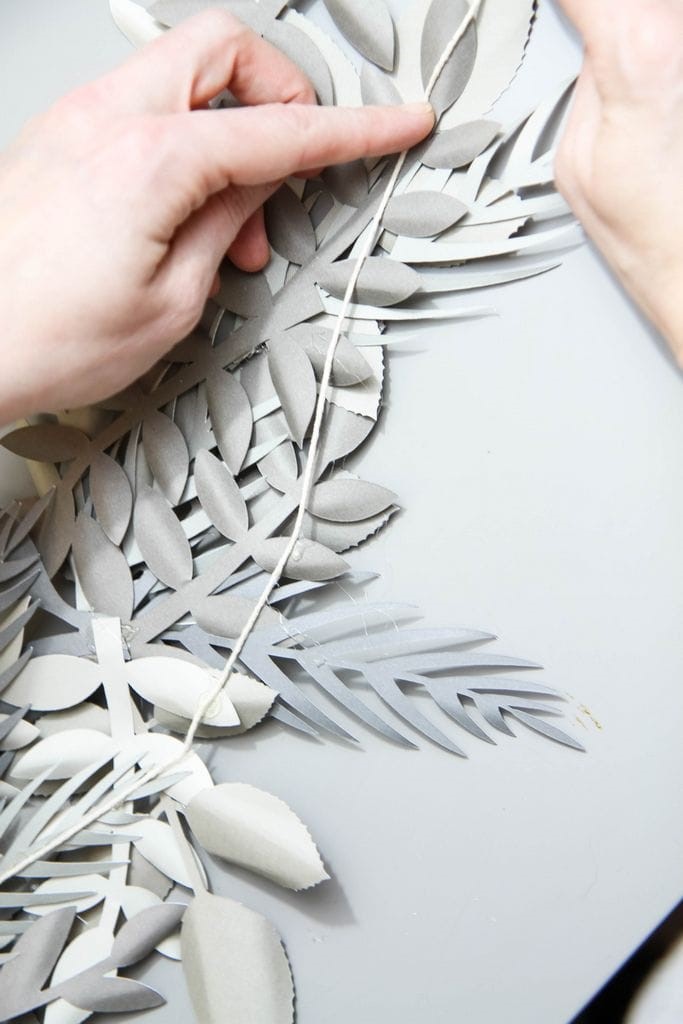
Along the back, you will then add a thin line of hot glue and attach your twine to help hold the garland together and that can also act as a tool for hanging, if you decide this one is better suited to your mantle or bar.
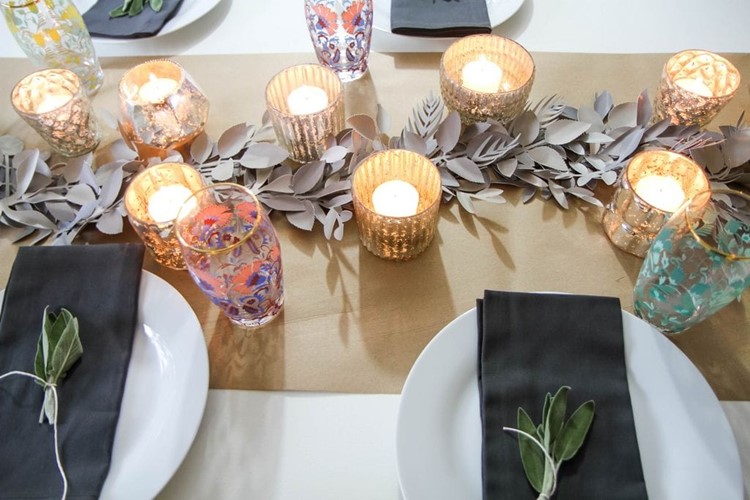
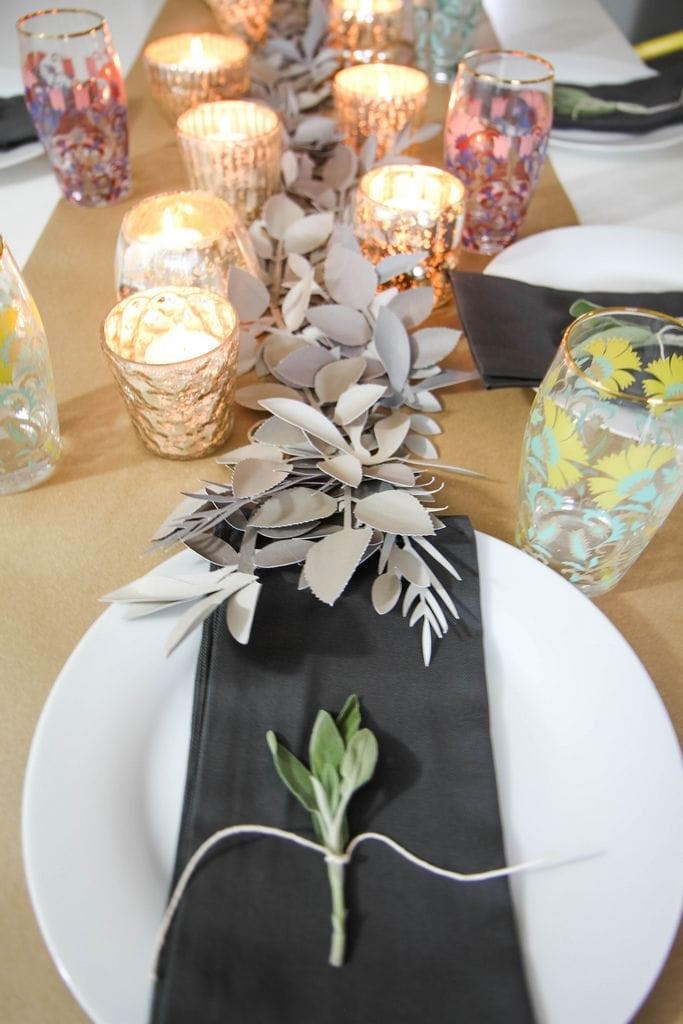
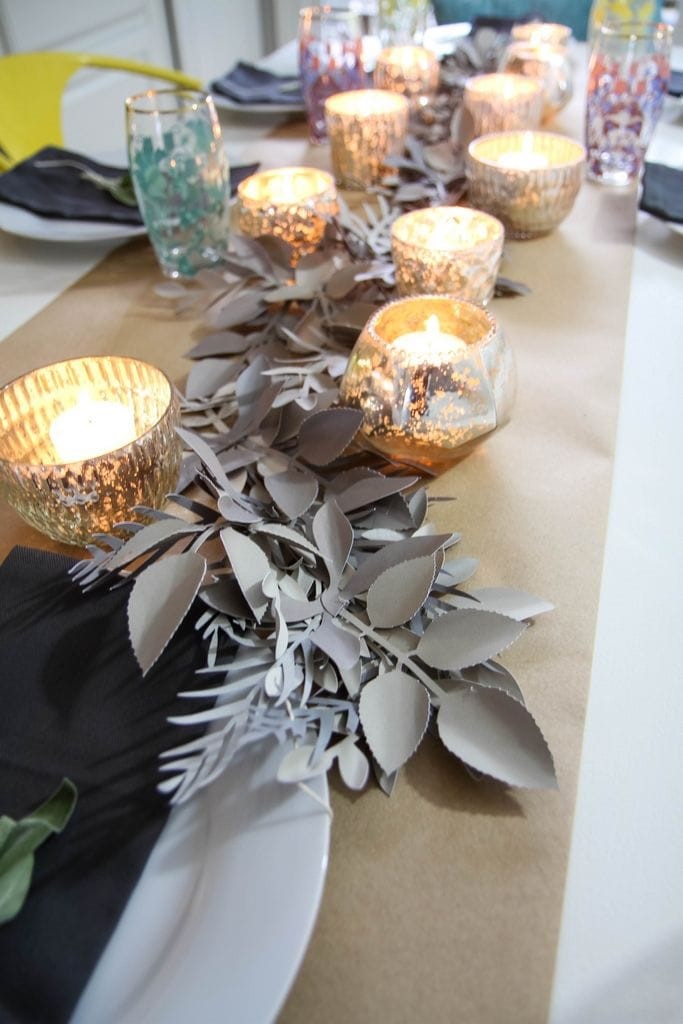
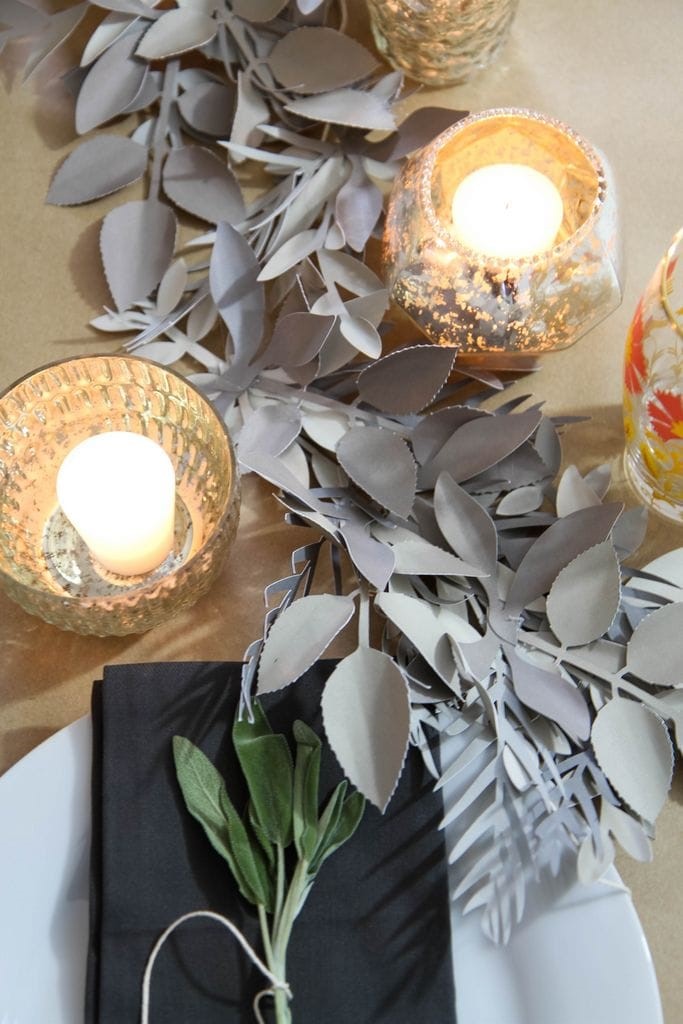
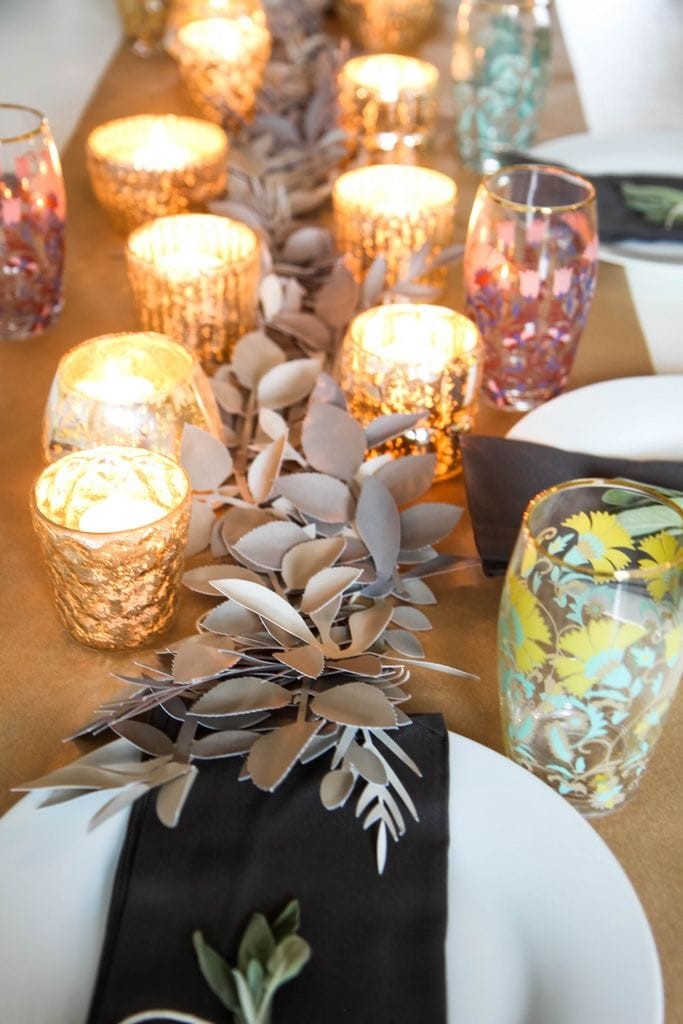
You can see the layer of brown paper has been laid underneath it. To add a little more dimension to this table, I added two sets of these inexpensive votive candle holder sets (I’m pointing you in the general direction so you can pick out your favorite finish). You can get them in a variety of shades and I love that these sit low so you don’t have to try to talk around a tall arrangement.
Here are just a few other details on this table, in case you were interested in replicating this further.
I tied tiny bundles of sage to nestle on top of our cloth napkins with a little more of the cotton twine. It added a natural element to the tablescape which felt really necessary with the paper display. It also smelled divine which is always a wonderful bonus.
I have had a hard time finding cloth napkins that wash really well, but can’t recommend these beauties enough. I picked a dark gray to eliminate needing to bleach out stains, but they come in a zillion colors that can match your own table runner.
The dishes were such a steal and came with such thoughtful storage racks. I am in love with how everything nests together so well especially these bowls which are the perfect size.
I found the glasses on clearance and can’t tell you how beautiful they are. I have been dying to have some ornate glasses for our fancier occasions. Of course, these already sold out (boooo!!!), but here and here and here are a few gorgeous options.
Once again, thankful for this smart tool I bought for our water bottles because it gets things clean, but doesn’t scratch the pattern or gold rim on these.
I hope this spread inspires you to embrace decorations you can use for all the seasons.
I’m also excited to share with you about the Friendsgiving gathering I had to make use of this lovely display. Stay tuned for all the details on that!
Looking for some more great craft ideas? Check these out!
Happy crafting, friends!
This post contains affiliate links.