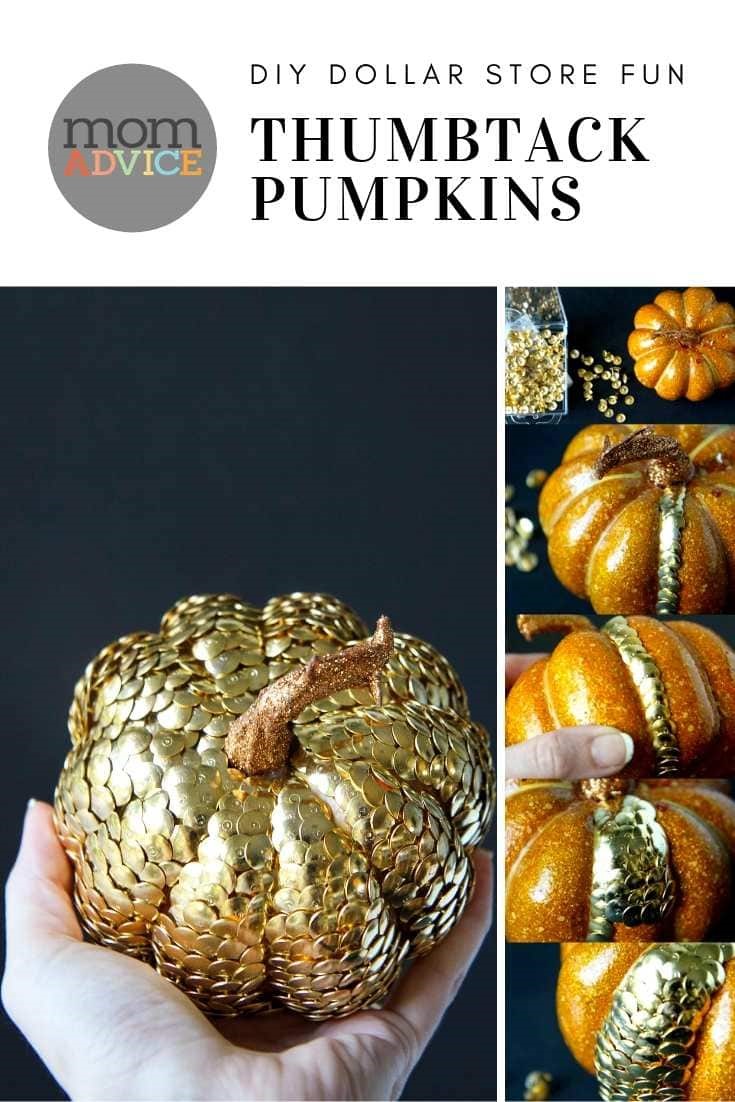
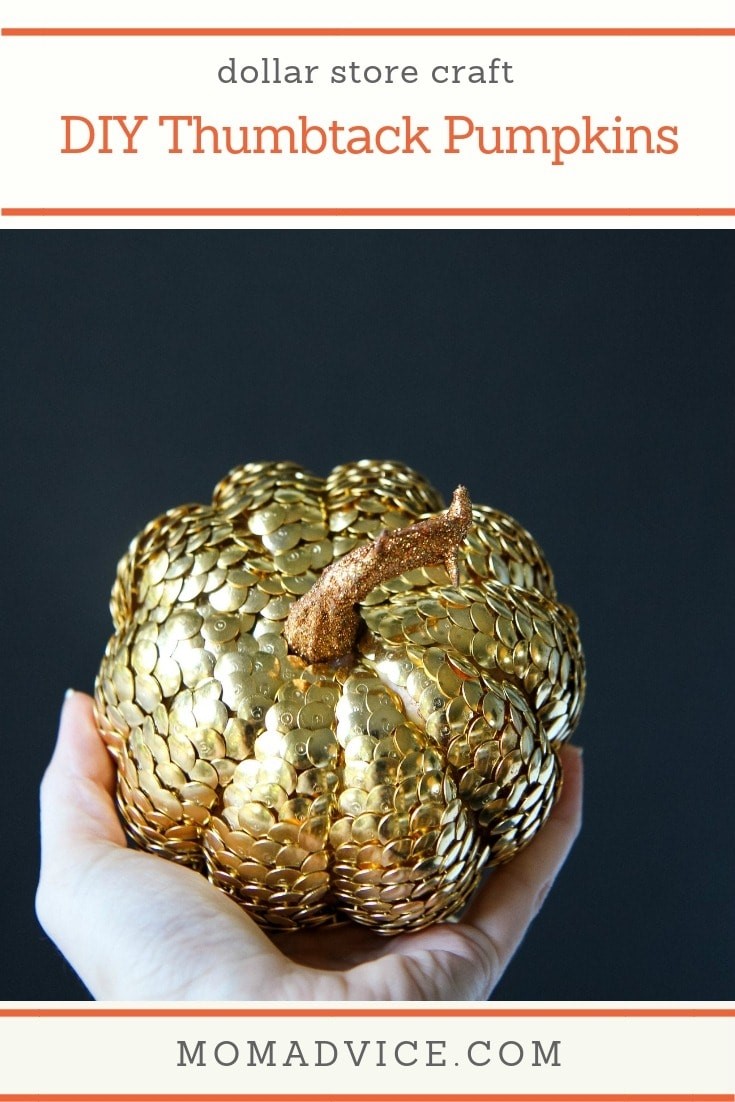
These gold pumpkins are the perfect craft for autumn, even if you aren’t crafty. You will love these DIY Thumbtack Pumpkins for your home!
I don’t know about you, but I am always looking for new ways to decorate the holiday table that are festive while staying easy on the budget. The gold trend has really been catching my eye this year so I wanted to create something beautiful and gold that anyone can do, no matter what your craft level.
Today’s tutorial is for a decorative thumbtack pumpkin that requires just two items for a fun and festive touch to your table.
DIY Thumbtack Pumpkins Tutorial
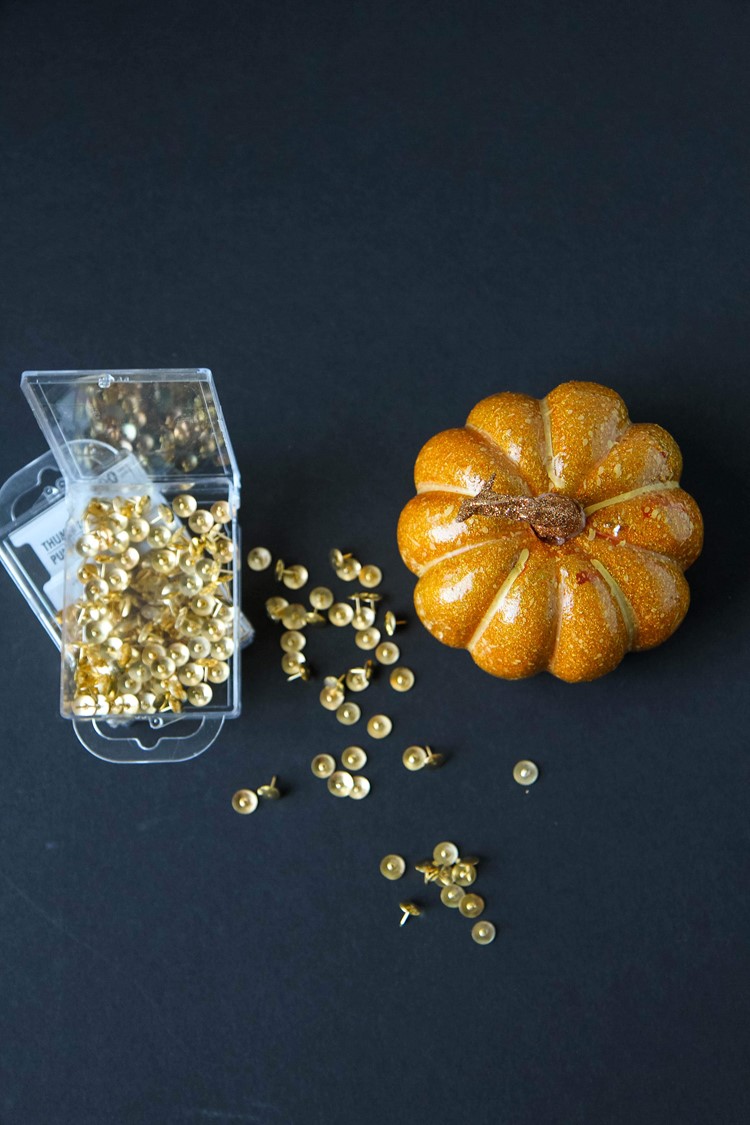
Supplies Needed
700 (or more!) gold or silver thumbtacks– these can be purchased in a package of 300 at your local dollar store
Small Faux Styrofoam Pumpkin (look for one with a fun stem detail like the glittered stem on this one)
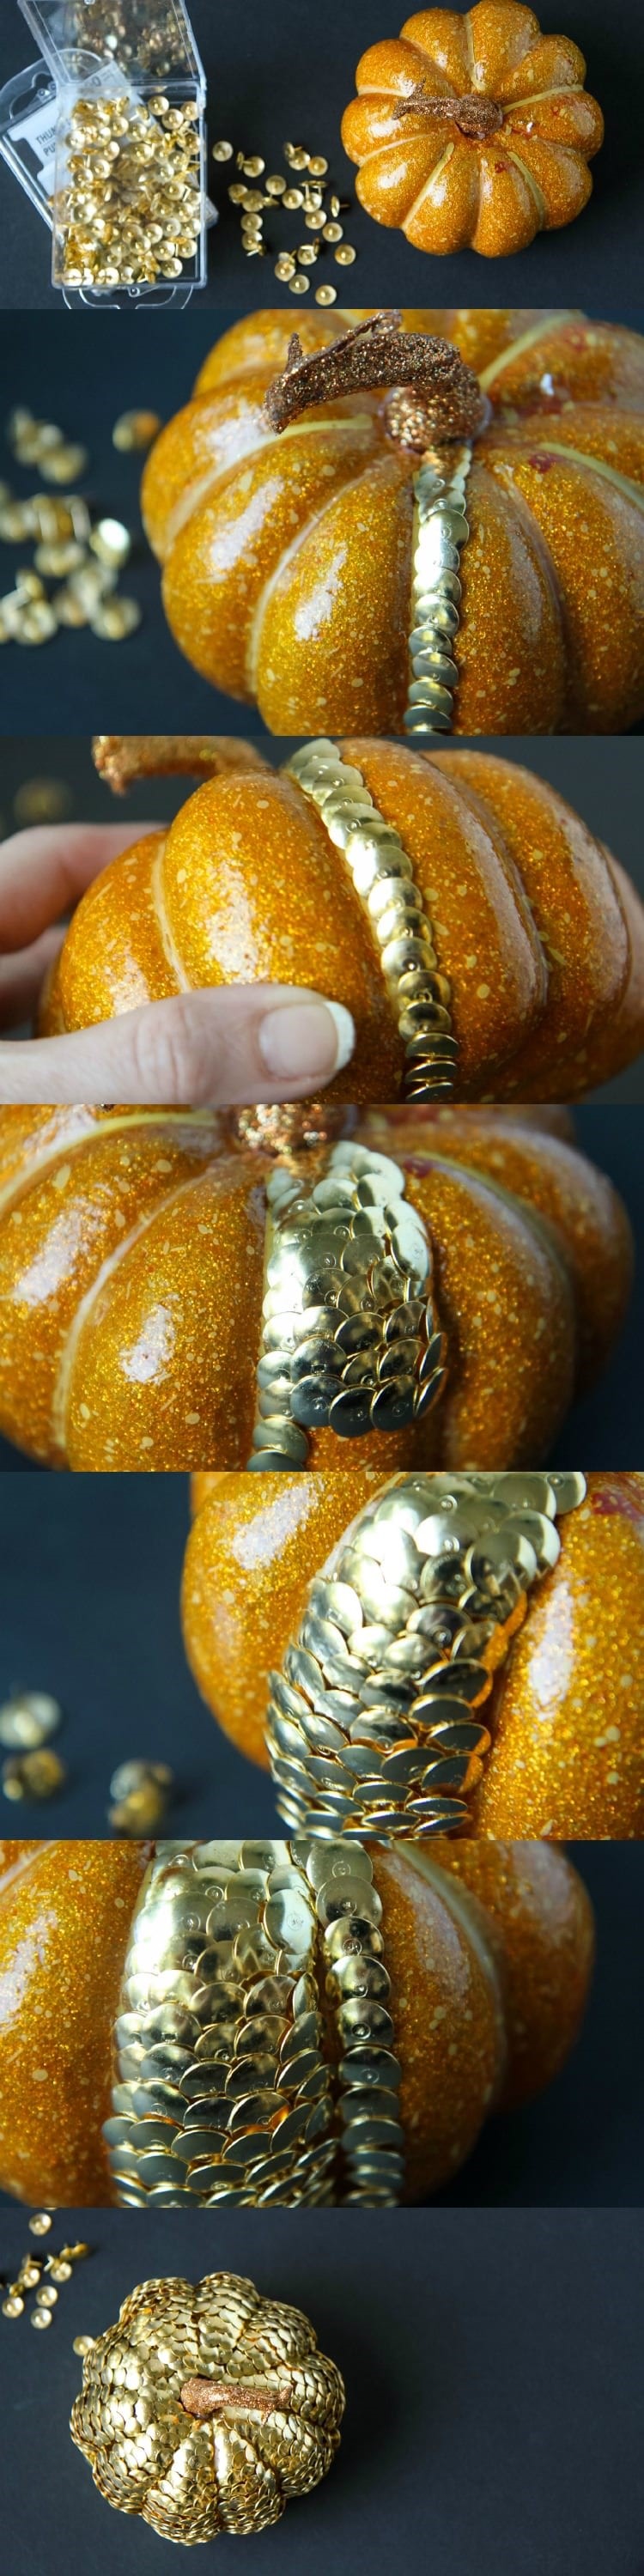
Directions
- Going along one of the ridges of the pumpkin, begin inserting thumbtacks, starting at the very top and working your way down. You will want to make sure that they overlap just a bit to create a feathered effect on your pumpkin. You do not need to go to the very bottom, just enough to cover it so that if the pumpkin is placed on a pedestal or candlestick holder that you can’t see the plastic bottom. This row helps to anchor your ridge as you place the thumbtacks in.
- Right next to that row, again overlapping from the side and down the row, begin placing thumbtacks in the same way, repeating this process until you have covered the entire ridge. Once the ridge is filled, just check and make sure there aren’t any holes in any places and fill, as necessary, with additional thumbtacks.
- Begin in the next ridge, just as you did with the first, giving just a little room between those ridges so you can still see that pumpkin shape. Now repeat this process again and again, until you have filled the entire pumpkin. This small pumpkin took 700 thumbtacks, but you may need more or less depending on how tightly you are overlapping your thumbtacks.
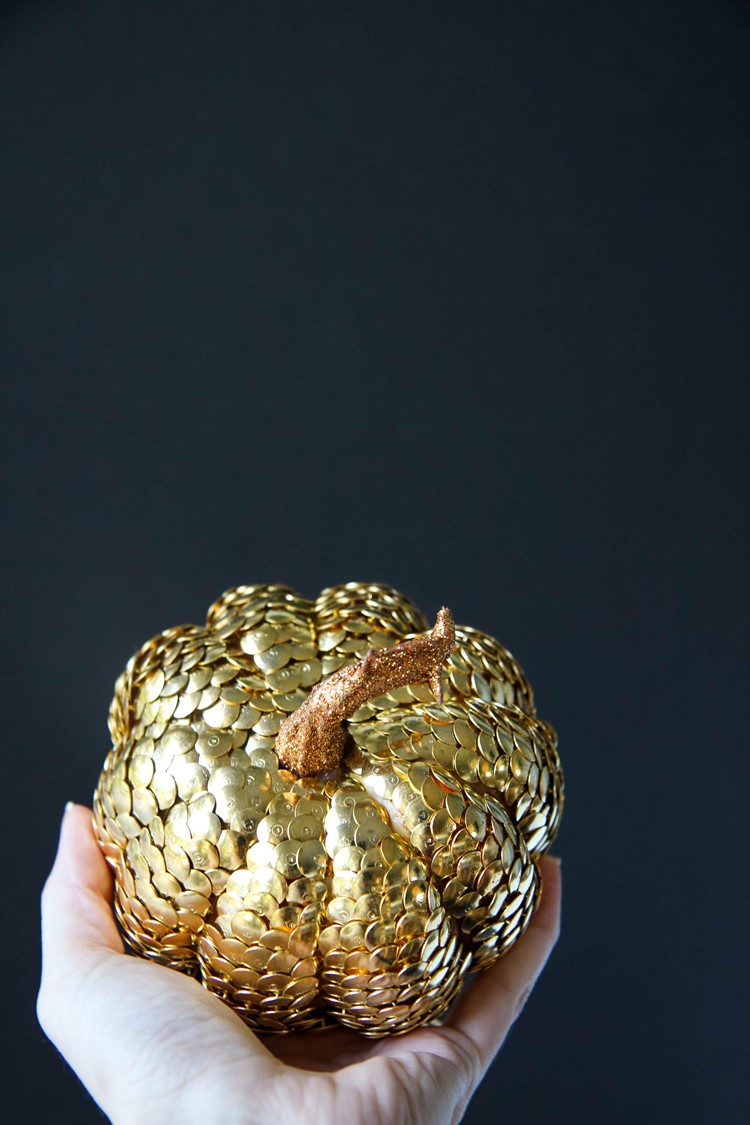
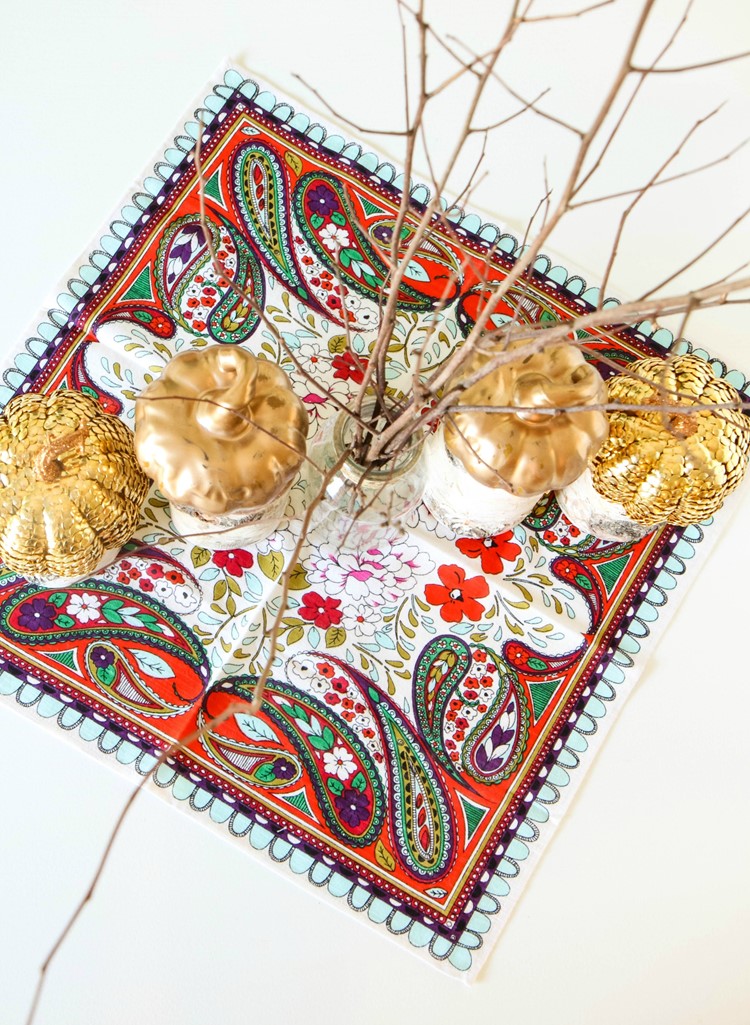
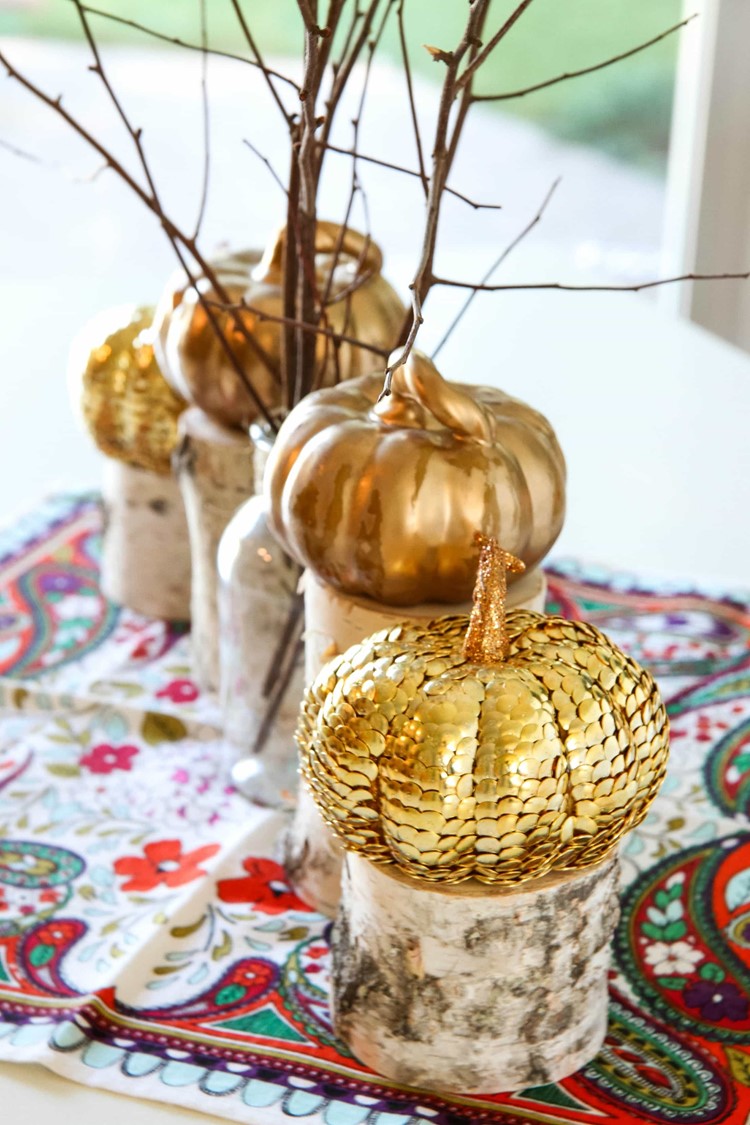
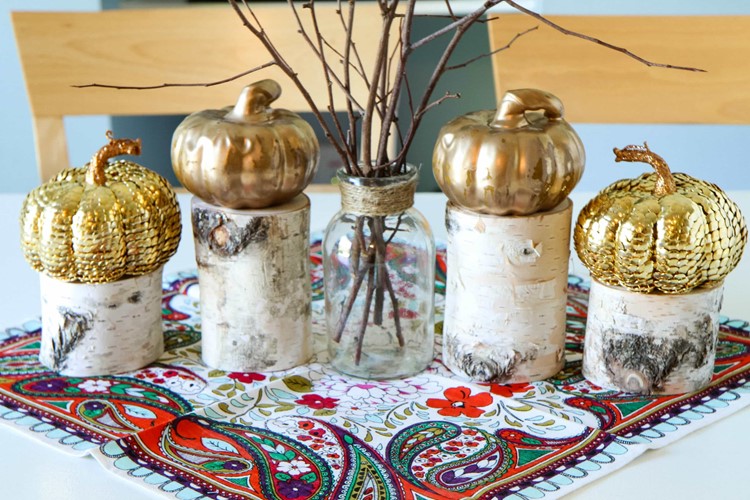
Isn’t this absolutely beautiful? Who would ever have guessed that it costs around $5 to make! I made two of them and wanted to show you a fun way to dress up your holiday table with these.
I spray painted two other faux pumpkins and then roughed them up with a little sandpaper. I filled a glass bottle with branches from our backyard to center these and then purchased these faux logs from my local craft store in two different heights to place my gold pumpkins on. I love all the variations on height and the different textures in this budget-friendly centerpiece.
I hope you find this idea easy and inspiring! Use your own creativity to create a few beautiful pumpkins of your own.
Speaking of autumn crafts…here are a few tutorials you might enjoy!
This post contains affiliate links!
Pin It