This post is sponsored by Airheads. Thank you for supporting the companies that support us!
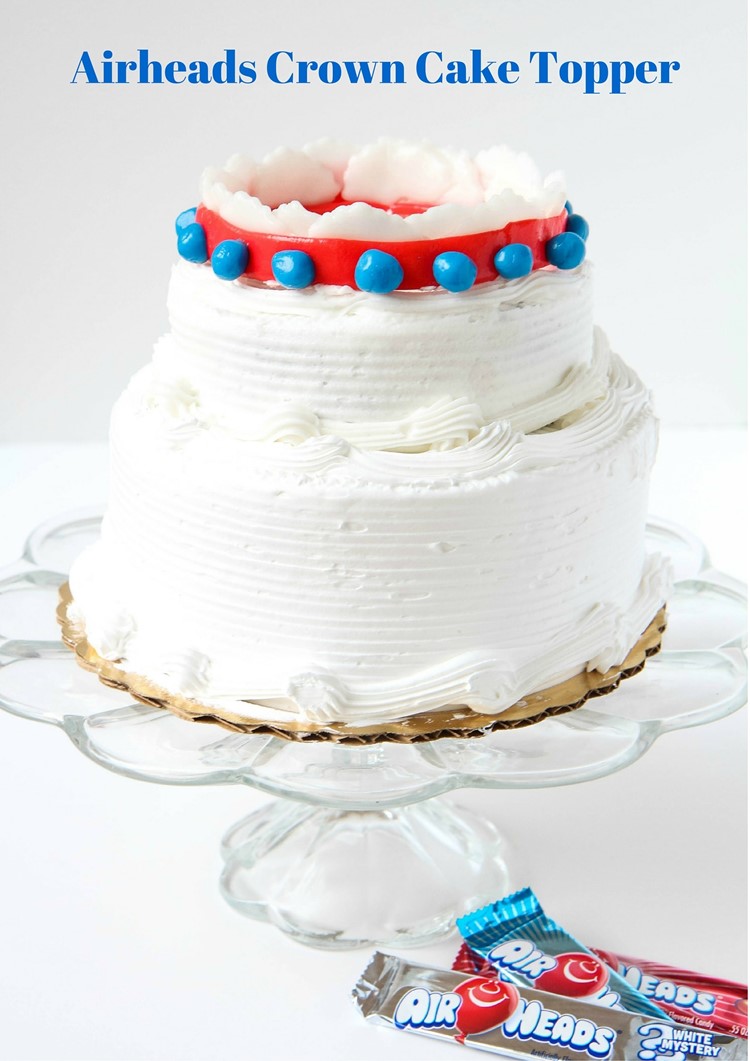
Are you a skilled decorator of cakes? I wish I was, but I am not! I have never been good with fondant decorating and have always found the flavor lacking. Thankfully, there is a delicious substitute lurking in the candy aisle that you can mold & shape into whatever your heart’s desire is. Did you know Airheads candy can add that decorative touch to your cake decorating in just a few easy steps?
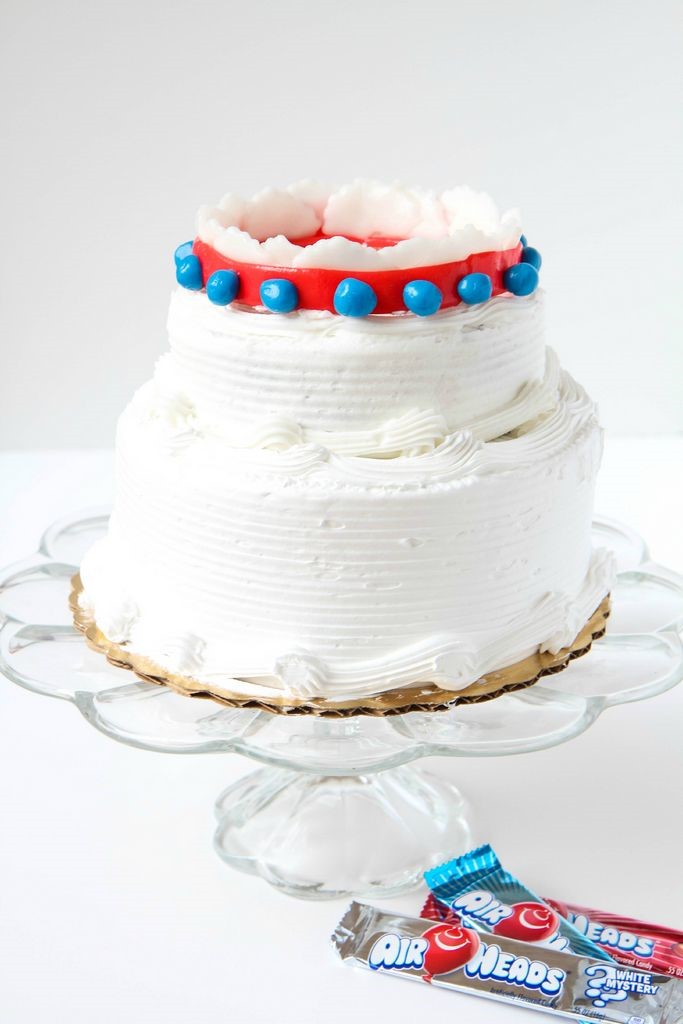
Today’s tutorial shows you how to transform Airheads into the perfect crown cake topper in just 5 easy steps. Wouldn’t this be a great princess cake? The best part is that, unlike fondant, it tastes sweet and delicious and will be a crown worth fighting for when those slices are dished up. For those with food allergies, it is also peanut and gluten-free! Yay!
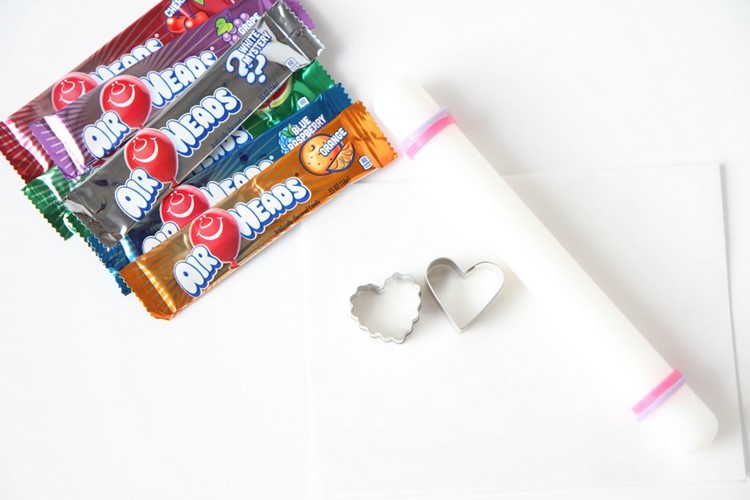
Supplies Needed:
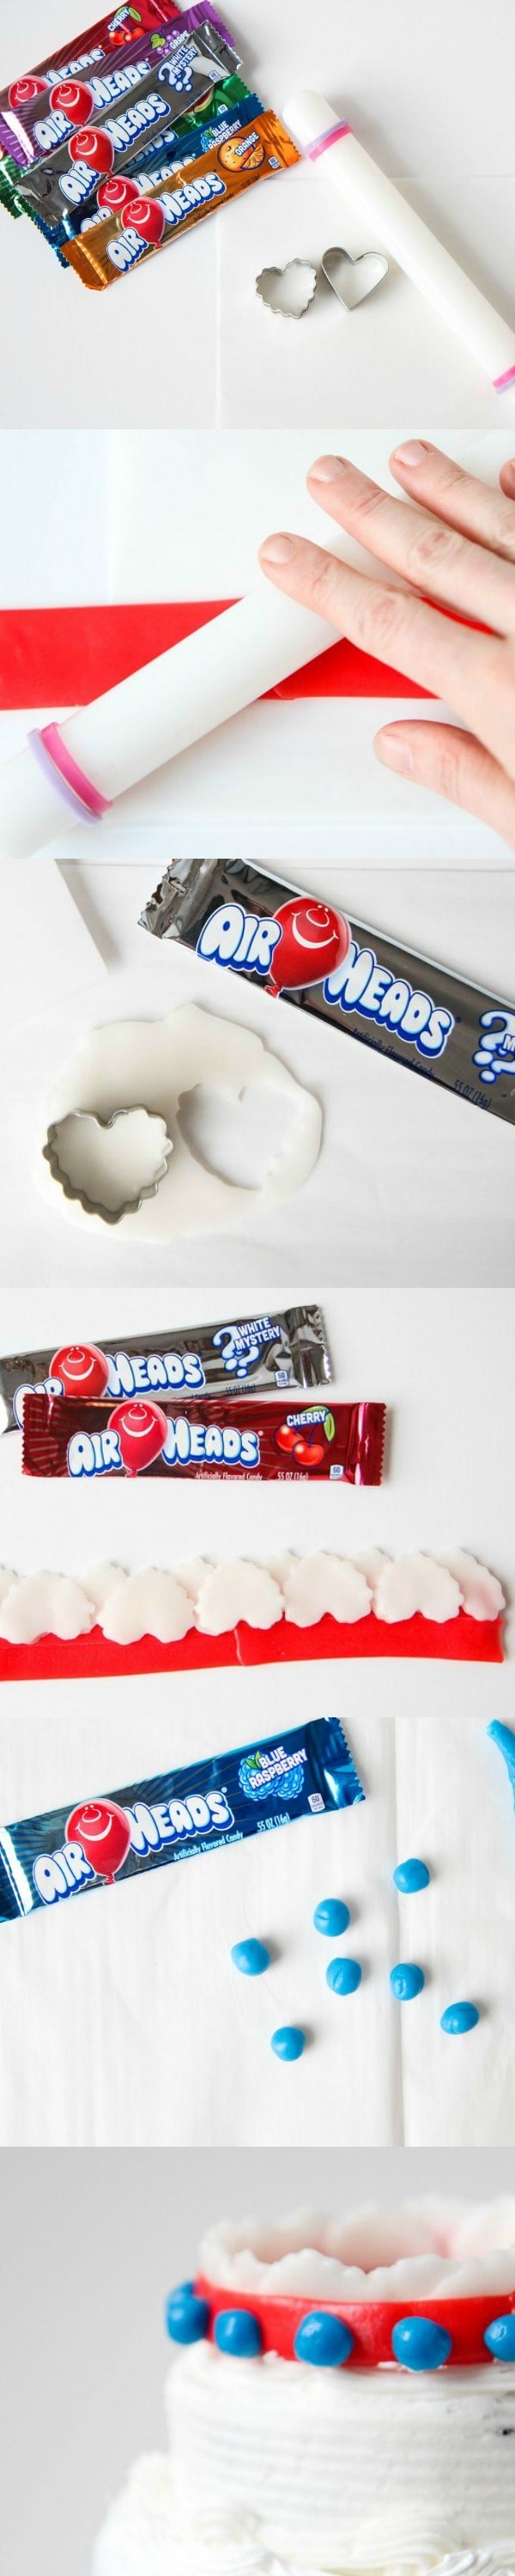
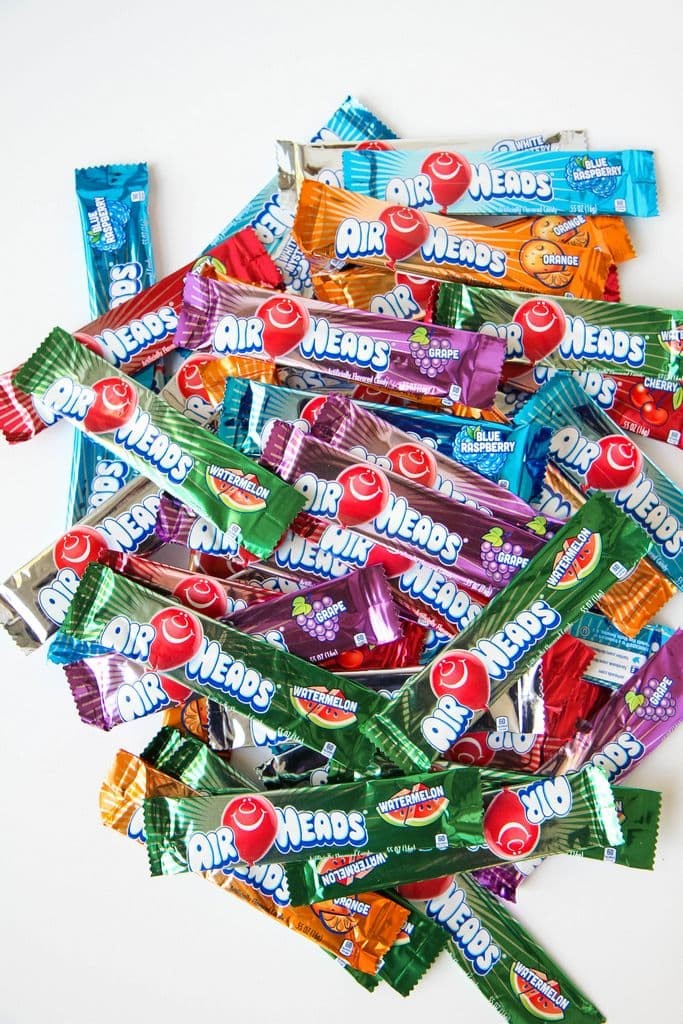
Airheads (I used Blue Raspberry, Cherry, & White Mystery for my crown)
Mini cookie cutters- metal or plastic, I used a heart with a jagged edging
Parchment Paper
Fondant Roller
Cake (we picked ours up in the bakery section of our supermarket)
Directions
- Pull out 3 cherry Airheads and line them up in one long line, slightly overlapping the edges. Place these between two sheets of parchment paper and roll with a fondant roller to smooth out your seams. Don’t worry if it isn’t perfect because we will be adding a dot detail to camouflage any flaws on the crown. Set aside.
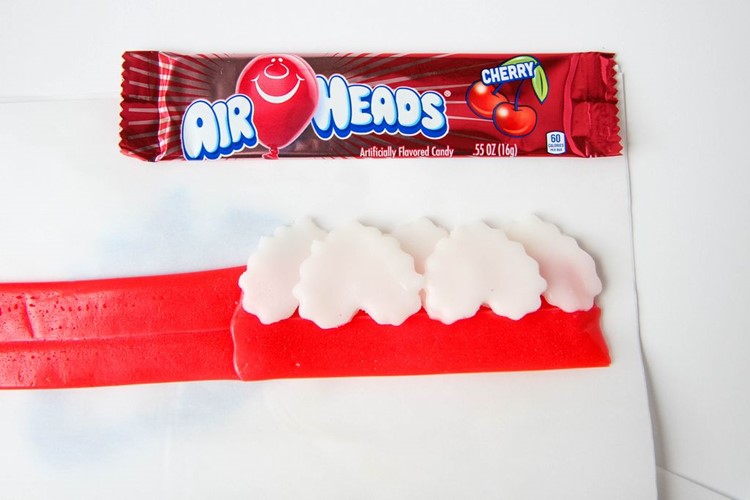
- Microwave a white mystery Airheads for 3-5 seconds and then roll them out between two sheets of parchment paper. Using a mini heart shaped cookie cutter, press the cookie cutter firmly into the white mystery Airheads and pull up. Push the heart shape out gently and then place it upside down (with your heart tip pointing up) to create your crown points. Do this all the way around, layering one heart between two hearts as pictured. Feel free to microwave and re-roll the Airheads to get as many hearts as you can out of each one. Press these firmly into the crown and continue layering until you get to the end.
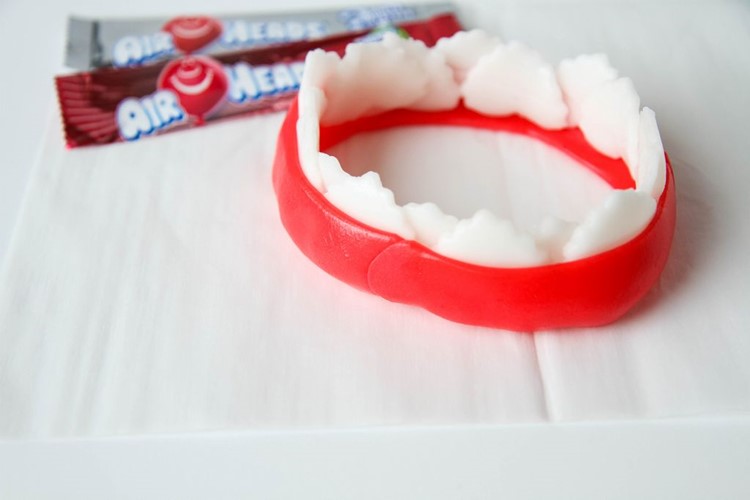
- Bring one end of the crown, to the other to create your shape. Using your fingers, gently rub the seam in a bit to create a smooth finish. Set your crown aside.
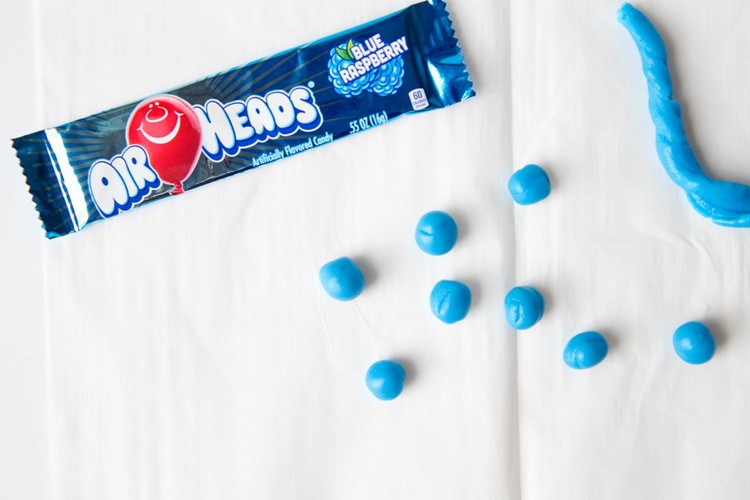
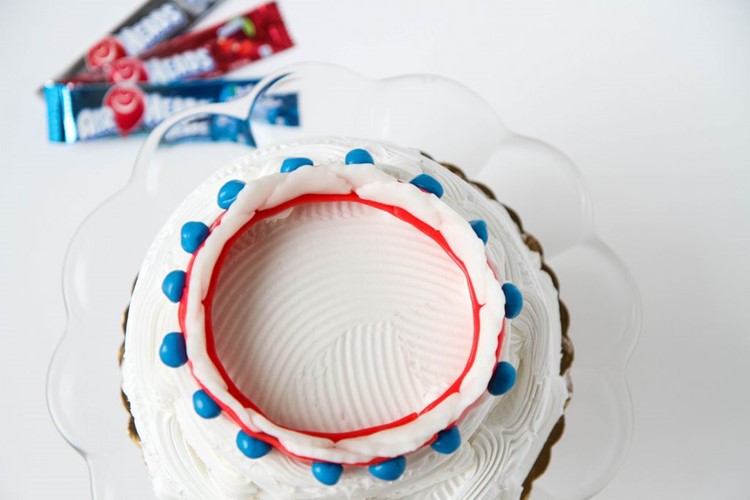
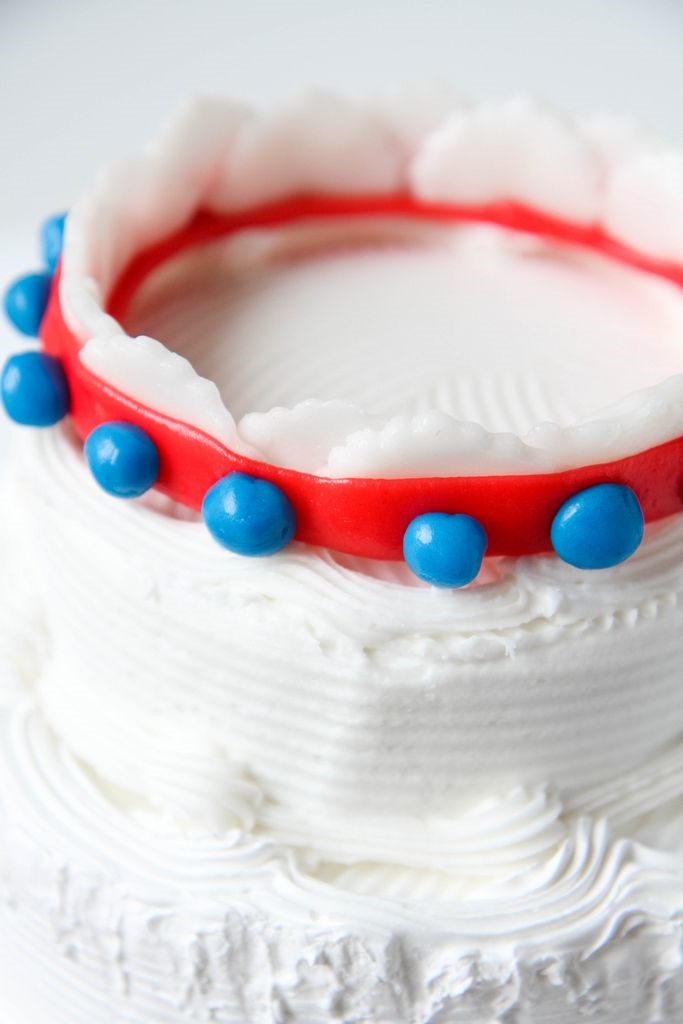
- Grab your Blue Raspberry Airheads and pull off small sections of the candy and roll between your hands until you have created a dot shape. Take the dot and press firmly into the crown, spacing it as evenly as possible to add a decorative detail to finish.

- Place the crown in the refrigerator until it is time for your cake so it can harden up a bit and to help it keep its shape. Once it is cake time, remove from the fridge and rest it on the top of your cake. How easy is that?
This post is sponsored by Airheads. Thank you for supporting the companies that support us!
Pin It