Archive for the ‘Sides’ Category

Baked Sweet Potato Fries With Lemon Meringue Dipping Sauce

Tuesday, May 22nd, 2018

Sweet Potato Fries With Lemon Meringue Dipping Sauce from MomAdvice.com

This post is sponsored by Honeysuckle White. All thoughts and opinions are my own!

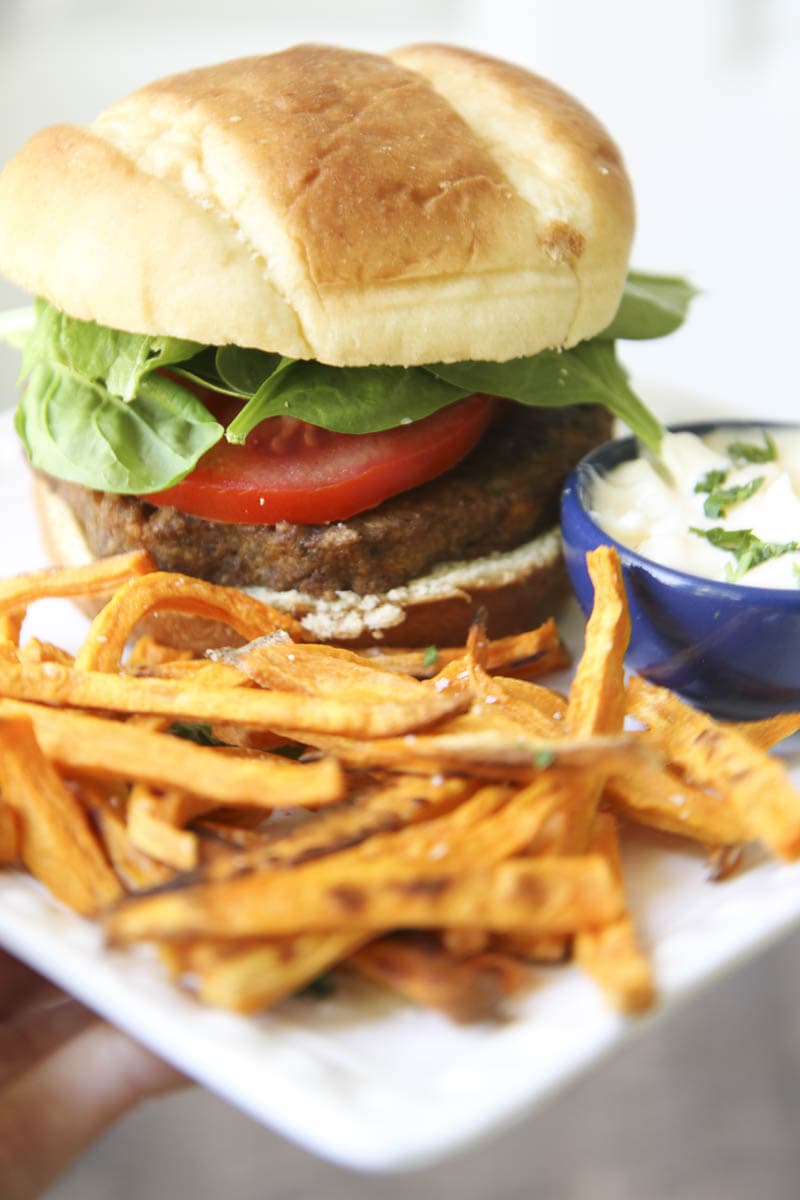
If you want to switch up your burger and fries game, today’s post is one you can’t miss, especially with a weekend of holiday grilling on the horizon.  Today I’m partnering with Honeysuckle White to share their fun new burger combos AND I have a fun baked sweet potato fries recipe with a lemon-filled dipping sauce that I know you will flip for.

Honeysuckle White Turkey Burger Flavors

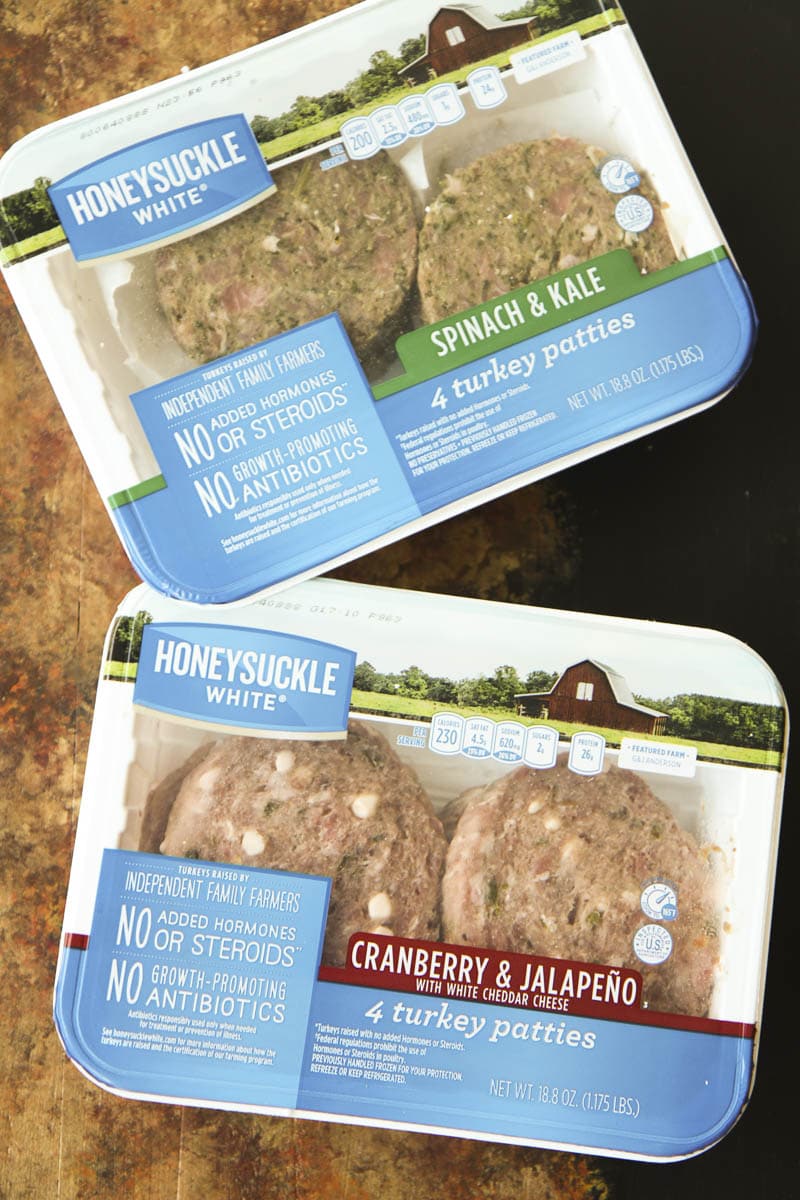
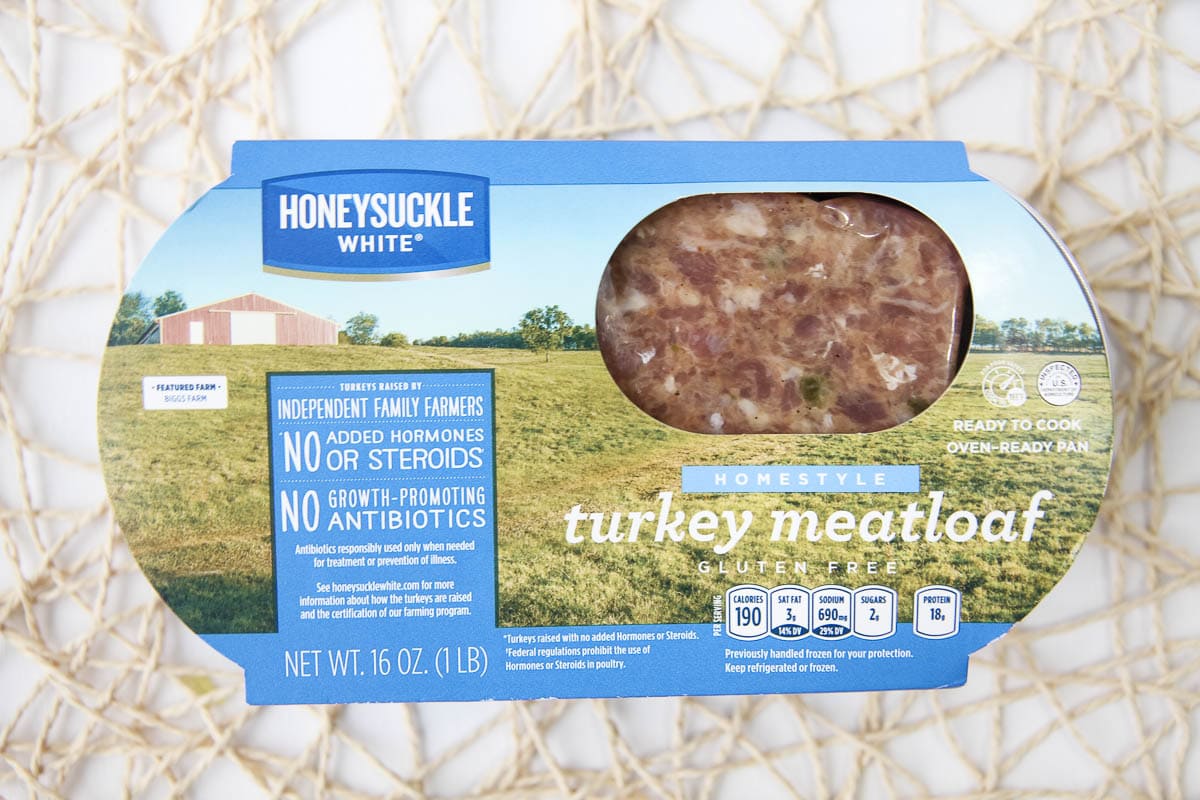
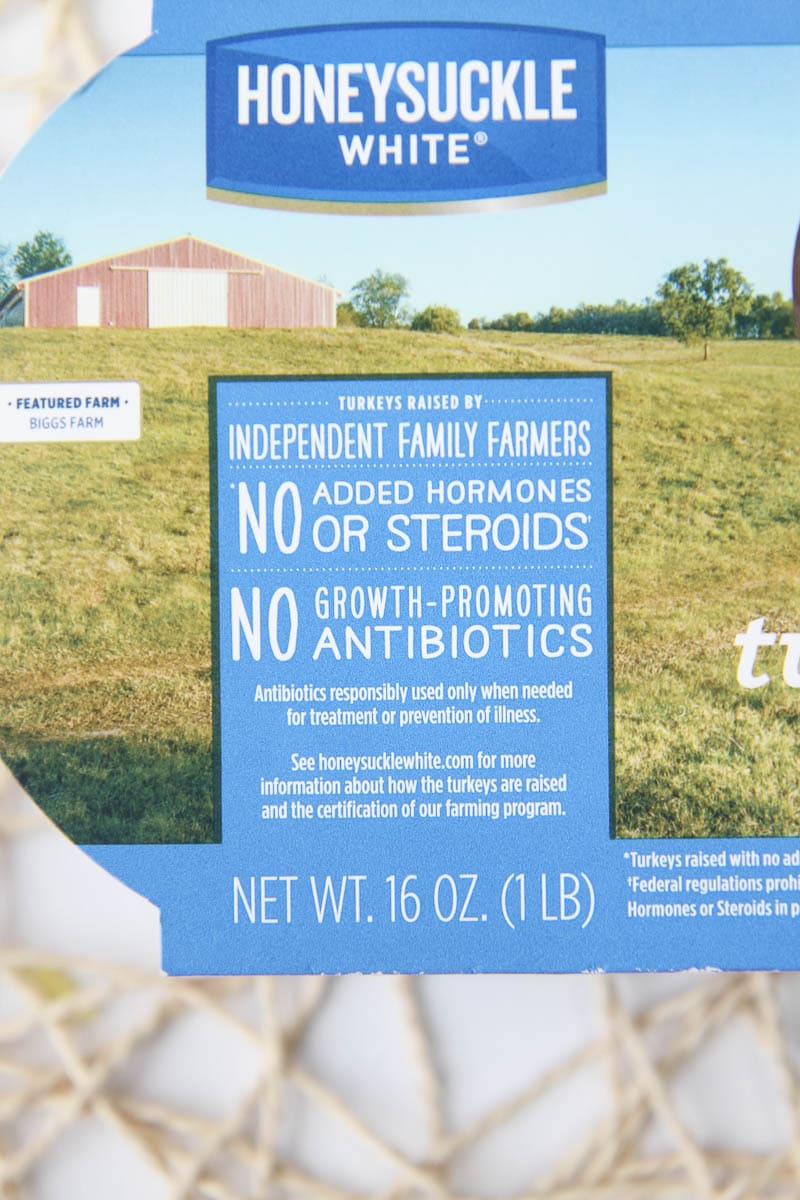
Honeysuckle White is now offering two fun and flavorful new turkey burger combos that are already prepared and ready to be thrown on your grill.  Our family sampled them both and absolutely fell in love with them.

The first one is a Cranberry & Jalapeño that offers a fun combo of sweet and spicy that seem to really balance each other. They have kick to them, but a kick that was mild enough to be called a favorite by my daughter.  The white cheddar cheese sprinkled throughout add a little bit of unexpected creaminess to the patty and helps cut down on the spicy factor.

Honeysuckle White Turkey Burgers

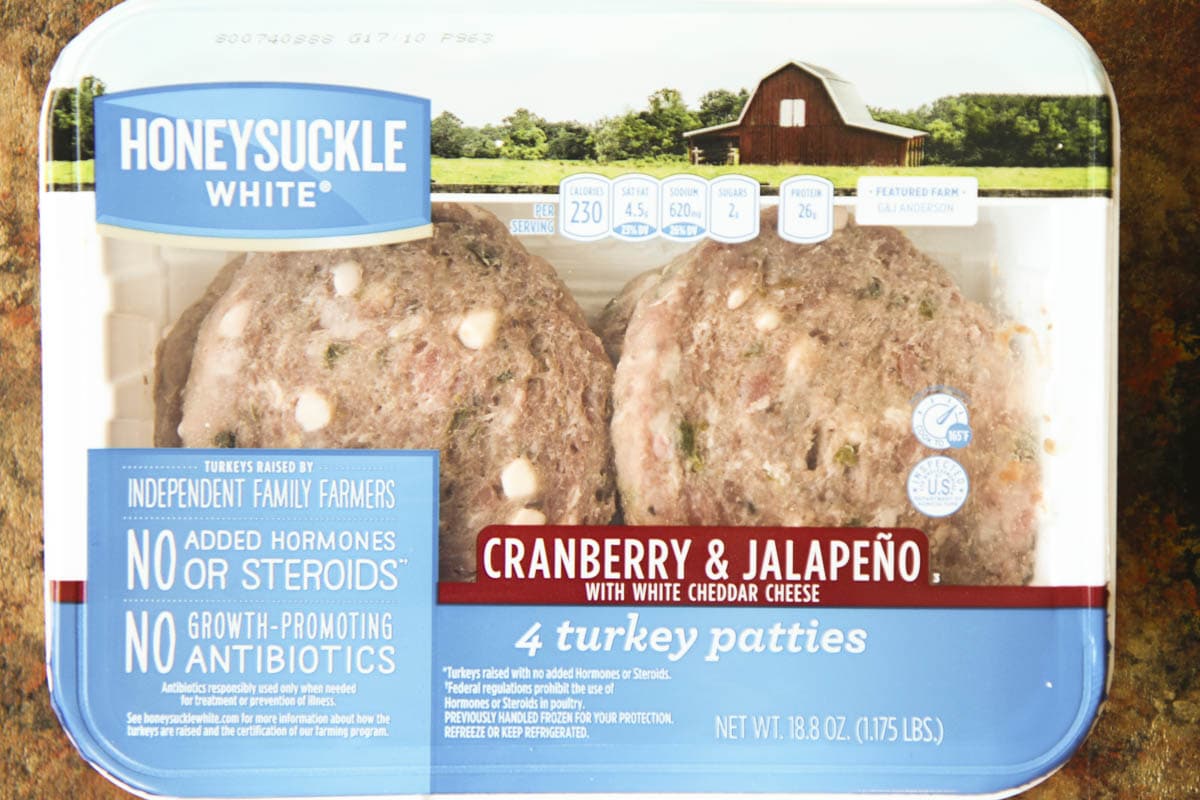
Here is a close-up shot of all that cheese for you- YUM!

The other combo they offer are their Spinach & Kale turkey patties and these also pack another fun flavorful punch, with the greens folded right into the patty. If you struggle to get your kids to eat their veggies, this is the perfect patty for them. Pairing it with today’s sweet potato fries recipe (see below), you are sure to get a couple of servings in your child without them even noticing just how healthy they are eating.

Definitely, swing by your store and pick some of these delicious patties up for your next grilling weekend! I think they would be a fun surprise for your guests and Honeysuckle White has done all the work for you in the preparation of these delicious ingredient combos.

Baked Sweet Potato Fries with Lemon Meringue Sauce from MomAdvice.com

baked-sweet-potato-fries-with-lemon-meringue-dipping-sauce (5 of 7)

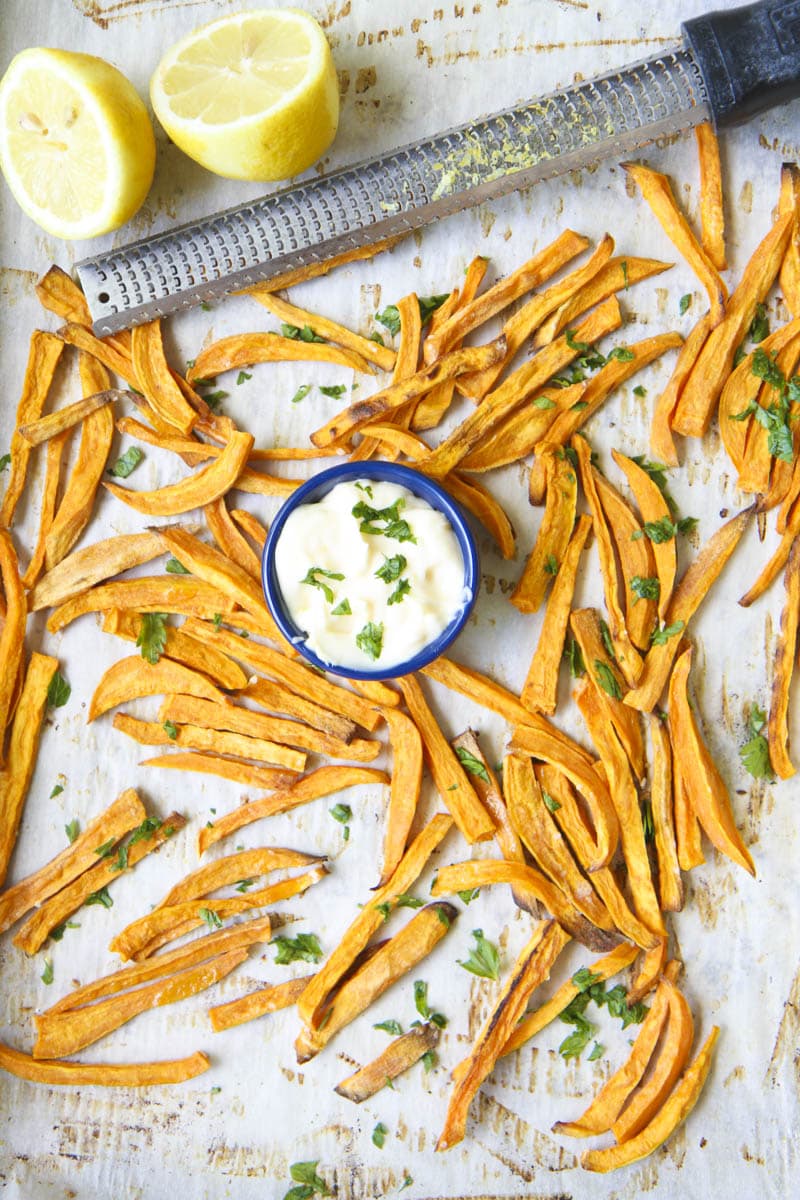
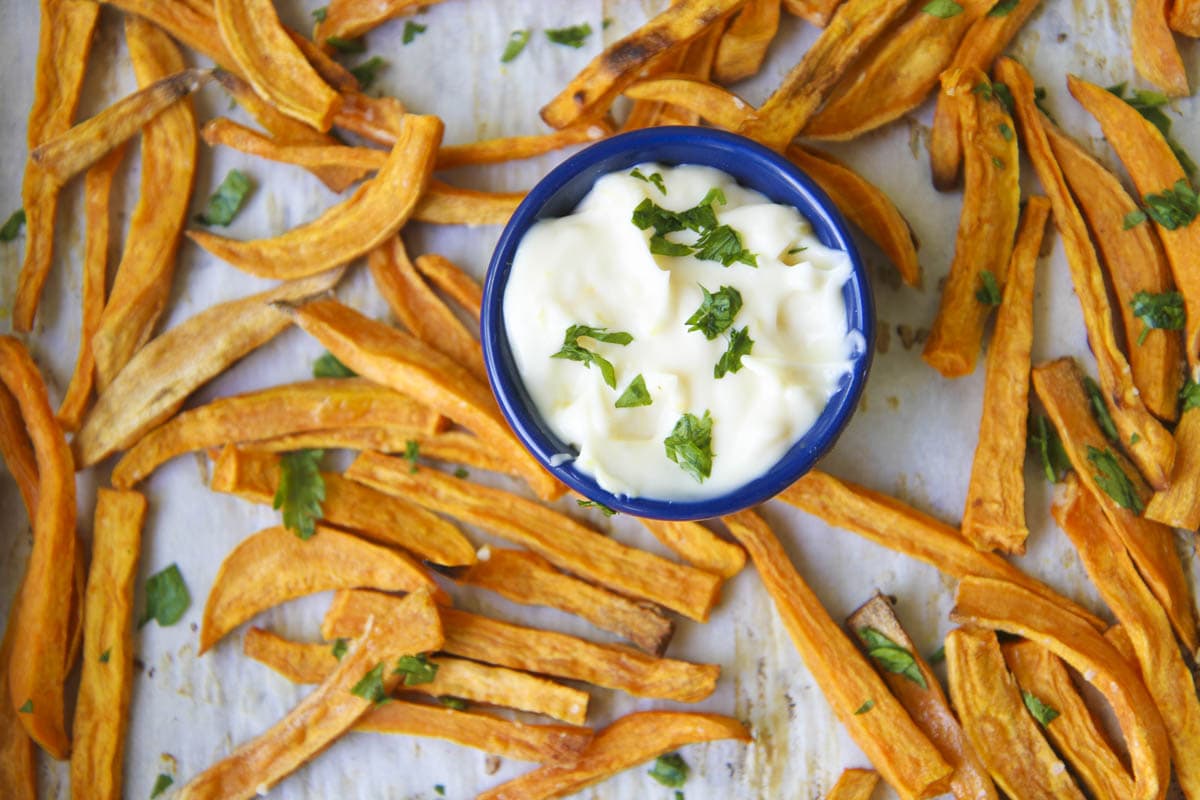
Sweet potato fries are my absolute favorite and one of our local burger joints inspired the dipping sauce to accompany them that I decided to recreate in my kitchen. This creamy lemon dipping sauce is tart and a fun match to the sweetness of the potatoes and is one of my favorite ways to indulge in a little fry dipping.

Not a big sweet potato fan?

I think this would be just as delicious with carrots as it is with the potatoes.

To make these fries ahead, before your guests arrive, peel and cut the potatoes into matchsticks and place in a bowl. Once you have cut all your potatoes, cover them with water and store in the fridge. Placed in a water bath, these cut potatoes can be stored up to twenty-four hours in the water. 

This simple dipping sauce is made out of several pantry staples- mayo, garlic, salt, and the juice and zest from a lemon. I guarantee that this unexpected sauce will be a huge hit at your barbecue just because it is such an unexpected flavor pairing.

Baked Sweet Potato Fries with Lemon Meringue Sauce from MomAdvice.com

I can’t wait until our next cookout so we can share these delicious Cranberry & Jalapeño Turkey Burgers and  Spinach & Kale Turkey Burgers with our guests. With all these new flavor combos, you are sure to wow your guests this year!  Best of all? Although the flavor profile is elevated, the price is quite affordable to have a high-end burger night right in your own backyard.

Baked Sweet Potato Fries With Lemon Meringue Dipping Sauce
Recipe Type: Side
Cuisine: American
Author: MomAdvice.com
Prep time:
Cook time:
Total time:
Serves: 6
These baked sweet potato fries are served with a lemon dip that brings together the sweetness of the potato with the tartness of the lemon.
Ingredients
  • 3 large sweet potatoes cut into matchsticks
  • 2 tablespoons olive oil
  • 1-2 teaspoons kosher salt
  • 3/4 cup mayonnaise
  • 1 clove garlic, finely minced
  • zest from one lemon
  • 1 tablespoon freshly squeezed lemon juice
  • 2 tablespoons flat leaf parsley
Instructions
  1. Preheat oven to 450 degrees and line baking sheet with parchment paper.
  2. Peel sweet potatoes and slice into matchsticks, roughly the same size. Place in a large bowl.
  3. If storing for the next day, fill the bowl with water, cover with plastic wrap, and refrigerate (up to 24-hours).
  4. If preparing immediately, toss with olive oil and salt.
  5. Bake in the oven for 20 minutes, on parchment paper lined cookie sheet, tossing once halfway through to crisp up both sides.
  6. While they are baking, mix together the mayo, garlic, lemon juice, lemon zest, and a pinch of salt.
  7. Once fries are done, garnish with parsley and serve with the lemon meringue dipping sauce.


Looking for more ways to enjoy turkey? Here are a few of my favorites!

Caprese Quinoa & Meatball Casserole

Asian Turkey & Green Bean Saute

Ground Turkey Gyro Burgers

Slow Cooker Thanksgiving Turkey

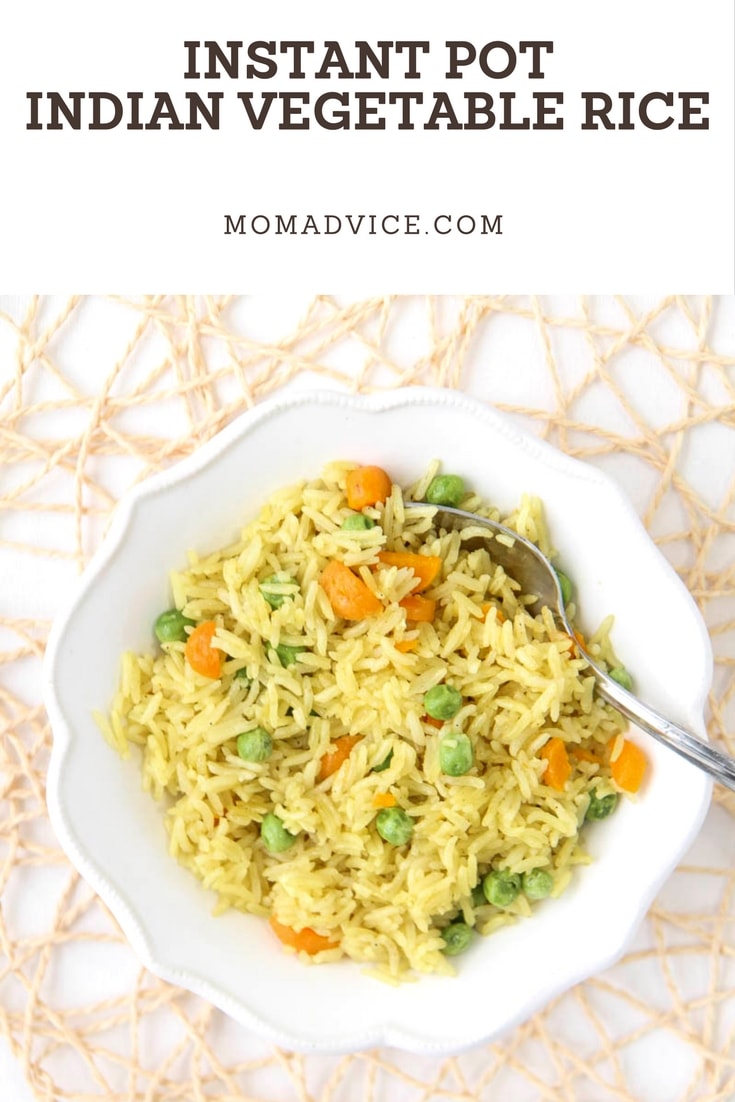
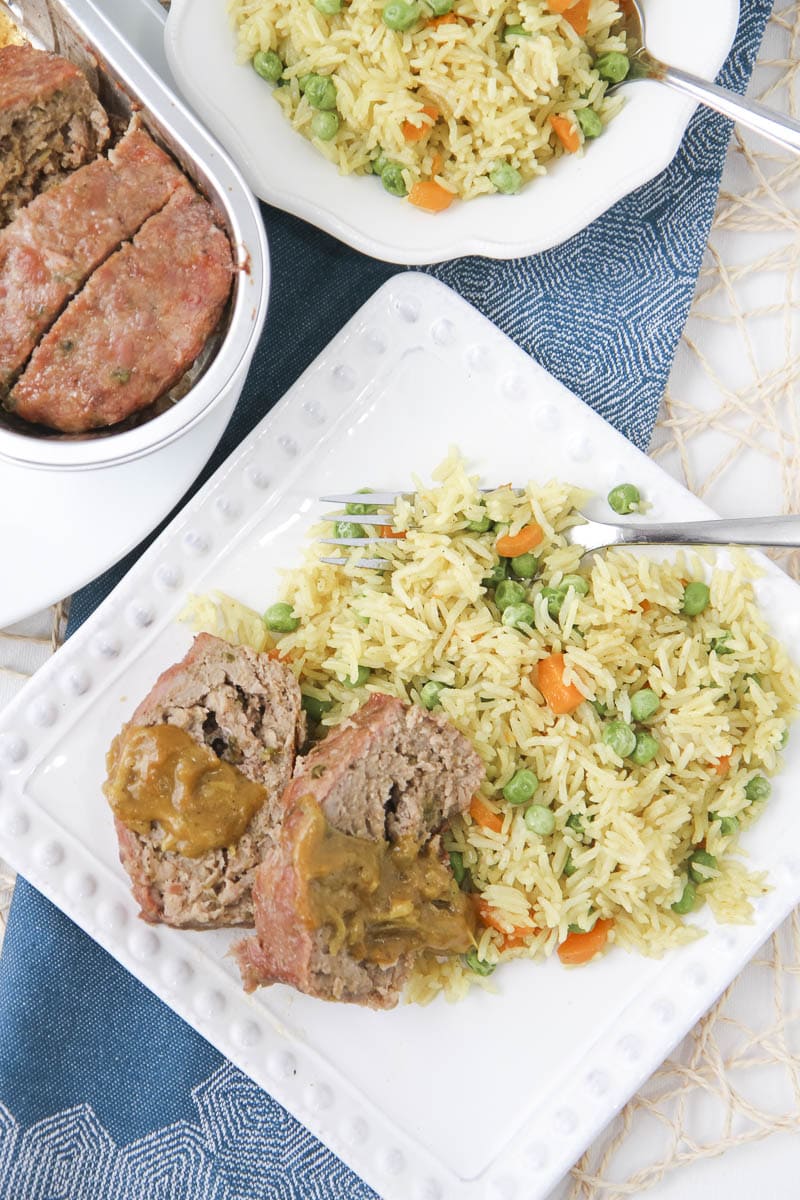
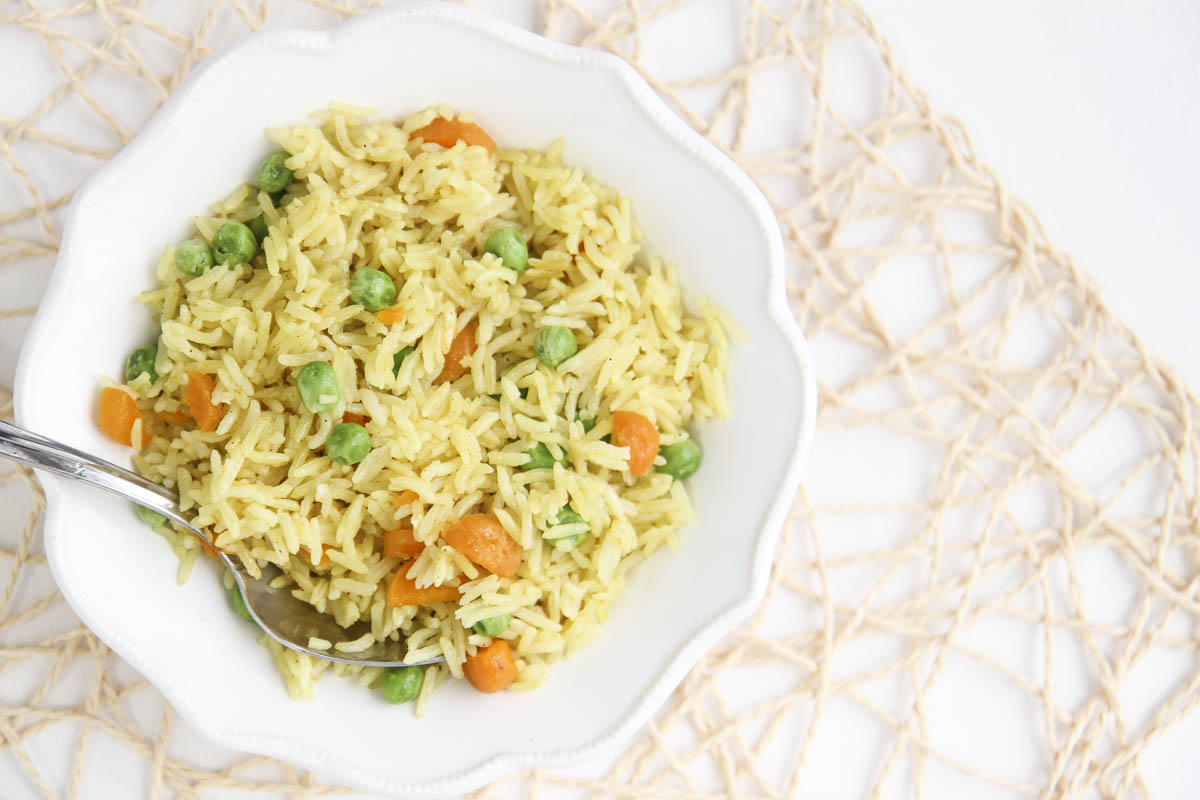
Instant Pot Indian Vegetable Rice (served with turkey meatloaf)

Spinach & Turkey Bacon Skillet Dish

This post is sponsored by Honeysuckle White. All thoughts and opinions are my own!

Instant Pot Indian Vegetable Rice

Thursday, January 4th, 2018

Instant Pot Indian Vegetable Rice from MomAdvice.com

This post is sponsored by Honeysuckle White. All thoughts and opinions are my own!

Happy New Year, everyone! I can’t tell you how much I’m looking forward to 2018 and getting a fresh page in our lives. Today I’m partnering with Honeysuckle White to talk about my New Year’s resolutions and share about their fun new line of ready-to-go products to help you with your dinner hour.

In 2018, my resolutions are:

– Read 100 books
– Set business hours so I have more time for my kids in the evenings.
– Be serious about strength training again at the gym
– Get a book proposal done and sold
– Get back to smart budgeting and tracking of our money to save more.
– Eat at home more and dine out less.
– Write & photograph an Instant Pot ebook
– Get back to crafting again (for the pleasure of it, not for work)

I like to think of myself as a bit of a go-getter (just in case that doesn’t always come through) and last year I had to sideline many of these goals to make a commitment to my physical health. Having an unproductive year definitely drives me a lot to do better this year and I’m hopeful that I can tackle everything on this list if I work on being more disciplined with my free time.

I’m giving you the side eye, Facebook & Instagram.

If you are looking for new ways to tackle resolutions too, I loved this piece that offered different strategies for starting the year well.  It doesn’t always need to be a list of goals, it could be as simple as a word commitment or writing a, “Dear Future Me,” letter.

The thing about good intentions is that life gets in the way of all the good that we want to establish, doesn’t it?  For example, I’m escaping for a girl’s trip for my big 4-0 and that means that I’m abandoning my kitchen duties and leaving them to my husband.

Which usually means a lot of eating out for the family and gets us ALL off track from saving and eating at home more.

Lucky for him, Honeysuckle White came out with this awesome line of products that make getting dinner on the table so much easier. This year  they launched a new line of flavored meatballs, burger patties, and cutlets to help make the dinner hour easier and more affordable for busy families. Today I’m showing you how to dress up their DELICIOUS HomeStyle Turkey Meatloaf. YUM!

Honeysuckle Farms Turkey Meatloaf

Honeysuckle Farms Turkey Meatloaf

Since we eat gluten-free, I am LOVING that these are gluten-free and a much healthier alternative to ditching it all for a bowl of cereal for dinner. Just like the package states, there are no added hormones, steroids, or growth-promoting antibiotics.

Best of all, they support independent farmers and YOU support independent farmers when you make a purchase.

Instant Pot Indian Vegetable Rice from MomAdvice.com

Top your meatloaf up anyway you like, but today I thought I’d show you the fun spin that we decided to do with this one.  Since we love eating Indian food, I usually have some type of simmering sauce in our pantry to put to work for an easy weeknight meal. Save just a little of those jars in your fridge and use these fun simmering sauce (like Tikka Masala, Butter Masala, or Korma sauce) to dress your turkey meatloaf.

How easy is that?

I wanted to create a delicious side today that would complement these amazing flavors so I’m sharing this OH-SO-EASY Instant Pot Indian Vegetable Rice that I just can’t get enough of. This rice is FRUGAL (which fits right in line with my resolutions) and DELICIOUS. I guarantee that you won’t make this recipe just once!

instant-pot-indian-vegetable-rice-3

If you got an Instant Pot for Christmas, this is a great beginner recipe to get you started.

Just as a reminder, when making rice, it is a good idea to give the rice a good rinse before placing it in your pressure cooker to get that beautiful fluffy consistency.

I hope you love this recipe as much as our family and can keep these Honeysuckle White products in mind when you are doing your grocery shopping!

Instant Pot Indian Vegetable Rice from MomAdvice.com

Instant Pot Indian Vegetable Rice
Recipe Type: Side
Cuisine: Indian
Prep time:
Cook time:
Total time:
Serves: 6 servings
This gluten-free side is so easy to create and happens to be easy on the wallet too! If you prefer your dish spicier, add an additional teaspoon of curry to bring on the heat!
Ingredients
  • 2 tablespoons olive oil
  • 2 garlic cloves, minced
  • 1 1/2 cups basmati rice
  • 1/2 cup diced carrots
  • 1 teaspoon curry powder
  • 2 cups vegetable broth
  • 1 cup frozen peas
  • salt to taste
Instructions
  1. Turn your Instant Pot on the saute function.
  2. Rinse your basmati rice well in a colander
  3. Once your Instant Pot has warmed up, add the garlic and rice and saute for 30 seconds.
  4. Add the carrots, curry powder, vegetable broth, and salt. Stir well.
  5. Secure the lid to the top of your Instant Pot and cook on HIGH pressure for 22 minutes.
  6. Once the rice is finished cooking, turn off your Instant Pot and wait ten minutes before releasing the pressure.
  7. Release the pressure, open lid, add the frozen peas, and fluff your rice. Add additional salt to taste.

This post is sponsored by Honeysuckle White. All thoughts and opinions are my own!

Pin It

No-Bake Gluten-Free Granola Bars

Thursday, December 21st, 2017

Gluten-Free No-Bake Granola Bars

This post is sponsored by Mirum, but opinions expressed are my own.

This gluten-free mama is excited to share with you a new tool for making sure that you have good meals that your WHOLE family can enjoy!

Not only that, I’m sharing an EASY no-bake granola bar recipe that is our new favorite after school treat!

Good Choices Made Easy Tool at Walmart

Nestlé has launched a new tool, in partnership with Walmart called Good Choices Made Easy.  This tool helps recommend different products for your family’s meals and helps you select these products based on your own dietary needs.

They recognize that every meal can’t be homemade (especially during this busy season), but they want you to know and trust that the products they are sharing are made with quality ingredients and save you time in the aisles reading all those labels.

How cool is that?

Combining this tool with the low prices at Walmart, you can feel confident about the ingredients you choose AND the pricing on these items!

no-bake-gluten-free-granola-bars-recipe-1

No-Bake Gluten-Free Granola Bars from MomAdvice.com

To celebrate the launch of this new tool, I am sharing a recipe for No-Bake Granola Bars using the Nestlé® Toll House® Semi-Sweet Chocolate Morsels.

I have incorporated oats, almonds, honey, and peanut butter in these delicious treats that are perfect for serving up as a snack after a long day of school.

You may recall that I had a baked granola bar on our site, from many years ago. My original recipe relied upon flour and baking so this is a spin on my No-Bake Energy Bites recipe, just in bar form. These days, I’m all about easy!

Mix these delicious ingredients up in a large bowl and line an 8×8″ pan with parchment paper. Pat these down until you have an even surface across your pan. Place these in your refrigerator for about thirty minutes and then cut them into bars for your week.

No-Bake Gluten-Free Granola Bars from MomAdvice.com

As soon as these were sliced, they were devoured by my kids. I love that these are made from ingredients that we always have in our pantry! I bet if you make them, they will go fast in your house too!

No-Bake Gluten-Free Granola Bars
Recipe Type: Snack
Prep time:
Total time:
An easy no-bake gluten-free treat that makes the perfect snack.
Ingredients
  • 1 ¾ cups quick-cooking oats
  • 1 ⅓ cup sliced almonds, coarsely chopped (if making nut-free, substitute with 1 ⅓ additional cups of quick-cooking oats)
  • 1 cup Nestlé® Toll House® Semi-Sweet Chocolate Morsels
  • 1 teaspoon ground cinnamon
  • 1/2 teaspoon salt
  • 1 cup creamy peanut butter (or almond butter or sunbutter)
  • ½ cup honey
  • 2 teaspoons vanilla extract
Instructions
  1. Line an 8×8″ pan with parchment paper. Set aside.
  2. Using a small handheld chopper (or your chef’s knife), give your almonds a coarse chop.
  3. Add the peanut butter and honey to a microwave-safe bowl and microwave for 30 seconds.
  4. In a large bowl, mix together your oatmeal, coarsely chopped almonds, chocolate morsels, ground, cinnamon and salt. Mix well.
  5. Add the peanut butter & honey mixture (make sure it has cooled so you don’t melt your chocolate morsels) and your vanilla extract. Mix well.
  6. Spoon the mixture into the pan and then press these in the pan, until they are pressed evenly throughout. I like to spray a little cooking spray on a little plastic wrap to assist with getting these even.
  7. Place the pan in the refrigerator for a half hour.
  8. Remove and slice into bars. Wrap bars individually in plastic wrap or in baggies for snacks and lunches.

Be sure to check out the Nestlé Good Choices Made Easy Tool at Walmart.com I think you will find it invaluable when doing your grocery shopping!

This post is sponsored by Mirum, but opinions expressed are my own.

Pin It

Chicken Pesto Frittata

Tuesday, February 28th, 2017

Chicken Pesto Frittata from MomAdvice.com

One of my favorite panini flavor combinations happened to be a roasted chicken pesto sandwich that I used to snag at my local supermarket for a special treat. Filled with pesto and rotisserie chicken with a little spinach and tomato, it was one of my favorite supermarket splurges after a day of errand running. I wanted to capture those chicken pesto flavors in a frittata recipe and dreamed up this gluten-free version of my favorite panini that I can enjoy for breakfast or as a filling lunch.

Chicken Pesto Frittata from MomAdvice.com

If you have never made a frittata before, welcome to the world’s easiest breakfast that can serve a crowd.  All you need is an oiled cast iron skillet for this easy one-pot dish. Years ago I got this one for less than $15 and it has served a million frittatas over the years. If you take great care of it, this small investment can last you a lifetime and be handed down to your kiddos. I have so many fond memories of the good things that we ate out of these skillets when I went to my grandma’s house.

To make a frittata in this, you just heat up the toppings and then pour the beaten eggs on top. Using a wooden spoon, I just shift the fillings around until they are covering the entire pan, heat for a few minutes on medium heat to develop the crust on the bottom, and then transfer it into the oven to finish. Within minutes, you have a frittata that can be divvied up into portions for a busy week or an impressive dish to serve a crowd.

How to Roast Chicken in Bulk

Chicken Pesto Frittata from MomAdvice.com

I rely up on my favorite big batch roasted chicken recipe, that I make for our wraps for the week, to add even more protein to this dish. This seasoning mix never fails me for rotisserie flavor on a small budget. Bursts of flavor from sun dried tomatoes really brighten the flavoring in this base. Of course, you can’t add those without a healthy amount of spinach and pesto, in my humble opinion!

Chicken Pesto Frittata from MomAdvice.com

Chicken Pesto Frittata from MomAdvice.com

I hope you love this yummy frittata as much as I do! I had a couple of gatherings that I took this to and it was a huge hit with everyone, even the egg haters. The pesto mellows the strong egg flavor in this so it’s a great one to give a spin if people in your family don’t always embrace eggs.

Enjoy!

Chicken Pesto Frittata
Recipe Type: Brunch
Cuisine: Italian
Author: MomAdvice.com
Prep time:
Cook time:
Total time:
Serves: 8
A chicken pesto frittata that is bursting with flavors from sun dried tomatoes, spinach, pesto, and deliciously seasoned chicken. It’s a great dish to share with friends or to package up for a busy week ahead! Did I mention gluten-free? Yay!
Ingredients
  • 2 tablespoons olive oil
  • 1- 8 ounce bag spinach
  • 1 1/2 cups roasted chicken, diced or shredded (see above for my recipe)
  • 1/2 cup prepared pesto
  • 3-ounce bag [url href=”http://rstyle.me/n/cgkdmswky6″ target=”_blank”]julienne-cut sun dried tomatoes[/url]
  • 10 eggs, beaten and seasoned
  • 1/4 cup milk
Instructions
  1. Preheat oven to 375 F. In a large mixing bowl, whisk eggs, milk and sea salt until fully incorporated.
  2. Heat a large cast-iron to medium-high heat. Add olive oil and spinach and then lower to medium heat and allow spinach to wilt.
  3. When spinach has wilted, add pesto, sun dried tomatoes, and roasted chicken. Stir to incorporate. Add egg mixture and use your spoon to spread the fillings out evenly in the skillet. Heat for a few minutes to create the crust on the bottom of the eggs.
  4. Place skillet in the oven, uncovered, and bake for 25-28 minutes or until the top is set and the edges are golden brown. Remove and allow to cool 10 minutes before slicing and serving. Finish with a sprinkle of flat-leaf Italian parsley.

 Looking for more fun frittata flavors? Try this easy Dairy-Free Sausage & Vegetable Frittata for another fun spin!

This post contains affiliate links that help our site! Thank you for supporting me! xoxo 


Brain Food: Trail Mix Energy Bites

Monday, October 3rd, 2016

Trail Mix Energy Bites from MomAdvice.com

I’m partnering today with Workman Publishing to chat a little more about our family’s genuine love for the new Big Fat Notebooks series, perfect for your middle school child, and to share a fun brain food snack to pair with these fun books!

Trail Mix Energy Bites from MomAdvice.com

Last month I shared with you my car organizing strategies (I can’t believe it still looks REALLY good, you guys!! Miracles DO happen!) and how we have incorporated these books into our car time as a great activity to make the most of those moments. Just like I love to take in a good audiobook or a podcast while I am driving, I love that this pocket of time is perfect for some fun learning on the way for my kids. Why not make the most of all those wasted minutes?

Trail Mix Energy Bites from MomAdvice.com

Trail Mix Energy Bites from MomAdvice.com

Trail Mix Energy Bites from MomAdvice.com

I know I have said it before, but these books are F-U-N. I am actually going to include these in our holiday gift guide because I think they make an incredible gift for any kid. As you can see, they are adorably illustrated and even the font choice makes it not feel like a textbook, but more like a Diary of a Wimpy Kid escape.

Do you remember that show, Are You Smarter Than a 5th Grader? Since my daughter has been asking me questions about the things she has been learning from this book and reciting trivia on different subjects, I can tell you that I am, indeed, NOT.

Hey, I can’t be good at everything!

There are five books in this fun series and each is the only book you need for each main subject taught in middle school: Math, Science, American History, English Language Arts, and World History. Did I mention that they meet  Common Core State Standards, Next Generation Science Standards, and state history standards?

Yup, pretty awesome stuff.

You can find these fantastic books at AmazonBarnes & NobleIndiebound, or Workman.

Here are 4 fun free Big Fat Notebooks worksheets to get you started! 

Thinking Like a Scientist

How to Take Great Notes

Displaying Data

Ancient Egypt Timeline

Trail Mix Energy Bites from MomAdvice.com

Trail Mix Energy Bites from MomAdvice.com

In honor of fueling our brains, I wanted to create a brain food treat that the whole family will enjoy and requires ZERO baking. Holla!  I am a big fan of energy bites and this little bite is filled with a protein-rich trail mix that is bound together with peanut butter, oatmeal, and quinoa.

I loved these plain, but I thought they could benefit from a little crunch so I toasted up quinoa in a skillet (watch out, it pops!!) and rolled these trail mix bites into the toasty quinoa for a crunchy coating that reminds me of sesame seeds or even rice cereal.

What Makes These Trail Mix Bites Good Fuel for Your Brain?

Nuts and seeds contain omega-3 essential fatty acids, a major building block of brain cells that are critical for a good memory and stable mood (AKA, they fight the HANGRY!). They are also rich in B complex vitamins, vitamin E, iron, zinc, and magnesium. It takes all these important nutrients to help keep your brain functioning well.

Quinoa is our binding agent and our crispy coating and it also contains vital nutrients for your noggin. Quinoa is so easy to prepare in a rice cooker (this tutorial should help!) and happens to be one of my favorite gluten-free indulgences. Quinoa, pronounced (KEEN-wah) is a very nutritious gluten-free seed that originates from the Andean region of South America. It also is a fantastic source of protein, contains all eight amino acids, is a good source of dietary fiber, contains B Vitamins, and iron. All such good stuff to help your brain!

I hope you can share this delicious brain food (both the treat AND the incredible Big Fat Notebooks with your kids. They truly make learning fun and I’m so happy our family got to share about these with you!

Trail Mix Energy Bites from MomAdvice.com

Trail Mix Energy Bites
Prep time:
Cook time:
Total time:
Serves: 24
Fuel your brain with these delicious energy bites that provide vital nutrients and vitamins. Packed with quinoa, these gluten-free treats are satisfying and filling!
Ingredients
  • 1 cup peanut butter
  • 1/2 cup honey
  • 2 cups cooked quinoa (check the post above for cooking directions or follow packaging)
  • 1-1/2 cups quick cooking oats
  • 1/2 cup almonds
  • 1/2 cup pistachios
  • 1/2 cup dry roasted peanuts
  • 1/2 cup dried cranberries
  • 3/4 cup uncooked quinoa
Instructions
  1. In a dry skillet, heat it to medium heat and toast the uncooked quinoa for 3-5 minutes, stirring occasionally. You want the energy bite to look golden. Be careful, quinoa does pop!
  2. In a large bowl mix together all the other ingredients until they are incorporated well.
  3. Line a cookie sheet with parchment paper and then begin scooping & rolling the balls (I like a cookie dough scooper for this).
  4. Roll each ball into the toasted quinoa, coating all sides evenly. Place on the parchment lined cookie sheet and repeat until all of the batter has been used.
  5. Place the cookie sheet in the refrigerator for 30 minutes. Remove and then place them in an airtight container for snacking.

 Recipe Adapted from The Baker Mama

 This post was sponsored by Workman Publishing and Big Fat Notebooks. All thoughts and opinions are my own! Be sure to follow the Workman Blog for more great ideas!

How To Make Smoothie Bowls

Monday, September 19th, 2016

Make Your Own DIY Smoothie Bowl Tutorial


How to Make Smoothie Bowls Tutorial

This post is sponsored by Mamma Chia.  Thank you for supporting the companies that make this site possible! 

I am always on the hunt for great post-workout snacks that can keep me fueled throughout the day.  

Today I wanted to share with you how to make two delicious smoothie bowls and I am pairing them with a fun new drink from Mamma Chia, called Chia Energy Beverages, that you can now find on Walmart shelves.  

Doesn’t that sound like a delicious pairing?


Mamma Chia at Walmart


I always struggle with finding new things at the store so, in case you are on the hunt, I wanted to show you where you can find them at Walmart.

These drinks can be found in the produce section at the front of the store.  

Our drinks were on full display on the top shelves and come in 4 flavors: Grape Power, Cherry Charge, Blackberry Blast, & Raspberry Razz.

These drinks are the first beverage that combine chia with the energy of guayusa.

For those of us with a coffee addiction (ahem!), these are a great way to get energy for the day without that caffeine crash.

Caffeine crashes are THE WORST.


Chocolate Cherry Smoothie Bowl from MomAdvice.com

As you know, I have been struggling with my health and I am really committed to eating better so that I can improve how I feel. The founder of Mamma Chia, Janie Hoffman, was also struggling with many debilitating autoimmune disorders and found a great deal of relief from adding chia into her diet. Her mission was to share that gift with others so that they can experience the health benefits too. I also love that the company donates a portion of their proceeds to support farmers, community groups, & organizations that build healthy, local food systems. 

It makes you feel doubly good about your purchase!

Today I thought I would incorporate the power of chia, not only in our drink, but as a topping in a healthy smoothie bowl.

Chia is actually considered a superfood because chia seeds are rich in omega-3’s, fiber, protein, and essential vitamins and minerals.

They also help you to sustain energy levels naturally while helping you stay fuller longer.

Today we are topping our smoothie bowls with chia.

If you haven’t had a smoothie bowl before, you are in for a treat.

I understand that many fancy-schmancy breakfast joints serve these now.

How lucky are you that you can save some money and make these at home for a fraction of the cost?

Let me share two recipes for smoothie bowsl with you and don’t forget to stick around to the bottom of this post for our giveaway with Mamma Chia- yay! 

Chocolate Cherry Smoothie Bowl from MomAdvice.com

Chocolate Cherry Smoothie Bowl from MomAdvice.com

The idea is to make the smoothie thicker (make sure you have a powerful blender for this one) by using less liquid to create a thicker consistency.

The fun part is the layering of delicious additions on top.

On this Chocolate Cherry Bowl, I have topped it with fresh raspberries, toasted coconut, & more chia.

Try any combination of flavors you like though!

Chocolate Cherry Smoothie Bowl from MomAdvice.com

Chocolate Cherry Smoothie Bowl
 
Author: MomAdvice.com
Prep time:
Total time:
Serves: 1-2 bowls
Smoothie bowls make the perfect snack or breakfast. Top with your favorite oatmeal toppings or try our suggestions for a healthy start to your day.
Ingredients
  • ½ cup frozen banana
  • 1 cup frozen cherries
  • ½ cup almond milk
  • ¼ cup avocado
  • 1/4 plain greek yogurt
  • 1 tbsp unsweetened cocoa powder
  • Toppings: toasted coconut, berries, chia
Instructions
  1. Combine all smoothie bowl ingredients in your blender and blend until smooth.
  2. Pour into a bowl and top with your favorite toppings
 

Raspberry Smoothie Bowl from MomAdvice.com

Raspberry Smoothie Bowl from MomAdvice.com

Raspberry Smoothie Bowl from MomAdvice.com

I love berry anything and I loved pairing a Raspberry Smoothie Bowl with the delicious flavor of the Chia Energy Blackberry Blast drink. I still wanted some of the chocolate flavor in this one so I topped it with a chocolate granola, and chia.  The vibrant hue from the raspberries in this one make such a pretty bowl, don’t they?

This is certainly a powerful motivator to get my workout done so I can enjoy this snack when I get home.

Raspberry Smoothie Bowl from MomAdvice.com

Raspberry Smoothie Bowl
 
Author: MomAdvice.com
Prep time:
Total time:
Serves: 1-2 bowls
Give me all the berries! This Raspberry Smoothie Bowl is packed with berries and can be topped with crunchy granola, chia, and more berries for a fun post-workout treat.
Ingredients
  • 1/2 cup frozen raspberries
  • 1 frozen banana
  • 1/4 of an avocado
  • 1/2 tsp vanilla
  • 1/2 cup almond milk
  • Toppings: granola, raspberries, blueberries, and chia
Instructions
  1. Place all smoothie ingredients in a blender and blend until smooth.
  2. Pour into a bowl and top with your favorite toppings.
 

Mamma Chia Energy Beverages

Today I’m giving away to one lucky winner a $50 prize pack from Mamma Chia that will include one each of the Mamma Chia’s new organic Chia Energy Beverages and some of their other delicious products. Please enter the giveaway in the widget below and I hope this post inspires you to give these new drinks a try!

a Rafflecopter giveaway

Raspberry Smoothie Bowl from MomAdvice.com

This post was sponsored by Mamma Chia.  Thank you for supporting the companies that make this site possible! 


Raspberry Smoothie Bowls


Sign up for the MomAdvice newsletter 


Looking for more breakfast ideas?


Meal Prep: Breakfast Sandwiches Recipe from MomAdvice.com

Make Ahead Breakfast Sandwiches


Mango Coconut Green Smoothie recipe

Mango Coconut Green Smoothie


Make-ahead breakfast burritos

Make-Ahead Breakfast Burritos


Sleepover Breakfast Buffet

Make-Ahead Sleepover Breakfast Buffet

Pin It

Picnic in a Jar: Easy Quinoa Salad With Spinach and Tomatoes

Thursday, July 7th, 2016

Quinoa-Salad-In-A-Jar

Summertime means a lot of eating on-the-go for our family. It isn’t the running to and from activities like the school year, but the good stuff like picnics with my people, poolside lounging and road trips to the neighboring Michigan beaches.

Thankfully, the fresh produce and deliciously grown convenience food that we all love is in season. A container of cherries shared by the pool, bunches of grapes on our car trips, and strawberries by the fistful in the sunshine until we think we might turn into berries ourselves. It’s all such good stuff, isn’t it?

Salads are my go-to in the summer thanks to their amazing portability factor. Not only do I love fresh green salads made with romaine or spinach, but I adore a healthy topping of quinoa on top for that protein punch.

Quinoa-Salad-In-A-Jar-1

Quinoa is one of my favorite summertime ingredients because it is filling and gluten-free. Have you had quinoa before? It couldn’t be easier to prepare or more delicious!

Quinoa, pronounced (KEEN-wah) is a very nutritious gluten-free seed that originates from the Andean region of South America. It’s a fantastic source of protein, contains all eight amino acids, is a good source of dietary fiber, and it contains B Vitamins and iron.

Though it is smaller than rice, barley, farro and bulgur, quinoa looks like a grain, thanks to its neutral coloring and hard exterior. In reality, it is actually a seed that originates from the cousin of the spinach plant. When cooked, these seeds expand rapidly and significantly, becoming tender but chewy, and expelling spirals that boast the slightest crunch.

To add more flavor to my quinoa I love to cook it in veggie or chicken broth.

Quinoa-Salad-In-A-Jar-7

To make these salads portable, I layer the salads in jars. You want to layer the salads in a way that everything stays fresh and delicious for as long as possible.

For these salads, I start with a scoop of cooked quinoa and add a drizzle of olive oil and squirt of lemon. I then allow that all to cool completely and then start the layer of veggies. The tomatoes go in first and then I fill the jar up to the tippy top with as much spinach as possible. I learned a lot from all those episodes of Popeye as a kid!

quinoa-salads-in-a-jar-tutorial

Picnic in a Jar: Easy Quinoa Salad With Spinach and Tomatoes
Recipe Type: Salads
Prep time:
Cook time:
Total time:
Take these along on your next family outing for a filling, easy meal!
Ingredients
  • 1 pound spinach
  • 1 pint grape or cherry tomatoes, halved
  • 1-2 lemons
  • 2 cups cooked quinoa (follow the instructions for preparation on the packaging)
  • Olive oil
  • Salt and pepper
Instructions
  1. Prepare quinoa as directed on package (it’s just like rice with a 1 cup quinoa to 2 cups liquid ratio- veggie broth, chicken broth, or water all work in this one). Season with salt and pepper.
  2. Halve grape or cherry tomatoes with a paring knife and add them to the mixing bowl.
  3. Once the quinoa is done, scoop it into equal amounts into four jars. Squirt the juice of your lemons on top of the quinoa and add a light drizzle of olive oil to each one. Allow these to cool fully before adding the rest of your ingredients.
  4. Next layer on your tomatoes and then add your layer of spinach.
  5. Lid your jar and store in your fridge for up to five days. Eat directly out of the jar or pour into a bowl for an easy picnic feast!

Quinoa-Salad-In-A-Jar-9

For a sweet little picnic touch, use a little twine to tie on forks or tape a plastic fork with washi tape on your lids. You now have the makings for the perfect summertime lunch wherever your summer adventures might take you!


Pin It

How to Make Quinoa in the Rice Cooker

Thursday, April 7th, 2016

How to Cook Quinoa in the Rice Cooker from MomAdvice.com

You will never have to babysit a pot again if you use this simple technique for cooking quinoa in your rice cooker. This set-it-and-forget-it recipe is the most pinned item on our site and we can see why. Not only am I sharing this easy rice cooker technique, but I’m also sharing loads of recipes- from quinoa main dishes to quinoa salads. Be sure to bookmark this page for this easy rice cooker technique.

I have discovered a new favorite food and it happens to be healthy for me too!

Quinoa is a delicious protein-filled side or main dish that is as just as easy as rice to prepare.

Today I want to show you how to cook quinoa in your rice cooker.

This is the quinoa cooking technique that I swear by. 

You won’t believe how easy it is to make rice cooker quinoa and the best part is that you can make a weekly batch and enjoy it all week long to add or create other dishes with.


How to Make Quinoa in the Rice Cooker from MomAdvice.com

What is Quinoa?

Thanks to a little site called Pinterest, quinoa is quickly becoming one of the hottest foods this year to try to create new recipes with.

Quinoa, pronounced (KEEN-wah) is a very nutritious gluten-free seed that originates from the Andean region of South America. It has a nutty flavor and can be prepared alone or you can make your own side mix with quinoa and brown rice.

There are so many surprising benefits of quinoa. Quinoa, for example,  is a fantastic source of protein, contains all eight essential amino acids, is a good source of dietary fiber, contains B Vitamins, and iron. 

Did I mention this seed is naturally gluten free? That’s one of those health benefits I can really get behind.

Though it is smaller than rice, barley, farro and bulgur, quinoa looks like a grain, thanks to its neutral coloring and hard exterior.

In reality, it is actually a seed that originates from the cousin of the spinach plant.

When cooked, these seeds expand rapidly and significantly, become tender but chewy and expel spirals that boast the slightest crunch.

What Does Quinoa Taste Like?

After cooking quinoa in a  liquid of your choice (water, chicken broth, or vegetable broth),  it becomes light, fluffy, and nutty.

I find the flavor of quinoa to taste a little like couscous and a little like brown rice. 

It is one of those grains that is difficult to describe, but worth trying simply for the nutritional benefits it offers. Many weight loss recipes use this ingredient as a main dish to replace carbs. It is one of those switch outs that I never feel is a sacrifice!


check out these video tutorial for some inspiration!

I Don’t Have a Rice Cooker. How Do I Cook Quinoa on the Stovetop?

Honestly, it is one of those kitchen appliances that is worth its weight in gold, but you can still prepare quinoa easily on your stovetop too.

To cook quinoa on the stove, measure two cups of liquid (pick your favorite- 2 cups of water, chicken stock, or vegetable stock)  per cup of quinoa and combine them in a saucepan.

Bring the mixture to a vigorous boil, then reduce heat to medium heat.  Finally, simmer (covered with a lid on) until the quinoa is tender, but still chewy. You will see white spiral-like threads appear around each grain.

This should take approximately 15 minutes to 20 minutes.

How to Make Quinoa in the Rice Cooker

What Rice Cooker Do You Recommend?

A year ago I bought this inexpensive rice cooker for about $20 and I have been using it two to three times a week ever since.

It provides consistently great brown rice, white rice, steamed vegetables, and quinoa for our family with very little work on my part.

I consider it a meal prep must-have for your home especially since everything can be prepared in under 30 minutes. I also love that the inexpensive versions don’t require a lot or programming or the use of a special rice setting.

You simply turn it on, and it does its own thing.

It does take up valuable space in my kitchen, but it has earned its rights to the space by saving me a lot of time hovering over pots!

How to Make Quinoa in the Rice Cooker from MomAdvice.com

How to Make Quinoa in the Rice Cooker from MomAdvice.com


Is Quinoa Good Plain?

I don’t really love quinoa plain, but I think it is a great building block for creating healthy dishes.

For example, my favorite dish right now is to simply add the zest from one lemon to the cooking liquid (in the recipe I have shown you below).

Then I chop a few handfuls of baby spinach and a pint of cherry tomatoes (halved) and place them in a large serving bowl.

Cook the quinoa as directed and then put the hot quinoa on top of the spinach and tomatoes and allow it to wilt the spinach and cook the tomatoes with its heat for about five minutes.

Then toss it all with the juice from one lemon and a little drizzle of olive oil. You can serve the salad warm or cold and I have found it to be a hit at every party I have ever taken it.

Other ingredients you can add are sauteed mushrooms, sun-dried tomatoes, roasted red peppers, or white beans for a double whammy of protein power.

Be creative with what you have leftover in your fridge, and put together your own flavorful combination.

How to Make Quinoa in the Rice Cooker from MomAdvice.com

How to Make Quinoa in the Rice Cooker from MomAdvice.com


How to Make Quinoa in the Rice Cooker  
Recipe Type: Side
Author: Amy Allen Clark
Prep time: 2 mins
Cook time: 15 mins
Total time: 17 mins
Serves: 4
Quinoa in the rice cooker is easy as 1,2,3. This is a simple and fool-proof way to make delicious quinoa that you can enjoy all week long in your recipes or as a protein-packed side dish.
Ingredients
  • 1 cup quinoa
  • 2 cups liquid (low-sodium chicken broth, low-sodium vegetable broth, or water)
  • 1/2 teaspoon salt
Instructions
  1. Using a fine mesh sieve rinse 1 cup of organic quinoa in cold water (Note: the brand pictured here does not require a rinse, but I wanted to show you how to do it if it does. Read the back of the box/bag to find out if rinsing is necessary).
  2. Pour rinsed quinoa into your rice cooker.
  3. Add your liquid and salt.
  4. Turn on your rice cooker. When the rice cooker beeps, you will have perfectly cooked quinoa (approximately fifteen minutes)
  5. Unplug the cooker. Allow quinoa to set for three to five minutes and then fluff with a fork.

Looking for more quinoa recipes and rice cooker recipes? Here are a few of my faves!

how to make brown rice in your rice cooker

Mexican Quinoa Stuffed Bell Peppers from MomAdvice.com mexican quinoa stuffed peppers

Quinoa Salad in a Jar from MomAdvice.com

Berry Quinoa Parfait from MomAdvice.com

Pumpkin Nut Quiona Breakfast from MomAdvice.com pumpkin nut quinoa breakfast recipe

Greek Quinoa Salad from MomAdvice.com greek quinoa salad recipe

Caprese Quinoa and Meatball Casserole from MomAdvice.com caprese quinoa and turkey meatball casserole

Have you cooked with quinoa before?

What is your favorite way to serve this food? Any tips or tricks for cooking it? I’m all ears!

Disclosure: The link to the rice cooker is an affiliate link and is provided so you can locate what you need quickly and easily.

How to Cook Quinoa in the Rice Cooker from MomAdvice.com


Pin It

Bacon, Apple, & Cornbread Gluten-Free Stuffing

Wednesday, November 25th, 2015

  Bacon, Apple, & Cornbread Gluten-Free Stuffing from MomAdvice.com.

This is a sponsored post written by me on behalf of Tyson Foods, Inc. All opinions are entirely my own. 

I don’t think any holiday meal is complete without a good stuffing. Being gluten-free can be a challenge around the holidays, trying to recreate those comforting holiday dishes, but without the gluten. Today I wanted to show you a delicious Bacon, Apple, & Cornbread Stuffing that you can make for the holidays with a few delicious ingredients at Walmart that you will never guess is gluten-free and so affordable to make too!

Bacon, Apple, & Cornbread Gluten-Free Stuffing from MomAdvice.com.

The star of today’s ingredient line-up is definitely this Wright® Bacon! I love that this thick bacon is naturally hickory smoked which adds a rich depth to your stuffing. This grocery staple can be found in the refrigerated section of Walmart.

Rounding out our ingredient list are sweet apples, savory celery, onions, Great Value Brand chicken broth, a gluten free-cornbread mix, fresh thyme, fresh sage, and just a pinch of cayenne pepper to add a kick to this dish. I love that these ingredients are all available at one store, even my gluten-free cornbread mix, leaving me more time for making those family holiday memories!

Bacon, Apple, & Cornbread Gluten-Free Stuffing from MomAdvice.com.

Confession time! I was really nervous about creating this dish for you. This was actually my first time baking any gluten-free bread so I was really nervous about the texture of this bread, but even more nervous that the bread wouldn’t stand up to cubing. I am so happy to say that it actually cubed up and toasted beautifully in my oven for this dish.  I would recommend baking it the day before and cubing it the next day to help it keep its shape and prevent any crumbling. In 15-18 minutes you have your base for a beautiful bowl of stuffing.

Bacon, Apple, & Cornbread Gluten-Free Stuffing from MomAdvice.com.

Great stuffing is all about the layering of flavors and this one has them all. From the sweetness of the apples to the savory of the celery and onions to the deliciously salty and chewy bacon to the kick of spices from the cayenne, each bite is like a little holiday symphony in your mouth.

Bacon, Apple, & Cornbread Gluten-Free Stuffing from MomAdvice.com.

I would definitely say that this dish takes my holidays from good to great. You can find this and so many other great recipes over at the Joy to the Meal site to help inspire you in the kitchen. I hope you can experience a few #joy2themeal dishes at your table and I hope this recipe helps you to be brave and tackle your own gluten-free stuffing for the holidays!

Bacon, Apple, & Cornbread Gluten-Free Stuffing from MomAdvice.com.

Bacon, Apple, & Cornbread Gluten-Free Stuffing
Prep time:
Cook time:
Total time:
Serves: 6 servings
It’s hard to believe that this stuffing is gluten-free thanks to the richness of the bacon & cornbread. I hope you love this dish as much as our family does this holiday season!
Ingredients
  • 1 package of prepared Gluten-Free Cornbread Mix (12 ounces), prepared one day prior
  • 10 oz Wright® Brand Bacon, chopped, 1/4-inch pieces
  • 1 onion, chopped finely
  • 2 ribs celery, chopped
  • 2 Fuji apples, peeled, cored, chopped
  • 2 tablespoons of thyme, removed from stem and chopped finely
  • 2 tablespoons of sage, leaves removed and chopped finely
  • 1 cup Great Value Brand Chicken Broth
  • 1/4 tsp cayenne
Instructions
  1. Preheat your oven to 400 degrees.
  2. Cube your prepared gluten-free cornbread and spread on a rimmed cookie sheet. Bake for 15-18 minutes until cubes are lightly toasted. Reduce the heat on your oven to 375 degrees.
  3. Fry bacon until crisp, remove with a slotted spoon to a plate layered in paper towels. Drain the fat from your pan, reserving three tablespoons to sauté your veggies.
  4. To the pan, add your onion and celery and sauté these until golden about 6-8 minutes. Add apples, thyme, sage, and cayenne pepper. Cook until apples soften, about 4-5 minutes.
  5. Toss cooked apples & veggies in a large bowl with cornbread cubes, broth and cooked bacon. Mix well.
  6. Bake at 375° in a buttered dish covered with foil for 40 minutes, remove foil and bake until top turns golden, about 15 minutes more.


Pin It

Make-Ahead Tutorial: How to Make Perfect Brown Rice In Your Rice Cooker

Monday, October 12th, 2015

How to Make Perfect Brown Rice In Your Rice Cooker from MomAdvice.com

I have all the secrets to a perfect batch of brown rice thanks to all of my failed attempts at yielding a great batch over the years. We have had crunchy brown rice, dry brown rice, mushy brown rice, and everything in between. For many years, I baked my brown rice (thank you, Alton Brown) before discovering the world’s most awesome gadget (used a minimum of twice a week!) called a rice cooker!

Today I want to share with you the secret to my brown rice succes.  For me, it is one part rice selection (no affiliation with them, I swear!) one part liquid ratios and one part rice cooker fuzzy logic that works. Intrigued? I hope so!

How to Make Perfect Brown Rice In Your Rice Cooker from MomAdvice.com

Brown rice is something I really rely upon to round out my meals because I am gluten-free.  I use it to make taco bowls, in lieu of making gluten-free pastas, and I toss veggies and meat with it to make hearty bowls for filling lunches.  Although I adore quinoa, I still find that this sticks to my ribs a little better so it has become a go-to side for our family.

What Brand Do I Swear By For Consistent Brown Rice Results?

The only brand I use is the Uncle Ben’s Whole Grain Brown Rice (the packaging looks just like this!) It delivers consistent cooking results for me and comes out perfectly every time. When people tell me that they don’t enjoy the texture of brown rice or their kids turn their noses up to it, I tell them to buy this brand because once this is prepared it has more of the texture of white rice than any other that we have tried and my kids prefer it over white rice. 

How to Make Perfect Brown Rice In Your Rice Cooker from MomAdvice.com

What is the Liquid Ratio for Brown Rice?

Brown rice is not a 1:1 ratio like white rice, it requires a bit more liquid to deliver consistently good results. For every one cup of rice, you need 1 1/4 cups of liquid for a long grain brown rice (this is the ratio I use for that brand I shared). For a short-grain rice, you actually need 1 1/2 cups of liquid for every one cup of rice. I also add a pat of butter as well to help round out the flavoring.

I rely upon chicken stock for my liquid, but you can use water, beef stock, or veggie broth too. If you are trying to save a little bit, cut the stock you choose in half with water or you can just use water if you do not want a richer flavor to your rice.

How to Make Perfect Brown Rice In Your Rice Cooker from MomAdvice.com

Rice Cooker- Perfect Rice Every Time

Five years ago,  I bought this rice cooker for about $20 and I have been using it two to three times a week ever since.  It provides consistently great brown rice, white rice, steamed vegetables, and even rice cooker quinoa for our family with very little work on my part. It does take up valuable space in my kitchen, but it has earned its rights to the space by saving me a lot of time hovering over pots!

My rice cooker has no fancy settings, I just push down the switch and it figures it all out for me.  When it is done, the switch flips up and a loud beep lets you know that the rice is done. That’s it. It’s basically a set it and forget it appliance that delivers consistent results for our family.

How to Make Perfect Brown Rice In Your Rice Cooker from MomAdvice.com

Now you know all my secrets! Do you have any of your own tips for perfect brown rice? Let me know in the comments below! I love hearing everyone’s strategies!

This post contains affiliate links! 

Pin It