Archive for the ‘Main Dishes’ Category

Best Instant Pot Wings Recipe

Tuesday, September 10th, 2019


Best Instant Pot Wings Recipe from MomAdvice.com

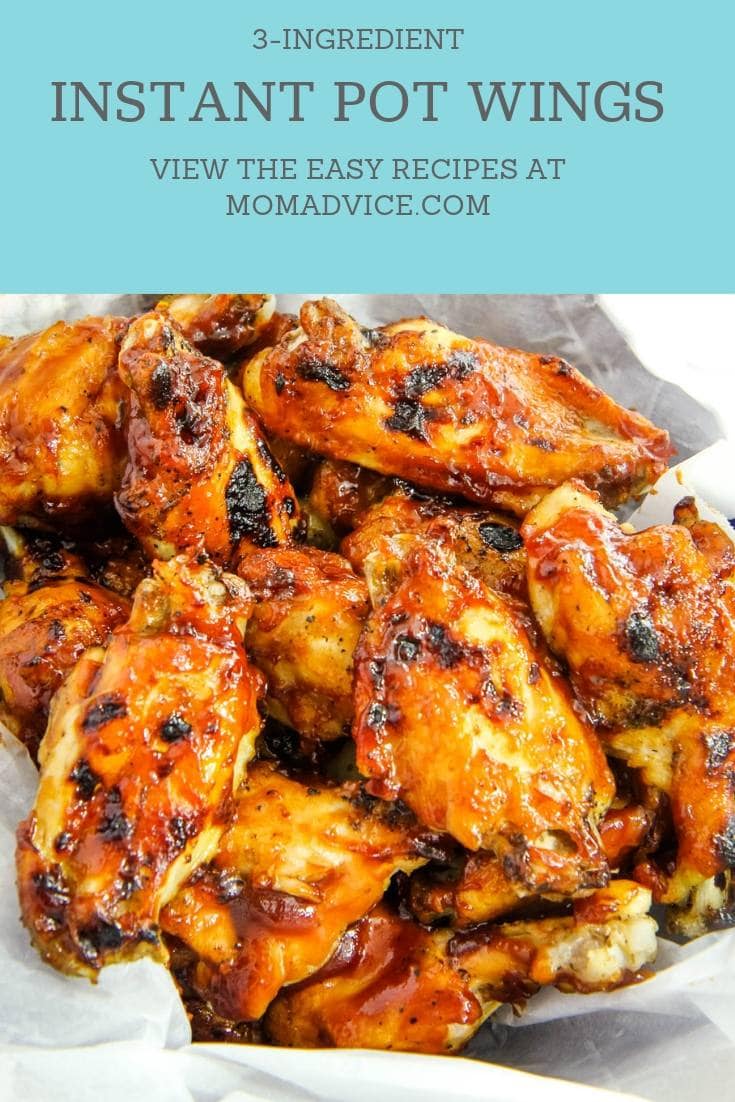
These Instant Pot chicken wings only require three ingredients and five minutes of pressure cooking until they are fall-off-the-bone tender. Try this Instant Pot Recipe today!

I am so excited to start showcasing more recipes on the site and one BIG request I got from readers was for more easy Instant Pot recipes. 

It seems I talked many of you into buying one of these appliances on a Black Friday sale and then dropped the ball on giving you ideas for ways to use it. 

That’s really nice, huh?

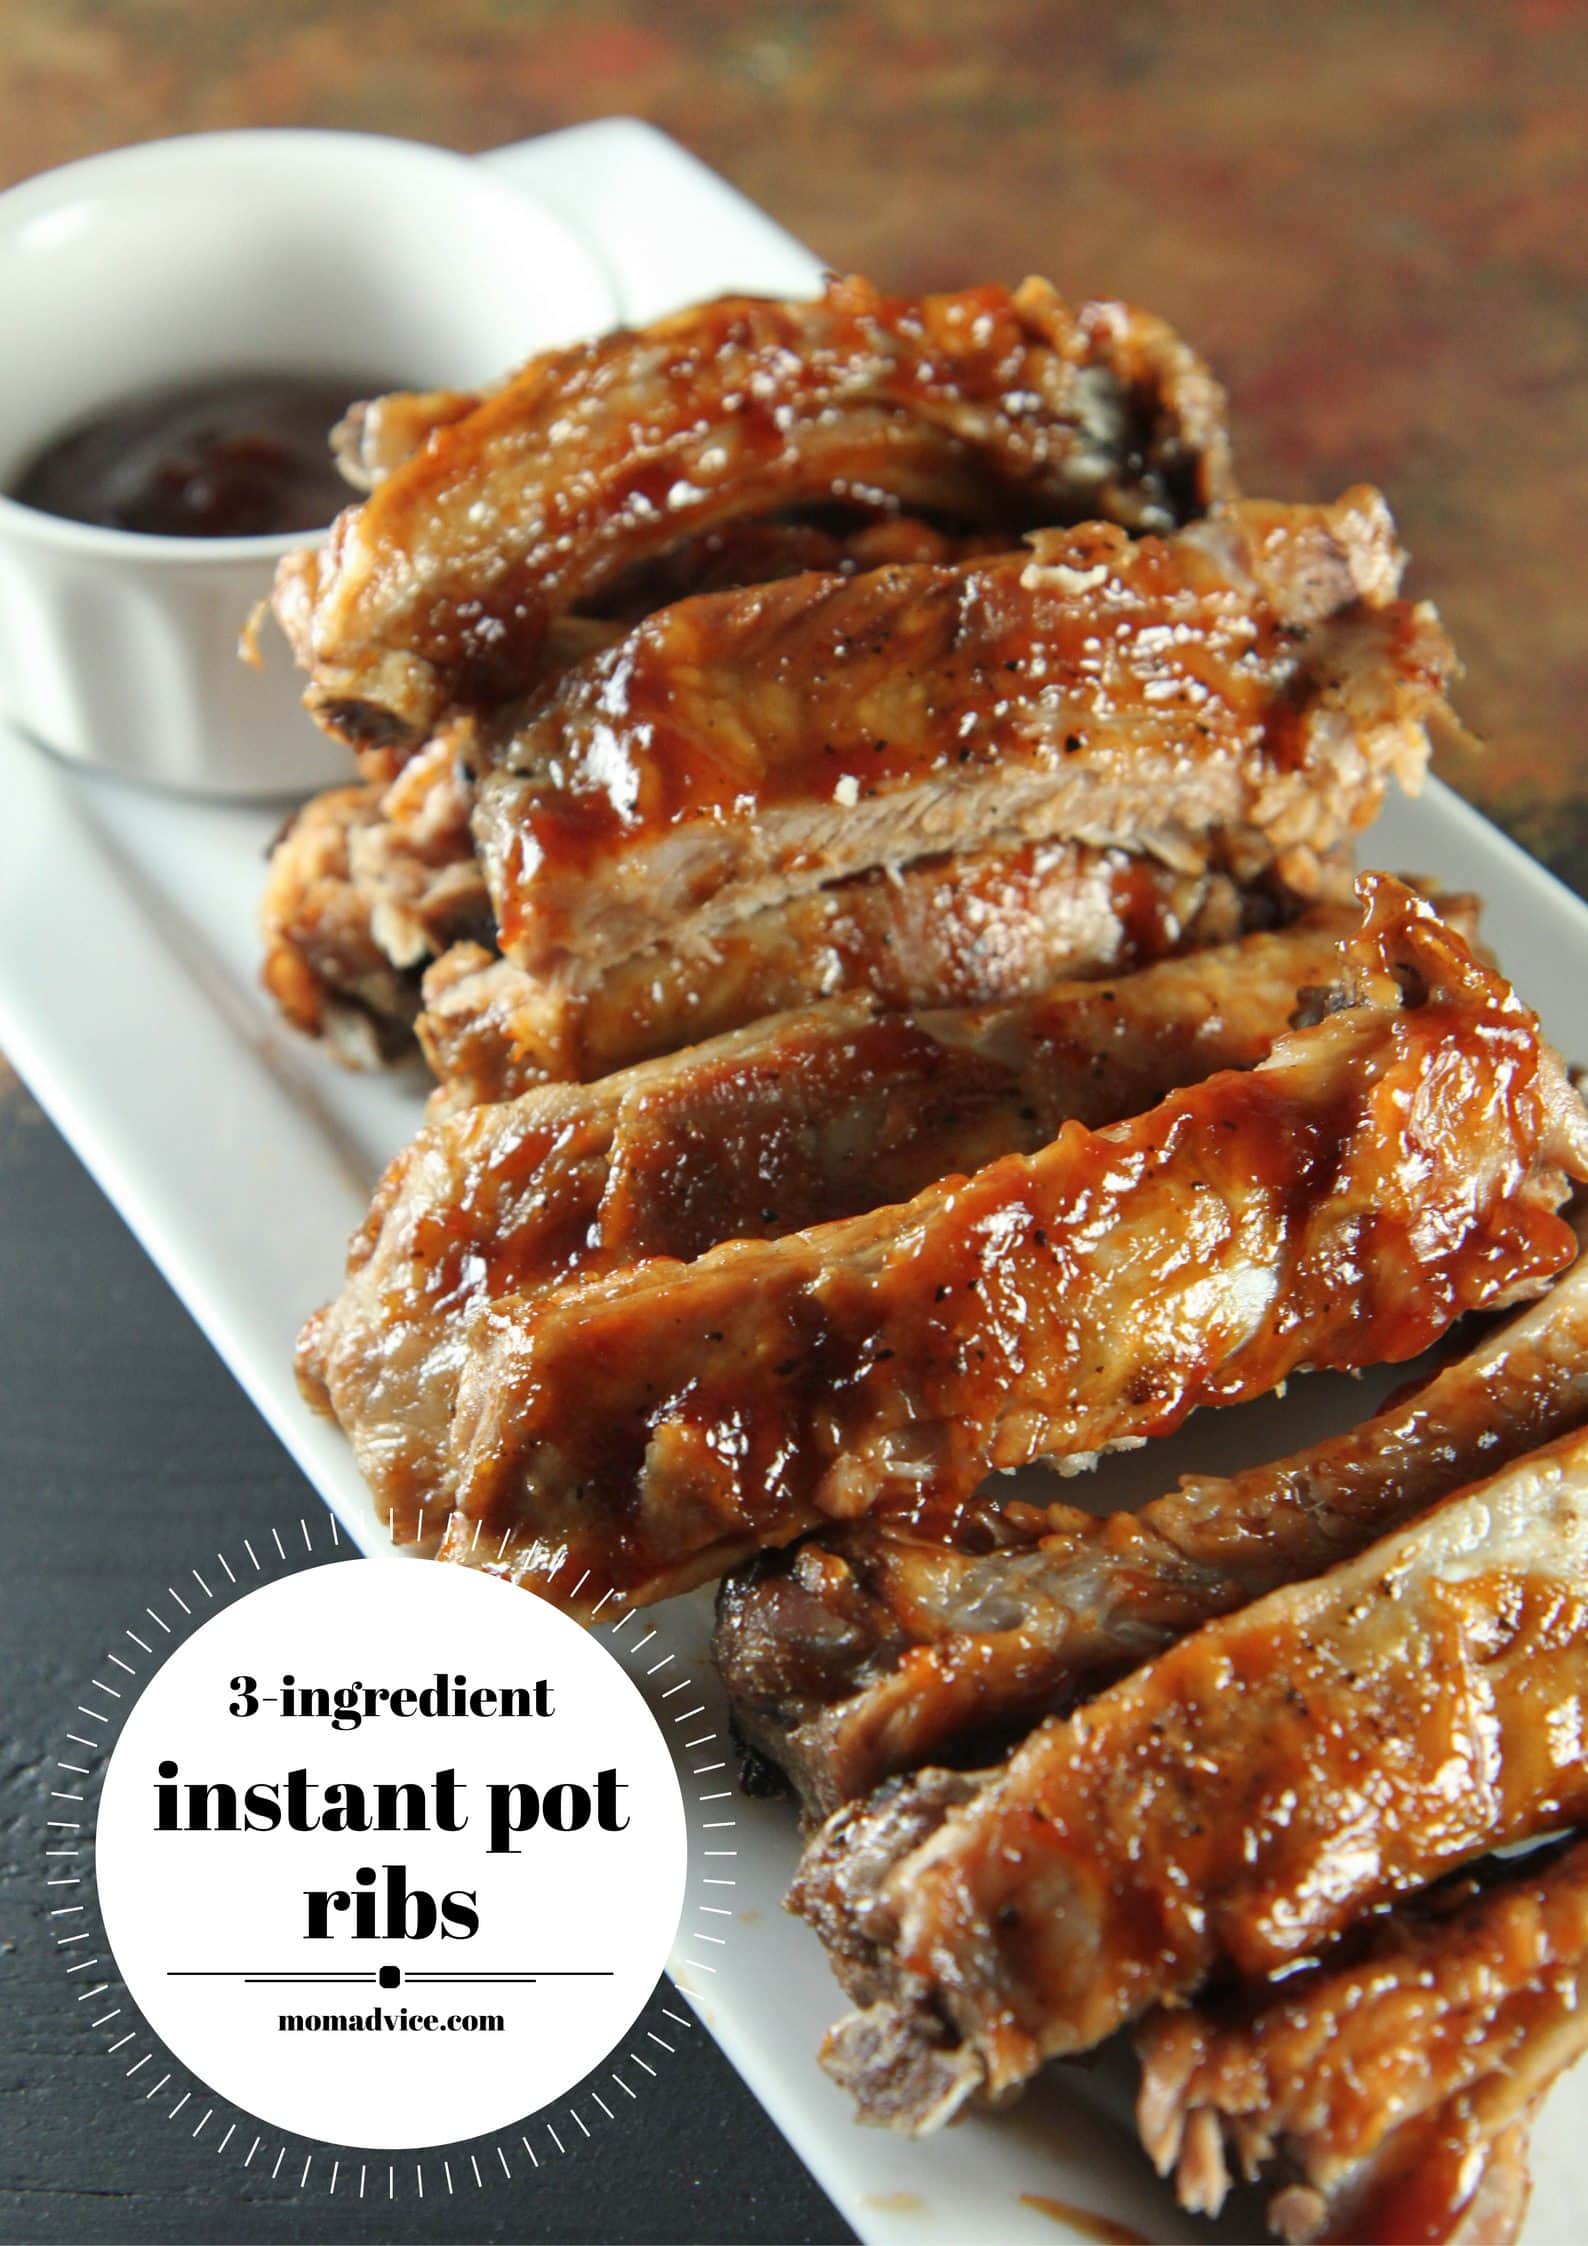
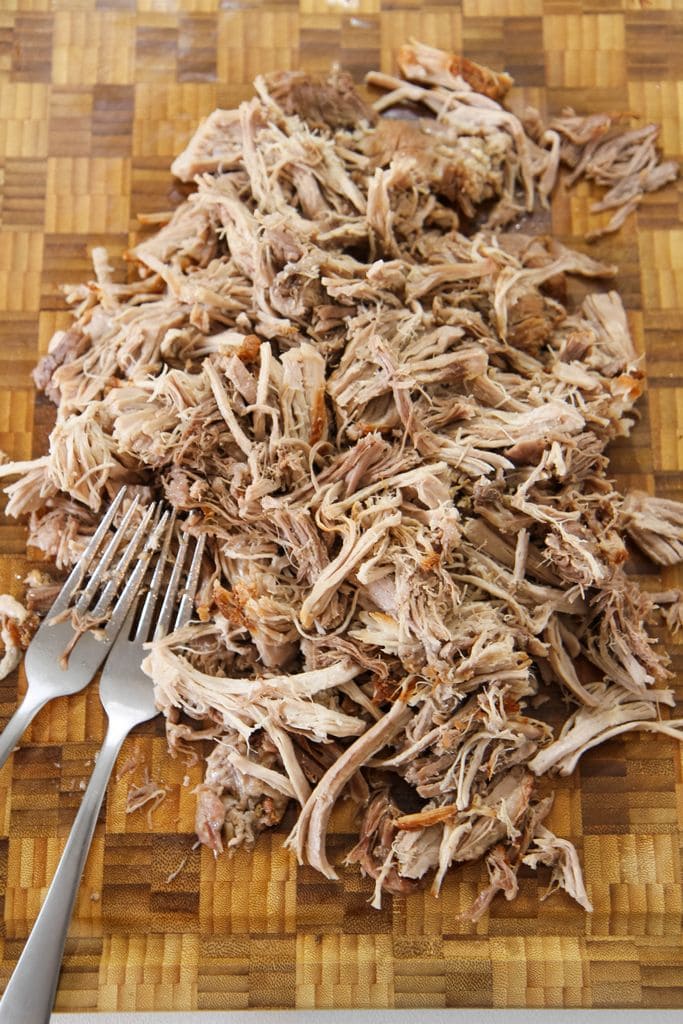
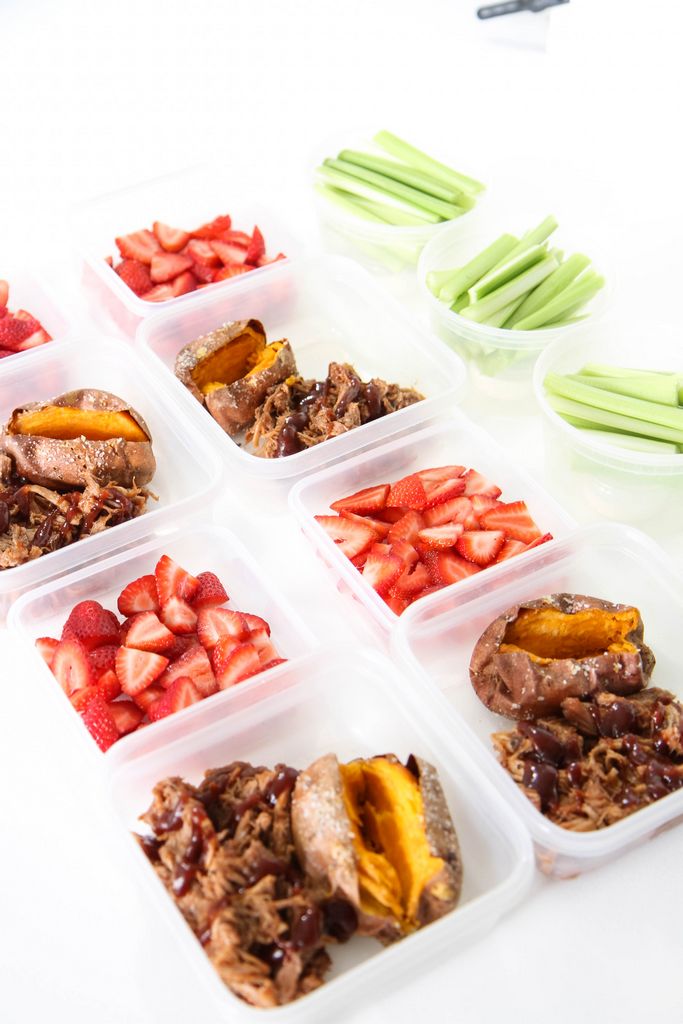
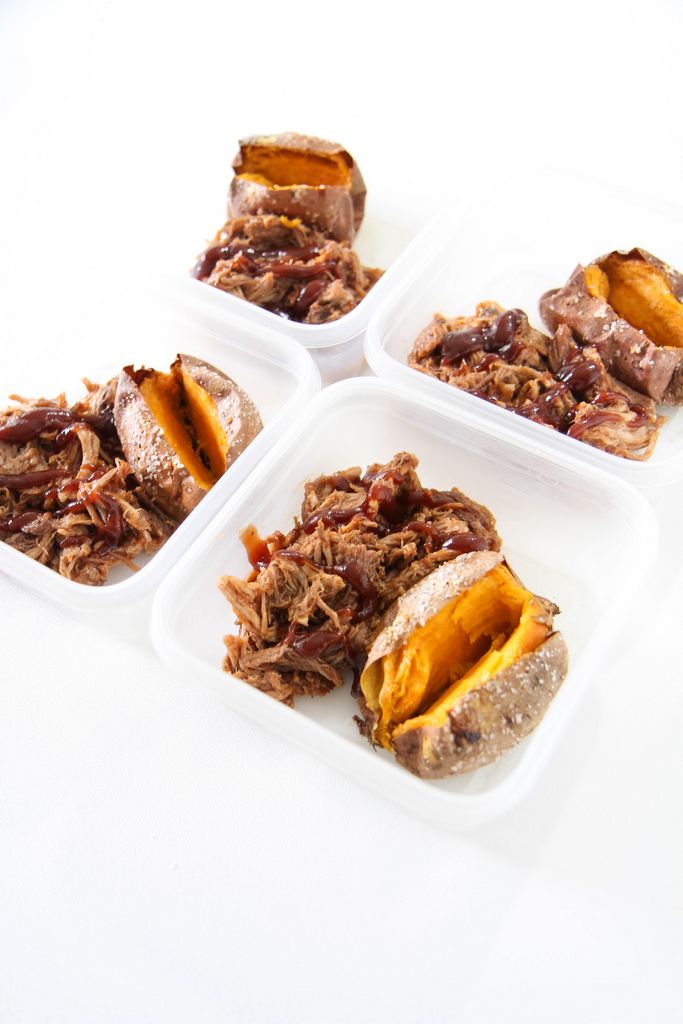
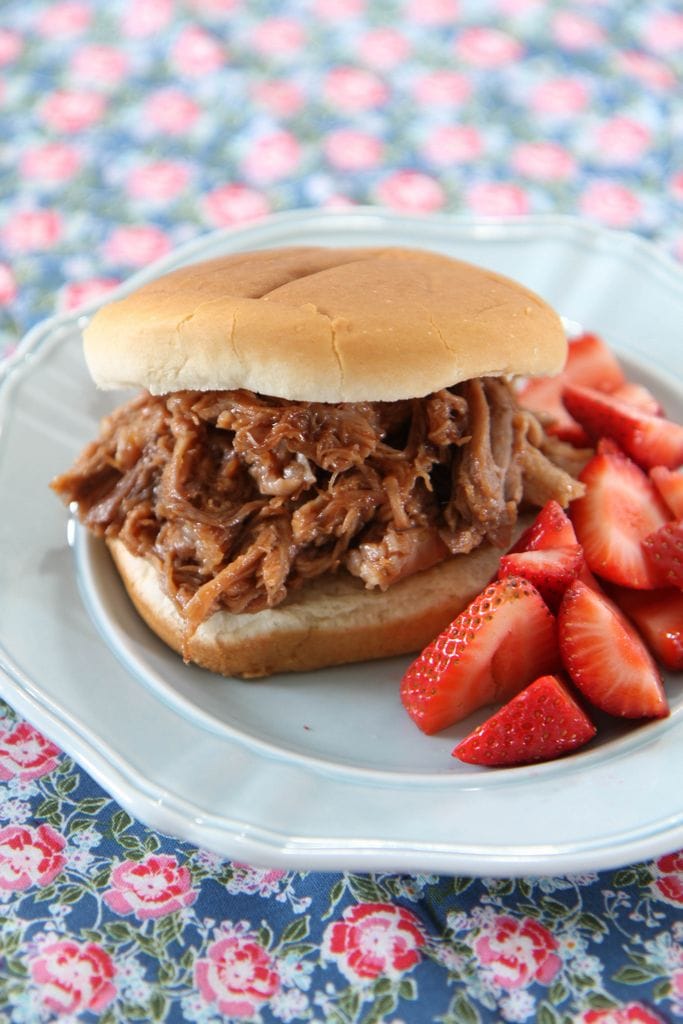
In all honesty, three ingredient recipes have been on repeat in our house especially these easy ribs (one of our most pinned recipes on the site) and these pulled pork sandwiches

It seems when I get a formula down, with my cooking, I just keep repeating it. 

As tailgating season is approaching, I wanted to show how you can cook the chicken wings in your Instant Pot in just about 30 minutes or so. 

Best Instant Pot Wings Recipe

Best Steamer Basket for the Instant Pot

xoxo steamer basket for instant pot 
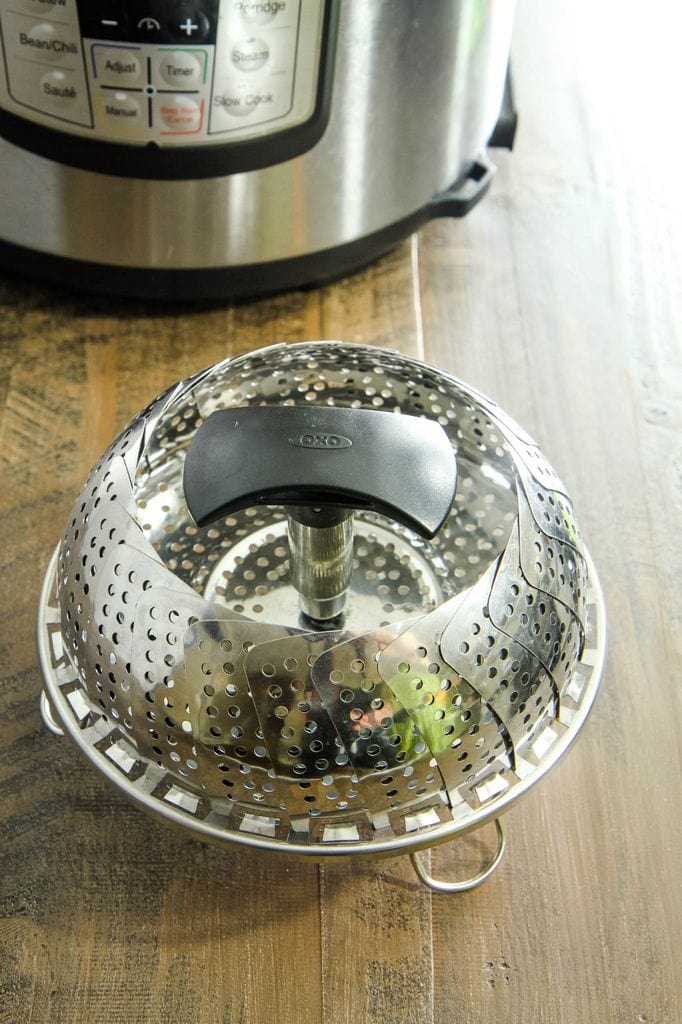
shop this steamer basket for your Instant Pot- you will love the handle on this for removal!

Although I don’t get sucked into the gadget game very often, I have found this steamer basket to be invaluable for cooking both my meat and my eggs. The basket fully holds what is inside and then can be lifted out by the center handle. I use it about once a week so I can confidently recommend this is a great addition to your kitchen arsenal.

When I first started blogging, I created a Honey Bourbon Chicken Wing recipe that I prepared in my slow cooker and I was so proud of my styling.


It was after this photo was posted that someone commented that they were surprised I didn’t, “trim my chicken wings.” 

How do I Trim Chicken Wings for My Instant Pot?

Trim the wings? 

I had no clue what that even meant. 

Wings weren’t something we ate in our house and I’m not the kind of girl who eats wings at a restaurant. It’s because I had no experience eating these that I didn’t know how to trim them for our family or what the wing was supposed to look like.

If you are still learning in the kitchen, I just want you to know that I’ve been learning right along with you. This wasn’t the first time I was wrong about the best way to prepare a dish and I really doubt that it will be the last. 

If you are looking for guidance on how to trim your wings for cooking, I found this tutorial very helpful for getting started. 

Best Instant Pot Wings from MomAdvice.com

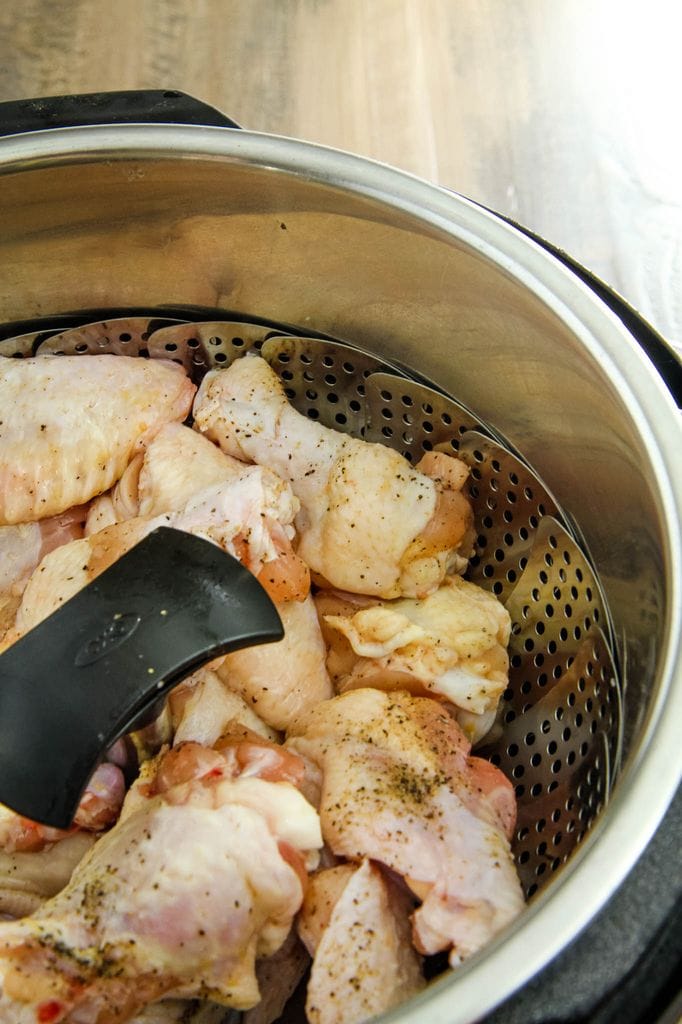
Once you have trimmed your wings, you are ready to toss them with salt and pepper. 

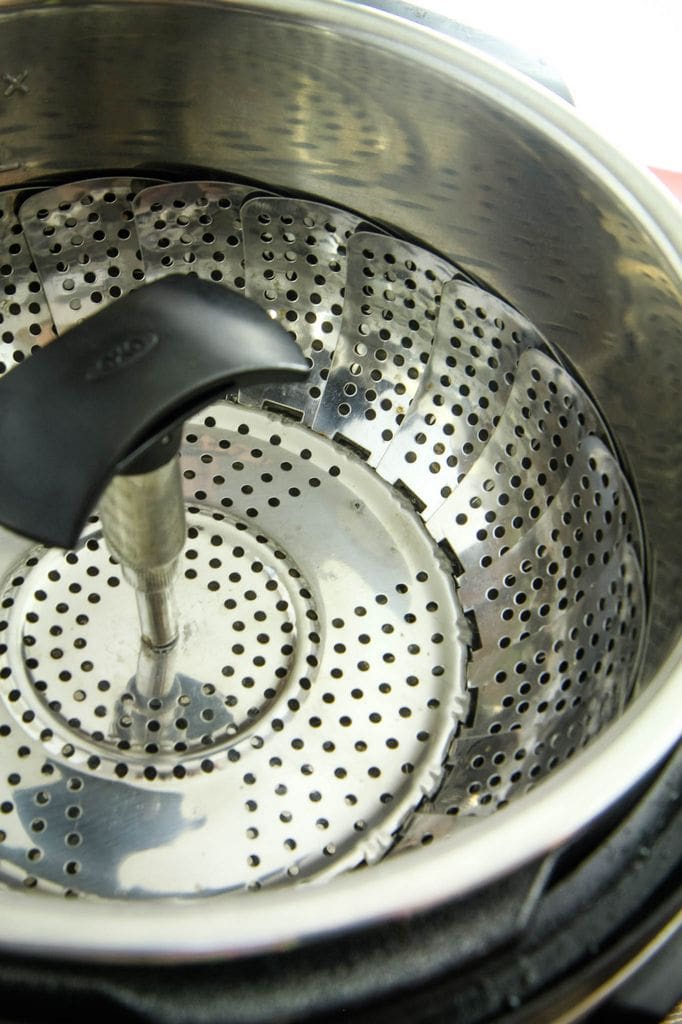
Next, you will add one cup of water to the bottom of your Instant Pot and rest your rack on top. Although I used water, I have also used chicken stock that has been leftover in my fridge. 

If you don’t have my rack, you can also use the rack that your pressure cooker came with. 

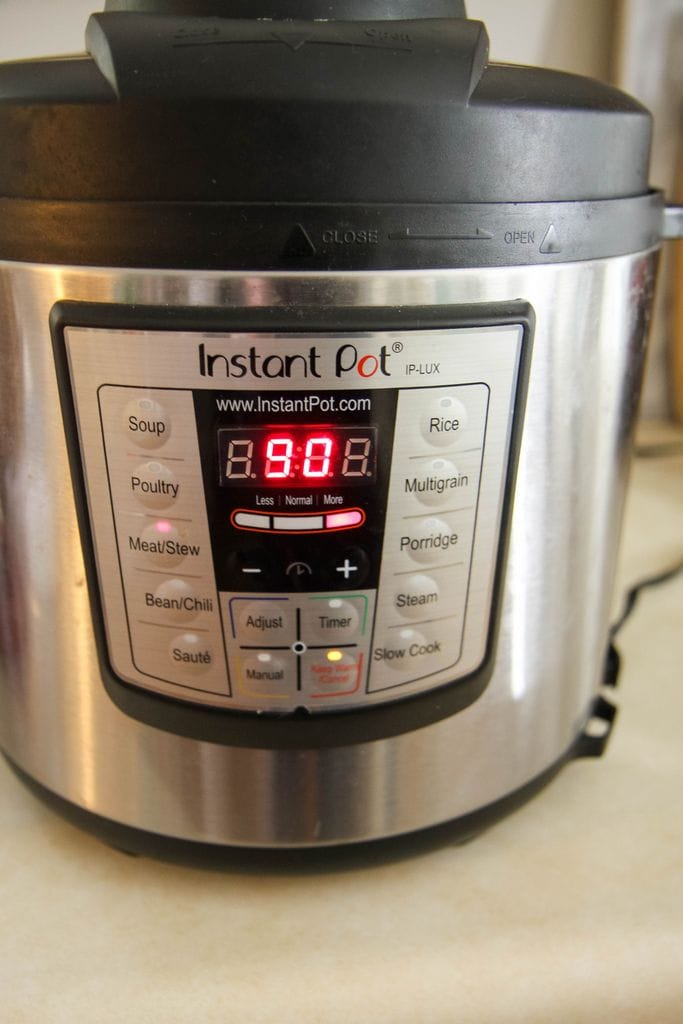
Rest the seasoned chicken on top of the rack, seal your Instant Pot, and then set the Instant Pot for High Pressure for 5 minutes. You will allow the Instant Pot to do a Natural Release for 5-10 minutes. 

natural pressure versus quick release diagram

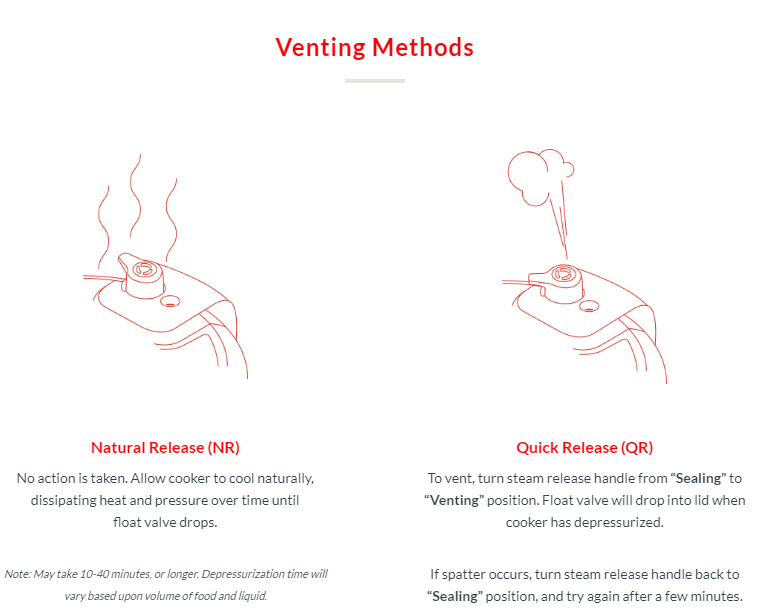
What the Heck is Natural Release?

Not sure what the difference is between Natural Release and Quick Release? That’s okay! This appliance definitely comes with a learning curve. 

I found this diagram that should help visually explain the big differences between these two types of venting. 

When we are told to Quick Release our pressure cooker, that just means that you are going to turn that steam release handle (located on your lid) to the Vent position on top. This allows all the steam to come out fast and at once. 

When we do Natural Release though, we just allow our pot to cool a bit on its own and then after 10 minutes, the steam that is released will be much less and the float valve will drop naturally over time.

Keep in mind, this does not adjust cook times, but only the length of time you are waiting to start working on the next step in the recipe (our broiler finish!).

Remove wings from the pressure cooker and place them on a baking sheet that has been lined with tin foil and has a baking rack on top to allow the circulate underneath. 

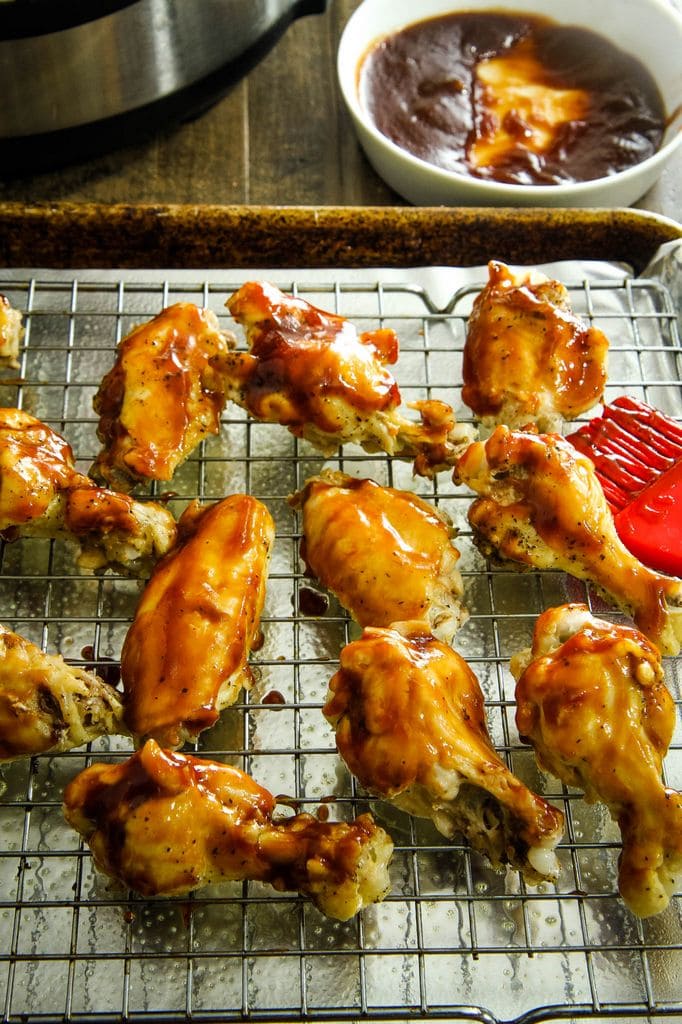
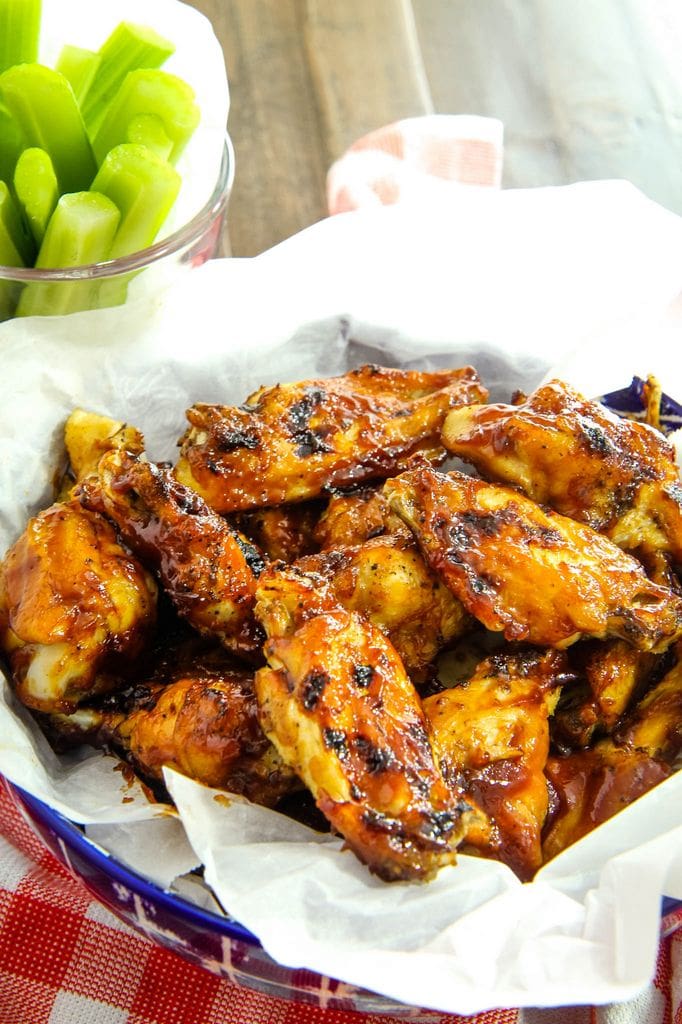
With a basting brush, you can apply your favorite barbecue sauce or you can really spice them up with buffalo sauce or hot sauce. Since our family is wimpy-wimpy-wimpy, we stick to our Sweet Baby Ray’s.

Since the chicken wings are fully cooked, you will not need to bake chicken wings ahead of time. Instead of deep frying these, we rely on the less messy and lower calorie option of just broiling the wings for about five minutes on each side.

I also love any dish that doesn’t require me to shred the chicken for preparation. Once you slide these out of the broiler, you are ready for dipping and eating these.

Please do keep your eyes on the oven though because they can burn on top if they aren’t carefully watched and may need adjusting during the broiling.  

Best Instant Pot Wings from MomAdvice.com

Best Instant Pot Wings from MomAdvice.com


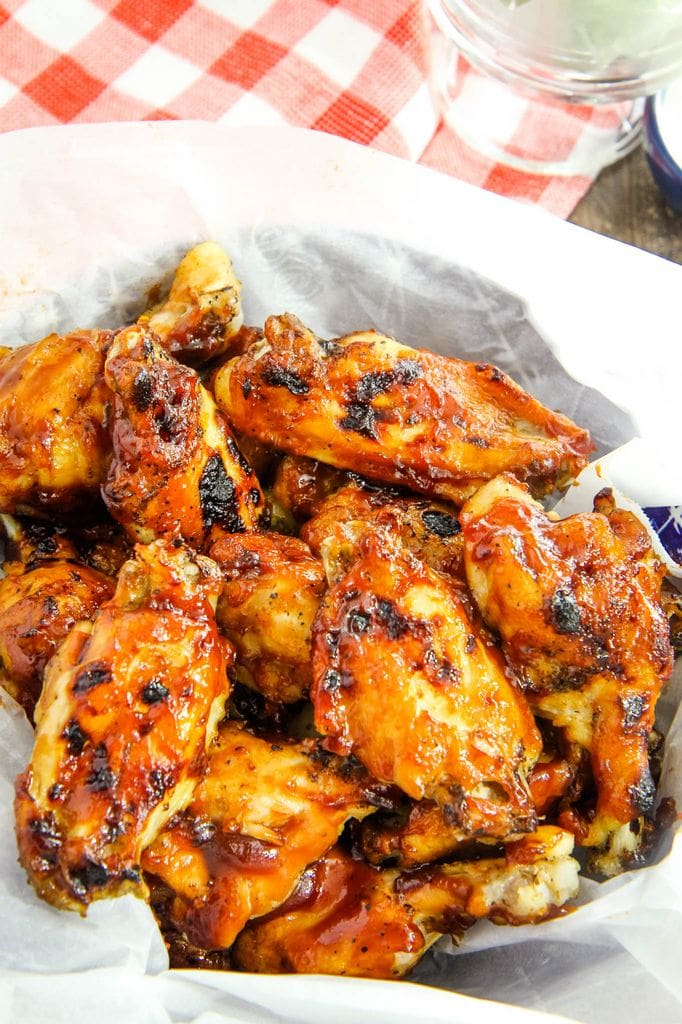
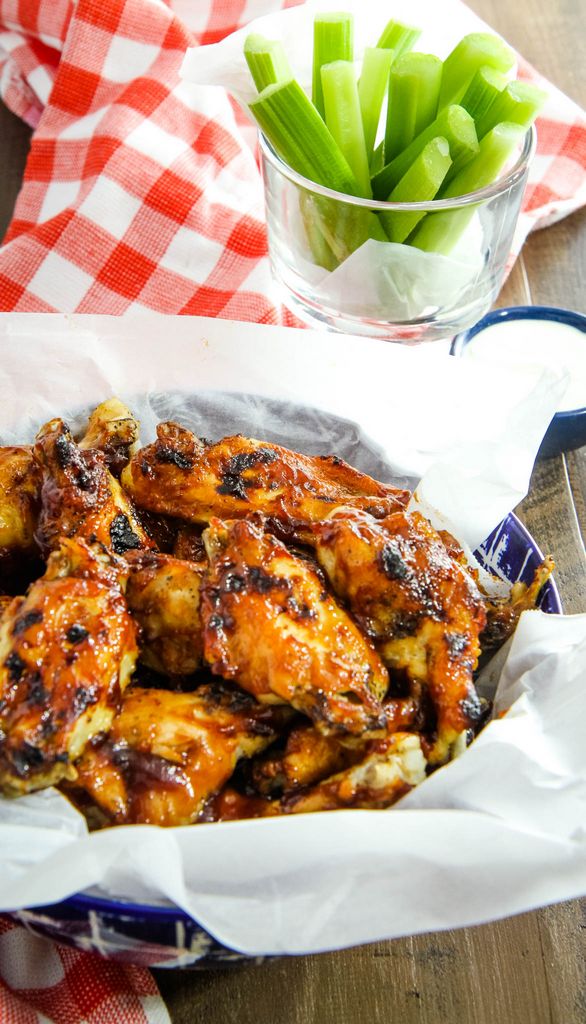
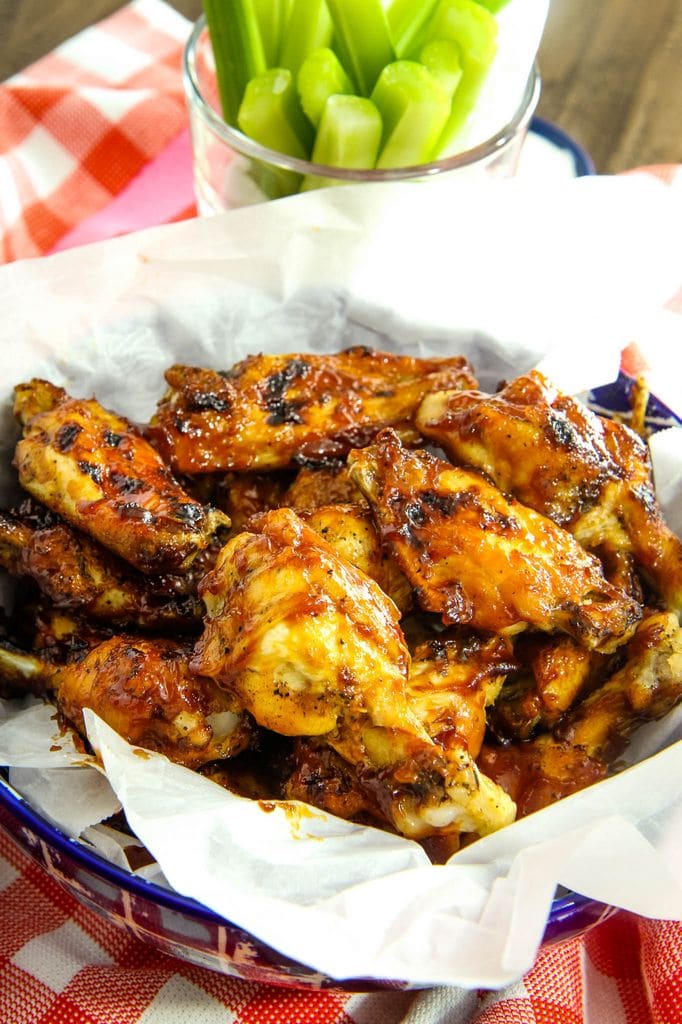
Once these are done, slide them into a serving bowl and pair with your favorite dipping sauce. 

I hope you love this recipe as much as I do and I’m thinking it is going to be the perfect recipe to tailgate with. I can imagine preparing a batch of these in my pressure cooker and then throwing them into my slow cooker to keep warm for game days.  

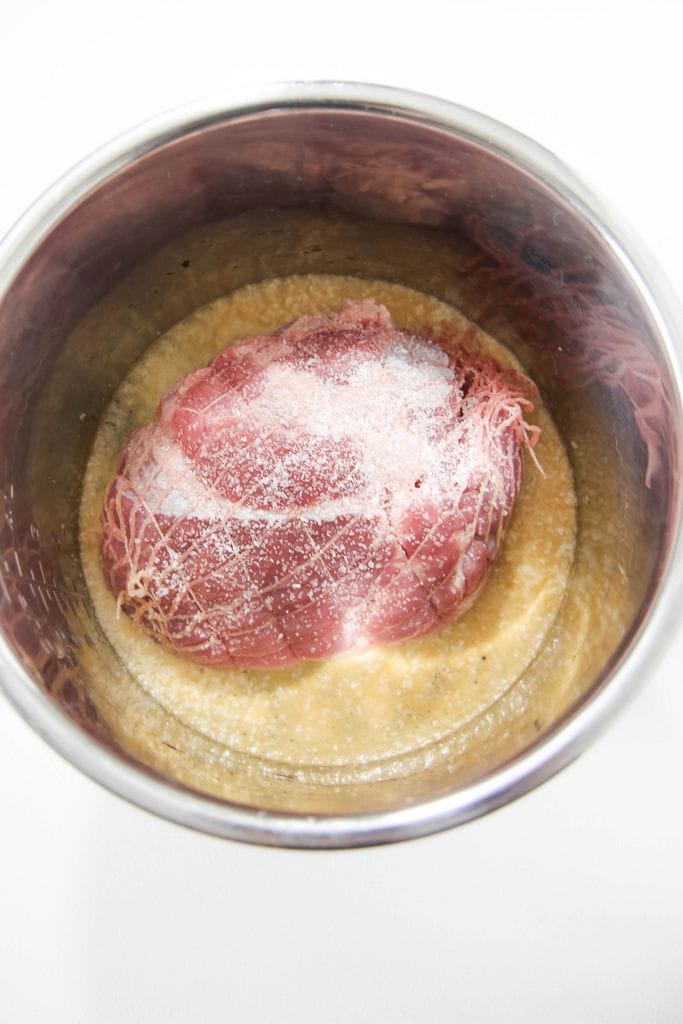
This isn’t the only Instant Pot recipe that I’ll be sharing this month though. I’m also looking forward to sharing a pot roast pressure cooker recipe that I perfected that I just know you will want to add it to your menu planner too. 

Best Instant Pot Wings from MomAdvice.com


Best Instant Pot Wings Recipe

Best Instant Pot Wings Recipe
 
Recipe Type: Appetizer
Author: MomAdvice.com
Prep time:
Cook time:
Total time:
Serves: 2 pounds
Ingredients
  • 2 pounds chicken wings
  • 1 cup water (or chicken broth)
  • Barbecue Sauce
  • Salt & Pepper
Instructions
  1. Trim your chicken wings by following the instructions that I linked to above. Once trimmed, toss with salt and pepper.
  2. Pour water (or chicken broth) in the bottom, place the steaming rack inside, and finish by putting your chicken wings within the rack.
  3. Lock the lid, select High Pressure and adjust to 5 minutes.
  4. While the wings are cooking, prepare a baking sheet with tin foil and a baking rack that has been sprayed with nonstick spray. Pour your sauce you will be using into a bowl, to baste on your chicken.
  5. Allow the pressure cooker to come to a natural release (I give it about 10 minutes) after the timer beeps, release the steam valve and then place the wings on foil-lined baking sheet.
  6. Broil the wings for 4-5 minutes (watching carefully to prevent charring). Flip the chicken wings over and brush the other side with barbecue sauce. Broil that side again for 3-4 minutes. Place on platter and serve with your favorite dipping sauce or additional barbecue sauce.


This post contains affiliate links.

Looking for more fun tailgate ideas? Check these posts out!

Gluten-Free Meatball Sub Bites from MomAdvice.com try these gluten-free meatball sub bites

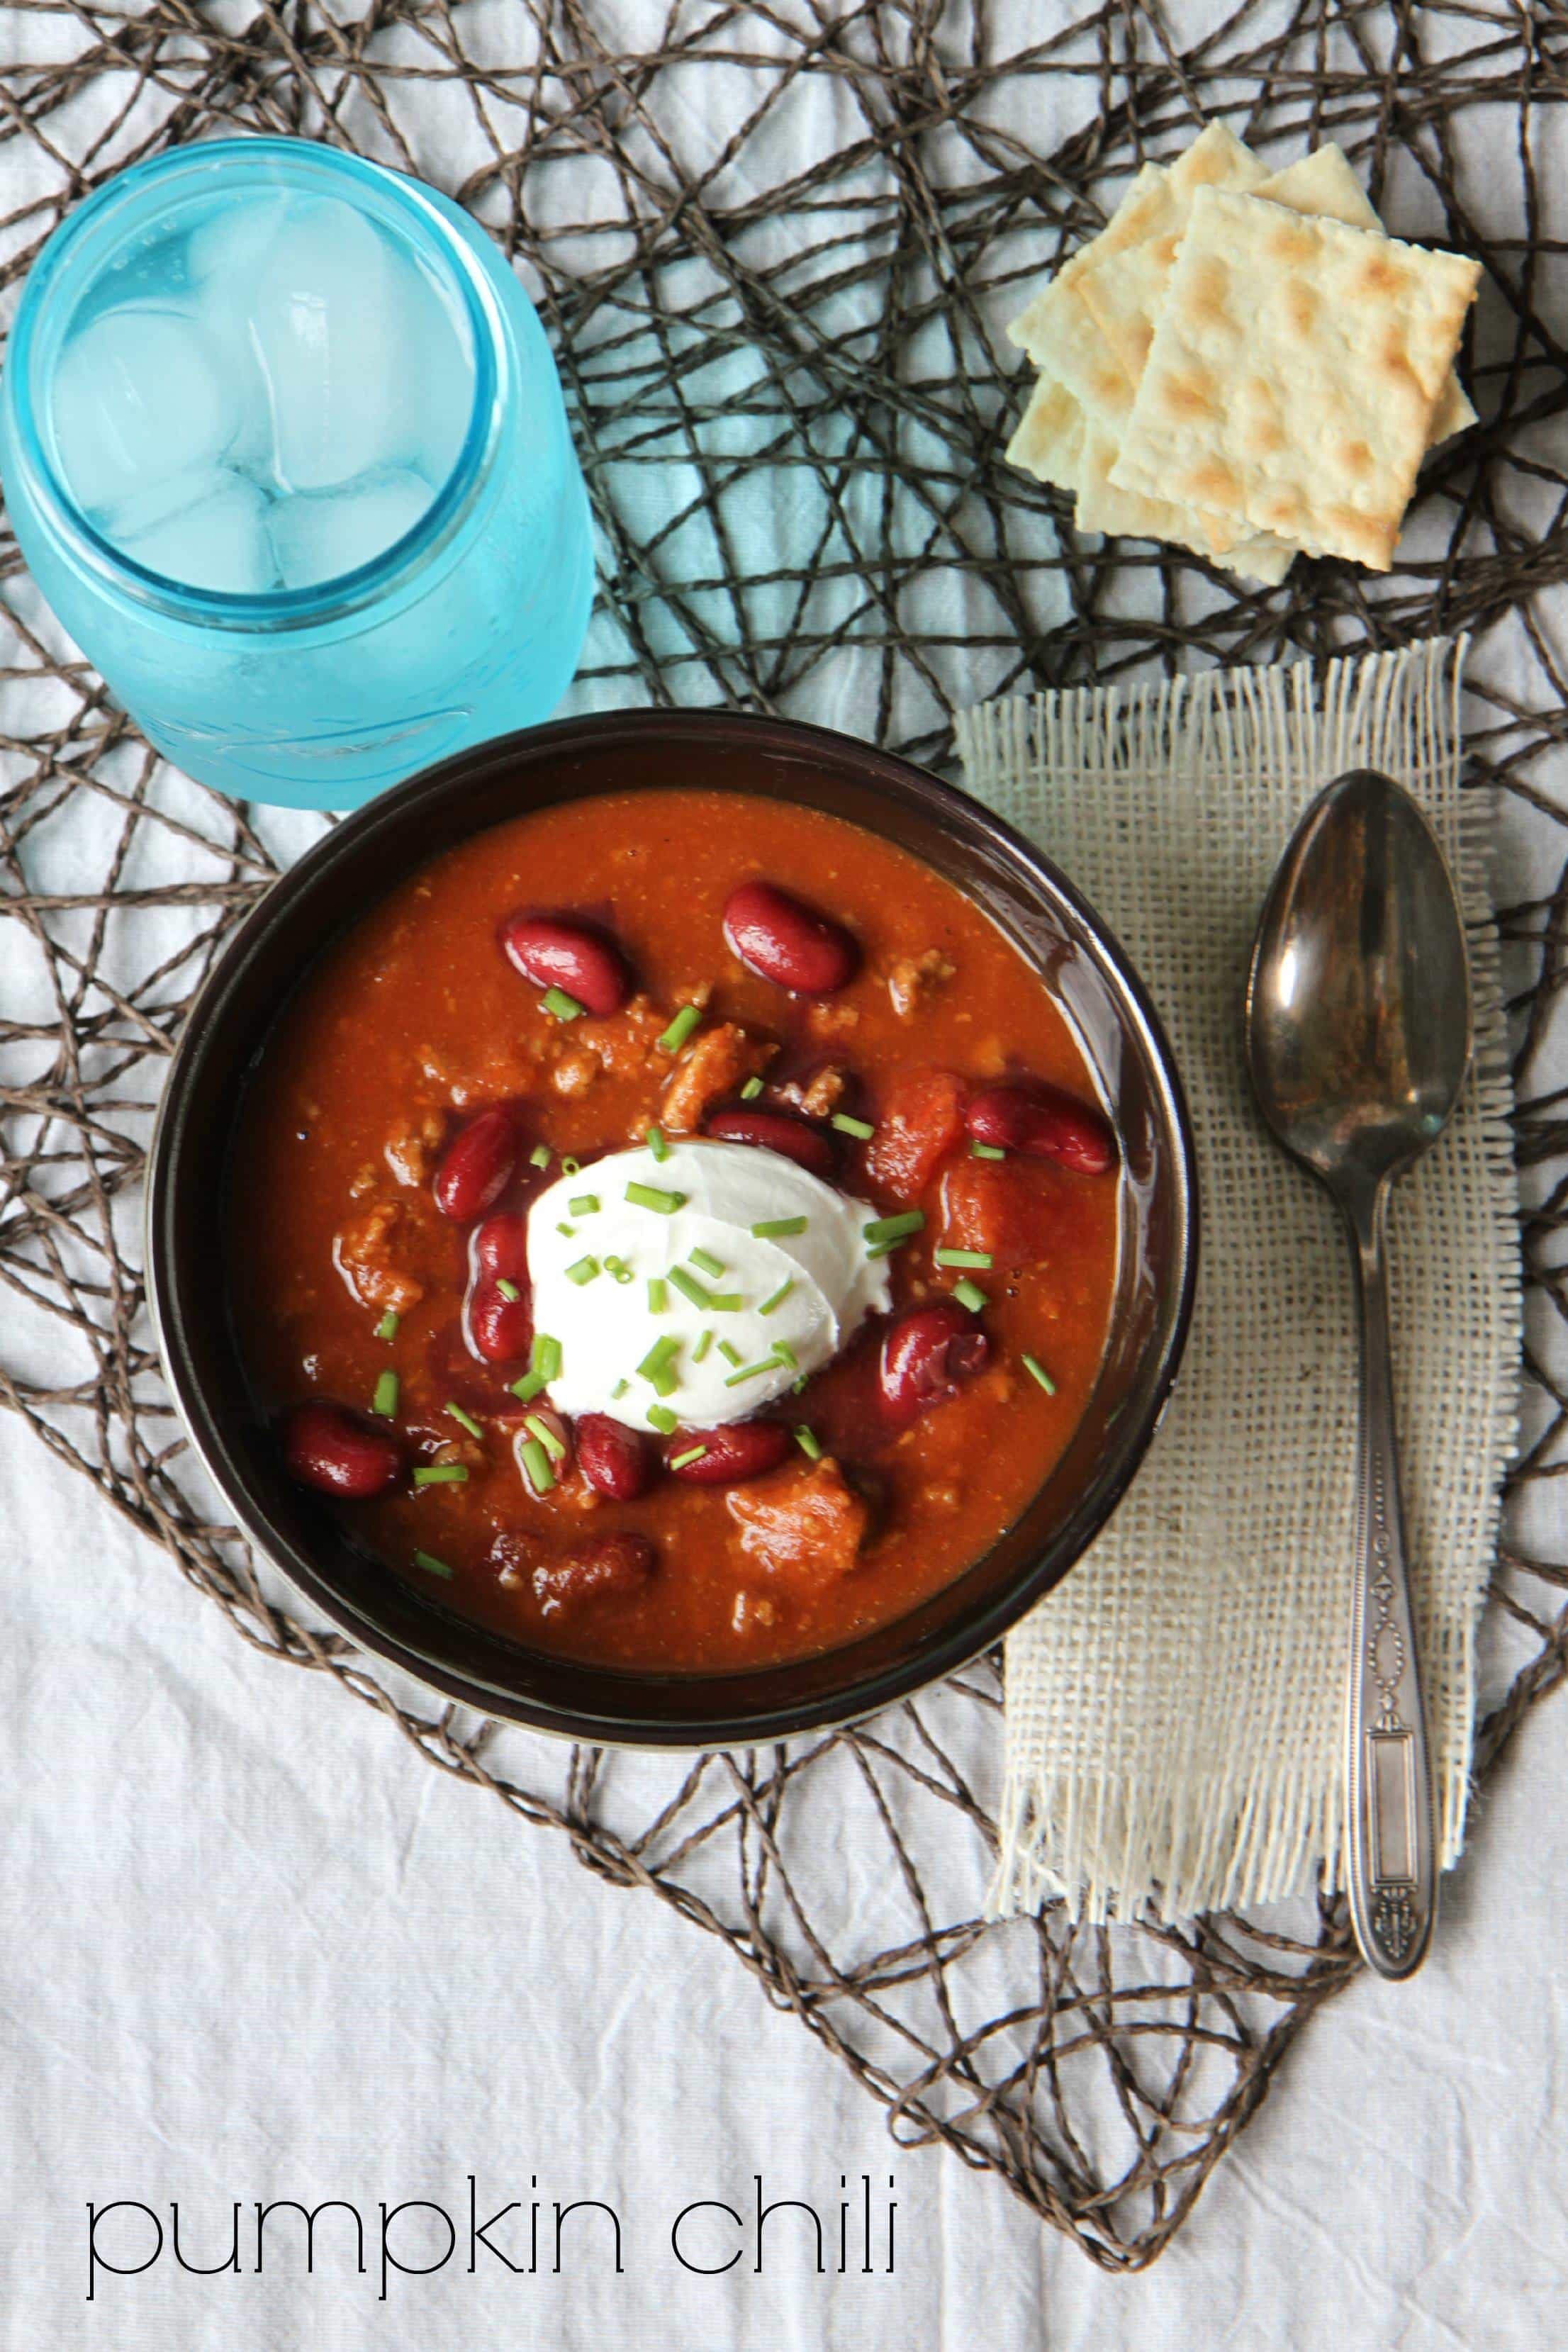
this slow cooker pumpkin chili is always a tailgate winner

you can’t go wrong with these sweet potato fries with a lemon meringue dipping sauce

this diy bar cart was made from a tool cart and a coat of spray paint. go, team!


Pin It

Herb Baked Tilapia Sheet Pan Meal

Wednesday, March 20th, 2019


Try this easy sheet pan meal for your next family dinner! This herb baked tilapia & asparagus bakes in under 15 minutes!

I don’t know about you, but I can never get enough sheet pan meal recipes! Today I wanted to share one of our tried-and-true family favorites  that I think you will love as much as I do. This herb baked tilapia sheet pan meal is gluten-free and can be prepared with a side of asparagus, all on one pan. This is an affordable meal that can serve a crowd and is simple enough that you could even get your kids in the kitchen to help you assemble these cheesy and crunchy toppings.

The preparation is pretty similar to my 5-Ingredient Salmon Sheet Pan recipe, but this time we will be preparing a crunchy gluten-free topping for the fish instead of a simple seasoning. If you don’t need to watch the gluten, you can substitute this ingredient with your favorite Panko or breadcrumb topping.  After trying several brands of crunchy coating, this is my favorite recommendation, if you end up needing the gluten-free version (like me!).

I also recommend splurging for the fresh tilapia, if you can swing it, because the fish is typically thicker than the frozen variety. It helps the fish to retain its moisture, while it is baking, and is also a little more filling.

If you have teenagers, you know that filling these kids up is a full-time job! #mamaisbroke

If you are trying to stay under budget though, the frozen fish does well, but will just cook up a bit quicker in your oven!

Here is what the dish looks like when it is prepared on the sheet pan. I lined my pan with nonstick foil, to help make clean-up a little easier! Underneath that layer of herbs & panko, you will find a cheesy layer that is prepared with just cheese and mayo.

Have issues with mayo?

I bet you will get over it when you mix that with cheese.

I mean, it is CHEESE!

You can also use your own substitution for mayo that works for your diet plan.

I have heard great things about this one!

Although, I know you aren’t here for my TED talk on this recipe, I have a pretty funny story about this dish.

When I was working for Kenmore, they asked me to share some of my favorite family recipes and they had them all printed up on gorgeous recipe cards to hand out at the Chicago Baby Show. Not only did they want to hand them out, but they told me that they wanted these dishes prepared for the attendees so people could eat samples as they walked through the different booths.

When I read how many people normally attend the Chicago Baby Show, I started to get spicy armpits.

I pride myself on my ability to feed many people, but what was this going to look like feeding THOUSANDS.

Also, why exactly did that think I was capable to cater this event?

The weeks leading up to the event were agonizing, but I couldn’t tell them that I couldn’t possibly do this. Our family was on the struggle bus financially so I had to do my best with this incredible job that I had been tasked with.

When I showed up, I put on my apron and was ready to go, spicy armpits and all!

That’s when they told me that the food was being prepared by someone else and I was just supposed to hand out my recipe cards.

Moral of the story?

Get the specifics on your jobs before you agree to do them and get ready to fake it until you make it!

I hope you enjoyed my TED talk on this fabulous dish.

In the end, I would prepare it for you, but not for thousands.

I hope you can give this one a spin at your house and can’t wait to hear what you think!

Herb Baked Tilapia Sheet Pan Meal
Recipe Type: Main Course
Author: MomAdvice.com
Prep time:
Cook time:
Total time:
Serves: 4-6 servings
Try this easy sheet pan meal for your next family dinner! This herb baked tilapia & asparagus bakes in under 15 minutes! If you are using a thicker cut of tilapia, you can double the topping for double the crunch!
Ingredients
  • 4 (4 to 6 ounce) tilapia fillets
  • 1/3 cup Parmesan cheese
  • 1/4 cup low-fat mayonnaise
  • 1/4 cup [url href=”https://amzn.to/2Ju9l38″ target=”_blank”]gluten-free panko crumbs[/url]
  • 2 teaspoons Italian seasoning blend
  • 1 pound asparagus
  • olive oil (for drizzingling on vegetables)
  • salt & pepper to taste
  • Fresh parsley, optional
Instructions
  1. Heat oven to 400 degrees. Adjust your oven rack to the second one from the top.
  2. Using a paper towel, blot the tilapia to soak up any moisture. Place tilapia on a sheet pan lined with nonstick foil.
  3. In a small bowl, combine cheese and mayonnaise. Spread evenly over fish.
  4. In another bowl, combine panko, Italian seasoning mix, salt, & pepper. Sprinkle over fish.
  5. Trim the asparagus ends. Drizzle the asparagus with olive oil and season with salt. Arrange the asparagus next to the tilapia.
  6. Bake 12-15 minutes
  7. Turn your broiler on high and finish with 2 minutes of broiling to get a pretty golden hue on your fish and to make sure the cheese coating is cooked all the way through. Make sure you keep an eye on it so your topping does not burn.
  8. Serve immediately with a little chopped parsley on top.

Looking for more easy dinner ideas? Here are a few of our favorites!

5-ingredient sheet pan salmon meal

5-ingredient caprese pork chops

gluten-free orange chicken

3-ingredient instant pot ribs

3-ingredient instant pot pulled pork

one pot gluten-free mac & cheese

5-ingredient gluten-free pizza crust recipe

This post contains affiliate links! Thank you!


5-Ingredient Salmon Sheet Pan Meal

Tuesday, March 5th, 2019

With just 5 ingredients, you have all you need to make this easy sheet pan meal. This recipe takes under 15 minutes to make and you will love these ideas for spice combos to completely change those flavors.

I am at a stage in life where I appreciate simple and straightforward food that doesn’t take a lot of time out of my day to prepare. That is why I have been relying heavily upon this 5-ingredient sheet pan salmon recipe to get us through all of these crazy nights where none of us arrive at the dinner table together.

I thought I’d give you the scoop today on my workhorse recipe that has been saving me a ridiculous amount of cash that would have been spent on takeout instead.

Salmon and asparagus go together like peas and carrots, don’t they?  I buy the whole side of salmon at our local ALDI and love the price for this fresh and not frozen fish. ALDI has partnered with Instacart (here’s ten bucks towards your order if you have never tried out this incredible invention!) and I have a note in our shopping list that instructs the shopper to buy enough salmon for a family of four.

Pictured here is what they typically bring and this is usually enough for six to seven meals, depending on our portion sizes.

For a long time I was intimidated by the idea of preparing a big giant piece of salmon like this. I would tell my scared self though that preparing this is incredibly easy. So easy, in fact, that I think even someone who has never cooked before could pull it off.

Here’s one quick tip that I would share with you about preparing fish that I didn’t realize in those beginning preparation days…

If you want your fish to have a beautiful golden exterior, you must use a paper towel and blot the fish well to remove the excess moisture.

It will make ALL the difference in the world when you broil it.

I season our fish with a simple shake of Old Bay Seasoning (you can usually find it over by the fish display at your market) and kosher salt.  The first night we eat this, we keep it with this basic set-up and it is delicious.

When I reheat the fish later in the week though, I love to use different spices in my spice cabinet (be sure to snag our FREE printable labels) to make the flavor profile different each day.

Everything Bagel mix, lemon pepper seasoning, and a Sicilian bread dipping mix are three that I rotate pretty regularly with a little squeeze of lemon.

The beauty in leaving your canvas blank is that you have the opportunity to switch things up over the course of the week.

Are you drooling too?

I love how beautifully this all broils up together.

My trick for keeping the asparagus looking great is to not broil it at the tip top of the oven rack, like you usually would. I give it one step down to allow the top of the salmon to still get that golden top, but also allowing enough space to not burn that asparagus.

This is 9 minutes in our oven.  Sometimes, with thicker cuts, I have needed 11 minutes, but I prefer to keep it closer to the 9 minute timeline to keep the fish flavorful and not dry.

How pretty is that?

I hope you can add this recipe to your arsenal and that it helps you succeed at saving money on takeout nights too.

5-Ingredient Salmon Sheet Pan Meal
Recipe Type: Main Dish
Author: MomAdvice.com
Prep time:
Cook time:
Total time:
Serves: 6-7 servings
You only need 5 ingredients to make this salmon sheet pan meal in under 15 minutes. After you try this impressive dish, I bet this recipe will be in constant rotation at your house too. See the post for fun spice combination ideas you can add to your fish to change the flavor profile.
Ingredients
  • Side of Salmon
  • Olive Oil
  • Kosher Salt
  • Old Bay Seasoning
  • 1 pound asparagus
Instructions
  1. Line your sheet pan with nonstick aluminum foil.
  2. Using a paper towel, blot up any excess moisture on your fish.
  3. Brush your salmon top with olive oil and add a generous amount of kosher salt and Old Bay Seasoning to the top.
  4. Trim the asparagus ends. Drizzle the asparagus with olive oil and season with kosher salt. Arrange the asparagus around the salmon.
  5. Move your oven rack to the second row from the top. Turn your broiler on HIGH and broil the salmon and veggies for 9-11 minutes.

Want more recipes?

Scroll down for some of my favorite dinner ideas!

an easy shrimp boil dinner

roasted salmon with pistachio gremolata

CLassic Shrimp and Grits #recipe via MomAdvice.com nearly classic shrimp & grits

gluten-free pad thai with shrimp

10 minute fish tacos

gluten-free shrimp scampi

shrimp fried rice

Tried the recipe? Let me know your thoughts in the comments below!

This post contains affiliate links


3-Ingredient Instant Pot Pulled Pork

Wednesday, January 2nd, 2019

3-Ingredient Instant Pot Pulled Pork Recipe from MomAdvice.com

For this quick and easy pulled pork recipe, all you will need is 3 simple ingredients and an Instant Pot! Learn how to make this gluten-free main dish and prep it for a week of lunches for your week!

If you love your pressure cooker, raise your hand! I use my Instant Pot all of the time and have come to rely upon it for many effortless family meals. These simple pressure cooker recipes have, truly, become part of our menu plan rotation. I also began to realize that some of the older recipes (I see you, old school MomAdvice readers!!) could benefit from a pressure cooker update too.

These recipes have been quietly gathering dust at our home… that is, until now!

My 3-ingredient Instant Pot Ribs recipe have been a bit of a viral sensation on our website. It was with my rib recipe in mind that today’s pulled pork also has just a few simple ingredients.

Confession time! We love our pressure cooker so much now that we frequently bring it with us when  we go on vacation. I’ve discovered so many great recipes that everyone seems excited now when I break this gadget out. Honestly, we have saved so much money on our trips by taking this gadget along with us when we travel that no one makes fun of me anymore.

The best part, of course, is the minimal clean-up with Instant Pot cooking. I also purchased an additional plastic lid that makes food storage easy. One of the best investments we made was to purchase this awesome lid.

An extra insert is always handy too so you always have a pot to prepare in!

Less dishes AND less money spent?

Now, that’s a vacation mom’s dream!


3-Ingredient Instant Pot Pulled Pork Recipe from MomAdvice.com

3-Ingredient Instant Pot Pulled Pork Recipe from MomAdvice.com

3-Ingredient Instant Pot Pulled Pork Recipe from MomAdvice.com

The first time I adapted my recipe, the directions said that I only needed 45 minutes to achieve perfectly shredded pork.

Unfortunately, this short duration of cooking did not yield the fall apart meat that I was after. I tested my pulled pork recipe several times with two different cuts of pork. I have made this recipe several times and, through my trials, I now know exactly what type of pork to purchase and how long to cook it.

Here is the thing, while many recipes do suggest a shorter cooking duration, you will struggle more with shredding your meat.

Trust me, this recipe is worth the wait!

Once your pork shoulder is done, it is time to quick release your pressure cooker.


3-Ingredient Instant Pot Pulled Pork Recipe from MomAdvice.com

3-Ingredient Instant Pot Pulled Pork Recipe from MomAdvice.com

How to Package Pulled Pork with Vegetables for Lunch

What Does Quick Release Even Mean?

Not sure what the difference is between Natural Release and Quick Release? That’s okay! This appliance definitely comes with a learning curve. 

I found this diagram that should help visually explain the big differences between these two types of venting. 

What does a recipe mean when it says that you should quick release your valve? This just means you will move the float valve to the venting position when it is done cooking. This allows all the steam to come out fast and at once. 

When the recipe calls for Natural Release though, we just allow our pot to cool a bit on its own. Typically, you wait 10 minutes so that the steam that is released will be much less. It is called Natural Release because it allows the float valve to drop naturally over time.

With today’s recipe, you won’t have to wait a minute after your bbq pulled pork is done. As soon as you hear the pressure cooker beep, you can slide your valve right on over to release the steam.

What Is the Difference Between a Pork Butt and a Pork Shoulder?

Am I the only one that wishes I was taught the difference in different cuts of meat for my recipes? One of the most confusing parts of cooking is knowing which cut of meat to select when visiting your grocery store.

Pork butt and pork shoulder are often offered as two cut options for recipes like this pulled pork. The thing I have discovered though is that they yield very different results.

Both of these cuts of meat come from the shoulder of the pig. The big difference is that the pork butt portion will be higher on the foreleg, while the shoulder is further down.

While both of these pieces of meat can benefit from similar cooking styles, they don’t end up with the same results.

The flavors were very different and reminded me of how different a chicken thigh is versus a chicken breast.

If we use a cut of chicken, as a comparison tool, I do find that the pork butt has the same consistency as the thigh meat of chicken.

It is darker in appearance, is more tender, and yields a better flavor.

Dare I use the word, MOIST?

Ugh!

Sorry, but that is the truth!

The pork shoulder, on the other hand, has a drier texture and is more difficult to shred. I find that this cut always ends up chewier than the pork butt.

Cooks Illustrated agrees with me that the pork butt is far superior when creating your pulled pork at home. The reason why the pork butt works best is because of the higher fat content in the cut of meat.

You can still use the pork shoulder as your cut of meat though. It is just important to understand that this cut won’t yield that delicious consistency you are after in your final product.

Are Pork Loin Roast and a Pork Tenderloin the Same Cut of Meat?

Once again, we find another confusing cut from the piggie. Pork Loin Roast and Pork Tenderloin are NOT the same… even though they sound the same.

Both of these cuts are leaner cuts of meat and although they sound the same, they look very different. Pork tenderloins are long and thin while the pork loin roast has a similar shape to the beef roast.

Now That I Know All About Pork Cuts, What Other Things Can I Make With Pork?

If you are adding more pork to your menu plan, I have a few reliable recipes for you. These Slow Cooker Carnitas helped us ease up on our Chipotle runs.

If you prefer a pork chop, these Caprese Chops are perfect for throwing on the grill.

Looking for a lean tenderloin recipe? I can’t recommend this Balsamic & Rosemary Pork Tenderloin Sheet Pan meal enough. It’s one of those that works really well at feeding a crowd, with minimal effort and minimal dishes.

What Other Types of Liquid Can I Use if I Don’t Have Any Root Beer?

I consider the liquid added to my pulled pork as a “clean out the fridge,” type of project. While root beer has always been my go-to liquid choice for my pulled pork, I have replaced it with any dark colored soda (like Coke or Dr. Pepper) with equally great results.

We also aren’t beer drinkers, but people have left beers at our house when we have entertained. Sometimes I use cider beer or even a dark ale as my cooking liquid. I have used beer successfully with my carnita recipe too.

Whatever liquid you choose, it is important to know that whenever you pressure cook, you want at least one cup of liquid on the bottom of your pot. This liquid prevents any scorching from happening and helps with the flavor of your dish.

Why Does This Recipe Use a Bottled Sauce?

Honestly, it takes a lot more than three ingredients if you want to make your own sauce. The additional time to mix up all those flavor components makes it a more labor intensive project. Instead of trying to make your own sauce, you will find that bottled sauce can make this dish much easier.

Do you have a favorite barbecue sauce? I’m a big fan of the Sweet Baby Ray’s Barbeque Sauce because I feel like it incorporates the brown sugar sweetness that I have come to love in a good bottled sauce.

Why would I go to the trouble of doing this when I can just buy a sauce on the grocery shelves?

As a mom, it is allll about saving time in the kitchen, amiright?

Once your pork butt is done cooking, it should only take you about 15 minutes to shred the meat for sandwiches and finish with the barbecue sauce.

For sides, fruit and veggies are the perfect accompaniment.

Are you a ranch dipper? I used these cups for our dip and just piled my veggies on top for snacking on while I worked.

I have found sweet potatoes are the perfect vehicle for pulled pork.

To prepare your sweet potatoes, begin by rinsing them off. After your potatoes are rinsed, prick them with a fork, brush them with olive oil, and roll them in kosher salt. Place your sweet potatoes on a cookie sheet that has been lightly sprayed with cooking spray. Bake them for one hour at 400 degrees.

I hope you will enjoy our great recipe at your dinner table too! Who knows? Maybe you will be traveling with the pressure cooker on your lap too!

Be sure to SCROLL DOWN for loads more dinner ideas. I have you covered!! Don’t have an Instant Pot? Use this recipe for your Slow Cooker instead! 

3-Ingredient Instant Pot Pulled Pork Recipe from MomAdvice.com

3-Ingredient Instant Pot Pulled Pork
 
Recipe Type: Main Dish
Cuisine: Barbecue
Author: MomAdvice.com
Prep time:
Cook time:
Total time:
Serves: 6-8 servings
For this pulled pork recipe, all you will need is 3 simple ingredients and an Instant Pot! Learn how to make this gluten-free main dish and prep it for a week of lunches for your week!
Ingredients
  • Prepared Sweet Potatoes
  • 1 (4 pound) Pork Butt (you can substitute with the Pork Shoulder, but please read why I don’t recommend this)
  • 1 (12 fluid ounce) can or bottle root beer
  • 1 (18 ounce) bottle your favorite barbecue sauce ([url href=”https://rstyle.me/n/dd57cpwky6″ target=”_blank”]this is my recommendation[/url] ALWAYS)
Instructions
  1. Pour a can of root beer in the Instant Pot. Place your pork butt (or shoulder) on top of the root beer and season well with salt and pepper. If you like a little garlic flavor to your pulled pork, you can also sprinkle with garlic powder to bring that component in. This is optional though!
  2. Lock the lid and select the Meat function (this should be on HIGH pressure), and set your timer for 90 minutes.
  3. Once the timer beeps, quick release your valve and remove the pork butt from the pressure cooker.
  4. Shred the meat and drain the root beer from the pressure cooker. Stir in barbecue sauce and toss gently.
  5. Serve in buns or prepared sweet potatoes. See my full post for a meal prep day for a week of lunches.


Looking for more easy recipes? Check these simple weeknight meal ideas below!

Instant Pot Indian Vegetable Rice from MomAdvice.cominstant pot indian vegetable rice

pressure cooker korean street tacosinstant pot korean street tacos

3-ingredient instant pot ribs

Shrimp Fried Rice from MomAdvice.comshrimp fried rice

Balsamic Pork Loin Sheet Pan Meal from MomAdvice.combalsamic pork loin sheet pan meal

sheet pan ranch chops& veggiessheet pan ranch chops & veggies

gluten-free meatloaf recipeeasy gluten-free meatloaf recipe

sheet pan lemon paprika chicken with vegetablessheet pan lemon paprika chicken with vegetables

Baked Orange Chicken Meatballs from MomAdvice.combaked orange chicken meatballs

5-ingredient gluten-free pizza crust5-ingredient gluten-free pizza crust

slow cooker carnitasslow cooker carnitas

asian-turkey-and-green-bean-sauteasian turkey & green bean skillet dish

5-ingredient caprese pork chops5-ingredient caprese pork chops

Roast Frozen Chicken in Bulkroast chicken in bulk for your week

What is your favorite thing to create in your Instant Pot?

*this post may contain affiliate links- I only recommend what I love though.

Pin It

Make-Ahead & Freeze Your Thanksgiving Meal

Wednesday, November 14th, 2018

Make-Ahead & Freeze Your Thanksgiving Meal from MomAdvice.com

These make-ahead holiday dishes are my favorites & I love that I can have our holiday feast prepped in our freezer. These recipes, decorating ideas, and hostess gift ideas are the perfect things you need in your arsenal for a perfect day!

It’s that time of year again where I show you how incredibly awesome it is to prepare your Thanksgiving meal ahead and pack it away in your freezer for the big upcoming feast.

Over the years I have tried so many recipes to share with you and today I want to show you my foolproof technique meal for creating a delicious meal right from your freezer and to your table that will taste like you cooked it that very day.

Before we dive into all the recipes, here are a few items I recommend having in your arsenal to make your meal preparation day easier and to actually create room for all of these delicious dishes.

Make-Ahead & Freeze Your Thanksgiving Meal from MomAdvice.com

Ninja Cooker For Preparation & Buffet

This item is definitely a splurge item, but has paid for itself over and over again for me. The Ninja Cooker has two functions on it (Stovetop & Slow Cooker) that allow you to brown meat inside of it and then switch to slow cooking. It also has a Buffet setting that is perfect for using on Thanksgiving Day to keep your dishes warm.

I can’t recommend this gadget enough and consider it to be a smart holiday investment.

Did I mention it is nonstick?

DREAMY!

Ziploc Freezer Bags For Food Storage for the Big Day

I love, love, love Ziploc Freezer Bags for their stackability for storing our food for the big day.

I use these to package up my stuffing and casseroles to help me pack more in my freezer without taking up so much space like a disposable pan would.

Make sure you reach for the freezer bags and not the regular ones though to prevent freezer burn.

When in doubt if something will hold, always double bag!

Chinet Bakeware For An Elegant Freezer Meal Spread

Since I freeze my feast for Thanksgiving Day, I love the ease of stacking (and clean-up) when it comes to disposable pans.

Chinet makes ones that are nonstick and I have found them to be a bit more durable for transporting from oven to table.

Since they are made of paper, the first time I used them I was a little scared how my food would turn out, but I have had great success with these and find them to be an affordable alternative to foil pans for Thanksgiving Day.

If you want to keep things looking nice, these casserole baskets (less than $10 each) are a clever trick I use to disguise a disposable pan.

Make-Ahead & Freeze Your Thanksgiving Meal from MomAdvice.com

Pie Cutters For Glamming Up Store-Bought Pies

If baking pies isn’t your thing, consider buying a little pie dough and adding a personalized touch with an inexpensive set of decorative pie cutters.

You simply roll out the pre-packaged dough, cut out a piece with the pie cutter and press to make a detailed impression on the top.

Transfer these delicate details to a parchment-lined cookie sheet and bake as directed.

Add a glossy shine with a little egg or sprinkle sugar & cinnamon on top to add a little flavor.

Between this and a glammed up whip cream or quick topping, your store-bought pies will be a fabulous addition to the dinner table.

Carry-Out Dishes For Packing Leftovers

Sharing the leftovers is not only a nice gesture for your guests, but it makes sure that all the dishes get eaten.

I use my takeout pho containers when packaging food up for myself, but these Fitpacker containers would be lovely to share and let your guests take home food or to prepare a few lunches/dinners for your own family for the week so you can really put your feet up!

Make-Ahead Thanksgiving Dishes To Try

Cheddar Apple Pie Dip from MomAdvice.com

Appetizers

Bacon Ranch Cheeseball– Need I say more?

Spunky Spinach Dip– A delicious combination of spinach, salsa, & cream cheese. Serve with carrots and tortilla chips for dipping

Cheddar Apple Pie Dip– Prepare until the point of baking. Freeze for the big day.

Chocolate Chip Cookie Dough Dip– AKA Crack Dip, as it is so lovingly referred to in our house.

Slow Cooker Chex Mix

Gluten-Free Meatball Sub Appetizer

Gluten-Free Meatballs– Bake & prepare sauce. Freeze separately for the big day. Warm up on the stove top and then skewer with baby mozzarella balls.

Sugar & Spice Nut Mix– Would also make a great hostess gift if you aren’t making the meal!

Cranberry Spread– Tangy and a delicious dip to pair with crackers.

Make-Ahead Green Bean Casserole

Sides

Green Bean Casserole– Panko with homemade mushroom cream sauce- it’s divine!

Make-Ahead Mashed Potatoes– I always double batch this recipe because these are the best mashed potatoes you will ever eat.

Brandied Orange & Cranberry Sauce– This is the best cranberry sauce I have ever eaten- truly!

Buttery Bread Machine Rolls– This foolproof recipe makes storing a bread machine worth it! Be sure to read this article for lots of bread machine tips!


Make-Ahead Gravy

Make-Ahead Gravy Recipe– Finding out I could make this early last year saved me so much time in the kitchen on Thanksgiving.

Pumpkin Cranberry Cornbread– Bake & freeze for the big day!

Make-Ahead Apple, Sausage, & Sage Sourdough Stuffing

Gluten-Free Bacon, Apple, & Cornbread Stuffing follow these directions for freezing!!

Slow Cooker Turkey for Thanksgiving Turkey

This turkey isn’t a make-ahead recipe BUT did you know you can cook it in your slow cooker?? Follow these instructions to save some space in your oven for the big day!

Not having a lot of guests? Give this easy method a spin. If you only like white meat, you can double or triple one of these for about the same price (and save the hassle of carving- boom!)

Not up for cooking the turkey? Check out this easy option you can have delivered to your doorstep from Amazon Prime!!

Fancy Up Store-Bought Pies

Desserts

Store-Bought Pie Tricks– Wow, your guests with a few easy details

Homemade Pumpkin Pie

All-Butter Pie Crust– Prepare and freeze discs of dough

Cranberry Crunch Pie Topping

Cranberry Crunch Pie Topping– Store wet and dry ingredients separately for the big day

Spiced Whipped Cream– Make-ahead and store in the fridge for the big day

No-Bake Peppermint Cheesecakes

No-Bake Peppermint Cheesecakes– A promise of all the good treats to come this holiday season

Not cooking? Here are a few of my favorite hostess gifts

DIY Slow Cooker Pumpkin Spice Candles

DIY Slow Cooker Pumpkin Candles

Mini Pie Hostess Favor

Mini Pie Gifts

diy trophy toppers (free gift tag printables)

Microwave Peanut Brittle

Easy Microwave Peanut Brittle

diy vanilla chai tea mix

succulent terrariums (even a sweet small one in a thrifted tea cup!)

Sugar & Spice Nuts Mix

Sugar & Spice Nuts

Knitted Sweater Cozies

Knitted Sweater Coffee Cozies

Wine Hats & Scarves

Wine Hats & Scarves

Neon Paint Dipped Spoon Set

Paint-Dipped Spoon Sets

Free Thanksgiving Printable

Thanksgiving Decor, Crafts & Entertaining

Woodland Thanksgiving Table + Free Printables

DIY Thanksgiving Centerpiece

DIY Table Runner for All Seasons

Decorating & Food Advice for the Perfect Friendsgiving

Friendsgiving Feast

Host a Friendsgiving Feast

How to Entertain the Kids on Thanksgiving Day

How to Set the Perfect Thanksgiving Table

DIY Chalkboard Food Label Frames

I hope these ideas inspire you! If you are looking for a great turkey recipe, be sure to check out this Herb-Roasted Turkey Breast or just use this simple technique for a small crowd to prepare a boneless breast! Happy holidays, friends! xo

*this post may contain affiliate links- I only recommend what I love though! 

Pin It

Simplifying Your Holiday Gatherings

Thursday, November 1st, 2018

You will love these strategies for hosting memorable gatherings without the stress.

I’ve got everything from cooking shortcuts to decorations that transition through the seasons to your perfect playlist! 

This post is sponsored by Honeysuckle White. All thoughts and opinions are my own! 

Now that Halloween is behind us, it is time to start thinking about all of those upcoming holiday gatherings. Hostess duties can often feel stressful and overwhelming, don’t they? That is why I’m excited to be partnering today with Honeysuckle White to share some fresh ideas for hosting your next gathering without the stress.

I learned that if I wanted to connect with my friends and family that I often had to be the one to step up to bat and offer to host. I have discovered, over the years, that so many people feel intimidated by hosting and are often self-conscious of things like undone house projects, their limited cooking abilities, or not feeling like they have that perfectly sized space for the ideal gathering.

The thing is, our own intimidations rob us of precious moments with those we love and the people that REALLY and GENUINELY love us will always, always be thankful to you for creating space in your home and day for them.

That is, truly, why I am excited to share that Honeysuckle White recognizes how precious our time is and wanted to take out that intimidation factor by providing a brilliantly easy turkey product that will make gatherings so much easier on busy moms.

Even better?

You can order it right through Amazon.

And, ladies, I KNOW we all have Amazon ordering down pat! (*ahem*)

Say hello to the world’s easiest holiday dish, the NEWS Honeysuckle White Bacon Wrapped Turkey Breast “Turketta”, inspired by the flavor profile of porchetta!

I gave ordering one of these a spin and really was surprised how well-seasoned and easy this was to execute for my Friendsgiving gathering this week.

In your package (that arrives right on your doorstep!)  you will get one of these beautiful roasts that serve approximately 4-6 people.  The packages arrive frozen and you can thaw it for an ASAP gathering or you can tuck this in the freezer for a future meal.

The bird is perfectly seasoned, boneless (no carving- woot, woot!), and requires just a simple quick sear on the bottom and baking.

This isn’t the only option you can have delivered. They also are offering Hickory Smoked Turkey Breast, a Honeysuckle White Fresh Traceable Whole Bird Turkey, & the Honest Turkey Whole Turkey.

Even better, for a limited time offer, MomAdvice readers can get 15% off using my coupon code 15MOMADVICE.

I can really get behind this company and the work they do with farmers, especially after having the opportunity to tour one of the farms.

The company is committed to raising their turkeys without growth-promoting antibiotics and no added hormones or steroids.

They also are committed to supporting independent family farmers to provide family farm-raised turkeys.

I don’t know if you know this, but my great-grandpa was a farmer and that is why that commitment and their true love for these families really warms my heart.

Now that you have the turkey covered, here are a few other ideas for a simple gathering of great friends and great food!

Send Out a Small Invite

I have done loads of large gatherings, but I find the best gatherings are often the intimate ones with just a couple of close friends so you can really catch up.

A friendsgiving need not be a large gathering and the invitation does not need to be a formal one.

Text invitations are perfectly acceptable, especially during such a busy season.

Also, allowing mamas to bring kids is a blessing to the mom (who won’t have to cook) and to you (to get to love on your friend’s beautiful kiddos especially since your kids are tweens/teens and you now have to FORCE YOUR LOVE on them).


Keep the Sides Simple

Roasted vegetables are an easy side that can be prepared a day in advance.

In fact, storing your carrots and potatoes in water overnight will yield a much crisper roast than if you cut them up immediately.

Toss your prepared vegetables in olive oil, kosher salt, and your favorite dried seasoning (I’m a thyme girl!) and roast them at 450 degrees for 25 minutes.

Love perfectly roasted potatoes?

Cut baby potatoes in half and put the cut side down on a cookie sheet that’s been lined with aluminum foil and is lightly greased. You will get a perfect roast every time AND they are so good that my kids call them mom’s french fries.

It goes without saying, but lining the cookie sheets with tin foil or parchment paper squares is also an excellent way to cut down on dishes!

Skip the Baking

Thankfully, there is no need to bake since we have so many delicious options for desserts that are already made and available for purchase at our local markets.

You can still make these purchased desserts feel really special though with quick homemade touches.

Spicing up your whipped cream, adding crunchy toppings, or adding details with pie cutters or an embossing rolling pin (made from refrigerated pie dough) are all fun ways to make pies feel special and more homemade.

This post offers 5 strategies for making store-bought pies feel special that I think you will find REALLY helpful for the holidays and even an idea for packaging up mini pies as a parting gift at the end of the night.

replicate my table with this easy tutorial

Think Evergreen When It Comes to Home Decorating

In the blog world, evergreen content is king. It means that we really focus on creating timeless pieces that can be shared over and over again and always feel relevant.

This is the SAME WAY we can approach our decorating. Purchase or DIY things that are neutral and can be used over and over again throughout the seasons. A bit of faux greenery, a roll of kraft paper (DO buy this– it’s such a affordable investment for decorating and gift wrapping), white plates, and loads of candles are perfect for ANY occasion.

Adding simple seasonal touches, like the small bundles of sage I gathered with cotton twine feel very Martha-y, but cost only a couple of bucks to pull off.

Stop pulling out and storing seasonal bins and buy a few items that you can use over and over and over again.

You can’t imagine the stress you will relieve yourself of!

Set the Mood

Before I go, I have one more fun fact for you…I used to be a glorified D.J. for my college’s radio station.

Music is essential to me like breathing and food.

Growing up, I played the violin, sang in the choir, did musical theater, and had parents who were crazy about music too.

I am also the one that hogs the microphone if you karaoke with me.

To me, a solid playlist for special occasions is oh-so-necessary.

Don’t have time to make one?

How about if I shared mine with you!

Also, as a thoughtful introvert, I have included three goodbye songs at the end that you can feel free to boot those up after the meal when you just need to retreat to your Snuggie and Netflix.

Hopefully they catch on..I know, “CLOSING TIME,” is a very, very subtle exit song!

I have embedded it here for you so be sure to bookmark this awesome post and give me a follow for more fabulous dinner music.

Now hurry on over to order your turkey and don’t forget to use my coupon code 15MOMADVICE to snag your 15% off!

this post contains affiliate links

This post is sponsored by Honeysuckle White. All thoughts and opinions are my own!

28 Instant Pot Soup and Stew Recipes for the Soup Season

Monday, October 22nd, 2018

Is it getting cooler where you live? I have to admit, this week was a bit of a shocker to my system with the temperatures dropping so quickly in Indiana. I have been hibernating this week and implementing ALL the strategies already for the cooler months.

One of my strategies I haven’t mentioned though is a weekly pot of soup that can save me from cooking a couple of nights a week AND for keeping us warm in the evenings.

Now that soup season is in FULL SWING, I thought I would share a gathering of Instant Pot soups that are my radar for my menu plans.

If you haven’t put an Instant Pot on your list of kitchen must-haves, I bet you will after seeing how quickly and easily you can pull together a pot of soup to enjoy all week long.

Last week I shared a recipe with you, but I also shared two gadgets that I think every Instant Pot fan will love, especially for your soup seasons!

The first is this type of lid that will make it easier to serve and reheat your soups for family meals.

There is nothing more awkward than trying to open and shut the sealing lid, amiright?

The other thing I absolutely love is this gadget that allows you to store your soup right in the pot in your fridge without any messes or spills.

If you can’t wait to get your pot back for the next meal though, many people also purchase additional inserts so that they can store a soup for their week as well as continue keeping the Instant Pot dishes in their rotation.

You can bet that an additional insert is on MY Christmas list this year.

And while we are on the topic of gadgets, if you haven’t bought one of these yet, it is a workhorse in our kitchen.

I, honestly, can’t imagine making soups or sauces without it…not to mention all that frothing of milk for my lattes at home.

I promise, I only recommend what I really love and TRULY use in our kitchen.

Speaking of what I love…how about some new recipes for your menu plan?

Here are 28 Instant Pot Soup & Stew recipes that I can’t wait to make this Fall & Winter!

instant pot gluten-free broccoli & cheddar

pressure cooker italian chicken soup

instant pot potato soup

instant pot pho ga (vietnamese chicken noodle soup)

instant pot split pea soup

instant pot detox soup

instant pot moroccan spiced butternut squash soup

instant pot chicken gnocchi soup

instant pot chicken vegetable soup

instant pot chicken enchilada soup

pressure cooker red wine beef stew

instant pot vegetable soup

instant pot vegan carrot ginger soup

instant pot mushroom soup

instant pot tomato soup

instant pot cauliflower soup

instant pot classic french onion soup

instant pot thai shrimp soup

instant pot chicken & dumplings

instant pot white chicken chili

vegan potato corn chowder


instant pot chicken tortilla soup

instant pot creamy tortellini soup

instant pot sweet potato carrot coconut soup

instant pot vegetarian chili instant pot vegan udon soup

instant pot taco soup

instant pot chicken fricassee

Not enough Instant Pot recipes for you? Here are 3 of our most popular Instant Pot Recipes on the site!

3-ingredient instant pot ribs

instant pot korean street tacos

instant pot indian vegetable rice

What is your favorite soup to make in your pressure cooker?


this post contains affiliate links

Instant Pot Gluten-Free Broccoli Cheddar Soup

Tuesday, October 9th, 2018

This Instant Pot Broccoli Cheddar Soup will fulfill all those Panera cravings MINUS the gluten!

One of my absolute favorite soups is Broccoli Cheddar Soup and it is my ultimate Panera weakness. Unfortunately, their version isn’t gluten-free so this week I decided to break out my Instant Pot and do a little recipe-testing.  Broccoli cheddar soup is one of those cheesy comfort foods that a gluten-free girl can REALLY get behind.

Oh, I should say, if you haven’t hopped on the Instant Pot game yet, I encourage you to JUST GO FOR IT.

Seriously.

It is the best gadget ever and is relied heavily on throughout our week to make fast work of soups, sauces, and tender meat.

If soups are going to be in your Instant Pot rotation too, I highly recommend two tools that will REALLY improve your enjoyment HIGHLY of this gadget.

The first is this type of lid that will make it easier to serve and reheat your soups for family meals.

There is nothing more awkward than trying to open and shut the sealing lid, amiright?

The other thing I absolutely love is this gadget that allows you to store your soup right in the pot in your fridge without any messes or spills.

If you can’t wait to get your pot back for the next meal though, many people also purchase additional inserts so that they can store a soup for their week as well as continue keeping the Instant Pot dishes in their rotation.

You can bet that an additional insert is on MY Christmas list this year.

And while we are on the topic of gadgets, if you haven’t bought one of these yet, it is a workhorse in our kitchen.

I, honestly, can’t imagine making soups or sauces without it…not to mention all that frothing of milk for my lattes at home.

I promise, I only recommend what I really love and TRULY use in our kitchen.


Making gluten-free soups that are thick and creamy can be a challenge. If I can offer any advice, adding this flour to our pantry has replaced a lot of my difficulties with modifying recipes to make them gluten-free. It’s an affordable solution that doesn’t require any master mixing or extra effort. Who couldn’t get behind that?

You will want to take your time though, once you add the flour to your pot, and really work hard to keep stirring and adding that liquid gradually to prevent your soup from being riddled with clumps.  It helps to take your time with this element and, remember, you will get that time back thanks to how quickly this cooks in your pressure cooker.

I’m sure it goes without saying that freshly grated cheese will always yield a better dish, but I also live in that whole “ain’t nobody got time for that” mindset on most weeknights.

GUYS.

It’s survival mode over here most days.

Can I get an amen?

I hope you love this recipe as much as our family did! We paired it with my easy make-ahead chicken in bulk recipe in gluten-free wraps with a drizzle of ranch.

If you are trying to do more meat-free nights, it also goes great with a little bread for dipping and some apple slices to round out this satisfying bowl of soup.

Be sure to scroll down for some more of our family favorites after the soup recipe!

Instant Pot Gluten-Free Broccoli Cheddar Soup
Recipe Type: Soup
Prep time:
Cook time:
Total time:
Serves: 6 servings
Break out that Instant Pot for this satisfyingly filling Instant Pot Gluten-Free Broccoli Cheddar Soup. Not gluten-free? No problem! Replace the gluten-free flour with your gluten-y version.
Ingredients
  • 3 tbsp butter
  • 2 cups diced carrots
  • 2 cloves garlic minced
  • 1/4 cup gluten-free flour ([url href=”https://rstyle.me/n/c9y996wky6″ target=”_blank”]this is the brand our family prefers[/url])
  • 3 cups vegetable stock
  • 6 cups broccoli florets
  • 1 tsp paprika
  • pinch of nutmeg
  • salt to taste
  • 1 1/2 cups shredded monterey jack cheese
  • 1 1/2 cups shredded sharp cheddar cheese
  • 1/2 cup milk
  • 1/2 cup heavy cream
  • salt and pepper to taste
Instructions
  1. Plug in and turn on your Instant Pot. Press the Sauté button on the Instant Pot (you want to make sure it is set to Normal) and give it a few minutes to warm up. Add the butter. Once melted, add diced carrots and cook three minutes.
  2. Stir in the garlic and flour. Allow the flour to cook for a minute or so, stirring constantly. Next add a small amount of your vegetable stock, incorporating this in bit by bit while stirring constantly and eliminating any lumps in your soup base.
  3. Hit cancel on your Instant Pot to turn off Sauté function. Add your broccoli in the pot, seal with the lid, and set your Instant Pot to HIGH pressure for 8 minutes.
  4. At the end of your cooking time, do a quick release of pressure and open the lid. Add in your paprika, pinch of nutmeg, and salt to taste.
  5. Stir in cheeses and mix well until it has melted. Add in milk and cream. Taste again to double check your final seasonings.
  6. If you have [url href=”https://amzn.to/2ymYuiC” target=”_blank”]an immersion blender[/url], you can use it to blend the soup or you can carefully pour half of the soup in a blender and blend it well and add it back to the soup pot.
  7. Serve immediately.
  8. When reheating, you can add additional vegetable stock or milk to thin the soup back out.
  9. [url href=”undefined”][img src=”https://www.momadvice.com/blog/wp-content/uploads/2018/10/instant-pot-gluten-free-broccoli-cheese-soup-3.jpg” width=”5184″ height=”3456″ class=”aligncenter size-full” title=”Instant Pot Gluten-Free Broccoli Cheese Soup from MomAdvice.com”][/url]


Looking for more great dinner recipes? Here are a few others that are a big hit with our family (AND READERS!) You can also visit our RECIPE section of the site!

3-ingredient instant pot ribs

instant pot korean tacos

instant pot indian vegetable rice

asian turkey and green bean saute

gluten-free meatloaf recipe


gluten-free chicken noodle soup

shrimp fried rice

baked orange chicken meatballs

balsamic pork loin sheet pan meal 5-ingredient gluten-free pizza dough

one pot gluten-free mac & cheese

What is your favorite way to use your Instant Pot? Have any questions about this gadget? Leave them below and I will answer them in a future post!

this post contains affiliate links

Best Ground Beef Taco Recipe

Saturday, September 15th, 2018

This great weeknight dinner recipe for ground beef taco meat is a family favorite, thanks to its unique flavor combination. This is a MomAdvice Pinterest favorite and, after you try this, you will see why!

What is your favorite kind of taco? For me, a crunchy beef taco is the perfect taco. I promise to not complain if you serve me a fish or chicken taco, but beef tacos are always my heart’s desire.

A beef taco that incorporates a little tomato flavor too?

Now that’s taco perfection.

Since going gluten-free, tacos have become one of my most relied upon quick dishes. No one ever feels like they are sacrificing anything by eating them and they can easily be doubled or tripled for a crowd.

When I stumbled upon this taco meat recipe, I was intrigued by the spice combination. Simmering this meat in chicken broth and tomato sauce was also so intriguing. What would these two simmering ingredients add to this traditional taco filling?

Here is what I have discovered…this taco meat is the best taco meat in the world- truly! I make this recipe a few times a month and we rarely have any leftovers.

The mixture of tomato sauce and chicken broth really do add just the right flavoring to this taco filling. The sweet and spicy combination of spices and brown sugar also elevate these flavors, while not relying on a prepackaged taco seasoning mix.

No recipe seems complete without that acidic component. Luckily, this one gets it from a bit of apple cider vinegar. The addition of this ingredient really cuts the sweet and adds a balanced flavor to the tomato sauce.


Best Ground Beef Taco Recipe from MomAdvice.com

My kids can’t handle very spicy dishes so I often modify the cayenne and chili powder. Making this recipe with a homemade taco seasoning spice mix allows you to have control over the heat and sodium.

The best part about having this easy taco filling on hand is that it can be used in so many different dishes.

In the summer, I love to make taco salads, topped with black beans, diced tomatoes, and sour cream.

For a fun weekend dish, we rely on this easy recipe to make taco bowls, filled with rice, cheese, and avocado.

You could top this meat on top of a big stack of tortilla chips for a nacho night at home. I like to spread out tortilla chips on a sheet pan, and load them up with my favorite nacho toppings. Bake these at 400 degrees for 12-15 minutes and you have the perfect appetizer for a movie night at home.

This easy taco meat recipe is adapted from one of my favorite cookbooks, “The America’s Test Kitchen Family Cookbook.” Pairing this taco meat with their homemade chicken enchiladas & homemade enchilada sauce would, certainly, take your Mexican fiesta to a whole new level.

Since we are always trying to save money, mastering a few good takeout recipes is always on my agenda. I am hoping that my new recipes, like this taco meat recipe, will replace my cravings for take-out.

 
Best Ground Beef Taco Recipe
 
Recipe Type: Main Dish
Cuisine: Mexican
Author: Adapted from America’s Test Kitchen Cookbook
Prep time:
Cook time:
Total time:
Serves: 6-8 tacos
This great recipe for ground beef taco meat is a family favorite, thanks to its unique flavor combination. This is a MomAdvice Pinterest favorite and, after you try this, you will see why!
Ingredients
  • 1 tablespoon olive oil (or vegetable oil)
  • 1 diced onion (or 1 tablespoon onion powder)
  • 3 garlic cloves minced (I use a tablespoon of bottled minced garlic or you can substitute with 1 teaspoon of garlic powder)
  • 2 tablespoons chili powder (adjust to your personal taste)
  • 1 teaspoon cumin
  • ½ teaspoon oregano
  • ¼ teaspoon cayenne pepper (or you can do a pinch of crushed red pepper or a dash of red pepper flakes)
  • Salt
  • 1 pound (90 percent lean) ground beef or a combo mixture of half ground turkey and half ground beef
  • ½ cup smooth canned tomato sauce
  • ½ cup low sodium chicken broth
  • 2 teaspoons cider vinegar
  • 1 teaspoon light brown sugar
  • 8 taco shells (or flour tortillas or corn tortillas)
Instructions
  1. Heat the oil in a medium skillet over medium high heat until shimmering.
  2. Add the onion and cook until softened, about five minutes.
  3. Stir in the garlic, chili powder, cumin, oregano, cayenne pepper, and 1 teaspoon salt and cook until fragrant about thirty seconds. Make sure both the onion and garlic are cooked through.
  4. Stir in the ground beef and cook, breaking it up with a wooden spoon until no longer pink, about five minutes. Once it is cooked, drain the grease before proceeding to the next step.
  5. Stir in the tomato sauce, broth, vinegar, and sugar until thickened, about ten minutes.
  6. Season with salt to taste.
  7. Divide the filling evenly among the taco shells and serve passing any desired accompaniments separately.
  8. Make-Ahead Version: The filling can be fully prepared, cooled, covered tightly and refrigerated for up to three days. Reheat over medium-low heat, adding additional water to adjust the consistency.


Looking for more fun MomAdvice dinner favorites? How about these!

slow cooker carnitas

Slow Cooker Mexican Black Beans from MomAdvice.com slow cooker black beans

How to Make Perfect Brown Rice in Your Rice Cooker from MomAdvice.com how to make brown rice in your slow cooker

Mexican Quinoa Stuffed Bell Peppers mexican quinoa stuffed peppers


Pressure Cooker Korean Tacos pressure cooker korean street tacos

10 Minute Fish Tacos 10-minute fish tacos (the same recipe can be applied to shrimp tacos too!)

Chicken Enchiladas With Homemade Enchilada Sauce

chicken enchiladas with homemade enchilada sauce


This post contains affiliate links

Pin It

Back-to-School Meal Prep Ideas

Tuesday, August 14th, 2018

Back to School Meal Prep Ideas from MomAdvice.com

It’s time to bring on those meal prep ideas for packing lunches for back-to-school. I’m sharing 7 tips to nail your meal prep game for your kids and YOU. I’m excited to be partnering again with the Florida Department of Citrus for the back-to-school season and showing you some fun new strategies for lunch preparation.

It seems surreal to me that we are already talking about back-to-school, but we are just one week away from sending our kids off to school again. It is with this big occasion in mind that I look forward to getting back into our healthy eating routines and finding new ways to minimize stress during our busy weeks.

One of the ways I do that is through our meal prep routines.

back-to-school lunch meal prep ideas from momadvice.com

back-to-school lunch meal prep ideas from momadvice.com

Let’s talk about 5 really great strategies for meal prepping that can help you this year.

back-to-school lunch prep ideas from momadvice.com

back-to-school lunch prep ideas from momadvice.com


back-to-school lunch prep ideas from momadvice.com

Find New Ways to Use Up What’s Already in Your Fridge

Meal planning can save you tons of money at the grocery store, but I have the tendency to get excited about new meals without using up what we already have in our fridge.

Make a plan, but acknowledge ways that you can use up items that may be nearing their expiration date. I love frittatas, for example, because they can be whipped up from whatever you have lurking in your crisper drawer and from your weeknight meal leftovers. Today’s frittata, for example, was made from cherry tomatoes, spinach, mushrooms, and feta…all items leftover our salad nights this week. Ask your kids to help you come up with combos and give them the opportunity to brunch it up at school.

If you are looking for a great recipe, check out my Chicken Pesto Frittata or my Dairy-Free Sausage & Vegetable Frittata for two great options. Either of these can omit the meat for a fun vegetarian option too.

I paired this frittata with orange juice to round out the meal. Keep in mind that the recommended daily intake of Florida OJ is eight ounces for adults and four to six ounces for kids! The best part is that every glass of Florida Orange Juice provides the amazing 5. In fact, you have taste, vitamin C, folate, potassium and no added sugar in just one glass.

back-to-school meal prep ideas from momadvice.com

back-to-school lunch prep ideas from momadvice.com Consider the Snack Pack Trend

We caught a commercial for, “protein packs,” that you could purchase for your lunches that had meat, cheese, and nuts in them.  Even though my husband can’t cook, even he was laughing at how ridiculous it was that people couldn’t put these together themselves.

Snacks packs aren’t a new concept, but they ARE a perfect concept if you have a kid that is a snacker or if you happen to be a snacker yourself.

Utilizing toothpicks, stack a slice of lunch meat, a grape tomato, and a cube of cheese for a delicious bite that is easy enough that your kids can do it (and make their own dang lunch!)

I paired these with fresh veggies, a little ranch, and roasted salted almonds.

Want to add some fruit? Consider an apple! Using an apple slicer like this, slice the apples and then pull them back together in their original shape around the core with a rubber band.

Did you know that for additional insurance you can brush the apple with some orange juice to really help your apple retain its crisp appearance and cut down on browning? Now that’s a #lunchhack

prep peanut butter & jelly

Kids Keeping it Basic? Prep That Too!

I had one child who refused to eat anything except a good old-fashioned PB&J. I admired that she knew what she liked and that she kept it simple for her mom. That said, even those simple tasks rob us of precious time to get ready in the morning so I started meal prepping even these simple sandwiches.

If your child’s favorite is this sandwich too, simply spread peanut butter on both slices of bread to create a wall to prevent the jelly from making your bread soggy. Smear your jelly on in the center of one slice of bread and then put the two slices together. By creating an assembly line of sandwiches for your week you only dirty up the kitchen once and get back a little more time to enjoy your morning cup of coffee.

back to school meal prep ideas from momadvice.com


orange chicken meatballs recipe from momadvice.com

Plan Around Your Own Guilty Pleasures

Have you thought about packing yourself a lunch? I have the tendency to get out of the habit of caring for myself when the back-to-school rush happens and find myself grabbing takeout or “forgetting to eat,” when I don’t have something convenient to grab.

Jot down what your takeout weaknesses are and start searching Pinterest for some great alternatives for your meal prep day.

For me, Chinese is my weakness so these Make-Ahead Baked Orange Chicken Meatballs were just the ticket for my meal prep day. The sauce, of course, gets all of its orange goodness from a little Florida OJ!

Don’t Have Time To Make Separate Lunches? Double Up on Those Dinners!

Life gets chaotic this time of year so if you can’t devote a day to making lunches, consider doubling up on dinner ideas instead. For some great cold options, here are a few of my own recommendations!

Quinoa-Salad-In-A-Jar-7 quinoa salad in a jar with spinach & tomatoes

chicken caesar pasta salad chicken caesar pasta salad

Berry Pecan Salad

berry & candied pecan salad with a homemade raspberry vinaigrette (make with or without chicken)

Caprese Pasta Salad #recipe via MomAdvice.com caprese pasta salad

Roast Frozen Chicken in Bulk roasted chicken (perfect for salads & wraps)

Don’t forget those sides!

make-ahead hard boiled eggs make-ahead baked hard boiled eggs

Smoothie Bowl Recipe smoothie bowl recipes

roasted garlic hummus roasted garlic hummus

No-Bake Gluten-Free Granola Bars no-bake gluten-free granola bars

  trail mix energy bites trail mix energy bites

I hope that today’s ideas inspire you to try something new this year with your meal prep. Self-care is just as important so be sure to take some time out for YOU too with a few of my favorite self-care tips. Thank you to the Florida Department of Citrus for letting me share about these tips with you! Be sure to make Florida OJ a part of your daily routines to help boost your immune system during this challenging mom season.

This blog was sponsored by Florida Department of Citrus. Thank you for supporting the companies that support our site!


Pin It