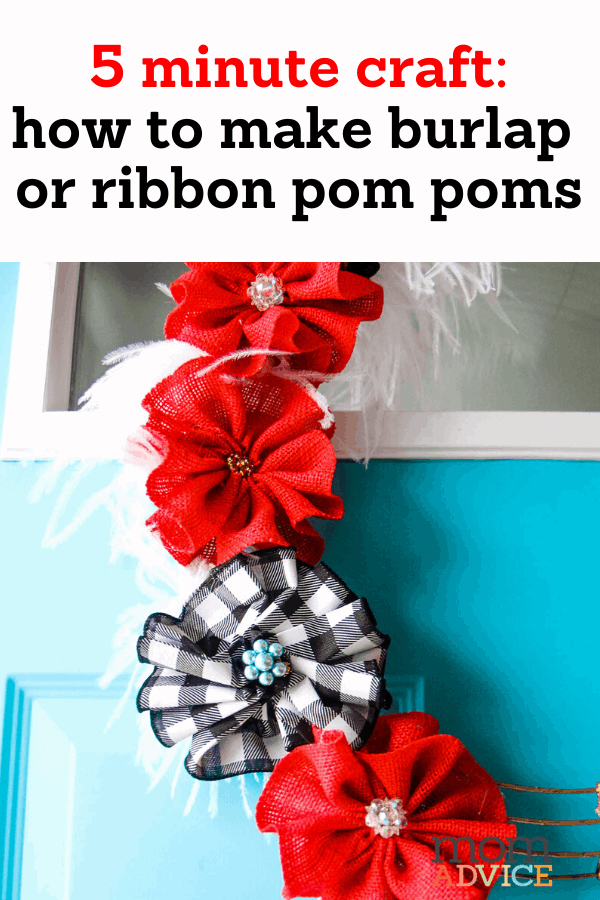
This fast burlap craft couldn’t be easier. With just five minutes, you can make these pom pom flowers for wreaths, gifts, or to make into a burlap pom pom garland. Use this tutorial to make your own with burlap or your favorite wired ribbon. This is a perfect kids craft idea or for the beginner crafter in you!
This is that weird time of year, after Christmas, when I’m looking for craft ideas to fill those empty spots in our home. I decided that it would be wonderful to have a little nod to Valentine’s Day with a new wreath for our front door.
I wanted to create something unique this year so I went to my button jar to see if I had anything to incorporate into a piece for our home.
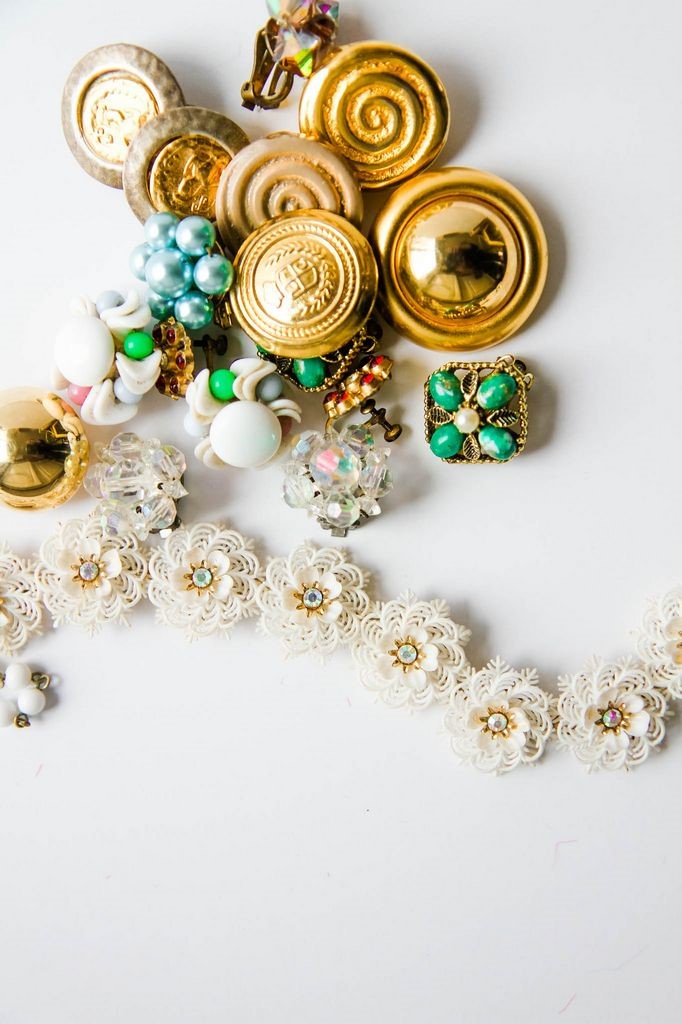
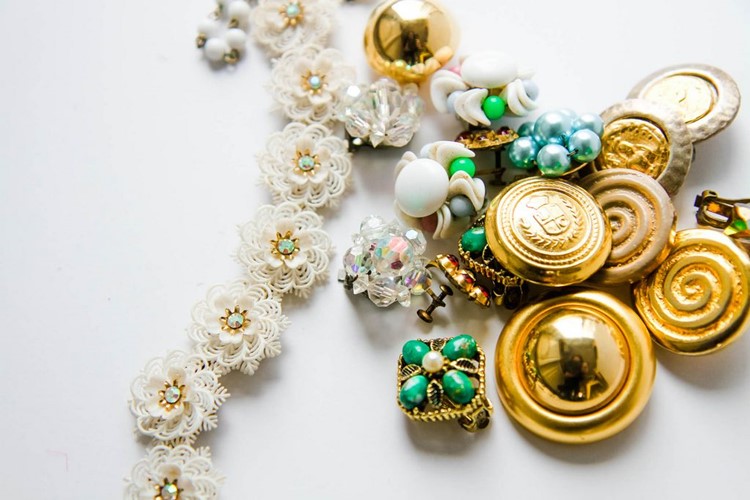
Years ago, my grandmother had shared some of my great-grandma’s costume jewelry with me because she thought I might enjoy crafting with it.
In that stash, were numerous gorgeous clip-on earrings that would make the perfect centers for flowers.
Crafting is so much more special with a little history blended in, isn’t it?
Today I’m showing off this easy 5 minute craft to make burlap and ribbon pom pom flowers to adorn a wreath in your house.
I’ll share my full burlap wreath tutorial for you tomorrow, but to get started, you will need to whip up a few of these easy burlap flowers.
5 Minute Craft: Burlap Pom Poms Tutorial
(don’t forget to download the Rakuten app to save on craft supplies- read all about it or just sign up here and get $10 of your first purchase)
Supplies Needed:
2 ⅜” Wide Burlap Ribbon (this is linked to exactly what I bought or search for your own favorite colors)
2 ½” Wired Buffalo Plaid Ribbon (this is linked to exactly what I bought or search for your own favorite pattern)
Tape Measure
Cotton Twine
Embroidery Needle
Hot Glue Gun
Glue Sticks
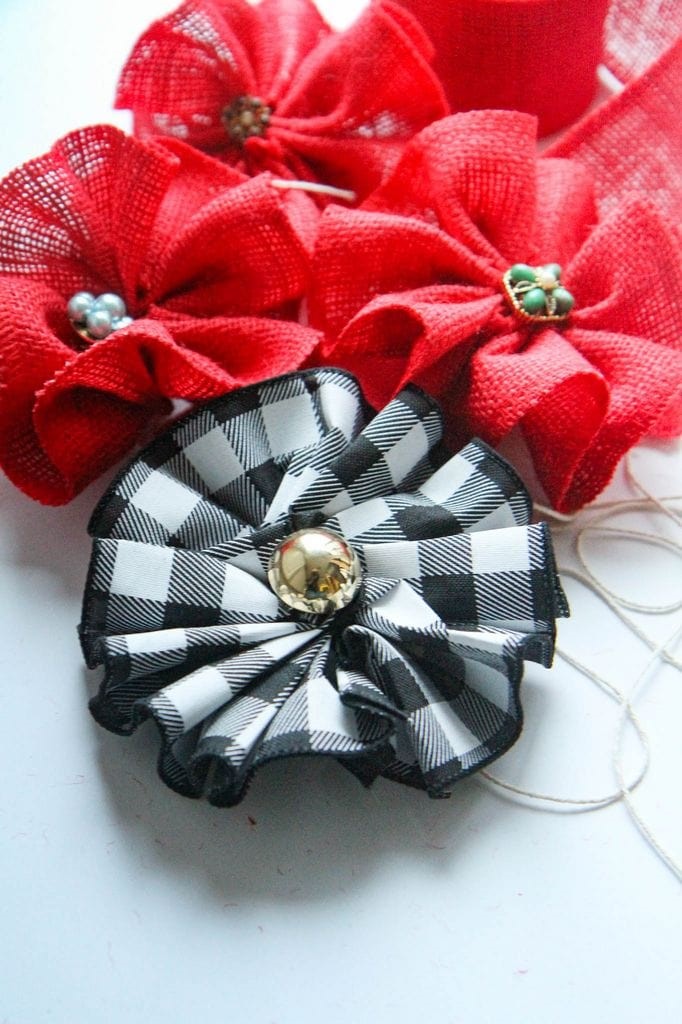
Vintage Buttons or Vintage Jewelry for Flower Centers
Scissors
Directions for Burlap Pom Poms (or Ribbon Pom Poms):
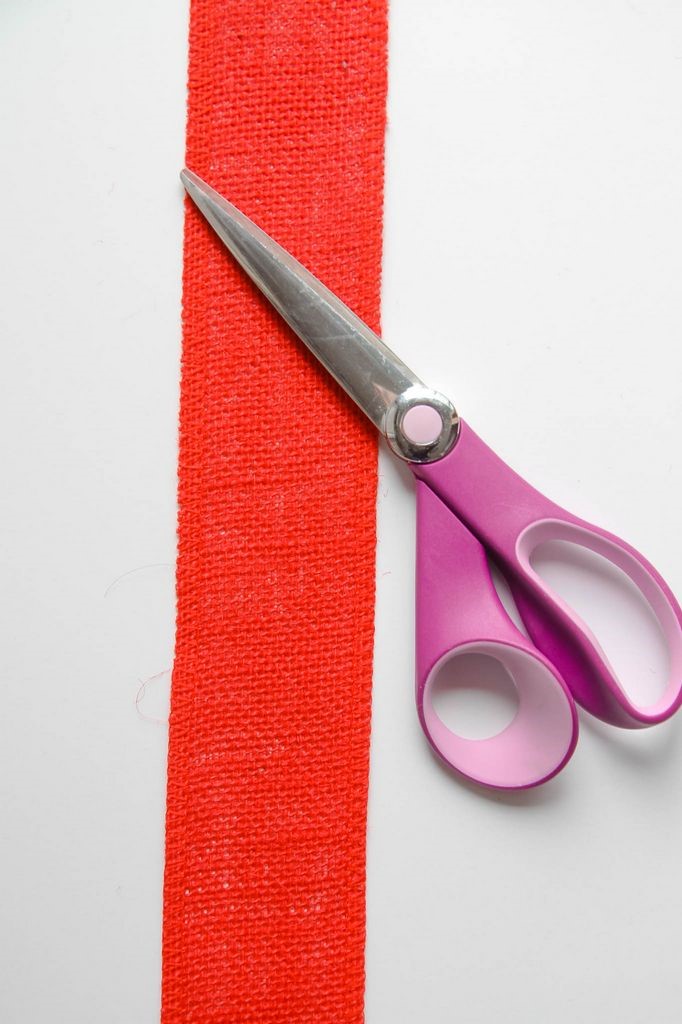
Measure 3 feet of burlap ribbon and cut with your scissors.
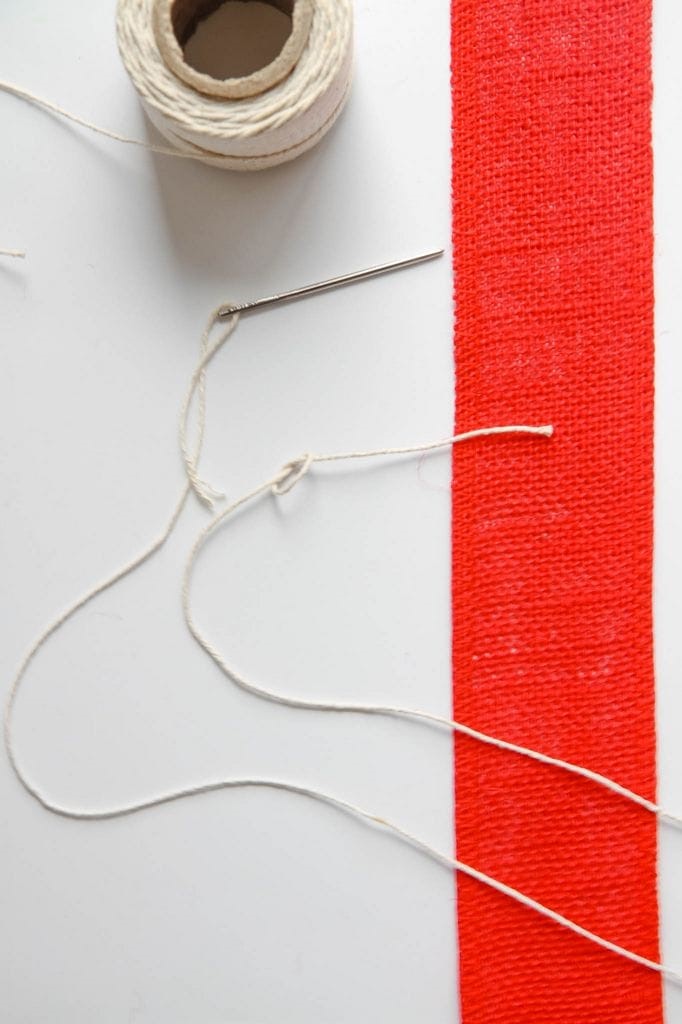
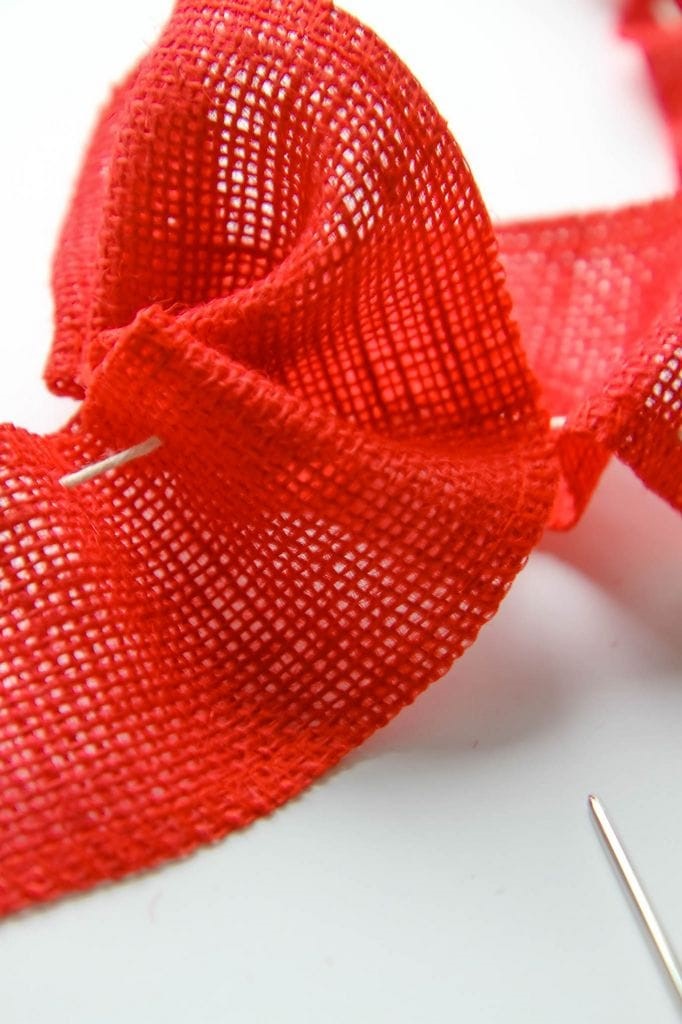
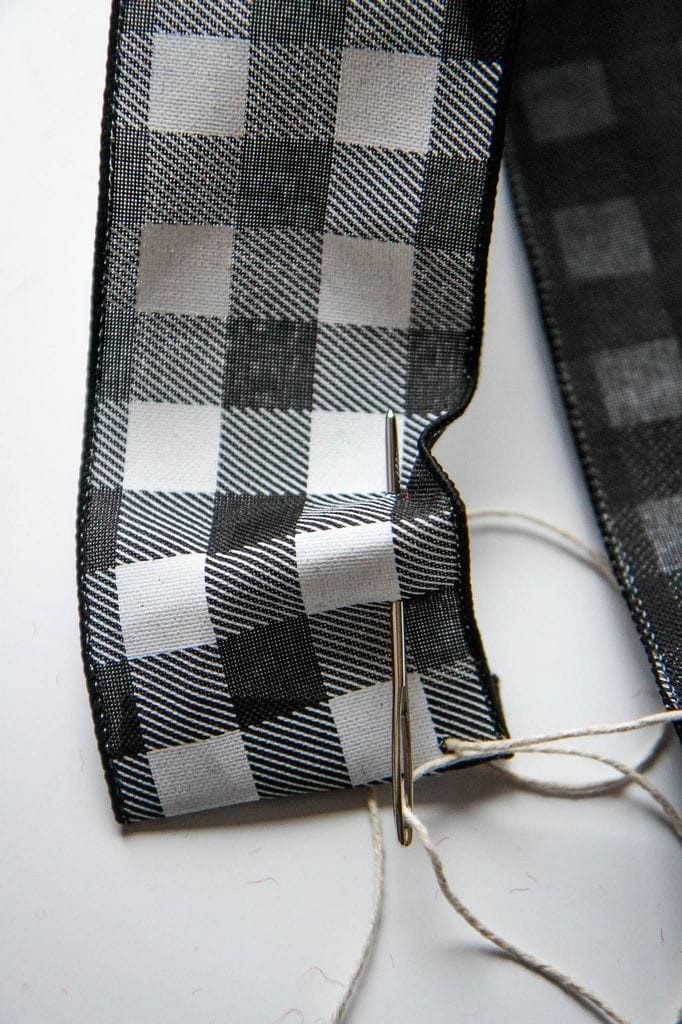
Cut a foot of cotton twine. Knot one end, leaving a generous tail, and thread your embroidery needle on the other end of the twine.
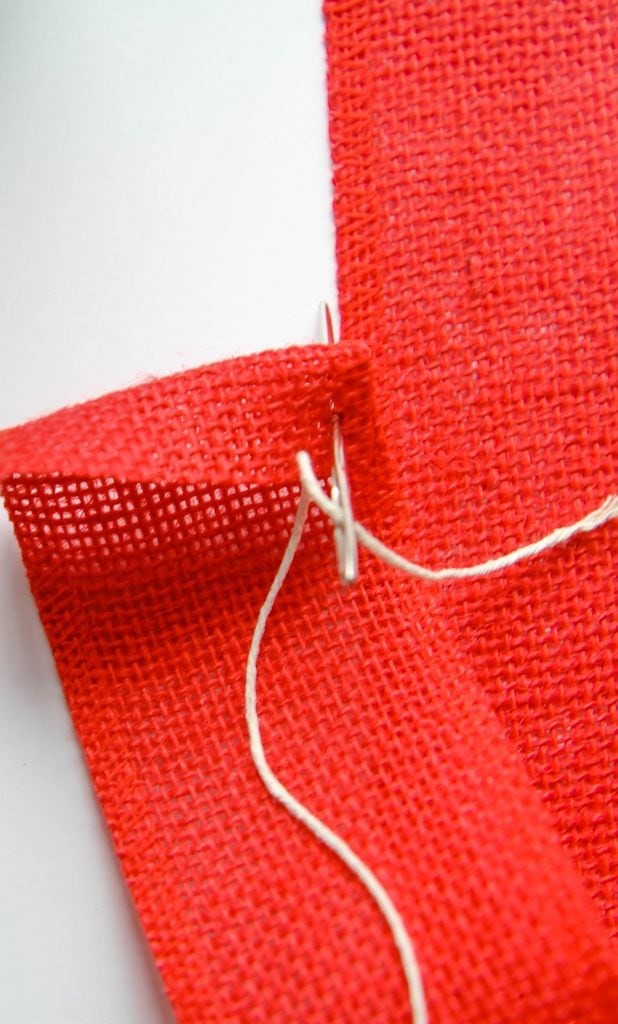
Fold the rough edge down and then start your running stitch just a little past the tail of the burlap. The reason we are doing this is because it has a tendency to fray and we want to start with a clean line.
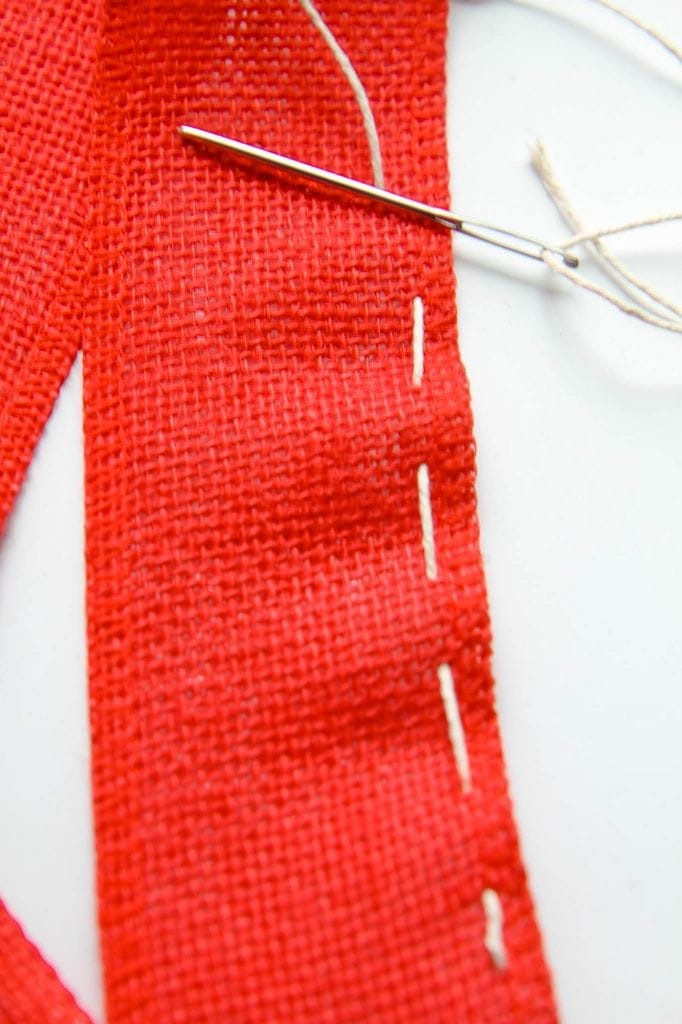
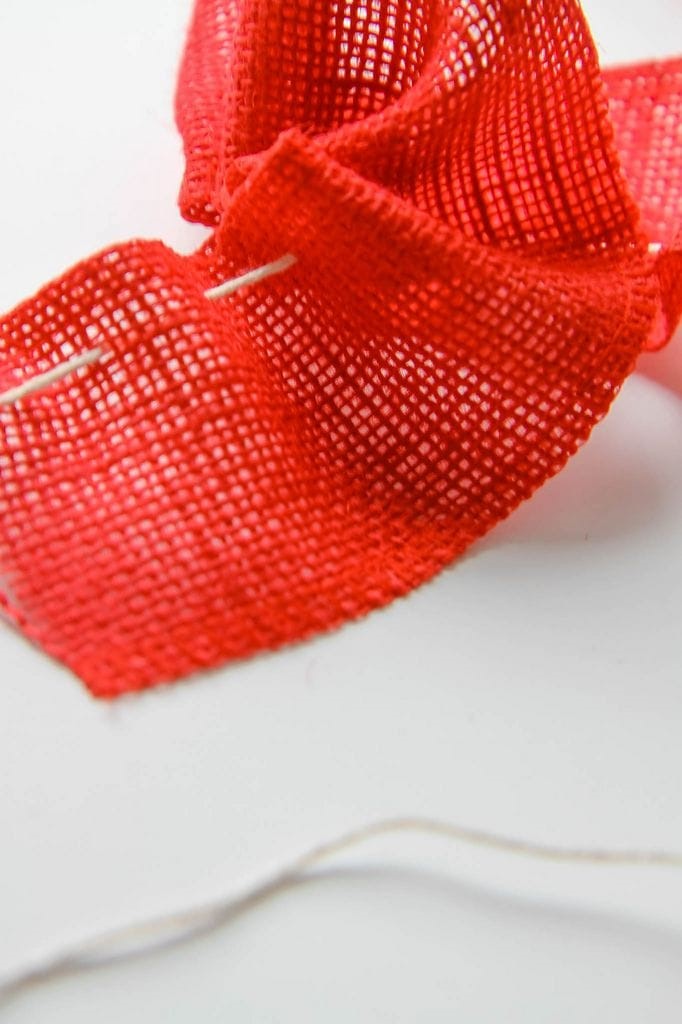
Now we will be doing stitches down the length of the edge.
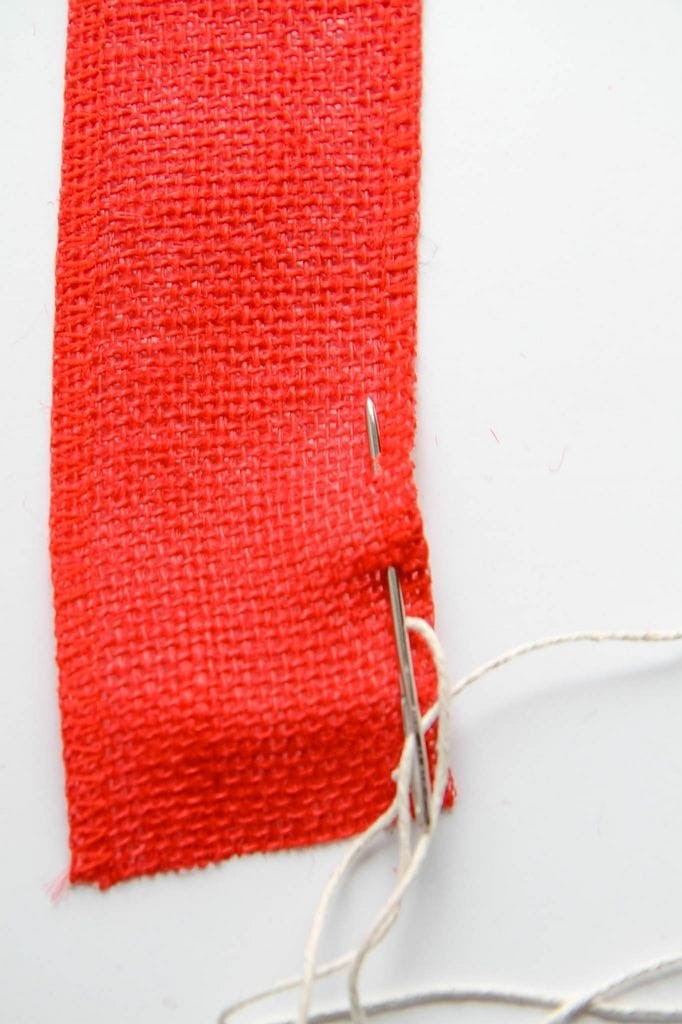
You can feed these individually, or make it quicker by threading back-and-forth and grabbing multiple stitches at a time.
Once you get to the end, remove your embroidery needle.
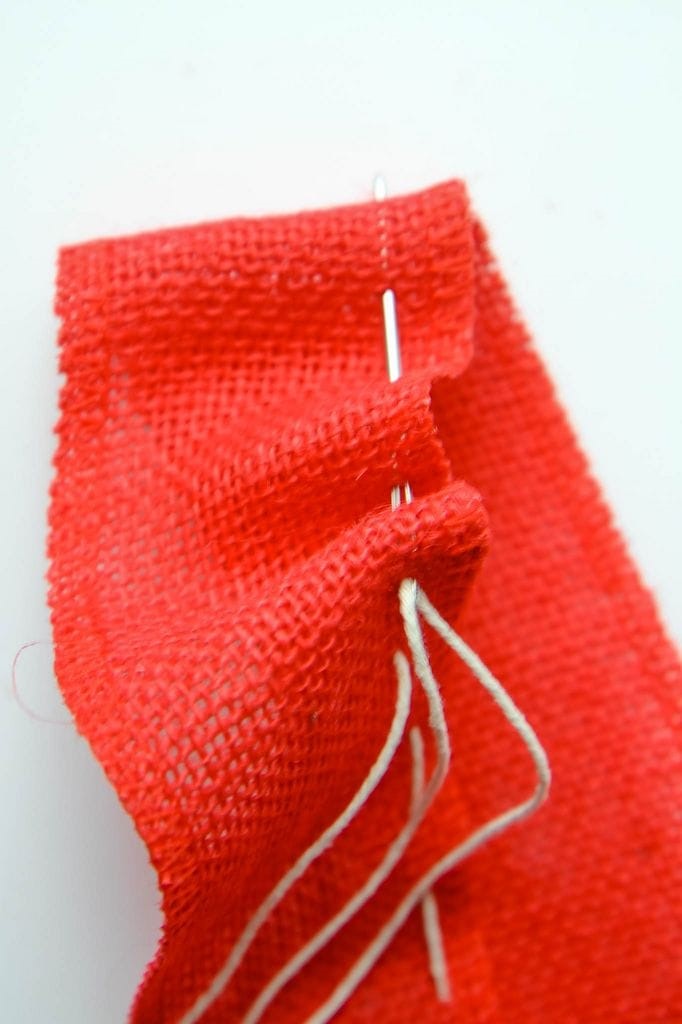
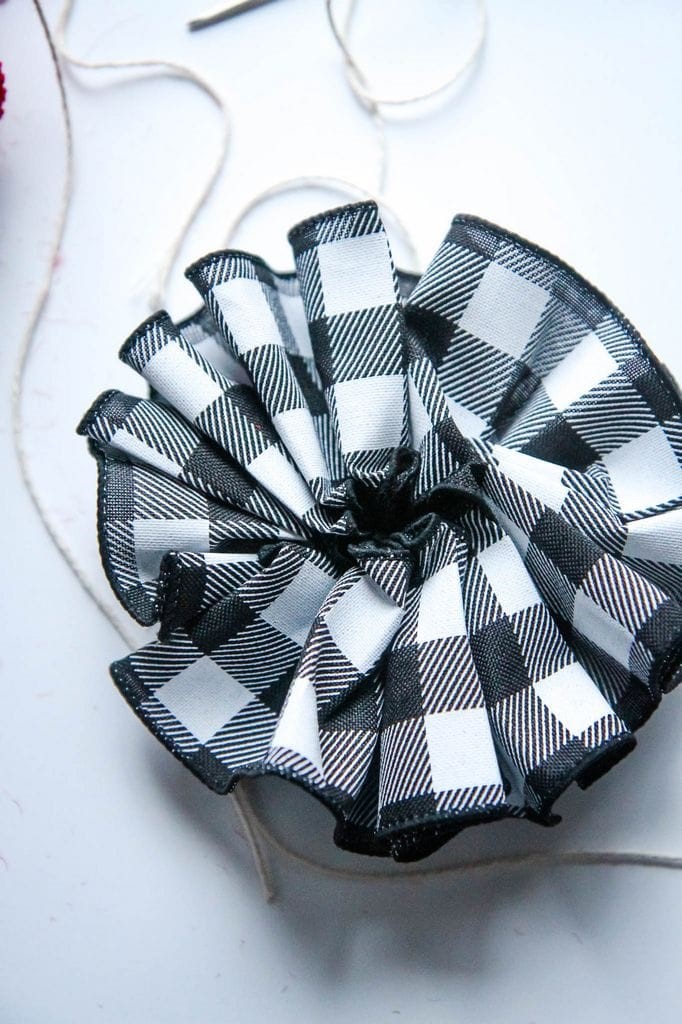
Now comes the fun part.
Grab the end of the twine (that once held your embroidery needle) and start pulling so the burlap bunches up and starts creating the pom-pom look we are after.
I also like to pull the opposite end to really bring these two sides together into shape.
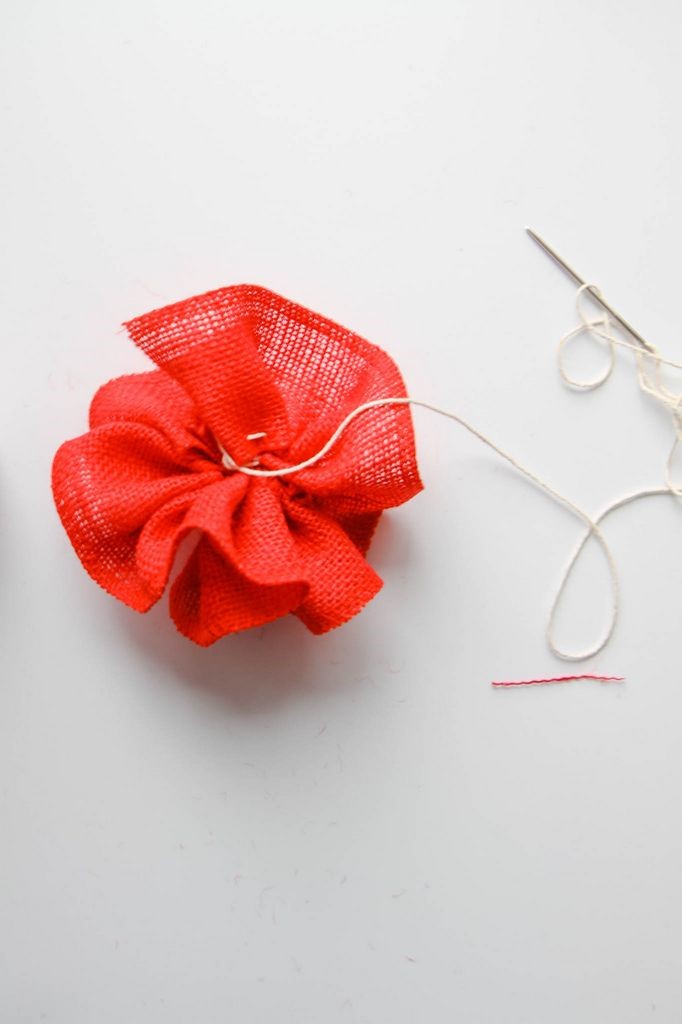
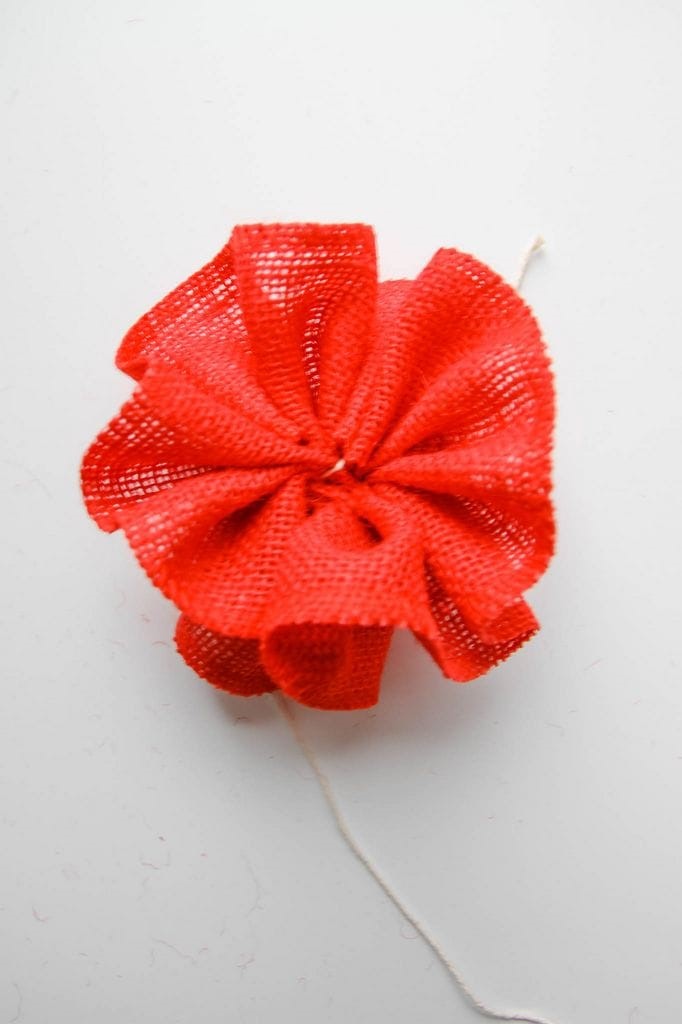

Now you can see exactly where your center will go to your burlap flower.
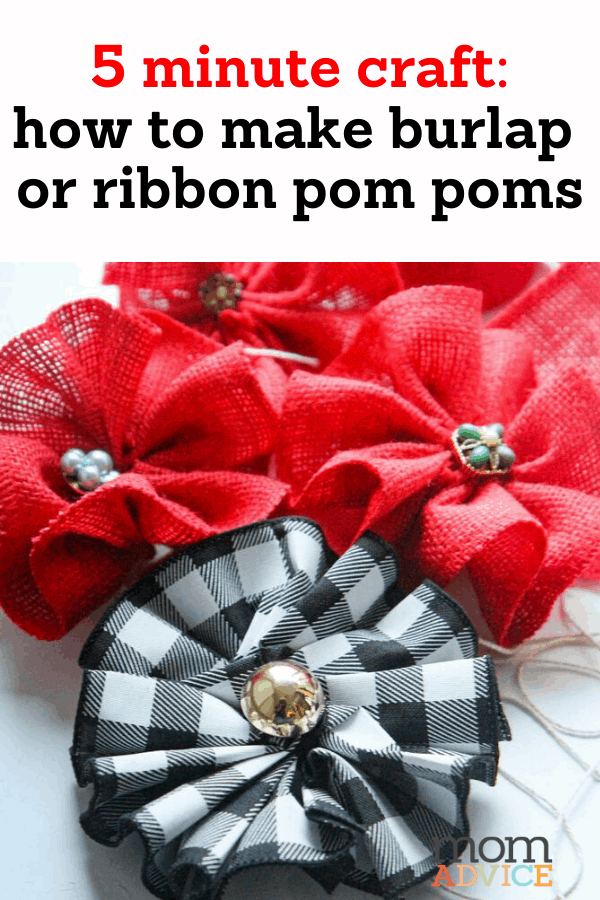
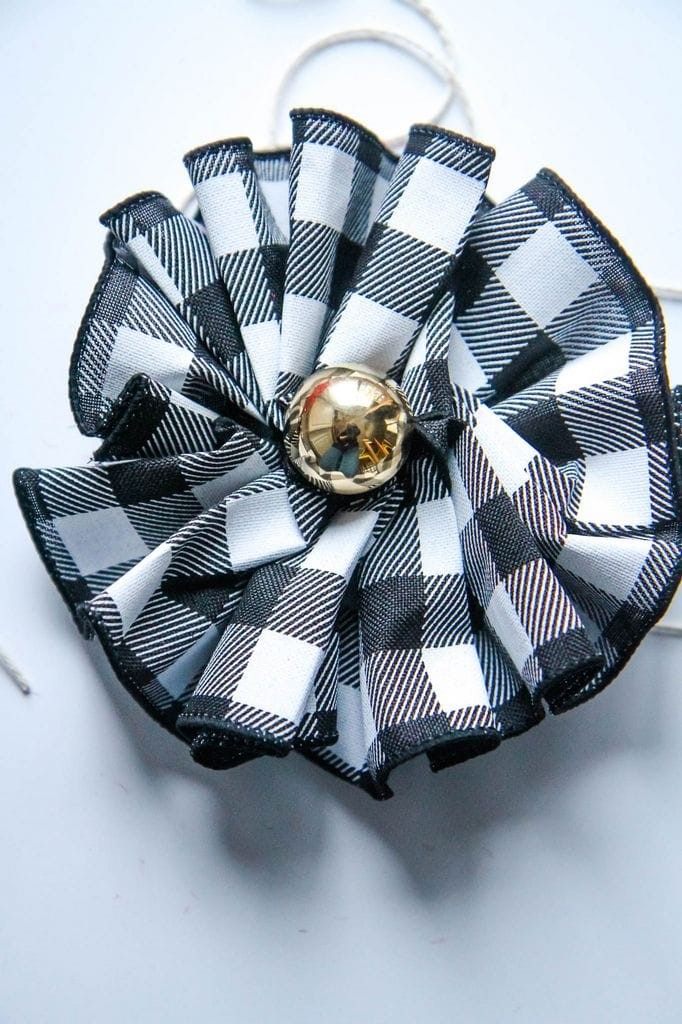
Apply your button or jewelry piece to the center of the burlap with a little hot glue.
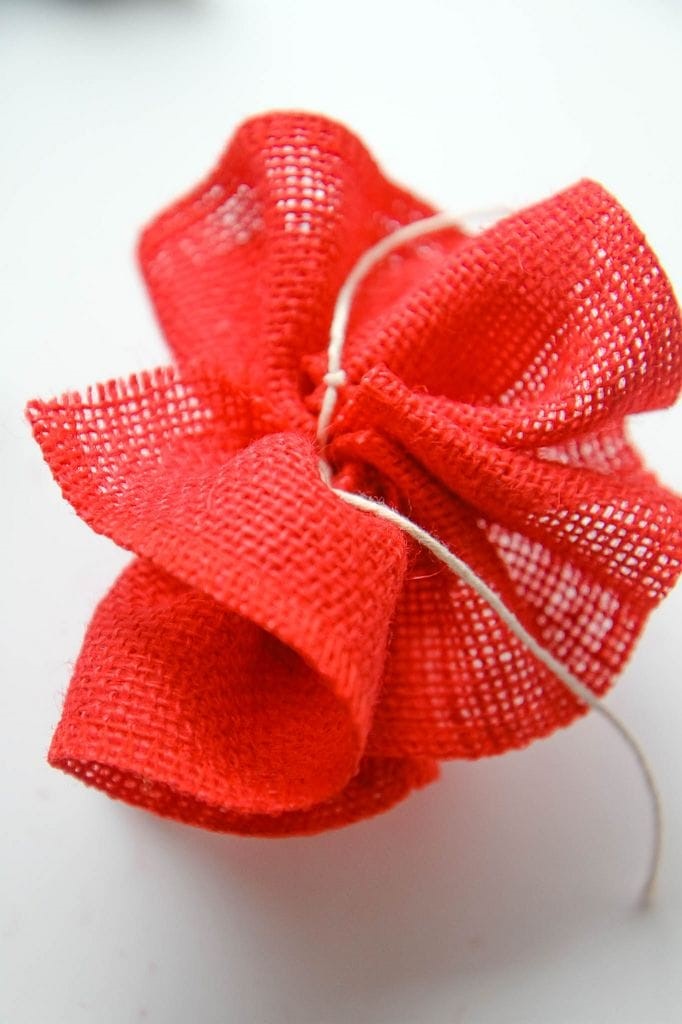
Finish by cleaning up the tails on the back of your pom pom.
For tomorrow’s wreath, we will leave these tails so we can secure these to our wreath.
If you are tying these to something, for example, you’ll just want to leave these tails on.
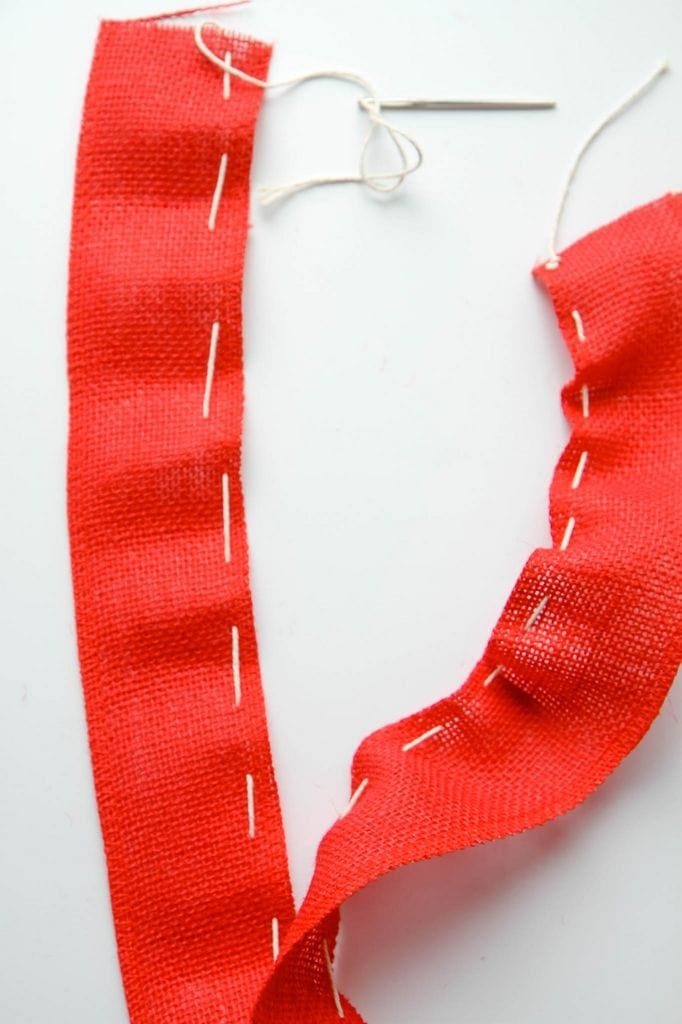
Prefer to make a pom pom flower out of ribbon? This same technique works with your favorite ribbon.
For this one, I used 4 feet of ribbon instead.
You can play around with the lengths too. There is no wrong way to do this fun craft.
I picked this buffalo plaid and found the pattern also helped me with spacing out those stitches evenly.
You will do everything the exact same way, but it yields two different texture textures for your pieces.
I will say that I do prefer a wired ribbon because it gives you the ability to fan it out and allow it to really hold its shape.
How fun are these?
I hope you love this tutorial as much as me!
Tomorrow I will share how I used these beauties in my wreath for Valentine’s Day!
As an Amazon Associate I earn from qualifying purchases.
As a RewardStyle affiliate I earn from qualifying purchases.
Looking for more burlap or pom-pom crafts? I’ve got you covered!
Happy crafting, friends!