This blog was sponsored by Westcott. Thank you for supporting the companies that support our site!
I’m back to crafting today (all the jazz hands!) and I’m SO excited to share a fun apple wreath tutorial to freshen up your front door for fall, but I’m even more excited to share with you a secret that I’ve been keeping for the past couple of months.
Westcott, our sponsor today, has launched a new Mini Hot Glue Gun and Hot Glue Pen.
A hot glue pen, you say?
Yes!
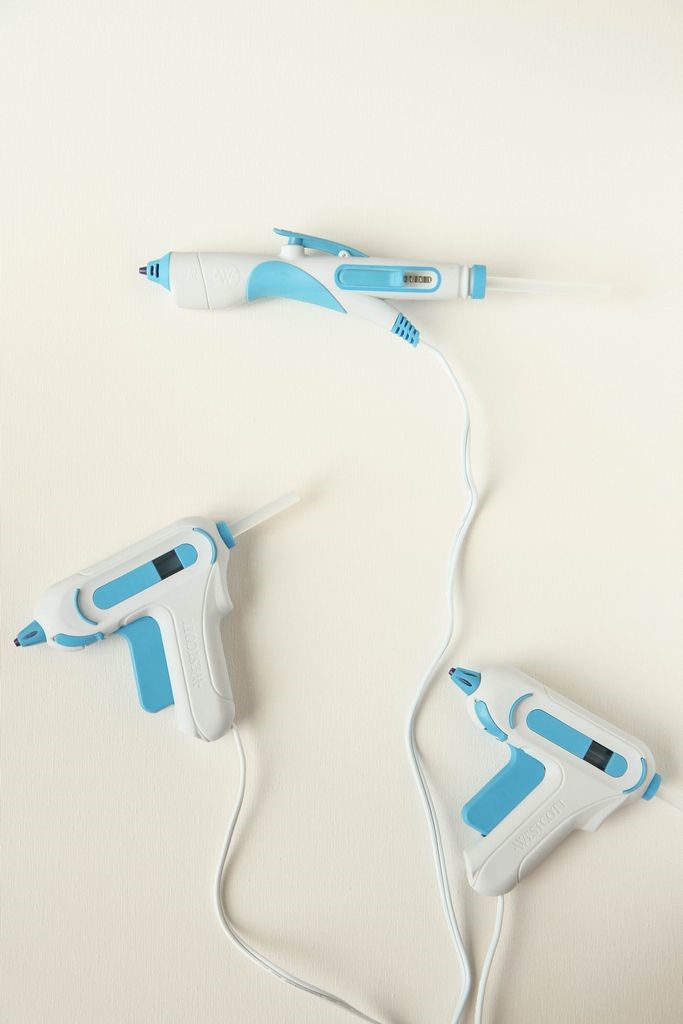
Let’s talk about the Mini Hot Glue Guns first. The Mini Hot Glue Gun comes in two versions, high temp (this baby reached up to 400 degrees Fahrenheit) and low temp (that can reach up to 170 degrees Fahrenheit). What makes these a little different are the smart features that I’ve always wished my glue gun had and I know you will appreciate too.
This has a non-stick tip (!!!) and the nozzle changes color from blue to red so you know when it is ready to use. No guessing and burning yourself checking it anymore! It also has been ergonomically designed to help your hands stay comfortable for all your crafting time.
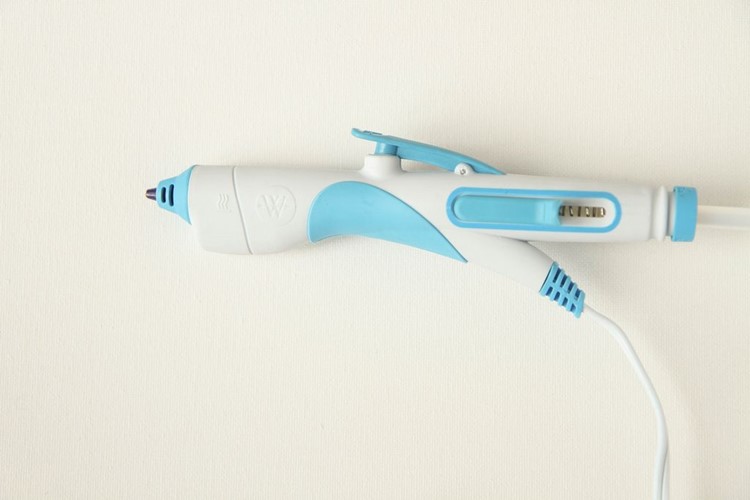
Since I have so much joint pain, I haven’t been crafting as much as I used to. This new Hot Glue Pen though is incredible and helps with your precision and accuracy when you are doing detailed projects. This one also turns colors to indicate when it is ready and it offers a finger trigger right on top to help you dispense glue in a more controlled way.
I have joked that our entire house is held together with a glue gun so I was MORE THAN HAPPY to spread the good news about these new products! You can read more over here and also check out their new site for Westcott Creativators.
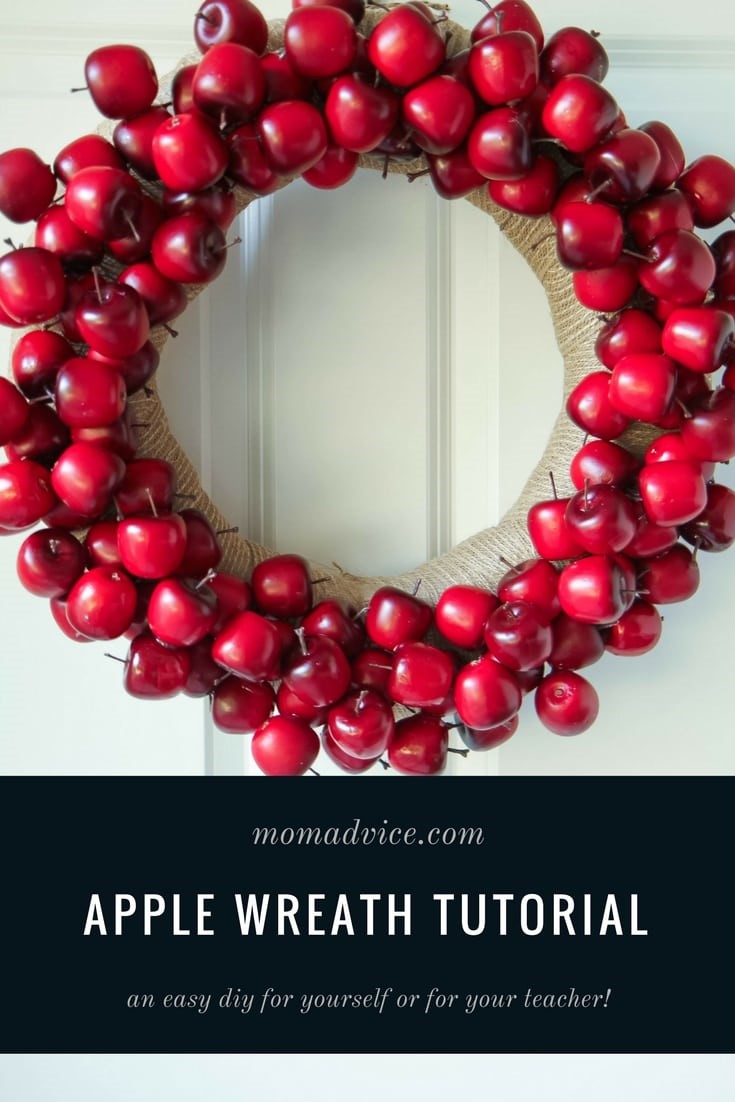
How about we take these for a test drive and craft up a beautiful diy apple wreath for your home, to share with a teacher, or a fun wreath to hang to celebrate back to school?
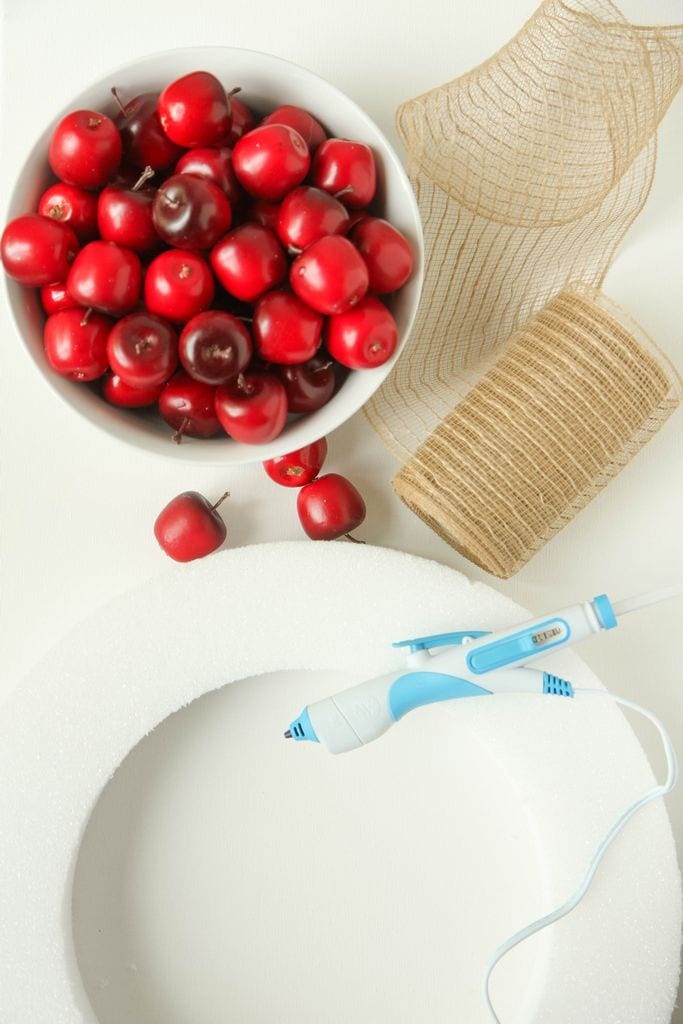
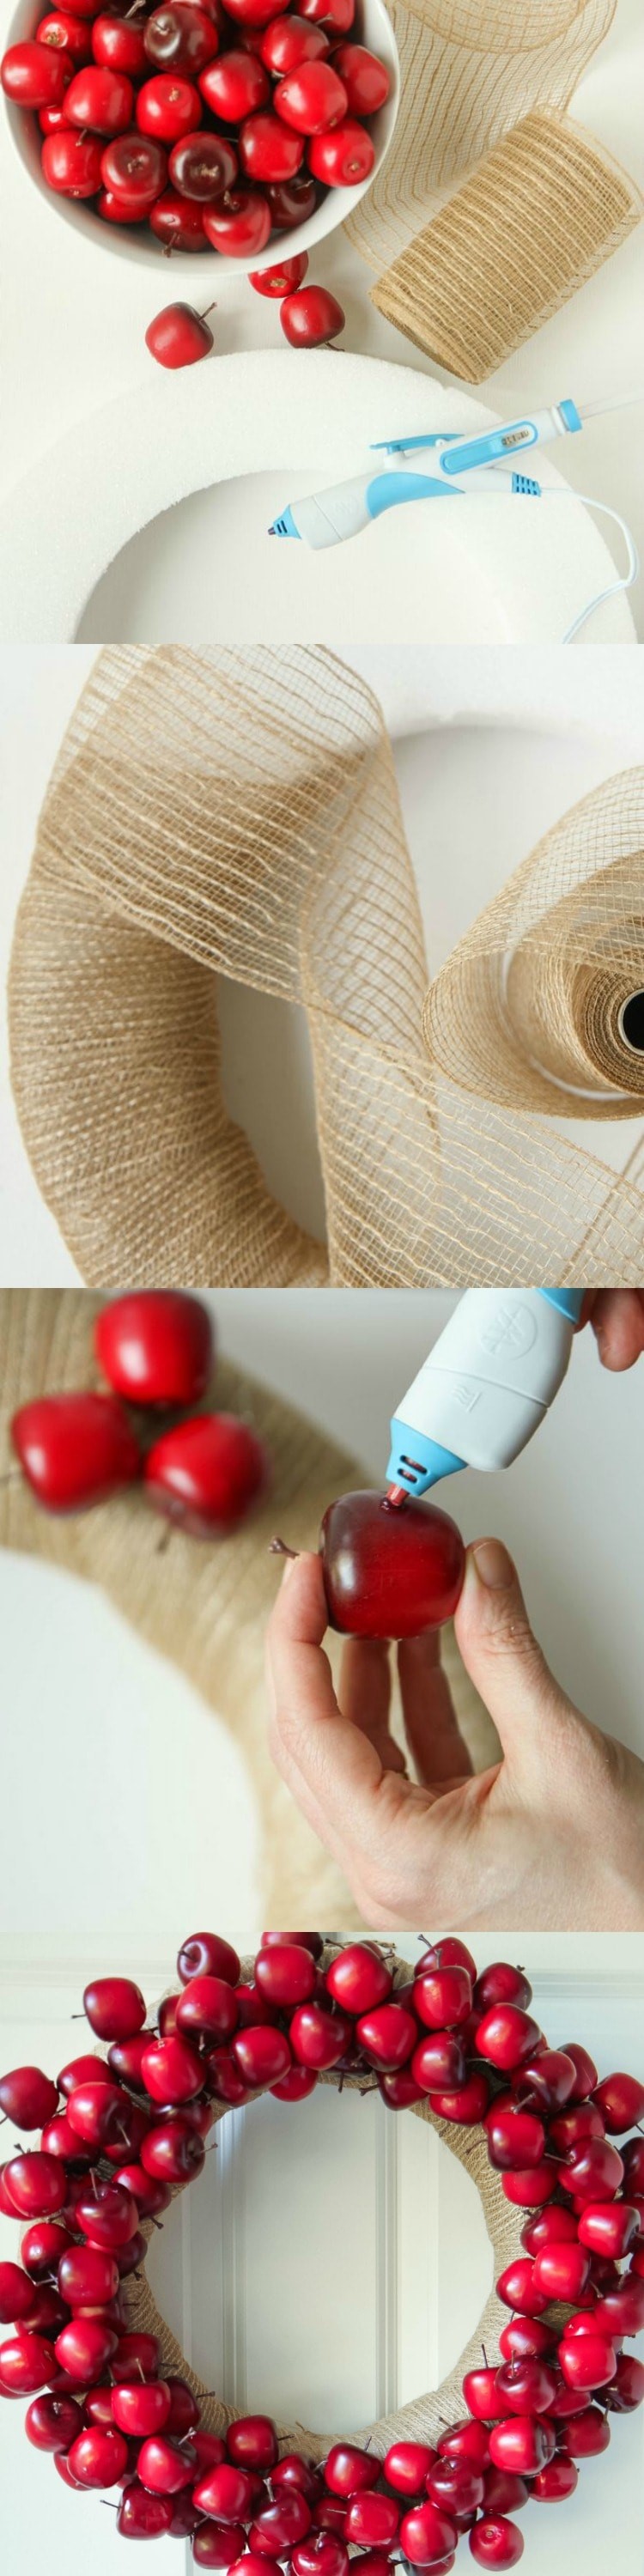
Supplies Needed
14″ styrofoam wreath form (or your own preferred size)
60-80 mini foam apples (I used 80 on mine to make it full)
24-30 feet of Mesh Burlap
Westcott Hot Glue Gun Pen or Mini Hot Glue Gun (low temp is great for gluing together plastic and styrofoam)
Hot glue sticks
1-2 Pins to secure on the back

Directions to Make an Apple Wreath
1. Begin by wrapping burlap around the styrofoam wreath form. Once the entire wreath is wrapped in burlap, secure with a couple of pins to keep the burlap tight.
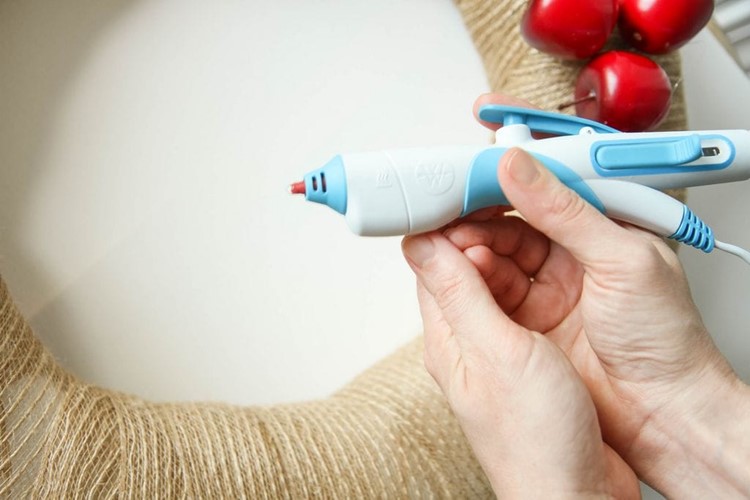
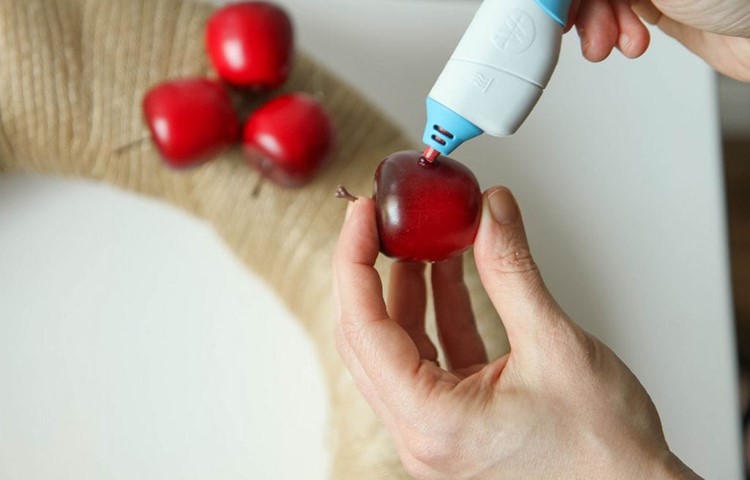
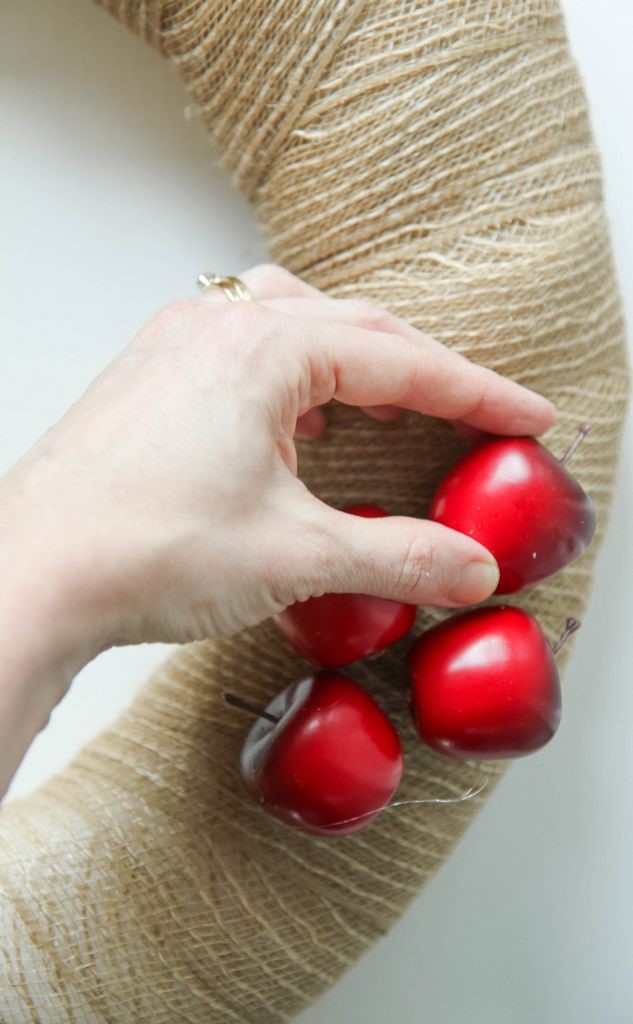
2. Heat up your Westcott Hot Glue Gun Pen and wait for the tip to turn red, to indicate that it is hot and ready. Begin securing these foam apples all around your burlap wreath, taking your time holding each of these to the burlap until they are secure. Be sure to tilt them in different directions, covering the entire top of the wreath. You can then leave the wreath as is or you can add another layer on top in between the first layer apples. I loved the dimension of two levels on this wreath so I added an extra round of apples to finish my wreath.
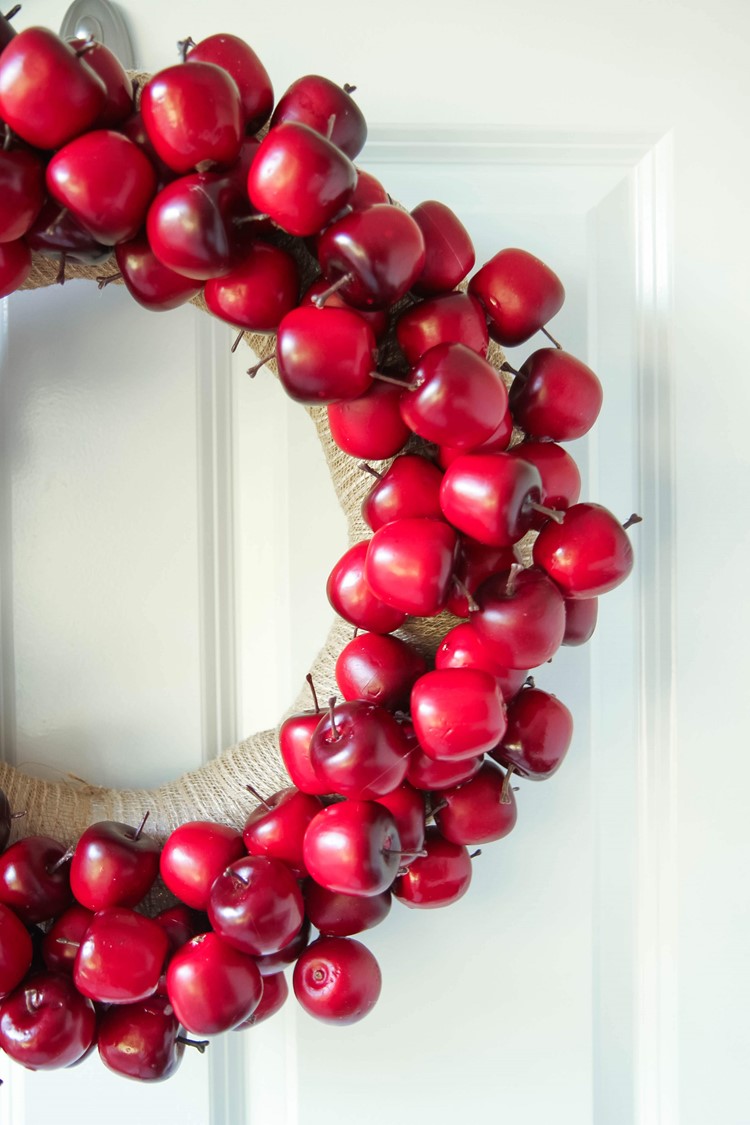
3. Finish by hanging your wreath on a door. I looped a little twine on the back through the holes in the burlap to finish this wreath!
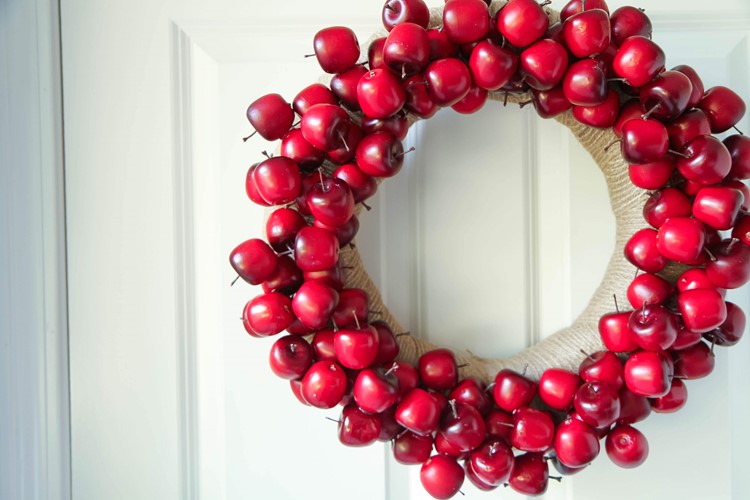
I hope you have fun making a wreath of your own, for yourself or for your favorite teacher! This is such an easy craft to make and can be enjoyed throughout the fall season. Thank you to Westcott for all the hot glue gun fun! I’m so excited to work on future projects with this smartly designed craft tool!
This blog was sponsored by Westcott. Thank you for supporting the companies that support our site!