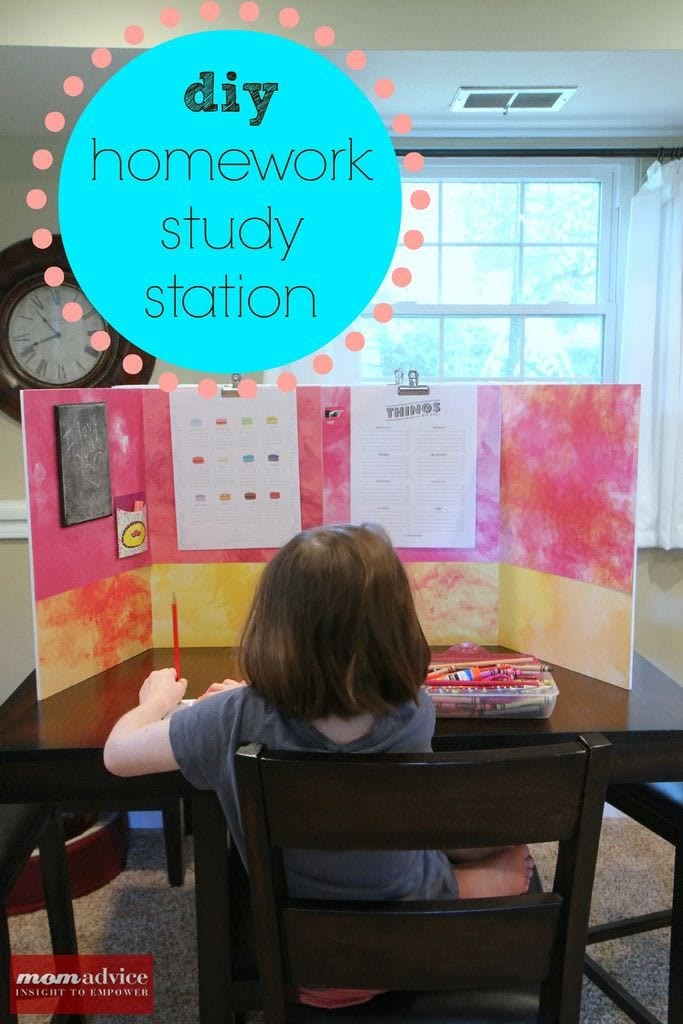
Back-to-School time is almost here for my crew and today I wanted to show you an easy DIY Homework Station you can create for a fun, focused, and quiet little spot you can create for your homework time. This Tri-Fold Homework Station idea was something that I came up with to do for the back-to-school season with Walmart. Each month they give me a fun craft challenge and I couldn’t wait to create these for my kids.
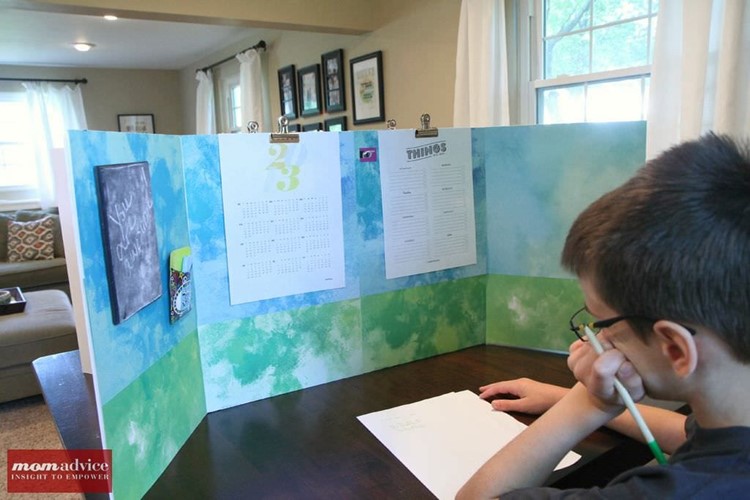
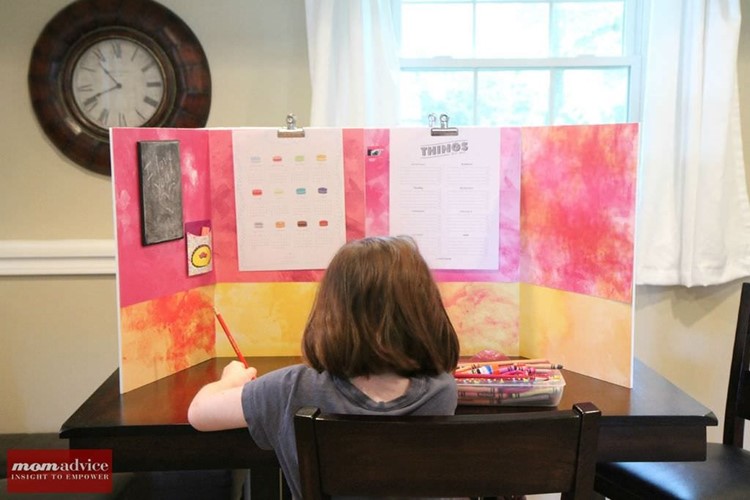
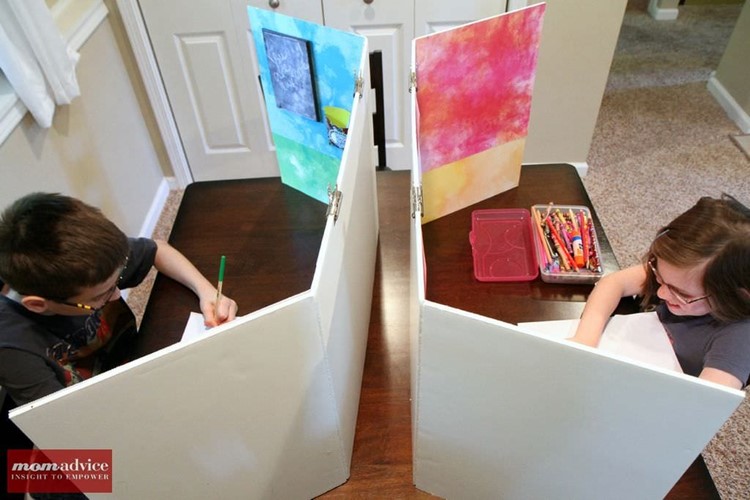 These homework stations are perfect for small space living. Two kids at one table, but each having a place to call their own, so they can focus on their own coursework. The best part is that these can fold flat and be stored elsewhere when not in use! I can’t wait to show you just how easy it is to create these for your kids!
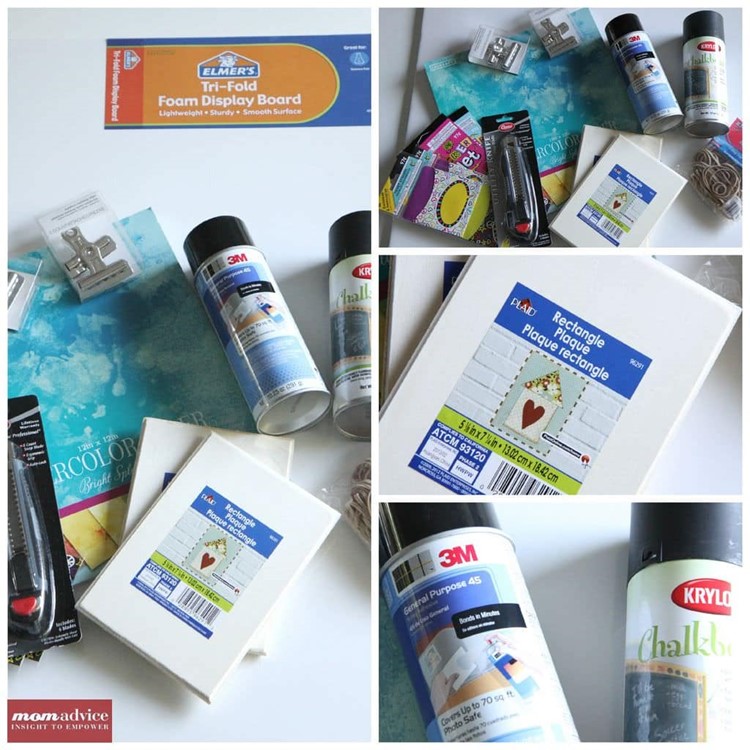
Supplies List
1- tri-fold foam display board (this will make two homework stations for you)
Razor Blade
General Purpose Spray Adhesive
Chalkboard Spray Paint (over in the paint aisle)
Rectangle Wooden Plaques (one or two depending on how many stations you are creating)
Decorative envelope(s) and stickers
Binder Clips (we did two for each one)
Scrapbook Paper in coordinating colors (8 sheets total per homework station. The type of paper we are using is their Watercolor Paper that they offer for $5 for the pack)
Hot glue & glue gun
 Directions
1. Begin by measuring and marking the halfway point for your tri-fold display board. The display board is 48″ total, so you will want to cut it so that each side is 24″ long.
2. Cut the display board with a utility knife, making sure to cut carefully through all of the layers.
3. Spray paint your wooden plaques to create your chalkboards for your homework station. Make sure to shake the can really well, as instructed on the back of the can. Hold your can 8 inches away from your surface and spray in a sweeping motion side to side with a slight overlap. It has always been my experience to go thin with the paint, allow it to dry, and then to add another layer for the best results and minimal drip. Allow the paint to dry for one hour.
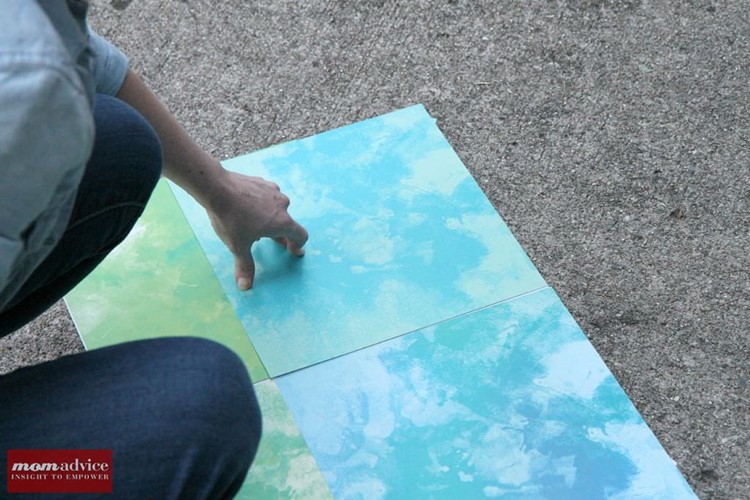
5. While the frames are drying, pick out eight sheets of scrapbook paper and set them up for where you would like to display them. Set them aside and, beginning with one side, line the bottom sheets up and, holding them in place with your hands, flip them up to add a little spray adhesive to the underside. Do this all along the bottom of your display board.
6. Now do the same process again on the top, making sure that they line up with each other and with the top edge of the display board.
7. Once your chalkboards have dried, use your hot glue gun to mount it to your display. Attach an envelope next to it with chalk. Make sure to give your chalkboard 24 hours to cure before writing on it and prepare your chalkboards as I have show in this handy tutorial.
8. Add any stickers or decorations you might like to your homework station or let your kids decorate it themselves.
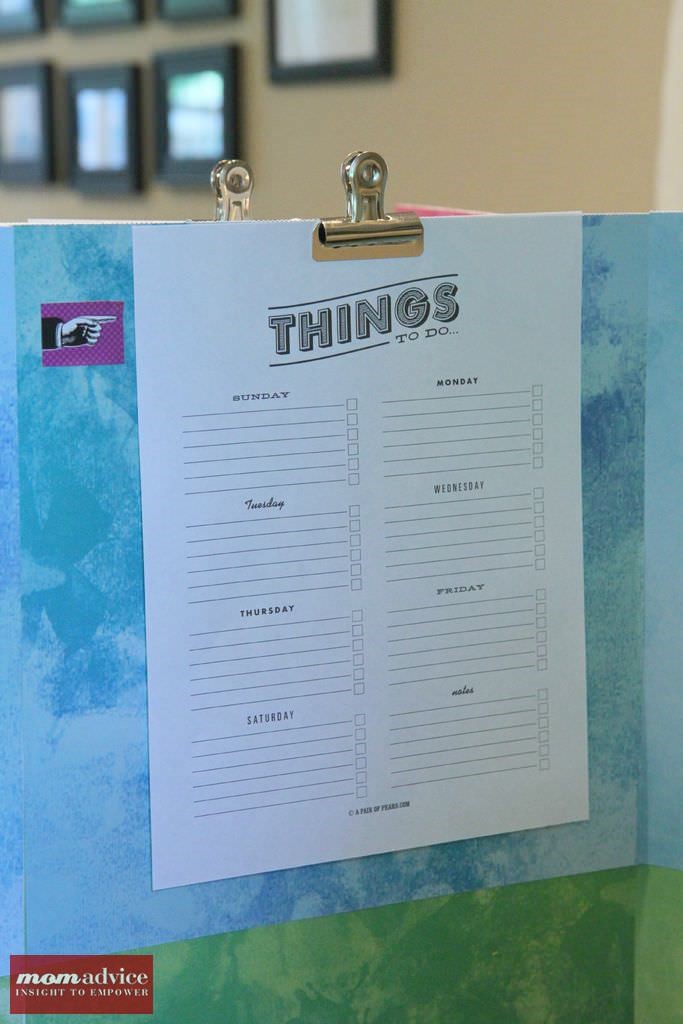 9. Clip your binder clips to the top of your display and then add any printables, thoughtful motivational quotes, calendars, etc… to the homework station.
Here are some free printables that I found that I really love:
Weekly To-Do List (A Pair of Pears)
Macaron Calendar (from Jolie Jolie Designs)
Modern Calendar (from LAUs NOTEbook)
If you are looking for more, be sure to check my Printable Goodness Pinterest Board for more ideas.
Good luck to everyone heading back to school! I hope this homework station inspires a fun new homework hangout for your kiddos! I look forward to showcasing more fun back-to-school ideas to inspire your life this year!

Pin It