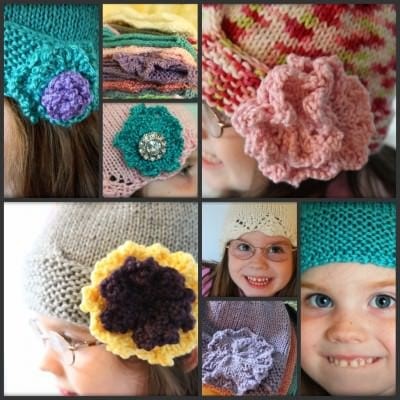
Each year it seems that I have a theme to my knitting and this year was the summer of chemo caps as I shared in our Scraps of Life Giving entry on inexpensive ways to give back to your community. I started the summer out by spending about $25 in supplies and then tried to work my way through some of the yarn in my stash combined with super soft yarn that I thought would help keep cold heads warm and not be itchy.
My intention had been to knit with frantic fury and get as many cranked out as I could. I managed to knit about fifteen hats this summer, in total, and distributed them to a couple of friends who were in need and the rest will be headed for the Patternworks drive at the end of the month. Although a bit short of the goal that I had hoped, I am still really proud and will continue to try and keep charity projects like this on my knitting needles as much as I can.
I was inspired by my mother-in-law and her mom, who always are doing some type of charity knitting and never cease to amaze me with their capacity to give what is on their knitting needles. If you are not a knitter, a knitted hat takes me about four hours of knitting (including the knitted embellishments) so it is a true labor of love to give something knitted to others. They are always giving these precious gifts away and my mother-in-law shared the Patternworks charity with me so I could assist with the giving too.
Each hat was uniquely different and accessorized with what I had hoped would be a little bit of fashionable accessories. Emily gladly posed in each hat for me, but as the summer grew to a close, I could tell she was getting a little impatient for her turn. Even poor Ethan was recruited to try on girl hats for mama to get appropriate sizing for older kid’s heads and loudly complained about the itchy hat that he had from last year.
I had only learned to knit hats a year ago and had knitted a cute little Cupcake Hat for Emily and had attempted to knit a patterned hat for Ethan…which was horribly flawed. Even though I messed up a huge spot on it, he wore it all winter, wearing my big old flaw right in the front. Every. Single. Time. It pained me.
This week, I made it my goal to get the children in newly knitted hats before the cold weather hit. Here are their sweet little hats that I made and some information about those patterns.
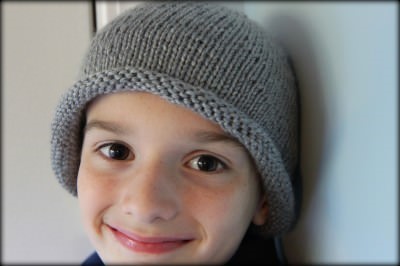
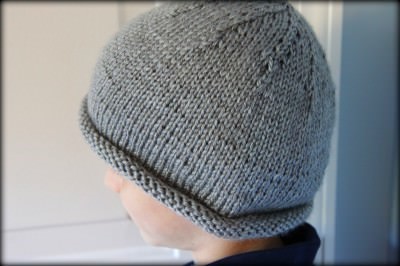
Pattern: Basic Roll-Brim Hat (Courtesy of Knitting for Peace book, a favorite in my book collection)
Needle Size: US 5 Needles
Yarn: Caron Simply Soft in Grey Heather (marked down to a mere $2.50 per skein)
Notes: This basic hat pattern was the first pattern that my mother-in-law used to teach us how to knit in the round. The hat originally calls for a US 7 size needle, but I have found that I am a very loose knitter and usually have to go down about two needle sizes for the sizing to fit on my hats.
This pattern is perfect for a beginner because once you have gotten your stitches cast on and made sure that nothing is twisted, all you do is knit around and around and it naturally creates the brim rolling that you see above. This basic hat pattern can be dressed up for a girl with simple embellishments or different styles of yarn or it can be done simply sweet and plain for a little boy.
Ethan pronounces this hat as awesome and we have it tucked in his bag for those cool days of fall and winter. This inexpensive yarn was perfect for a washable and soft hat that he can enjoy all year long.
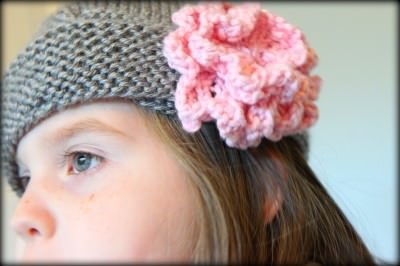
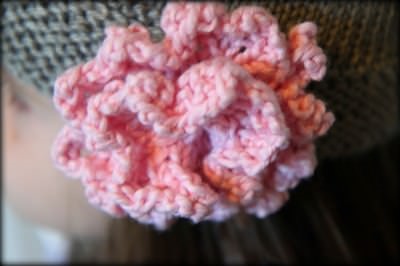
Pattern: Toddler Republic Hat (free pattern) & Lydia Flowers (free pattern), the medium and small flowers only for a toddler hat
Needle Size: US 5 Needles (three sizes down from what the original pattern called for as I knit very loosely)
Yarn: Caron Simply Soft in Grey Heather (marked down to a mere $2.50 per skein & I was able to make this second one out of the same skein from her brother’s hat) & scrap Cotton Tots yarn in baby pink for the flower.
Notes: The Republic Hat pattern (adult version available in the side bar as a free PDF) is still my favorite pattern of all and I was so excited when I happened upon this Toddler Republic Hat version to make a mini-me version for my daughter. It truly is a dream pattern for anyone just beginning to create hats because the two inch brim is not knit in the round and then, after a small amount of binding off, you begin knitting in the round after the two inch brim. By creating a brim that is not knit in the round, it reduces your chances of getting your hat twisted on the circular needles and makes the whole process so much easier.
The Lydia Flower is my favorite knitted embellishment ever created because it adds that beautiful knitted touch to all of our hats. I noticed in the shops that hats that look handmade are adorned with knitted flowers and I am thrilled that I can actually make my own! Do I even have to mention the savings? Two beautiful hats for my kids made out of $2.50 worth of supplies? That is a huge savings!
Emily is in love with her hat. She is so in love with her hat that she wore it all day at school after I gave it to her and refused to take it off except for her school pictures that day. I fear what her hair looked like for that picture, but was feeling quite proud that I made something that she was so excited to show off.
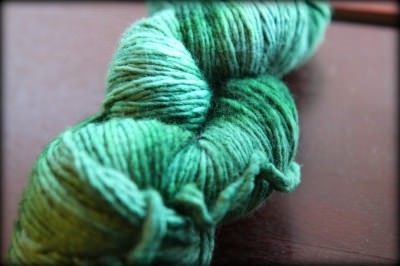
The hat trend will continue because it is finally my turn! At the beginning of the summer, I visited The Yarn Gourmet in town to buy myself two beautiful skeins of fancy yarn. This is the first time I have ever bought “real” yarn and I treated myself as a reward after I made all the hats for everyone this summer. Just as the kids have felt a little impatient about getting a turn, I couldn’t wait to indulge in a turn for myself.
I am so excited to show you what I do with this yarn and then it will be back to the knitting agenda of creating handmade holiday gifts for family & friends.
********************************************
If you are just beginning the world of hats, these are the three things that really helped me have success getting comfortable with double-pointed needles and knitting in the round.
3 Things That Helped Me With Making Hats
1. Bamboo 16″ Circular Needles– These are an off-brand of bamboo needles, but had a wider cord than the kind that you buy in the store. This helped me so my stitches didn’t get twisted. Circular needles are expensive in the store ($8.50 per needle set). These were $24.98 for all of the sizes 0-15! What a steal! I applied my Swagbucks towa
rds Amazon gift cards to score these for free.
2. Bamboo 9″ Double Pointed Needles– Again, these are an off-brand needle and they were extremely rough so they held my stitches really well. As a beginner on these, these rough double pointed needles were key for me to get the hang of it without dropping stitches. It was a lot cheaper to buy these as a set and I did apply my Swagbucks towards the Amazon gift cards so I didn’t have to dip in my pocket to pay for them.
3. A Better Ring Marker- I was using the kind that you just slipped over the needles and was finding that I was losing my starting stitch marker for knitting in the round. My mother-in-law gave me the kind that slip onto the yarn and I put that at the beginning of my round. It was key to not losing my place and helped me stay on track with my pattern!
*******************
Disclosure: The links to books and supplies are affiliate links and are provided so you can locate what you need quickly and easily. Feel free to order a book, but we encourage utilizing the library system and buying me some yarn instead. Wouldn’t that just be so much more lovely?
What crafts have you been working on? Feel free to share those links to your projects.