
I have been getting a lot of emails and comments lately requesting that I share a little bit about my experience with food photography. In full discretion, I am not a food stylist or food photographer at all. In fact, I know nothing about photography except what I have learned through my own trial and error and the tips from friends and books that I have read.
Let’s start with what my food photography looked like when I started blogging.
First, I started my blog with no photography.
Or paragraphs.
Or spacing between sentences.
Basically, it was one giant wall of text about food that we ate.
Then I decided to venture into taking photos of the food we ate. Let me tell you, if you made my recipes when my food looked like this, then you must have had a lot of faith in what that recipe would actually yield.


These examples really showcase where my first pictures of food started from. I had no clue about how to set the white balance on my camera, I thought all photos should be staged on top of my oven, and there was little thought to plating or creating a mood with my photography. Unless that mood was orange. Which, mind you, I fully succeeded at.
At the same time, I also know I am a very busy mom with very hungry children to feed. I spend my days running errands, activities, and volunteering. The idea of staging an entire photo session in my kitchen in the middle of the day still seems pretty impossible to me at this stage in our lives. My approach towards food photography is that it has to fit with my lifestyle and our family. The tips I am offering are hopefully approachable and can help you in whatever stage of photography you are in.
Set Your White Balance

No matter what type of camera that you own, setting your white balance is something that can help you achieve better pictures from the start. You can set your white balance with the preset balance options in your Camera Menu or you can customize the white balance on your camera by simply taking a picture of a white sheet of paper.
The Auto White Balance (AWB) option isn’t always the best option for your food photography. If the day is cloudy or if you have lights on where you taking your photography, you will need to take in account what types of bulbs or lighting situations you are dealing with. For a more in-depth look at setting the White Balance, be sure to read this post on Figuring Out Your White Balance.
Use Natural Light When Possible

Natural light is always the best option for beautiful food photography. Turn off all of the lights in your house and take pictures in a well-lit room for the best naturally lit photos.
I noticed a huge difference when I simply turned off the lights in my kitchen since the light bulbs really added a lot of orange and yellow hues into my photography, making my food less appetizing.
If you find that there are shadows in your pictures, it can help to use a foam board to bounce the light from your kitchen windows to create even natural lighting.
Whatever you do, keep the flash off on your camera. This may require a bit of reading in your camera manual, but your pictures will be a thousand times better if you can turn the flash on your camera off. Flash photography in food photos will, guaranteed, not create the beauty and the look that you are going for with your photography.
Practice taking pictures in different areas of your home to find the one spot in your house where the lighting is the best. I have found that I have great lighting in my kitchen during the daytime, but my front room also provides beautiful lighting when I move my console table out of the direct sunlight.
Stock Up on Thrifty Props
Creating beautiful scenes with food does not have to be an expensive endeavor at all. I love to visit thrift stores for unique tableware, glassware, and for fabric to use for my food photos. The best part about food props is that you can often take advantage of clearance items or patterns you might not use in your everyday life.
When I first started out I just used white plates for my food photos. These are simple, classic, and truly let the food take center stage. They also show every little spill and splatter so messier food can be trickier to photograph on them.
I started visiting the clearance section of the housewares and realized that I could inexpensively create unique displays for my food without a huge expense. My favorite plates so far are inexpensive salad and appetizer plates that look like real plates,but are just plastic tableware. My trick is always to look for small plates and bowls for my food photos. Using these smaller plates helps the plates look fuller than what they are.
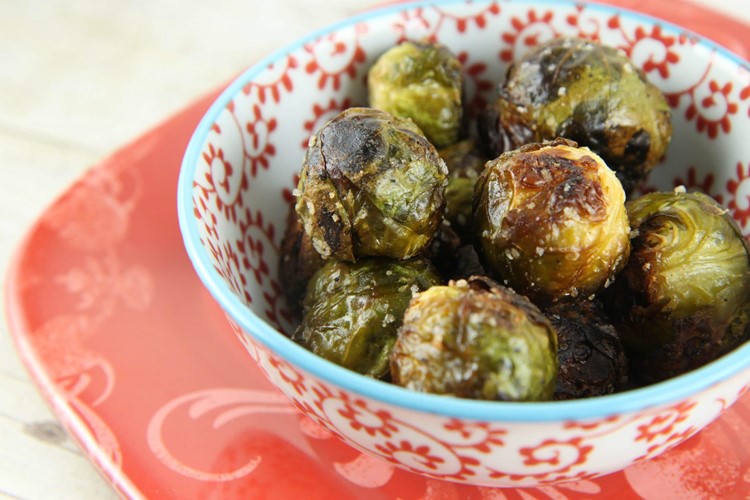 This bowl of Roasted Brussels Sprouts, for example, looks like a normal size bowl of Brussels Sprouts. This is actually one of our little applesauce bowls set on top of a plastic appetizer plate I found on clearance at Target.
The big joke around our house is that these tiny plates are how I stay so thin. These pretty plates are usually how I eat my dinner after I photograph them while the rest of my family eats on regular plates. My daughter is always irritated that my food is prettier than her food. I am sure this will lead to weird sessions in a counselor’s office one day.
Get a Weathered Table…Or Not.
The other question I always had when I looked at other people’s photos is where they got all these beautiful ancient weathered tables? Most bloggers actually don’t have a bunch of varieties of weathered tables in their home. I know…that kind of shocked me too.
I discovered you could buy weathered wood wallpaper fairly inexpensively on eBay. I also found this weathered wood paper, pictured above, that is just paper from a teacher’s supplies store that has worked really well for creating the wood look.
Don’t think of your faux wooden backdrops as being only used in one way, like a tabletop. Here is an example of how if you have a large enough backdrop, you can actually use it to cover both the back of the photo as well as covering the tabletop. I found some wipeable backdrops that were for sale on a deal-for-a-day site and bought several different varieties. Just to prove that you don’t have to have a fancy set-up, this is actually taped with electrical tape to my kitchen pantry door and is actually on the floor in the corner of my kitchen, right next to the window.
Rethink Your Backgrounds
Wooden cutting boards provide richness to food photos, place mats and fabric napkins can add more color and dimension to your food photography, and even the rusty bottoms of cookie sheets, inverted, can create uniqueness to your food photos (as learned through a fabulous BlogHer Food session).
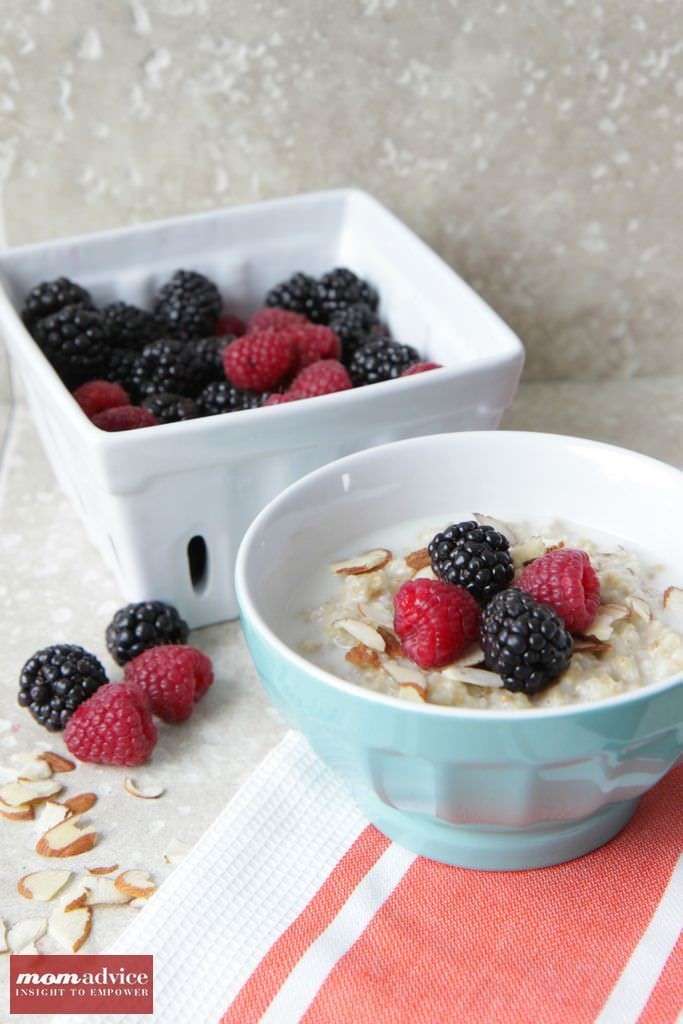
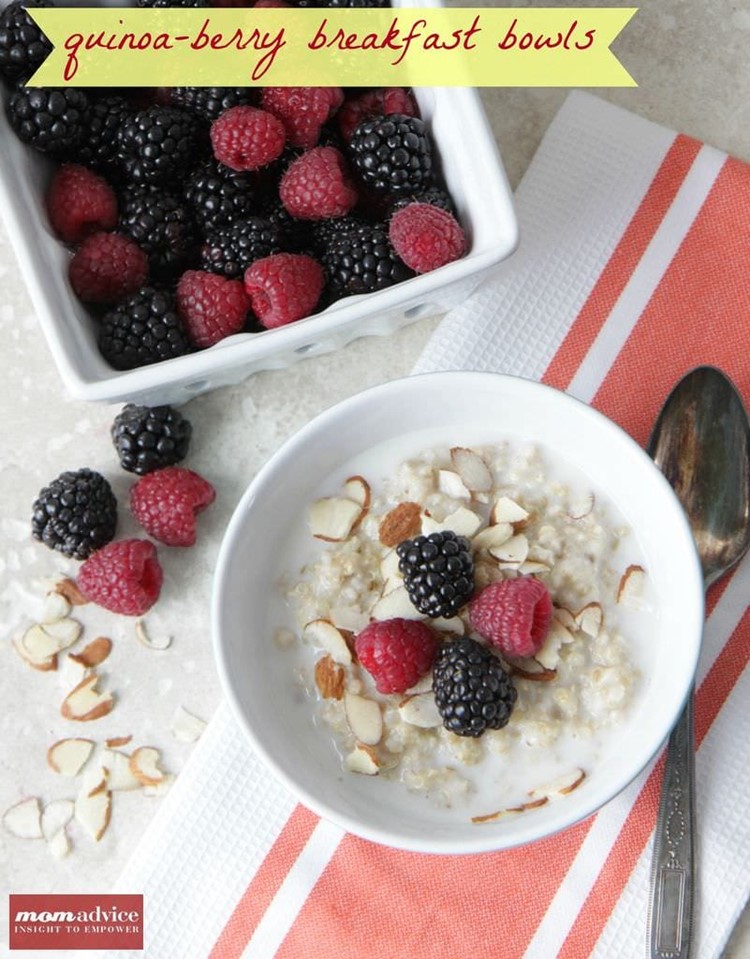
I have found tile can be an inexpensive purchase at our local Habitat for Humanity, at just fifty cents per tile at our store. This is four pieces of tile (two upright and two flat) to create this surface for my Quinoa Berry Bowls. Did I mention I also found swoon-worthy antique spoons at that store? I love when I happen upon a place like that for the unexpected prop!
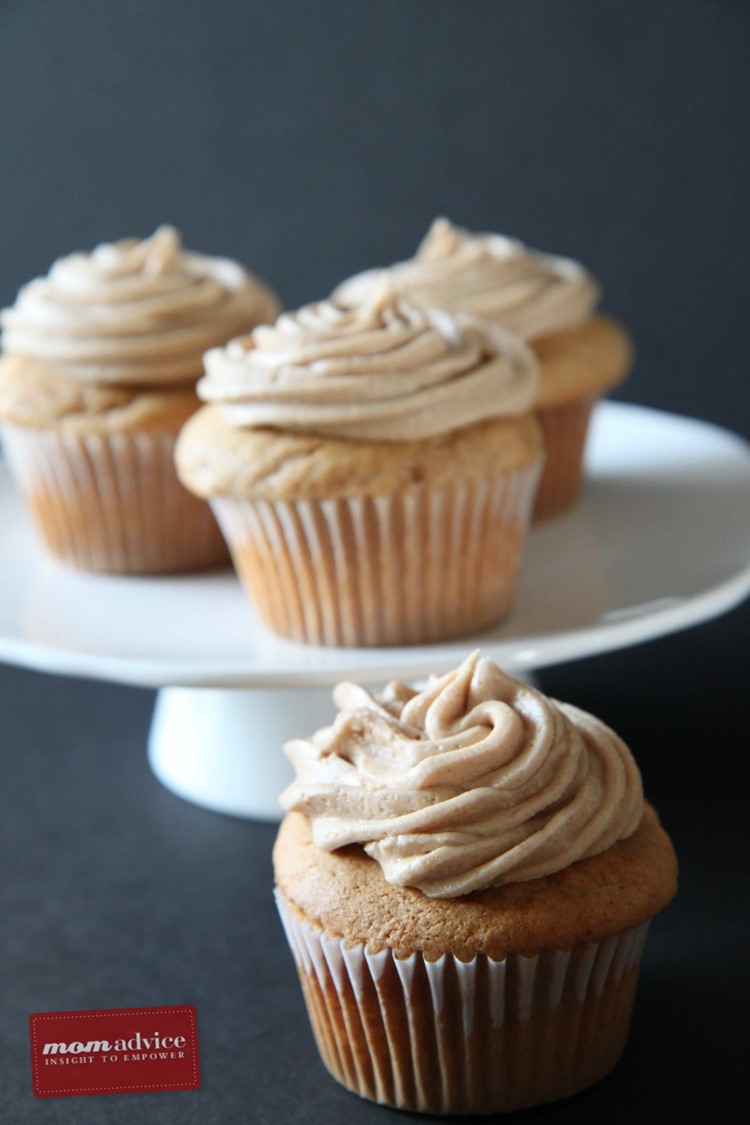
An inexpensive way to shoot a photo and still capture the beauty of your dishes is simply using foam board from your local hardware store. In this shot of my Snickerdoodle Cupcakes, the background and the base of this shot are two pieces of foam board. You can’t get any more inexpensive than that and this simple background lends itself well to creating a pretty title to your photos.
Create Your Own Mini Photo Studio

Indiana winters are a struggle for me because I have a limited window of truly great natural light in my kitchen. After battling with bad lighting for many years, I finally decided to create my own mini photo studio to help. While this lighting isn’t as lovely as the natural lighting in the morning in my home, it has provided consistent results for creating the types of pictures that I want when I am dealing with low-light situations.
I purchased this Lowell EGO Light set with backdrops and bounce board (currently priced at $214.99 total) for my food photography. These lights are set up on a small cabinet in my office in our sub-basement. There are no other lights on when I take my food photos and these two lights provide optimal light for my food photography.
The lights come with Daylight bulbs in them. I simply switch my White Balance to shoot in the Daylight setting (the setting with the Sun icon) to begin shooting.
 Here is the shot that I took in my basement with all of the lights off and using my two Lowell EGO lights. It still shocks me that this was taken at 8PM, in the dead of winter, and in my sub-basement of my home. I do think that the lighting is a little flatter than the natural light, but it is so much better than I could achieve with those scenarios going on any other time. (Picture of my Sun-Dried Tomato Basil Orzo Pasta)
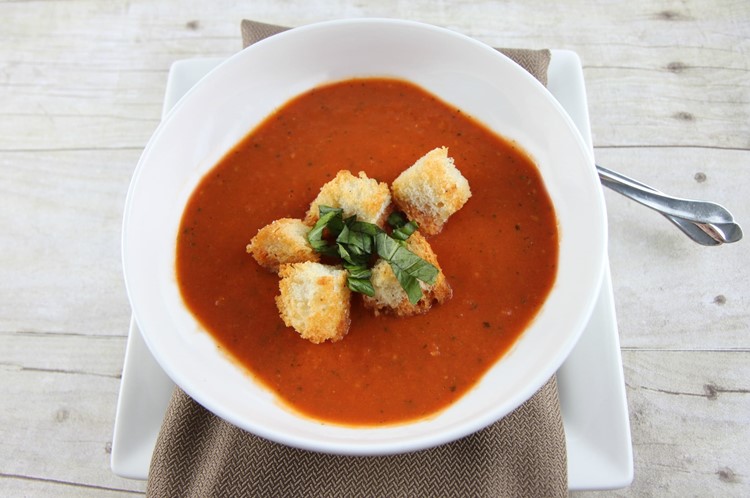
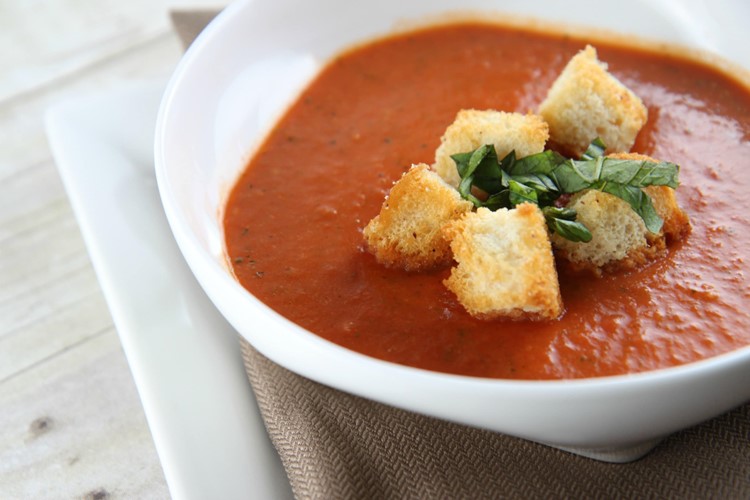 Here is the very first shot that I took with my Lowell EGO lights. I angled one of those lights so it appeared that this Homemade Tomato Soup was being shined upon by sunlight. Little does anyone know that this was all after we ate our dinner and shot in the dark depths of my basement. Since this is the first shot I took, you can see that even though I had no real clue what I was doing that I was able to achieve wonderful results with very little effort.
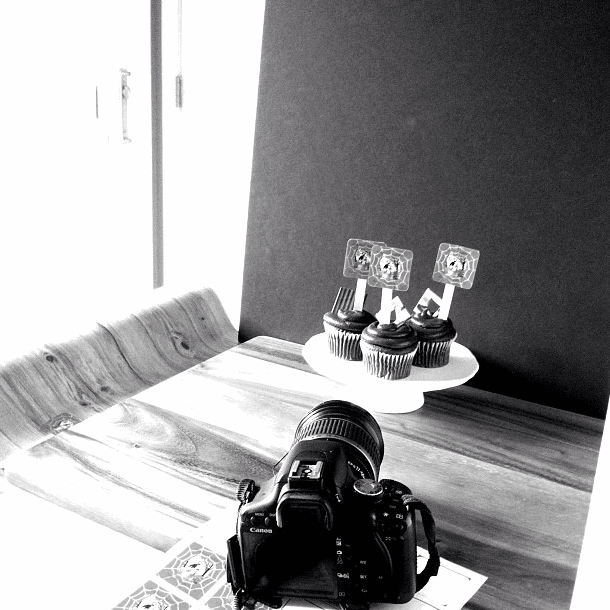
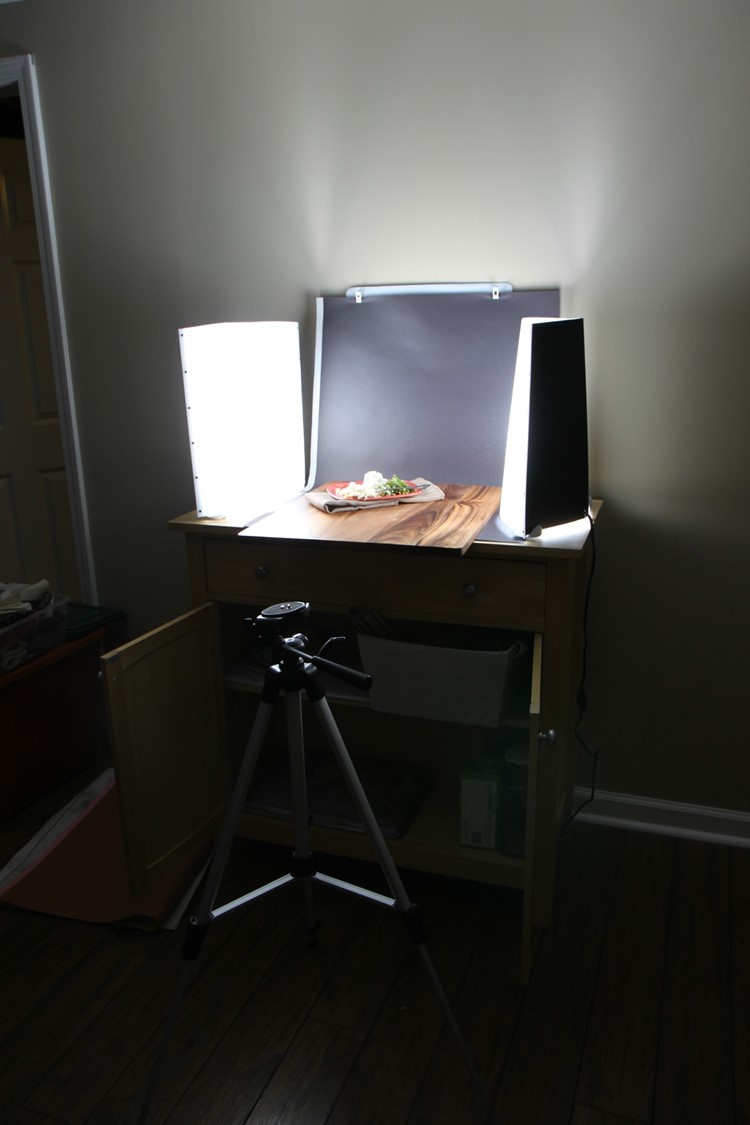 Here is another shot of my set-up. I have my tripod in front of my little mini-studio. Below the lights are my plates, back drops, cups, fabric, napkins, etc.. in the two lower shelves so I can grab what I need and switch out colors and accessories as I need to.
Were the lights a big expense? Yes! Have they been worth it? Worth absolutely every penny for this busy mom and novice food photographer.
Get Familiar With Your Camera

I am definitely no expert when it comes to shooting in Manual mode, although I do shoot in this mode sometimes, but I love shooting in Aperture Priority (Av) for most of my food photography. Aperture Priority means that you set the camera’s Aperture and then the camera automatically figures out the shutter speed that you need to achieve the best photos. You can consult your camera manual to find out how to switch your own camera to Aperture Priority.
I had my lens cap on when I took this photo (thus the ISO displayed), but I wanted to show you that even while shooting in Aperture Priority, you can still adjust the settings for your situation.
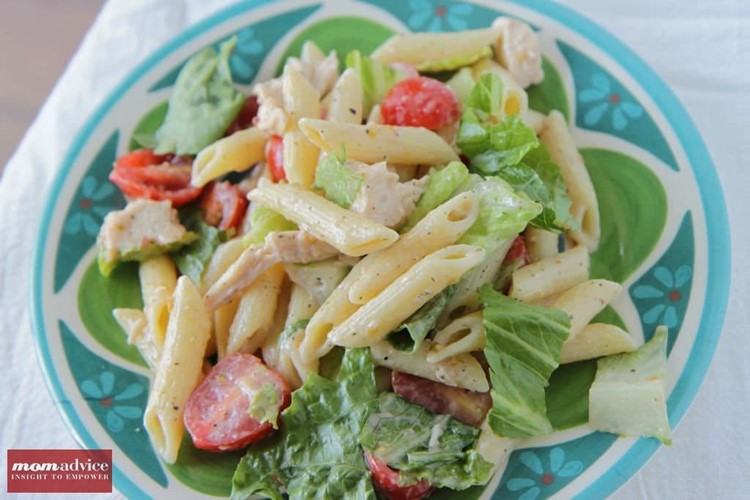
Exposure and Aperture are usually the two settings that I play with most on my camera for my food photography. I really like light-filled photos and tend to go for a brighter photo than what it automatically chooses for me. The box that is highlighted above determines your Exposure of your photos. Basically, the exposure simply determines if the picture is too bright or too dark. Usually when it’s set to 0, or right in the middle of that green box shown above, it is just the right setting for exposure. In Aperture Priority mode, it will always stay at 0 unless you specifically tell it to move. If you decide that you want more light in your photos, like me, you can bump this to the right. If you want your photos to be darker, you can bump your Exposure composition the left, to create a food with less light. Sometimes I will bump it lower especially when I am dealing with dark plates (like red, black, or blue) since it tends to overexpose the rest of the shot.
(Pictured Above: Chicken Caesar Pasta Salad)
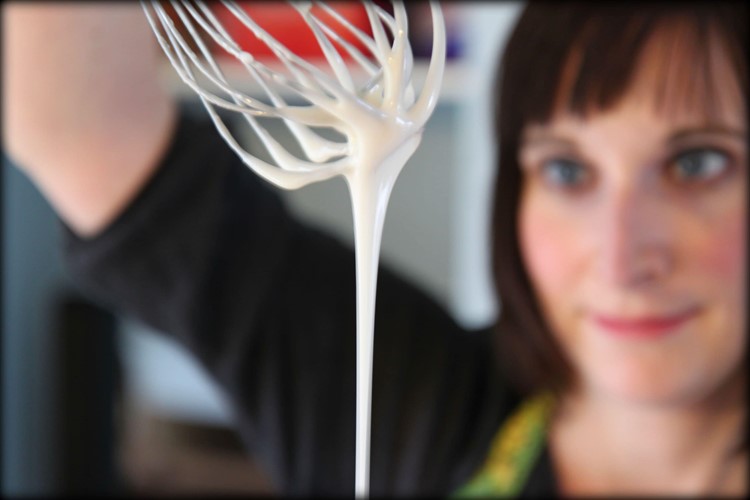
Getting that blurred background is probably the coolest thing about getting your first DSLR. Of course, you want to be sure that you are telling the whole story about your food photos and aren’t always shooting with this large of an Aperture. I usually like my Aperture around F5.6 unless I am really trying to blur something out behind the food, like the spoon in the picture above.
If you are looking for more information on understanding Exposure and Aperture, I really love this down-to-basics guide to understanding Aperture on i heart nap time. For understanding Exposure and Exposure Compensation, I really, really loved this series, “31 Days to a Better Photo,” on my 3 boybarians. You can also visit my Pinterest Photography Fun Board for lots of other links to great tutorials on the blogs.
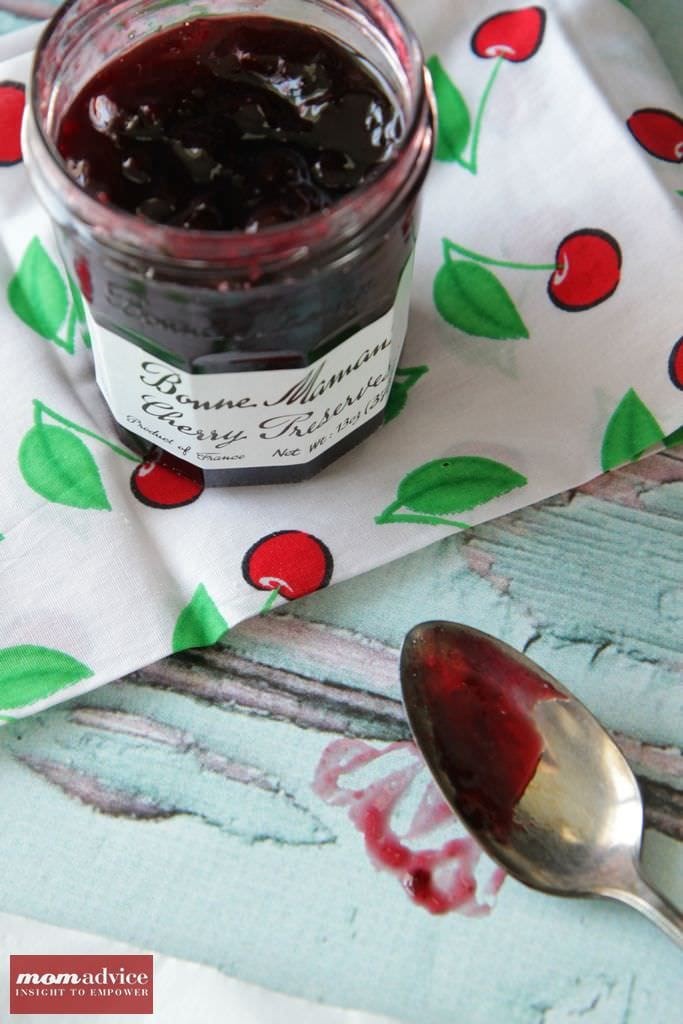
Edit, But Edit Wisely
If you take really great food photos, you will not need to make a lot of edits to them. My editing is usually just saturating my color (just a touch), sometimes adjusting the exposure, and cropping my photos.
I had been using PicMonkey to edit my food photos although my goal this year is to switch my editing process over to LightRoom. I just recommend concentrating your efforts on taking a great photo and use a program to help add a little saturation or adjust your exposure. Just remember that sometimes one can get carried away with the editing and you have pictures with all sorts of crazy fluorescent food. It is disappointing for your readers when they are unable to achieve what you have photographed at home. I always try to keep things as natural as possible so my readers know that the dishes can be created just as they have seen on the blog.
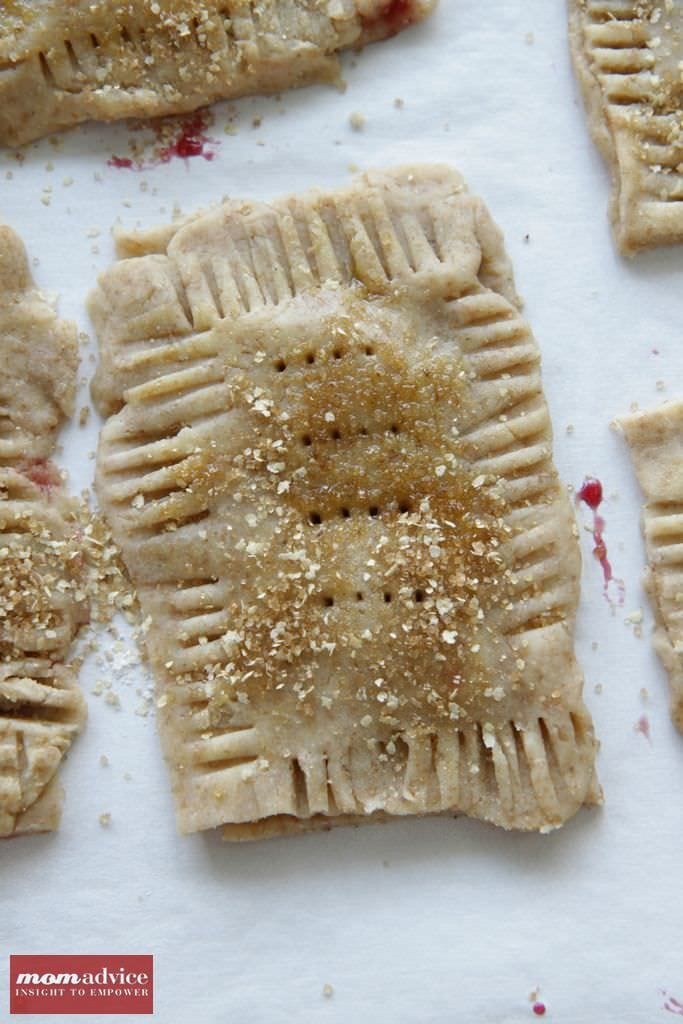
(Pictured Above: Homemade Whole Wheat Toasted Tarts)
Sometimes It Just Ain’t Pretty
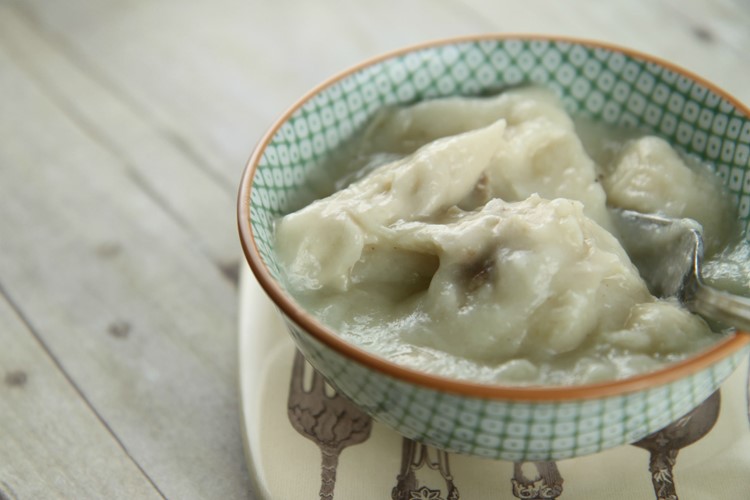
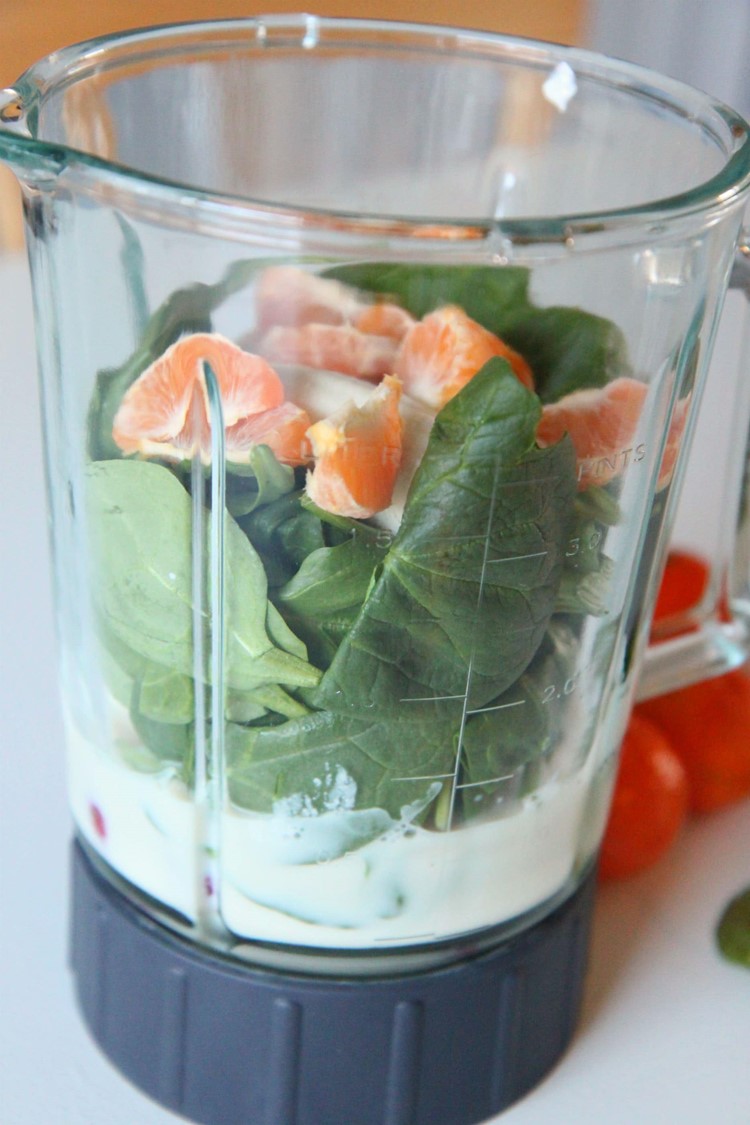
No matter how you look at it, sometimes it can be impossible getting a pretty picture of food. Chicken and Dumplings are absolutely delicious, but they don’t yield gorgeous and rich food photos without a lot of work. A green smoothie might be a great energy-booster, but the pictures of it weren’t among my favorites.
I find that in situations like this that I try to rely on richer content in these cases and hope that the readers will look past the unappetizing photos and read about how delicious the food is.
Here are the most FAQ questions that people have asked me about taking food photography…
What equipment do you recommend and what do you have?
A: I am not an expert on buying camera equipment, but I can tell you what I do know about it. I have always heard that it is much wiser to spend your money on your lens than the body of your camera. That is not to say to totally skimp on the body, but the body of cameras is constantly changing and being improved upon. I started out with the Canon Rebel T1i and, if you can believe it, they already have many more versions of my camera since I got this and they cost quite a bit more than my already antique and outdated camera! The truth is, I will never stay current with the body of my camera because within a few months, a new one will already be replacing my ancient equipment.
If you are on a budget and are looking for a great point-and-shoot camera that has the same functionality as the DSLR, but you don’t have to buy lenses and make a huge investment, I loved my Canon PowerShot (the link takes you to the current model). I am a Canon girl and was really happy with this point-and-shoot camera. It is the camera that I recommend to my friends and I have always heard how happy my girlfriends are with their Canon PowerShots. Agonizing amounts of research were done before I selected that camera and I was very happy with it!
If you are still on a budget, but want to make a long-term investment in your food photography, I can share with you the lens and camera that I have. As an aside, we found our lens on eBay from a photographer who was upgrading his equipment, but I am linking through Amazon for convenience sake. I now own the Canon 7D and we bought the Canon EF-S 17-55 mm lens. They have kit lenses that are around $100 or more each and I have seen people take great pictures with these, but we made the investment in one really good lens that would do just about everything for me for the rest of my life and until I die amen. This lens is all I really need in most situations.
What Other Photography Equipment Is Useful For Food Photography?
Other very useful tools for food photography include a good beginner tripod, a tabletop tripod, and a remote for your camera so you don’t have to lug around your camera while taking shots while in food preparation mode. A reflector can also be a smart inexpensive investment to help bring more even lighting into your photos or create moodiness in your pictures.
If you are low on funds, I recommend asking for these great gadgets and more food props for holiday & birthday gifts. I have been accumulating my collection over the last three years since I really started getting excited about food photography.
The most important thing to buy though is a lens filter to protect your lens. If for some reason you scratch your lens or something happens to the outside of it, this $10-$20 filter will protect the lens and be what breaks instead of your $100-$1,000 investment. Trust me, you will thank me later if you have this!
Do you have any good books or websites to visit that can help me learn more about photography?
My absolute favorite book on food photography is, “From Plate to Pixel.” It is the one resource I would really recommend investing in to help with your food photos.
I am also a HUGE fan of Scott Kelby and his Digital Photography Books 1, 2, & 3. See if your library has these and check them out for smartly written, witty, and down-to-earth tutorials on how to use your camera. I love that he says, “If you want a good portrait, turn you dial to this,” instead of high-brow photography terms that, as a mom, I just don’t understand. I just want someone to tell me what to do, not make me feel stupid!
For websites, every single day I am inspired by food bloggers and their photography. Some of my favorite sites to visit for inspiration are GoodLife Eats, Picky Palate, Two Peas & Their Pod, Steamy Kitchen, Dine & Dish, and Food Gawker.
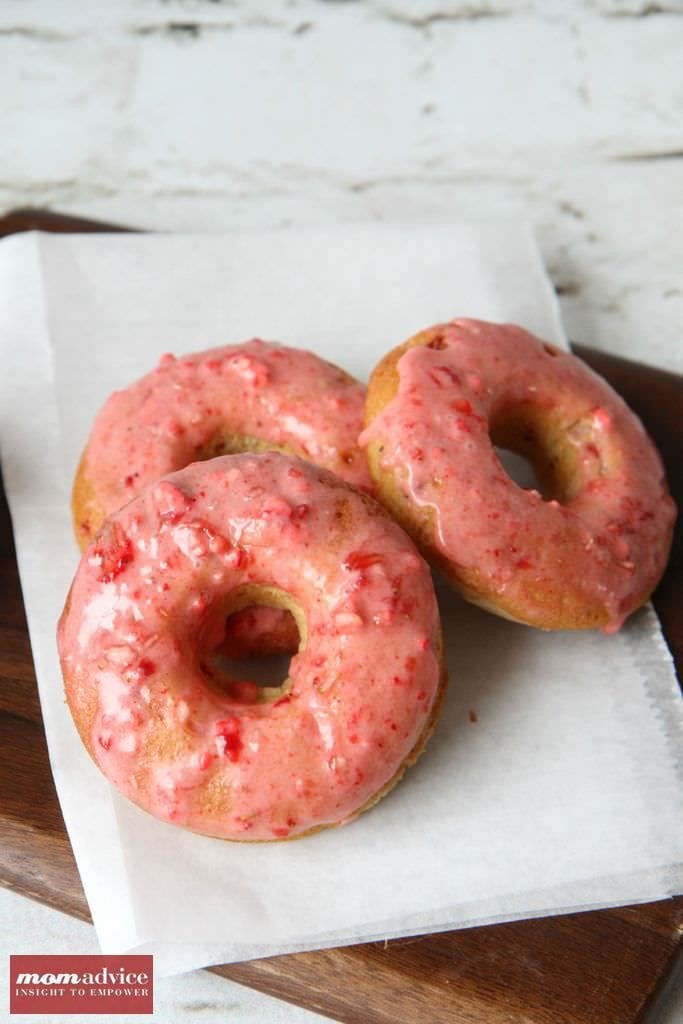
(Pictured Above: Baked Strawberry Doughnuts)
I hope that these tips will help inspire you and your own food photography. I am really proud of the progress I have made over the last few years to achieve food photos that I hope inspire you to create new dishes in your kitchen.
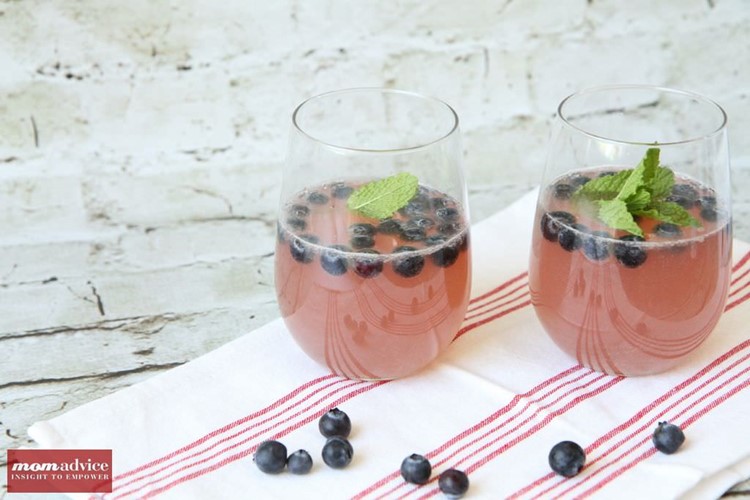
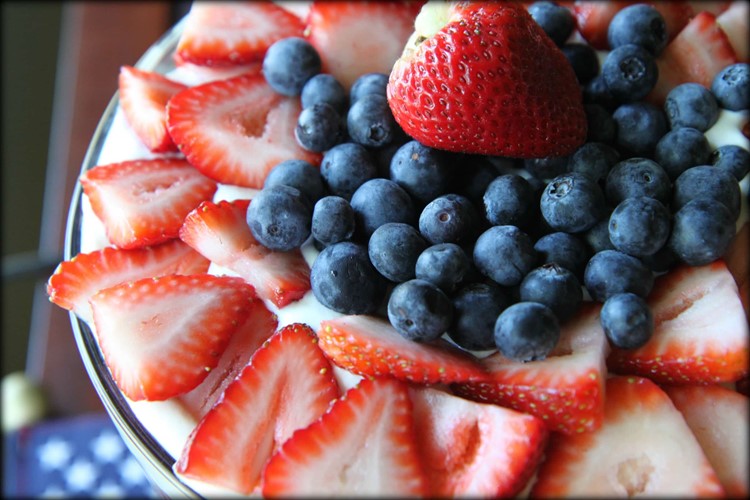
If I could have given myself advice when I first started out, I would have told myself all these tips that I have shared with you. I also would have told you that adding more color into your food photos is always a great idea, to strive to incorporate bits of the preparation into your food photos, to use natural ingredients for props, and to not be afraid to experiment with my camera more. We all have to start somewhere and I hope this encourages you, from one novice to another! (Pictured above: Red, White, & Blueberry Trifle)
Do you have any tips that have helped you with your food photography? If you take food photos what is the one tip you wish someone told you when you first started out? Let’s chat it up!!
Disclosure: All of the links above are affiliate links and are provided so you can locate your camera equipment and tools easily. Feel free to order through our site, but we always encourage shopping around for the best bang for your buck! Happy picture-taking!
Pin It