Learn how to make a burlap wreath with a wire wreath frame and burlap ribbon. This beginner craft takes 30 minutes. and can be customized for any holiday.
I am all about beautiful and simple decorations for the holidays. Today’s tutorial will show you how to make a simple burlap wreath that can be customized for any holiday.
This is a no-sew, no-glue, no-cut wreath project that should be easy to create in about 30 minutes.
Burlap ribbon does not only come in brown. There are so many different colors and patterns to choose from.
At the end of this post, you can see how I made a beautiful fall wreath in orange burlap.
How to Make a Burlap Wreath (Pictures)
SCROLL DOWN FOR PRINTABLE HOW-TO INSTRUCTIONS WITH SMALLER PICTURES INSERTED.
Before you visit your craft store, make sure to sign up with Rakuten to make money back on all your craft store purchases.
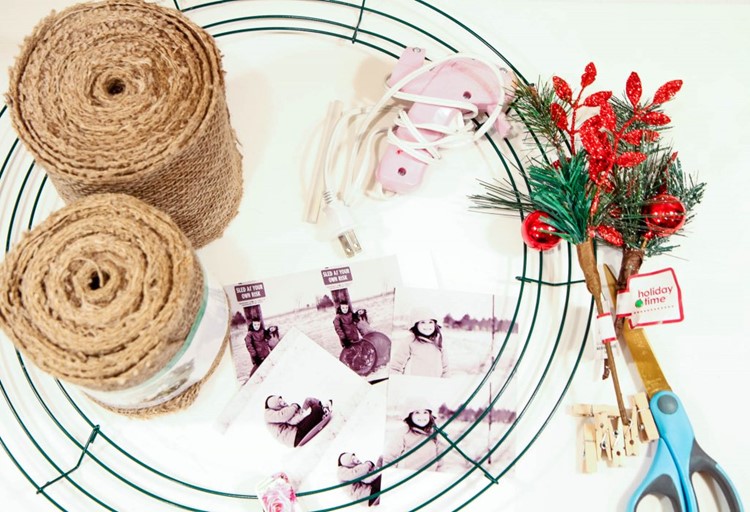
Gather your supplies. You will need burlap ribbon, a wire wreath form, mini clothespins, floral picks, floral wire, scissors, and wallet-size holiday photos.

Get wallet-sized photos printed or print them at home with a mini photo printer.
Now let’s begin weaving the burlap through our wire wreath form.
This is going to take a little time and practice with your first one so don’t get discouraged.
Begin by folding your burlap in half, like I have shown above, and keep it folded like this as we go.
Select one section of the wire wreath to start in.

Feed the beginning end through the wreath as shown above.
Leave a little loose end to tuck in or you can wire it to the wreath with a little floral wire in the back.
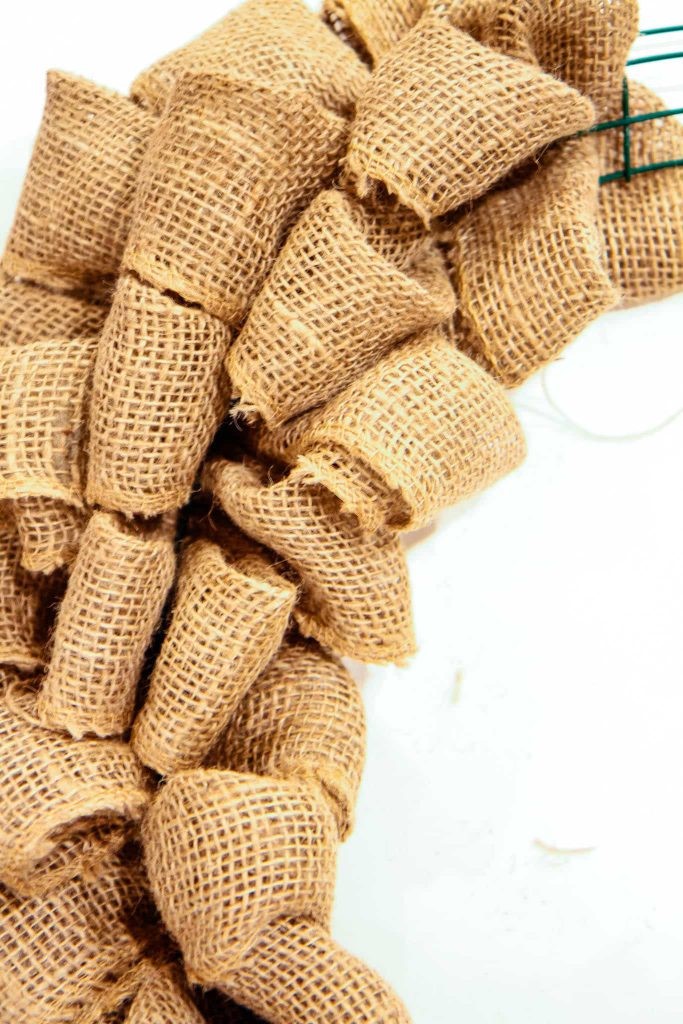
Over the outer ring, under the next, over the next, and under to finish.
This is the technique we are using throughout.
I am showing it to you tightly so you can see how this will work, when you do this, you will be actually pulling out the burlap a bit to give it to that bubble effect that we are going for.
Begin right next to the previous row, within the same section of the metal wreath.
However, this time, we’ll weave in the opposite direction.
As you go along, keep pulling out the burlap to create bubbles. Move the working burlap into each section, alternating the weaving direction.
When you run out of burlap (it should be when you are about halfway through covering the wreath), tuck the end towards the back and pick up where you left off.
Again, you can wire these ends with a little floral wire on the back.
Finish the wreath with your holiday accessories.
You can trim any of the pieces down that were wired to help your wreath lay more flush to your front door.
Wouldn’t this just make the most fabulous little gift for someone you love for the holidays? I’ve provided some bulk purchasing options if you want to make more than one wreath.
Happy crafting!
Looking for more burlap craft ideas? Here are a few of my most visited projects!
Pin It